







How To Oritech Nuclear Reactor – Minecraft 1.21.1
How To Build OriTech Nuclear Reactors – Minecraft 1.21.1
Welcome to the complete guide to OriTech nuclear reactors! This tutorial covers everything you need to know—from essential components to designing small, medium, and large-sized reactors. Whether you’re a beginner or looking to optimize your reactor design, you’ll learn how to build safe, efficient reactors that won’t result in a nuclear meltdown. All reactor designs featured in this guide have been thoroughly tested and are completely safe.
Understanding Reactor Components
Essential Parts You’ll Need
To build any OriTech nuclear reactor, you’ll need the following core components:
Reactor Control Panel: The main interface for accessing and monitoring your reactor
Reactor Walls: The structural boundary of your reactor (can range from any size up to 64 by 64)
Reactor Floor: A minimum height of 2 blocks is required, as some components need ports on top for inputting and outputting uranium and coolant
Reactor dimensions are highly flexible. For beginners, a 5 by 5 reactor is recommended as a starting point—there’s little practical benefit to building smaller.
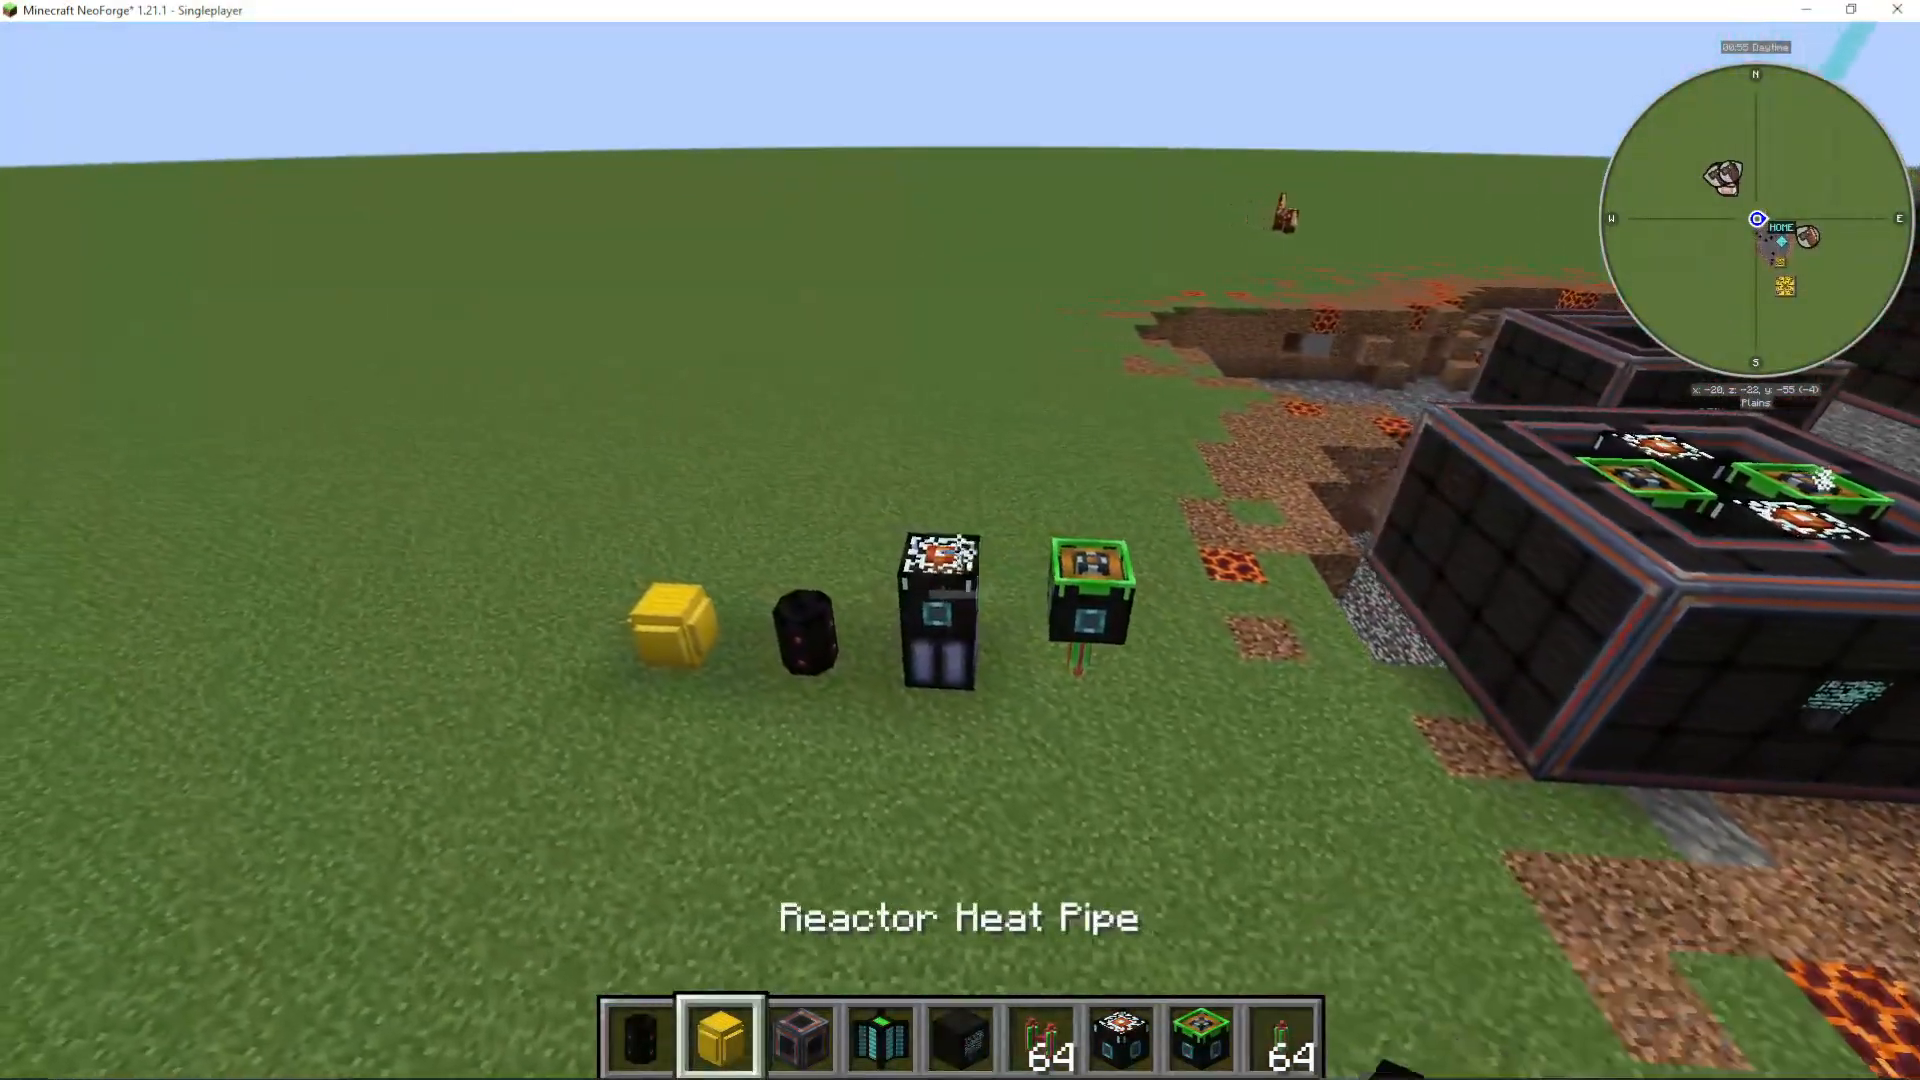
Fuel Rods and Fuel Ports
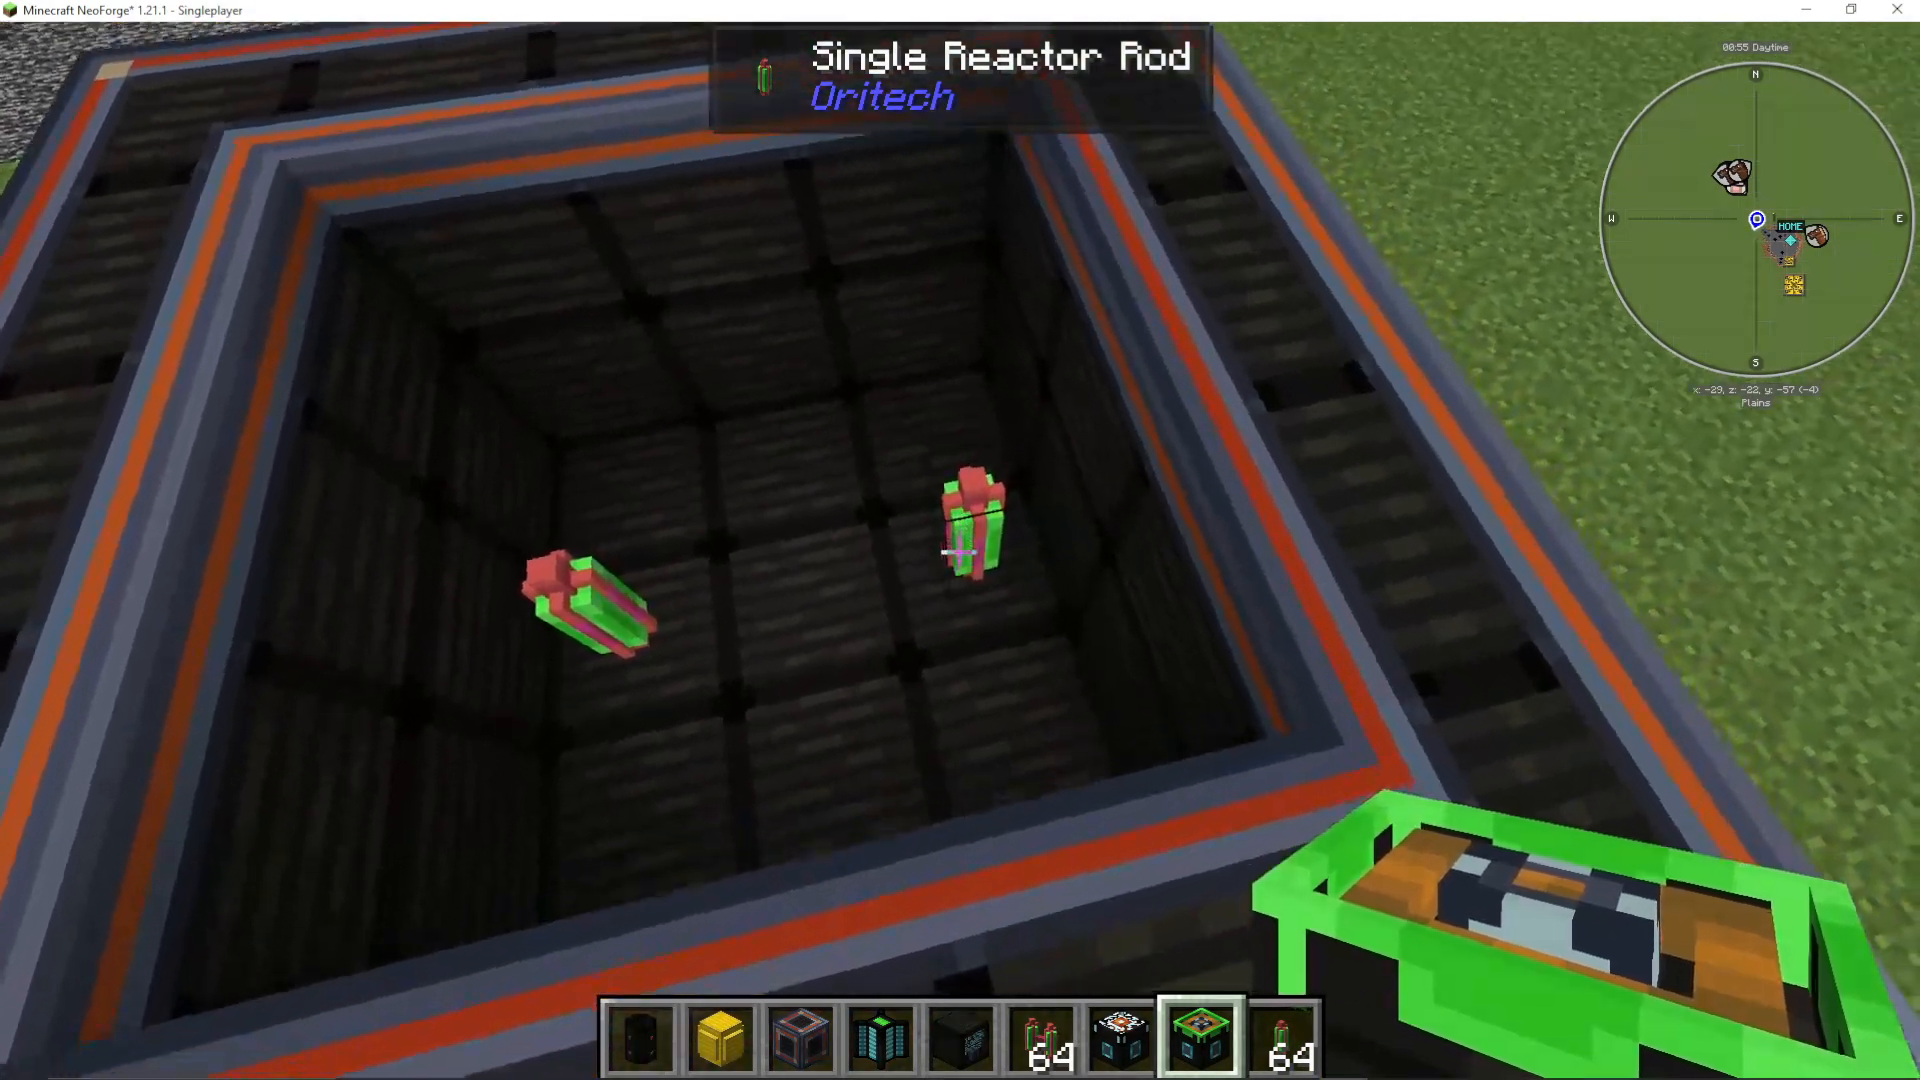
Single reactor rods are where you’ll place your nuclear fuel. Any component that requires fuel or coolant input/output must have a port on top. For single reactor rods, place a reactor fuel port directly above to allow uranium insertion.
Available fuel types include:
Small Uranium Pellets: Lower heat output, less powerful but safer for cooling-limited builds
Uranium Pellets: Standard fuel option
Small Plutonium Pellets: Advanced fuel alternative
Plutonium Pellets: High-tier fuel for maximum output
Cooling Systems Explained
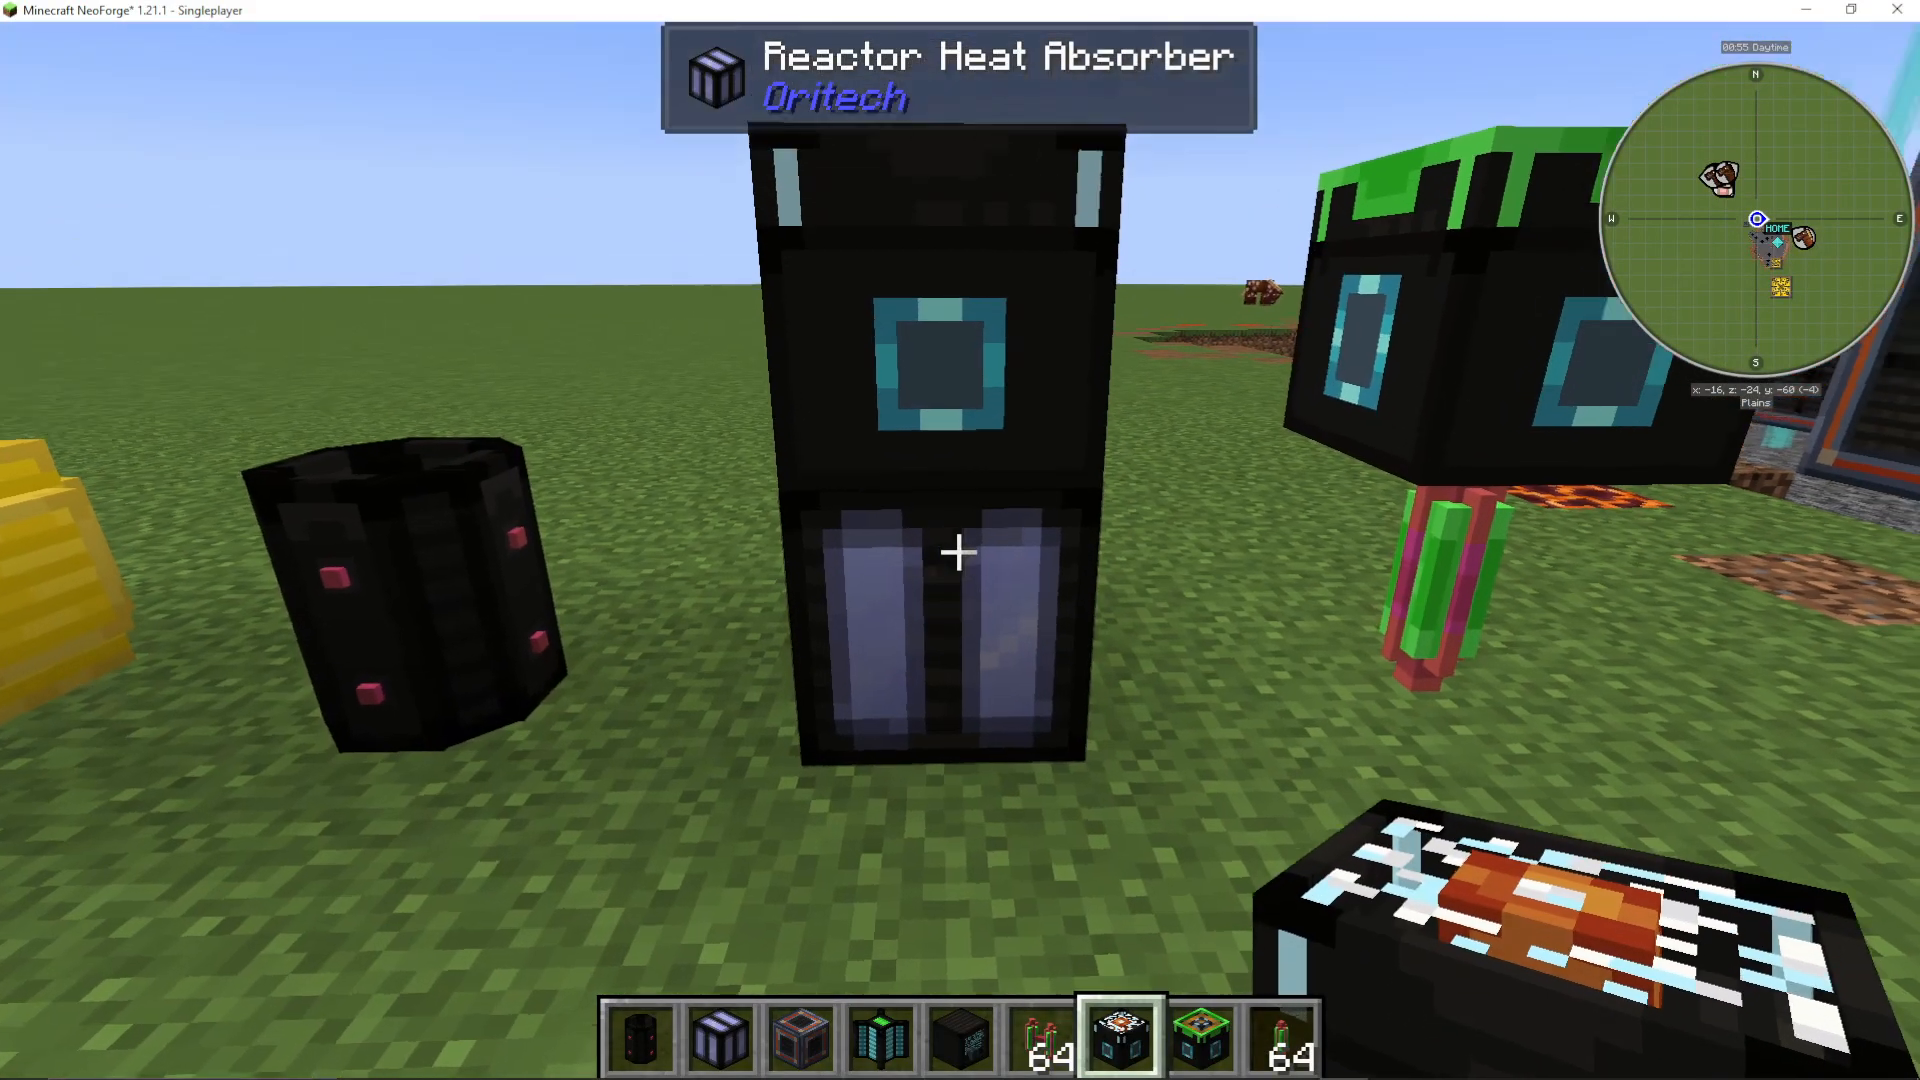
Active Cooling: Heat Absorbers
Heat absorbers provide active cooling and require a coolant port on top. You’ll need to continuously supply ice, packed ice, or blue ice through these ports to keep your reactor stable. Heat absorbers remove a fixed amount of heat from all nearby components, making them more efficient when completely surrounded by components that need cooling.
Critical Warning: If your coolant supply runs out, your reactor will begin heating up and may explode. Always monitor your ice supply and consider using an OriTech ice-making machine to maintain a constant supply.
Passive Cooling: Heat Pipes and Heat Vents
Passive cooling doesn’t require any external input and operates automatically:
Heat Pipes: These components absorb heat from neighboring fuel rods and distribute that heat to nearby heat vents
Heat Vents: These remove heat from the nearest, hottest component. The hotter the component, the more heat gets removed—making them self-regulating
A well-designed reactor uses passive cooling to distribute heat outward toward the edges, where it’s then dissipated by vents and active coolers along the way.
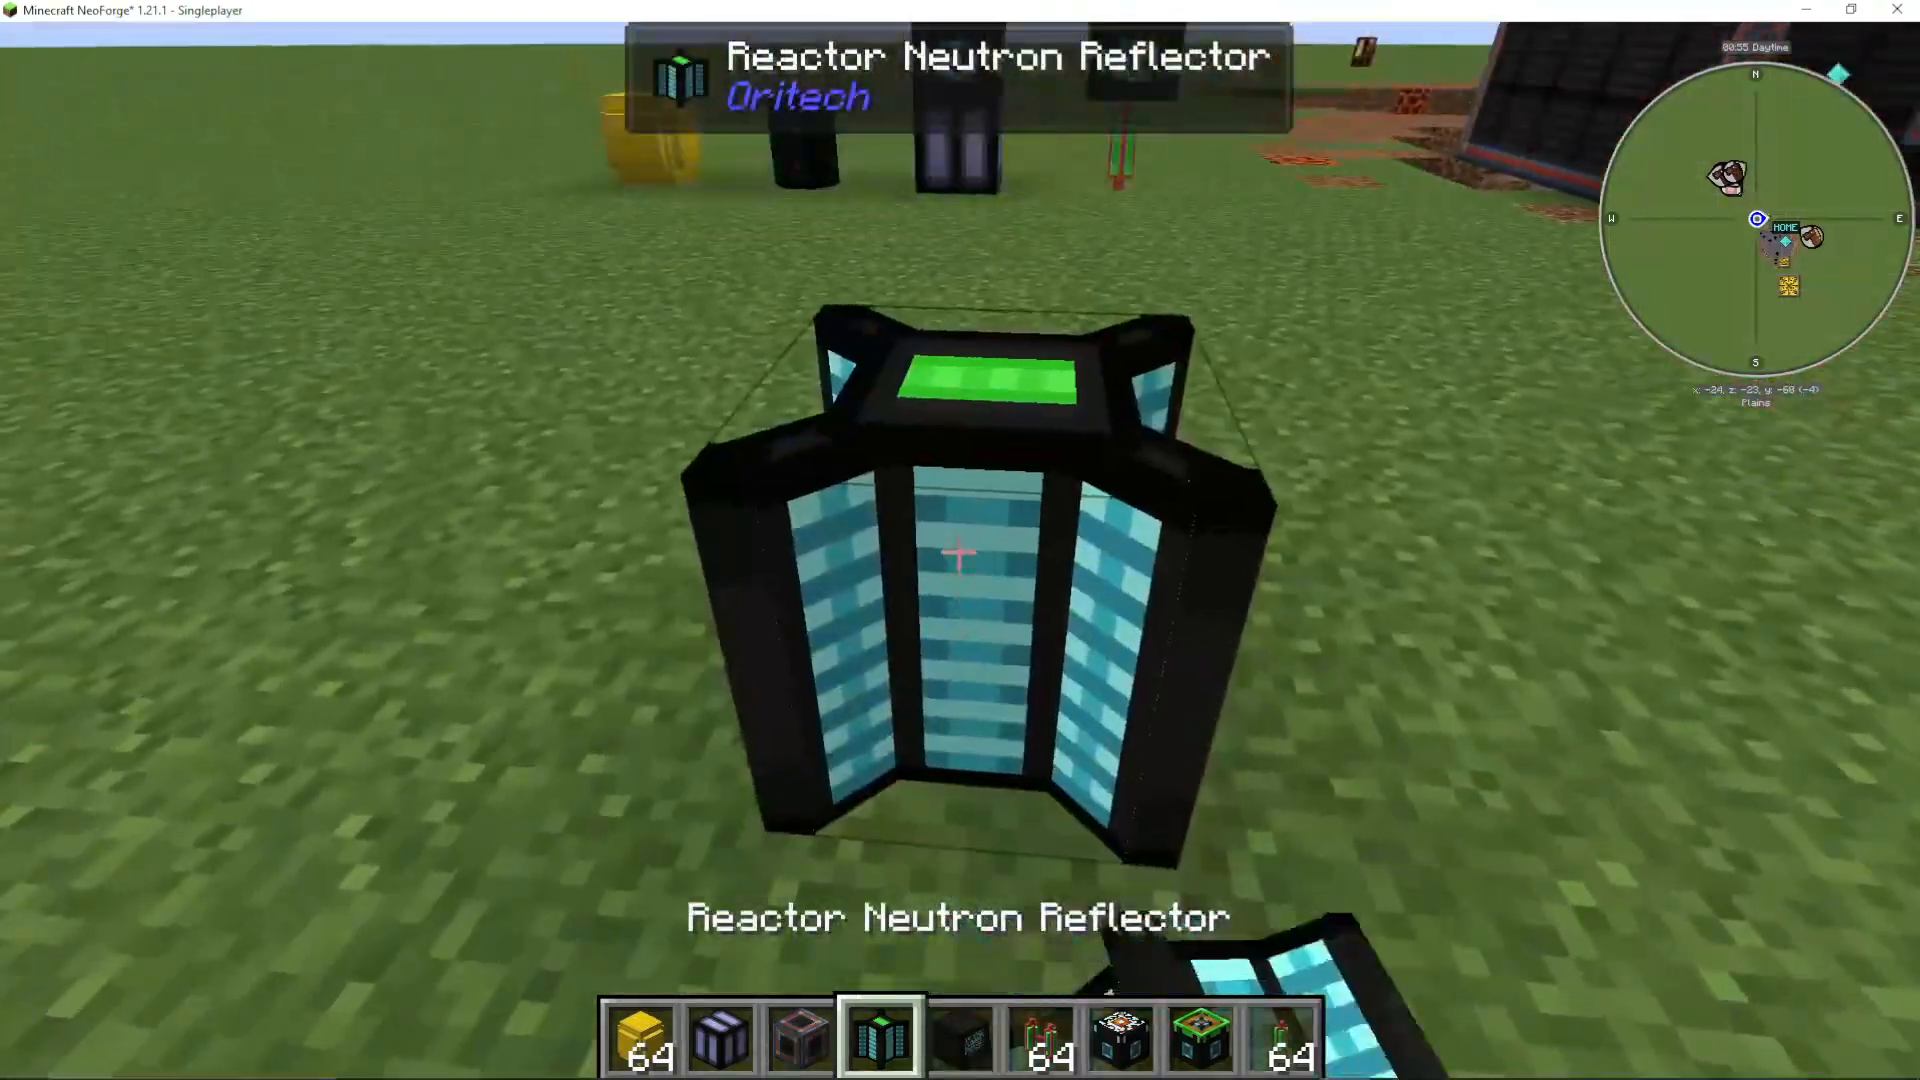
Neutron Reflectors
Neutron reflectors are a powerful upgrade that increases the efficiency of nearby fuel rods they touch. Placing a single reflector can effectively double your reactor’s power output by boosting the efficiency of adjacent fuel rods. Use them strategically to maximize performance without overheating.
Building Your First Reactor (Small Design)
Layout and Assembly
Let’s build a simple 5 by 5 reactor with a 3 by 3 interior:
Create a 5 by 5 reactor wall structure, 2 blocks tall
Place two single reactor rods on opposite sides
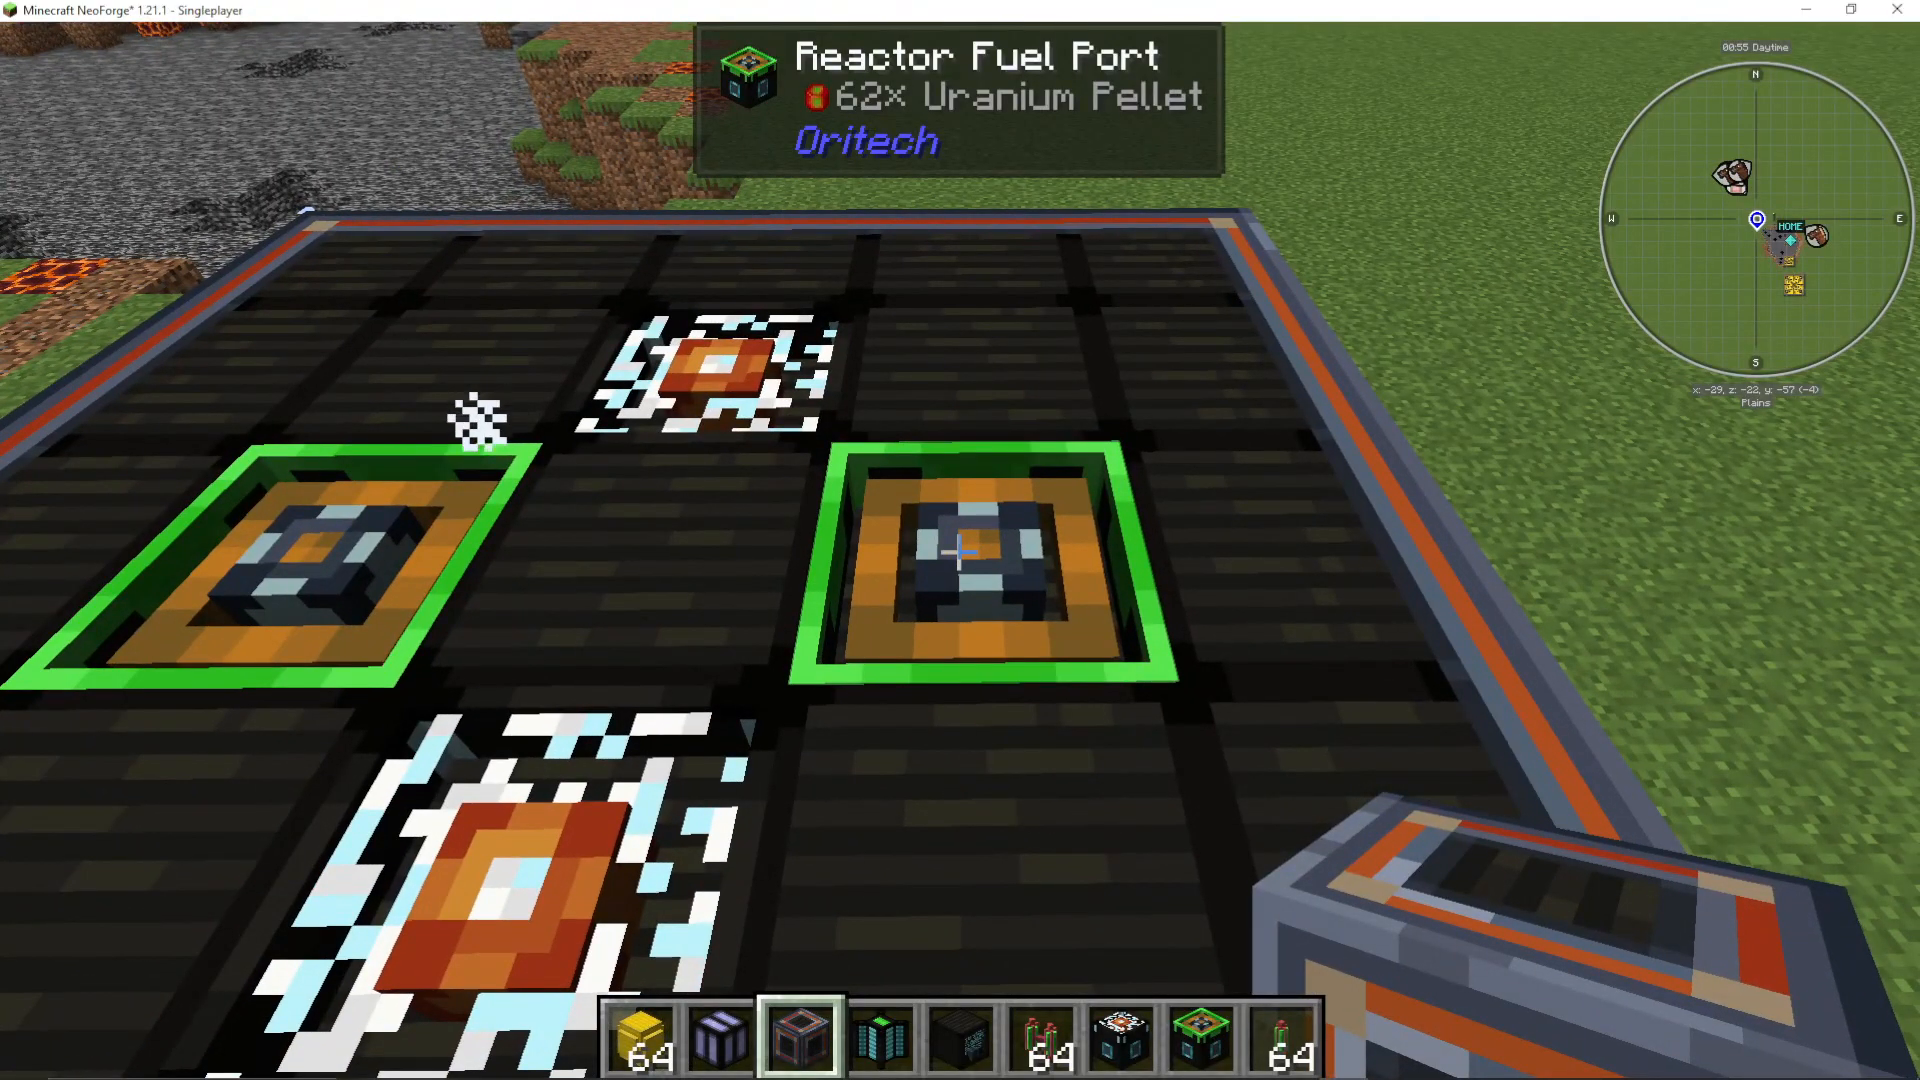
Add fuel ports on top of each reactor rod
Place two heat absorbers for active cooling
Add coolant absorber ports on top of each heat absorber
Fill coolant ports with ice
Place heat pipes in the corners to manage passive heat distribution
Install the reactor control panel on the exterior wall
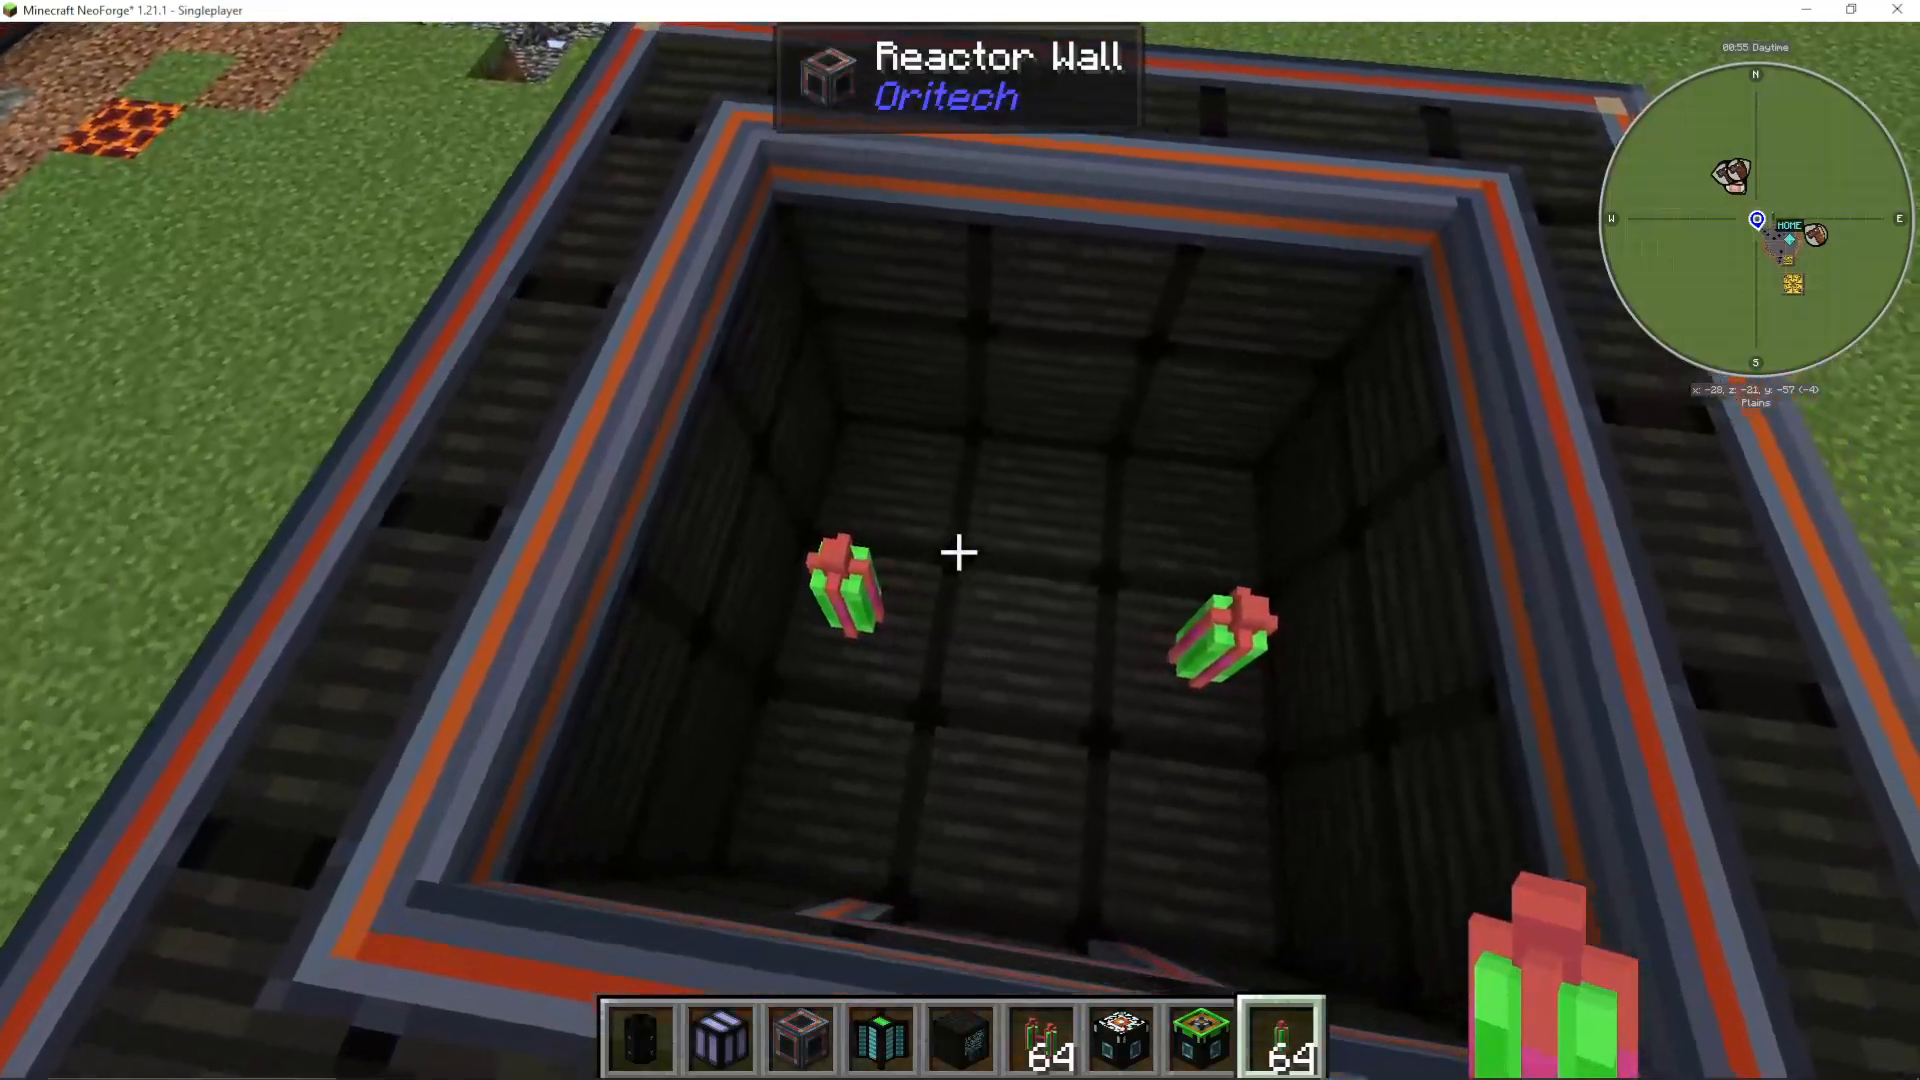
Performance and Optimization
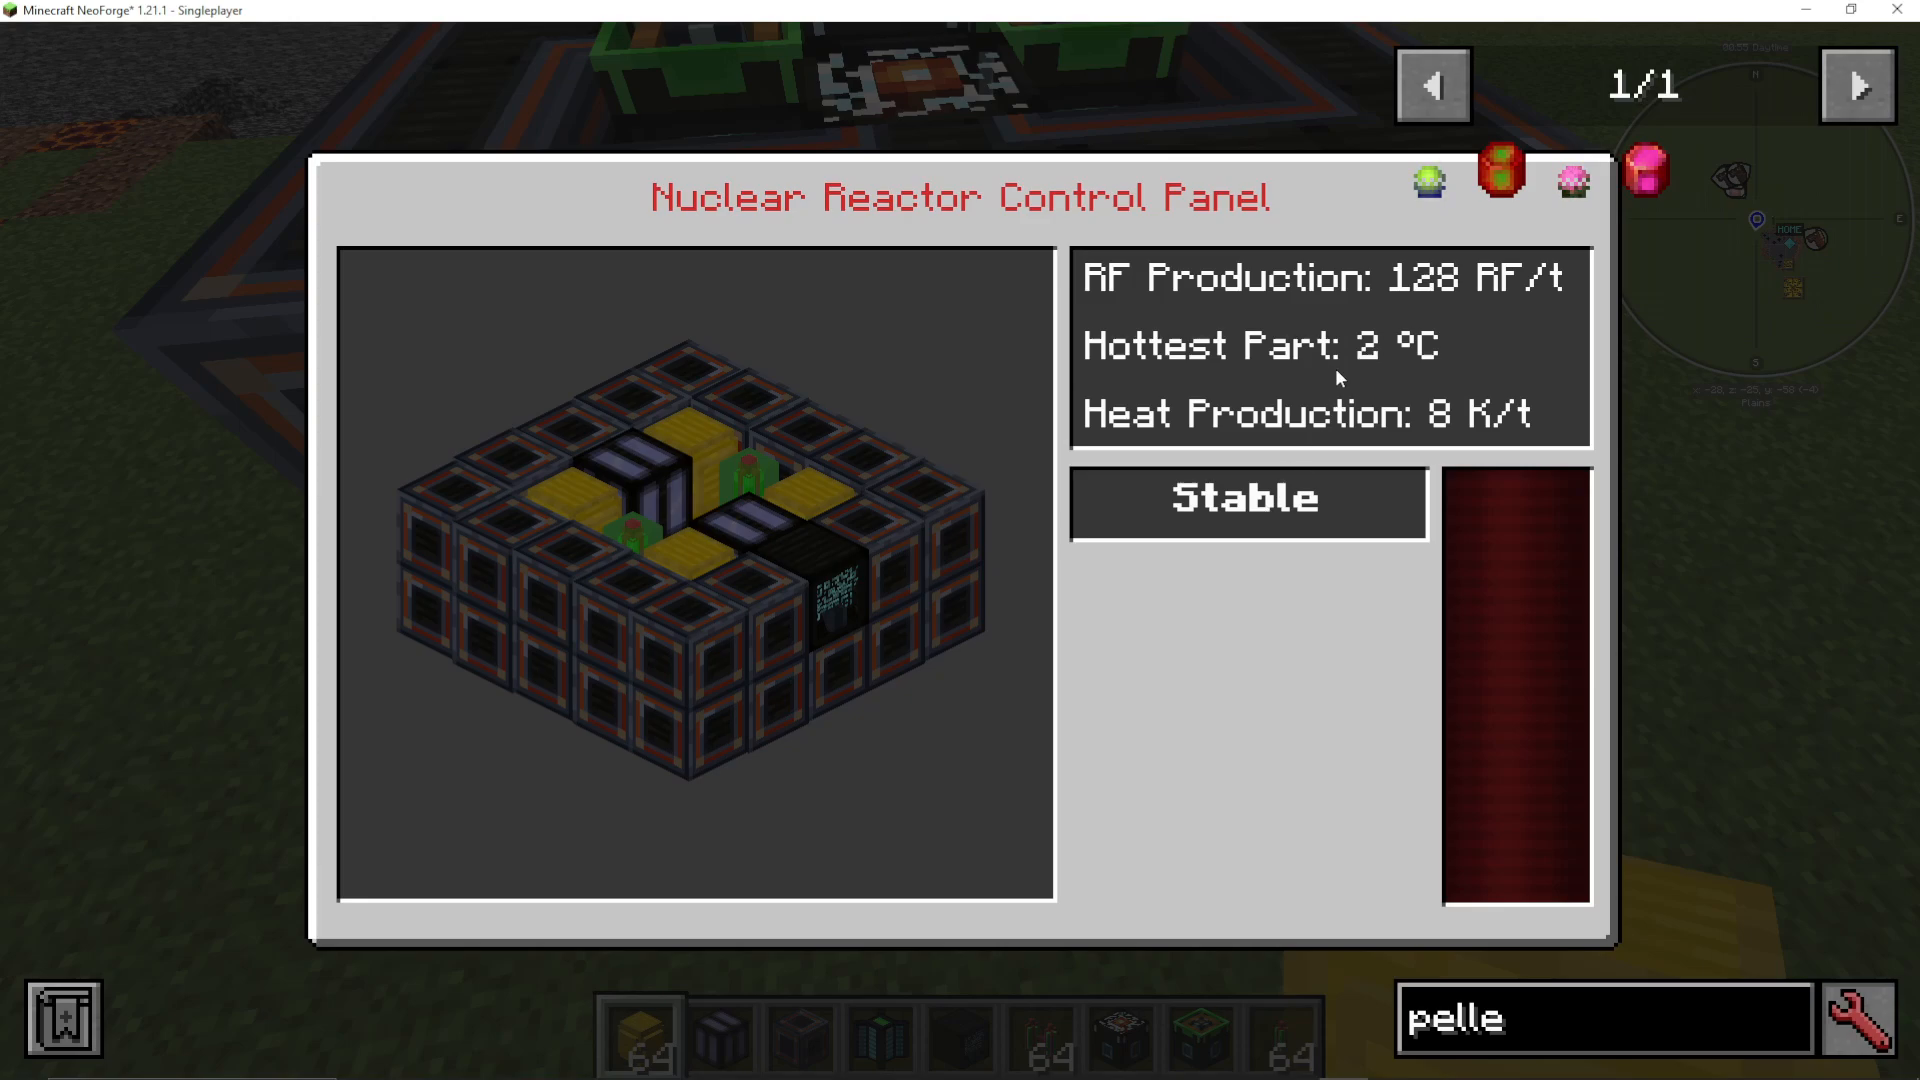
With this basic design using uranium pellets and two heat pipes with absorbers, you’ll generate 128 RF per tick when the reactor is stable. The hottest component will remain near zero degrees Celsius, indicating excellent cooling efficiency.
To double your output, add a neutron reflector in the middle of the reactor where it touches both fuel rods. This simple addition will increase output to 256 RF per tick while maintaining stability.
Connecting to Your Base
You can wall off the top of your reactor to create a cleaner appearance. This allows you to:
Insert item pipes into fuel ports for automated uranium input
Connect item pipes to coolant ports for automated ice supply
Use an energy port (place it on the reactor wall) to output RF power to energy cells or other machines
The reactor includes a 50 million RF internal buffer, so you don’t need immediate external storage.
Building a Medium Reactor (11 by 11 Design)
Scaling Up Your Reactor
Before building a larger reactor, remember that you can stack your small reactor design vertically. A single-height 5 by 5 design can be built 4 blocks tall to generate 1,024 RF per tick (4 times the output) with no changes to the cooling design.
Medium Reactor Layout (11 by 11)
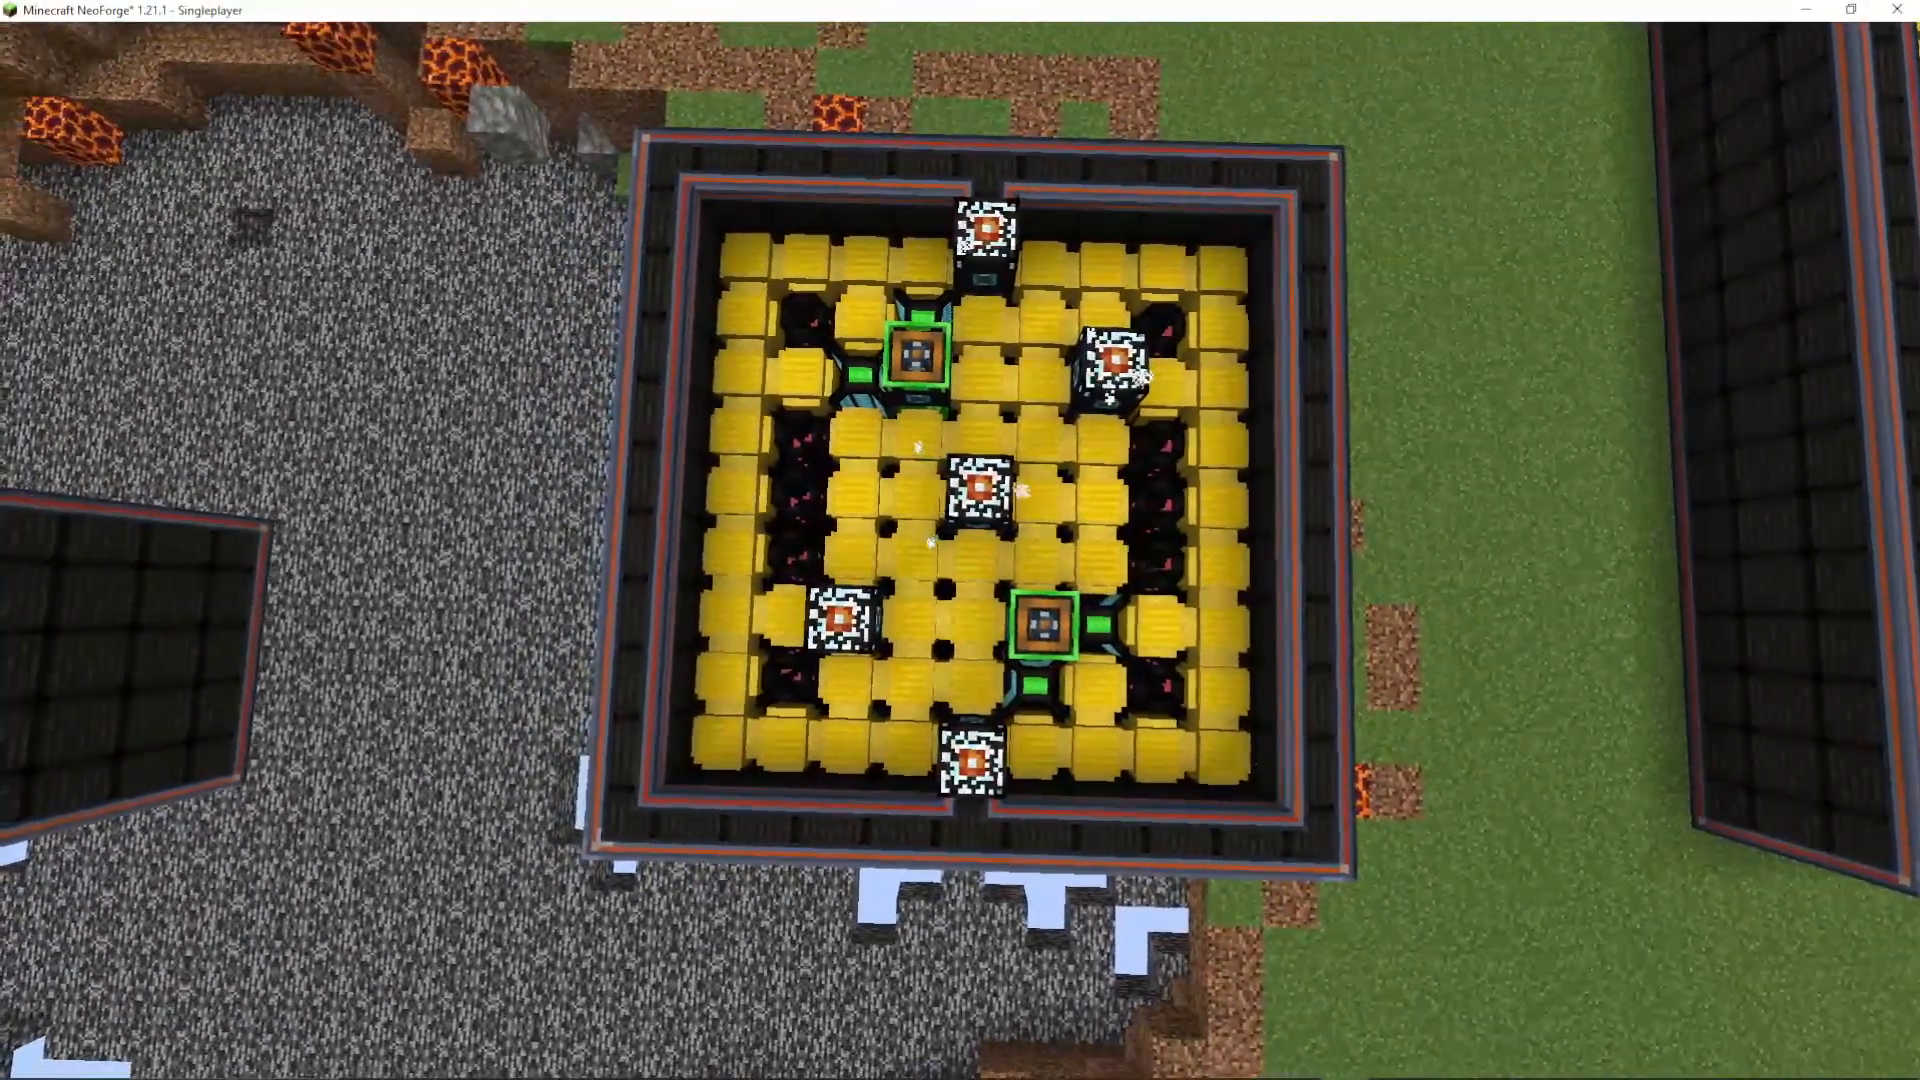
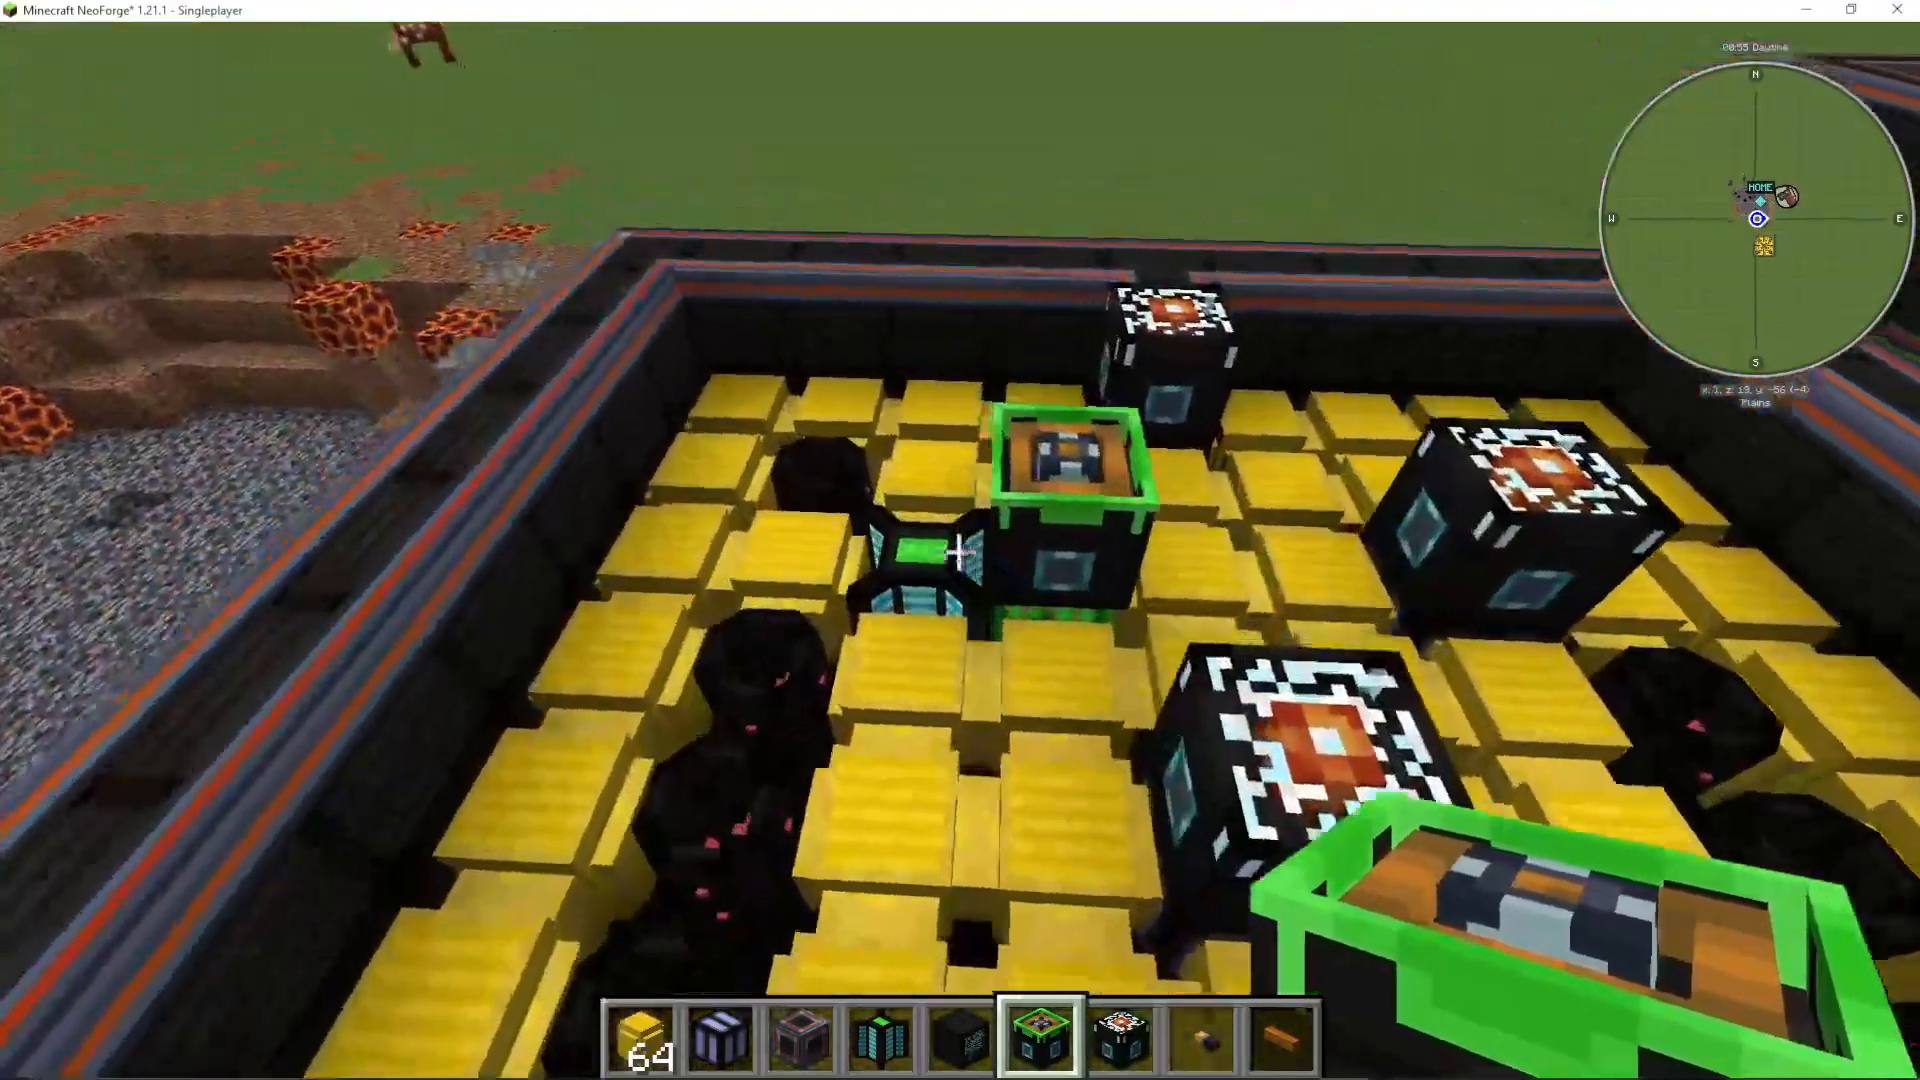
For a significantly more powerful single-height reactor, construct an 11 by 11 structure with the following interior:
Fuel Rods: Two dual fuel rods (more powerful than singles)
Active Cooling: Three heat absorbers in the center, plus two additional absorbers placed diagonally
Neutron Reflectors: Two reflectors positioned outside the main fuel area to double efficiency without overheating
Passive Cooling: Multiple heat pipes running through the center and to each corner, with heat vents strategically placed for heat dissipation
Medium Reactor Performance
This 11 by 11 single-height reactor generates 1,024 RF per tick and maintains extremely stable operation at around 45 degrees Celsius. The heat distribution is so even that the blue color barely reaches the outer walls, indicating exceptional cooling efficiency.
Vertical scaling potential:
5 blocks tall = 5,120 RF per tick
10 blocks tall = 10,240 RF per tick
20 blocks tall = 20,480 RF per tick
Note: You can experiment with quad fuel rods, but using two quads requires careful tuning to maintain stability. Start with dual rods for reliable performance.
Building an Ultimate Reactor (21 by 21 Design)
Maximum Power Generation
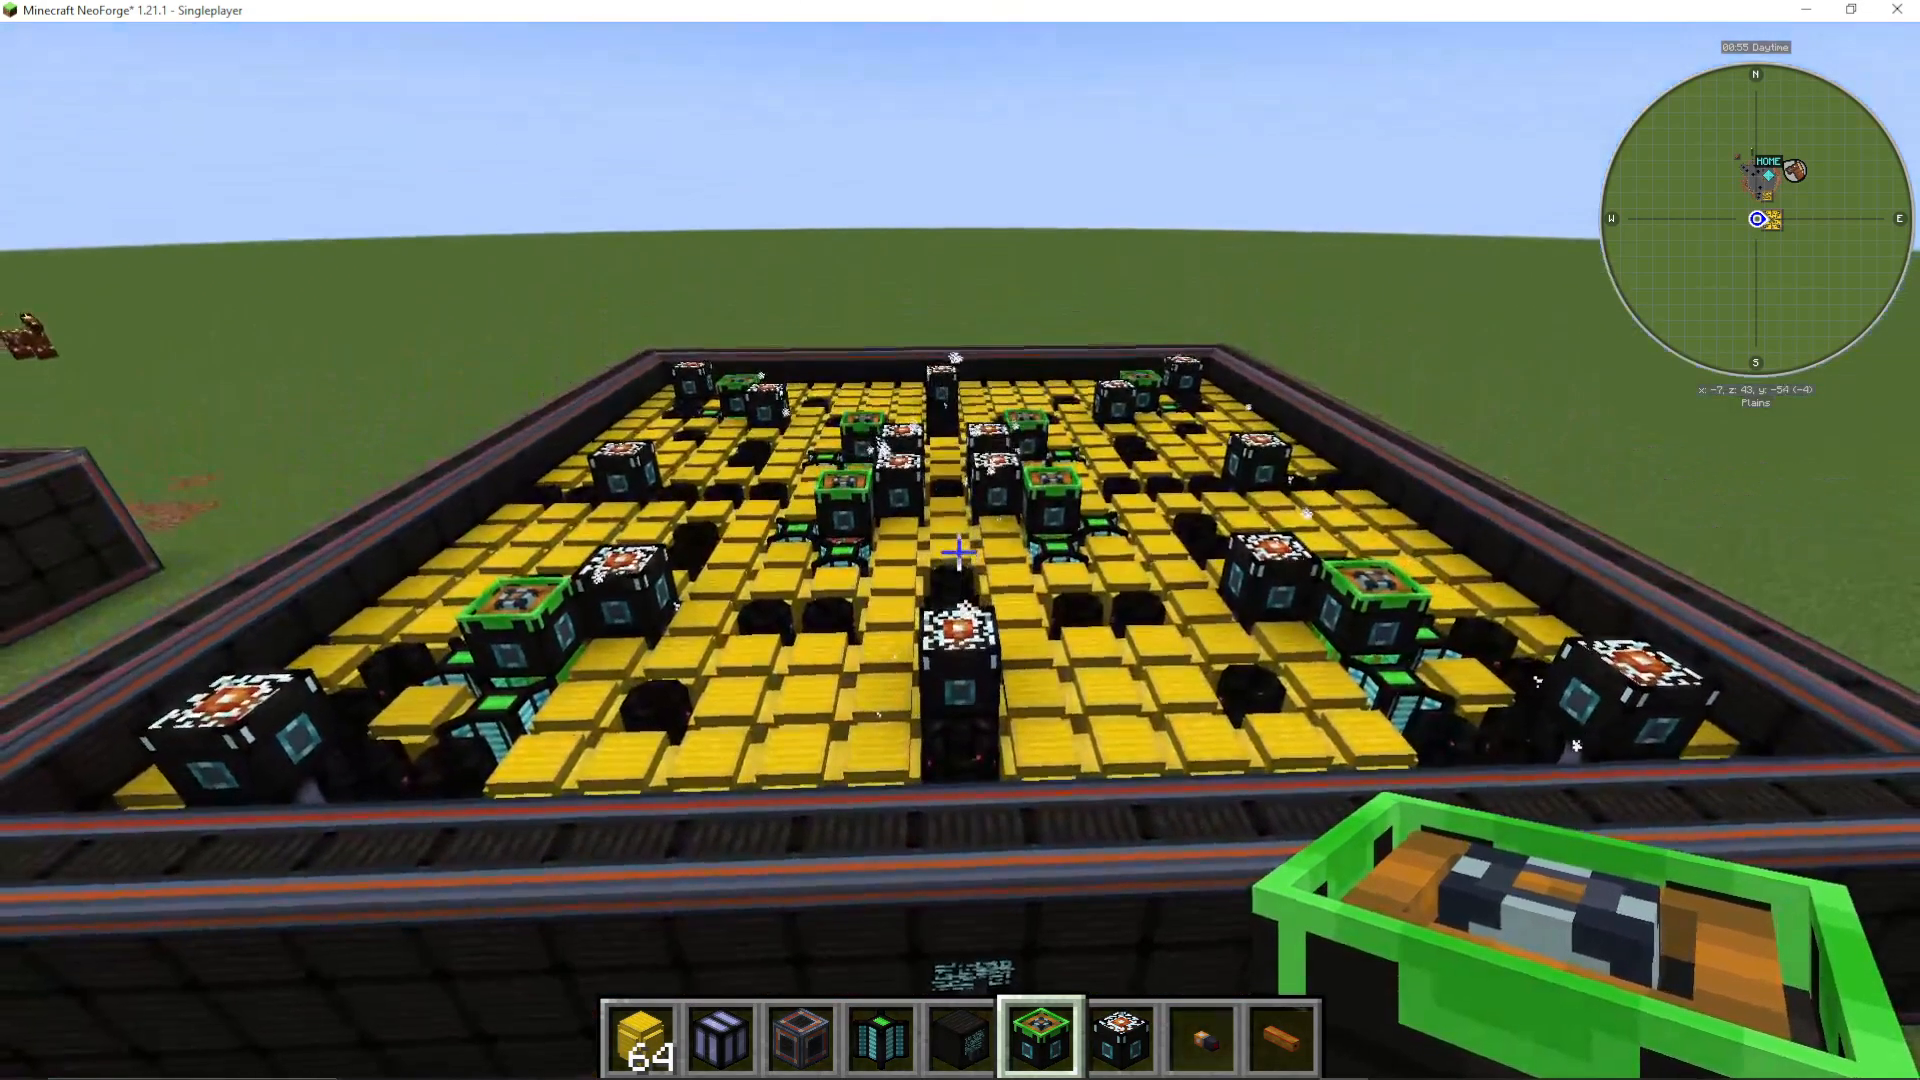
This is the largest reactor design featured in this guide. While OriTech supports reactors up to 64 by 64, this 21 by 21 design delivers exceptional performance while remaining completely stable. The design took extensive testing to perfect and represents the pinnacle of single-height reactor engineering.
Ultimate Reactor Layout
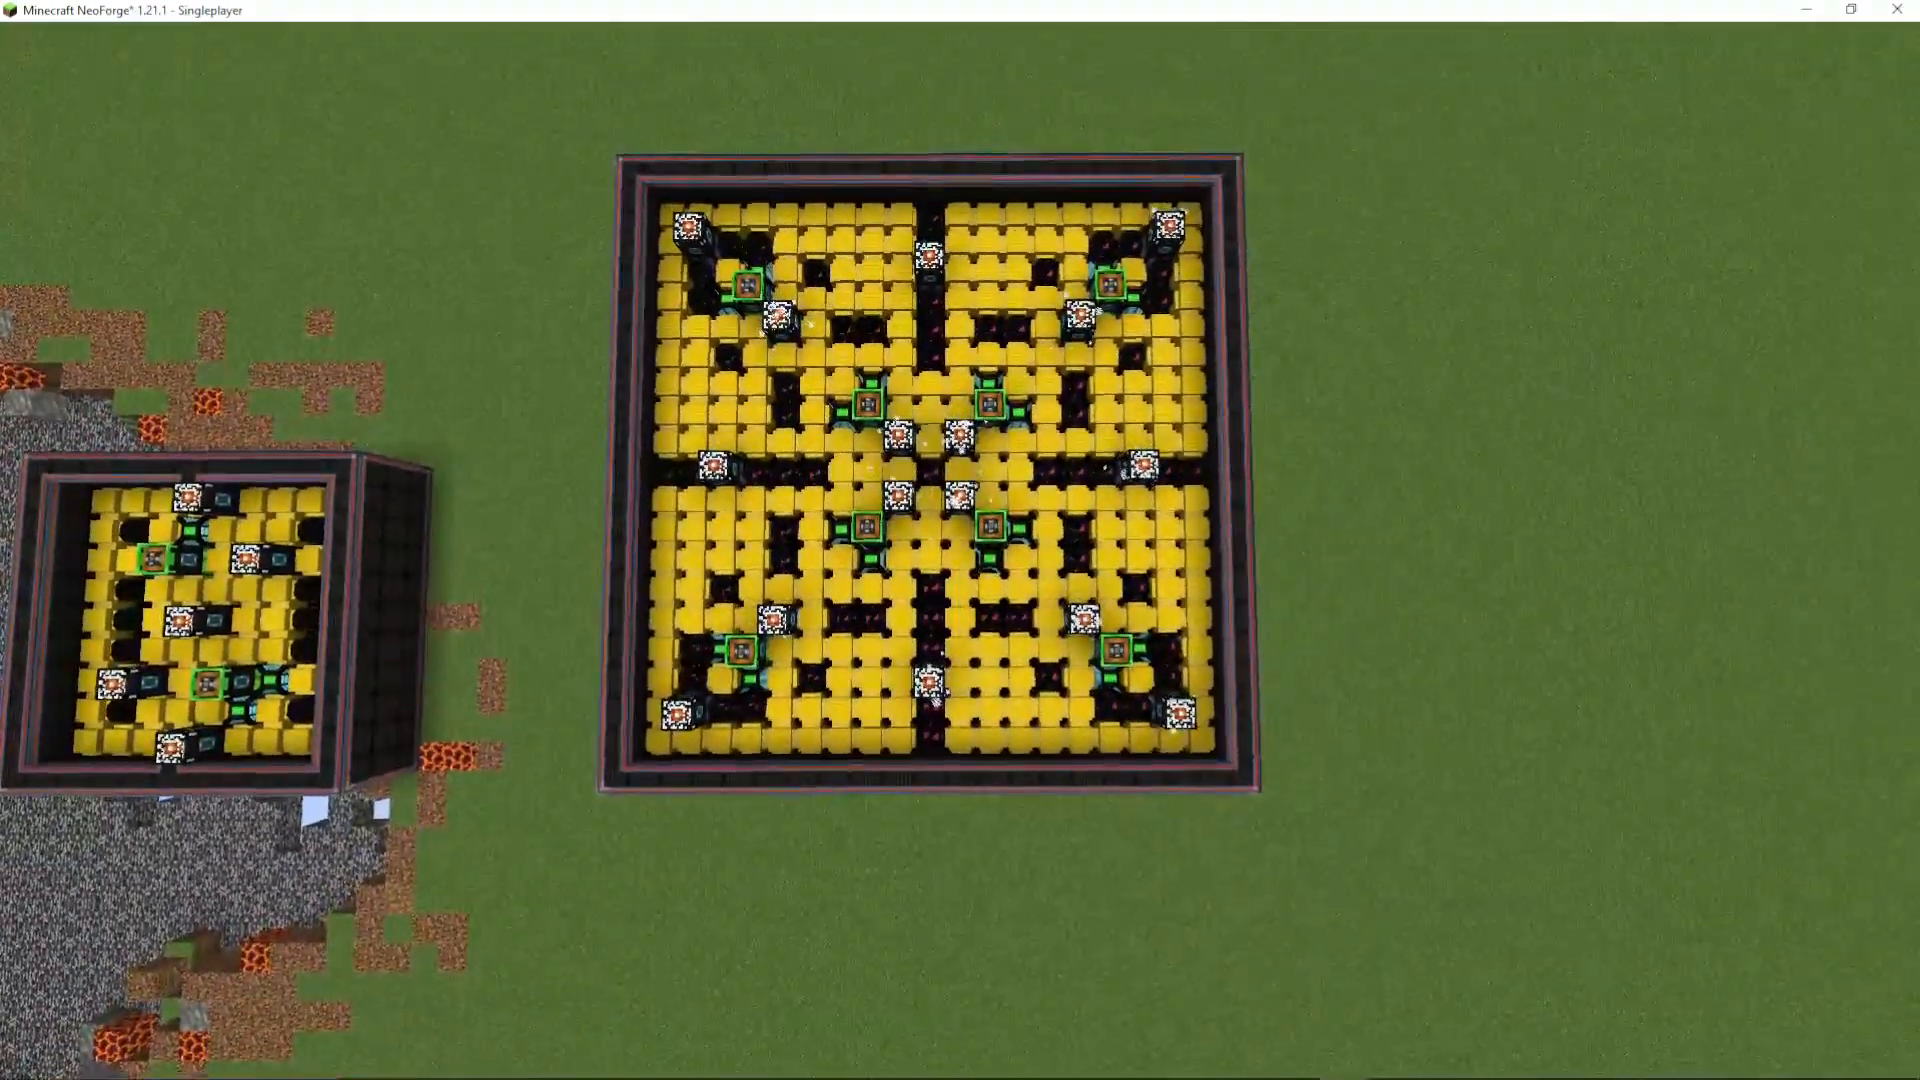
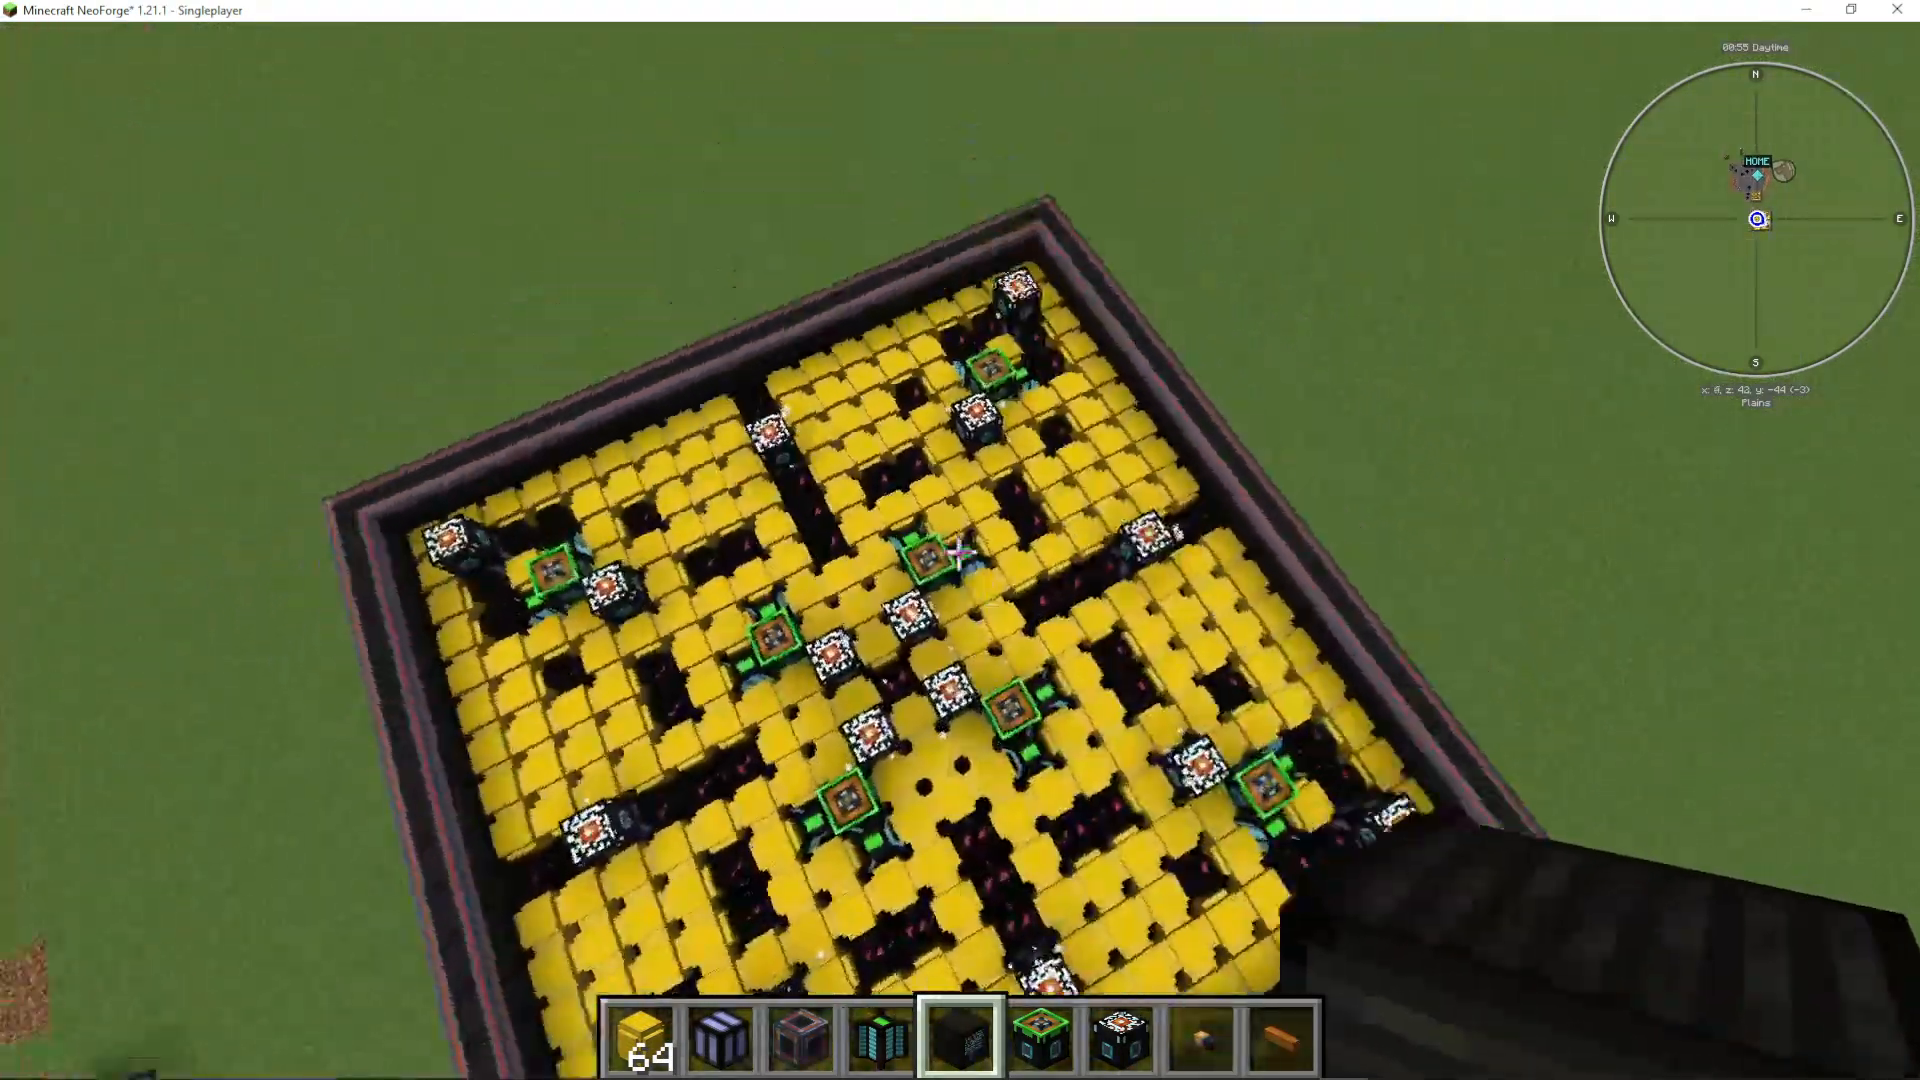
The 21 by 21 reactor features sophisticated heat management with the following components:
Core Fuel Rods: Four quad fuel rods positioned near the center (one in each cardinal quadrant)
Outer Fuel Rods: Four dual fuel rods placed in the outer sections
Active Cooling: Four heat absorber ports strategically positioned for heat dissipation, with additional coolers placed around the perimeter
Neutron Reflectors: Two outer reflectors per quad rod to maximize efficiency without causing instability
Passive Cooling Network: Heat pipes form a sophisticated distribution system that channels heat outward from the center toward the edges. A central vent removes heat from the core, while additional vents are positioned along the heat paths and in corner sections
Ultimate Reactor Performance
The 21 by 21 single-height reactor generates 4,000 RF per tick and operates at approximately 500 degrees Celsius—well below the instability threshold of 2,000-3,000 degrees. The temperature remains perfectly distributed, with the outer walls remaining relatively cool despite the massive power output.
Vertical scaling potential:
5 blocks tall = 20,480 RF per tick
10 blocks tall = 40,960 RF per tick
20 blocks tall = 81,920 RF per tick
40 blocks tall = 163,840 RF per tick
Design Philosophy: OriTech is intentionally designed to scale with the mod’s overall energy values rather than compete with mods like Draconic Evolution or Mekanism. The developer created OriTech to function cohesively within its own ecosystem, making these power levels perfectly appropriate for mid-to-late game progression.
📸 [ASSISTANT: TAKE SCREENSHOT AT SCREENSHOT AT TIMESTAMP 15:40]
What Happens When Cooling Fails
If your reactor’s coolant supply runs out or cooling becomes insufficient, the temperature will rise rapidly. As heat increases:
Heat visualization shifts from blue (cool) to orange (hot) to red (critical)
At extremely high temperatures, flames will appear on the reactor components
If temperatures reach critical levels, the reactor will explode, destroying the multiblock structure
Always monitor your coolant supply and maintain a steady ice input to prevent disasters.
World Download and Resources
All reactor designs shown in this guide are available for direct use. The complete world file for Minecraft 1.21.1 containing the ultimate 21 by 21 reactor design is available as a free download on the JaviHeals Discord server. Patreon supporters get immediate access to world downloads for all featured designs.
For additional OriTech tutorials, check out:
The Ultimate Guide to OriTech (covers all machines and systems)
OriTech Beginner’s Guide
Complete OriTech Playlist (featuring multiple in-depth guides)
Summary
You now have the knowledge to build safe, efficient OriTech nuclear reactors at any scale. Start with the simple 5 by 5 design to learn the fundamentals, scale vertically by stacking the same design, and progress to the 11 by 11 medium reactor and 21 by 21 ultimate reactor as you become more comfortable with thermal management. Remember: passive cooling is your friend, active cooling requires constant maintenance, and neutron reflectors are your secret weapon for doubling efficiency. Build thoughtfully, monitor your temperatures, and never let your ice supply run dry.
Want to Support?
If you would like to help us continue making these guides – please consider joining our patreon here – https://www.patreon.com/c/JaviHeals
Alternatively – we host a group of MC Servers you can join here – https://discord.gg/zD7Gjt6MHF



