Assembler Full Tutorial – Immersive Engineering
Assembler Full Tutorial – Immersive Engineering
The Assembler is one of the most useful machines in Immersive Engineering, especially if you’re looking to automate your crafting processes. This multi-block machine can handle complex recipe chains and streamline your production line. In this tutorial, we’ll walk you through building and configuring an Assembler from start to finish.
Building the Assembler Structure
Base Layer
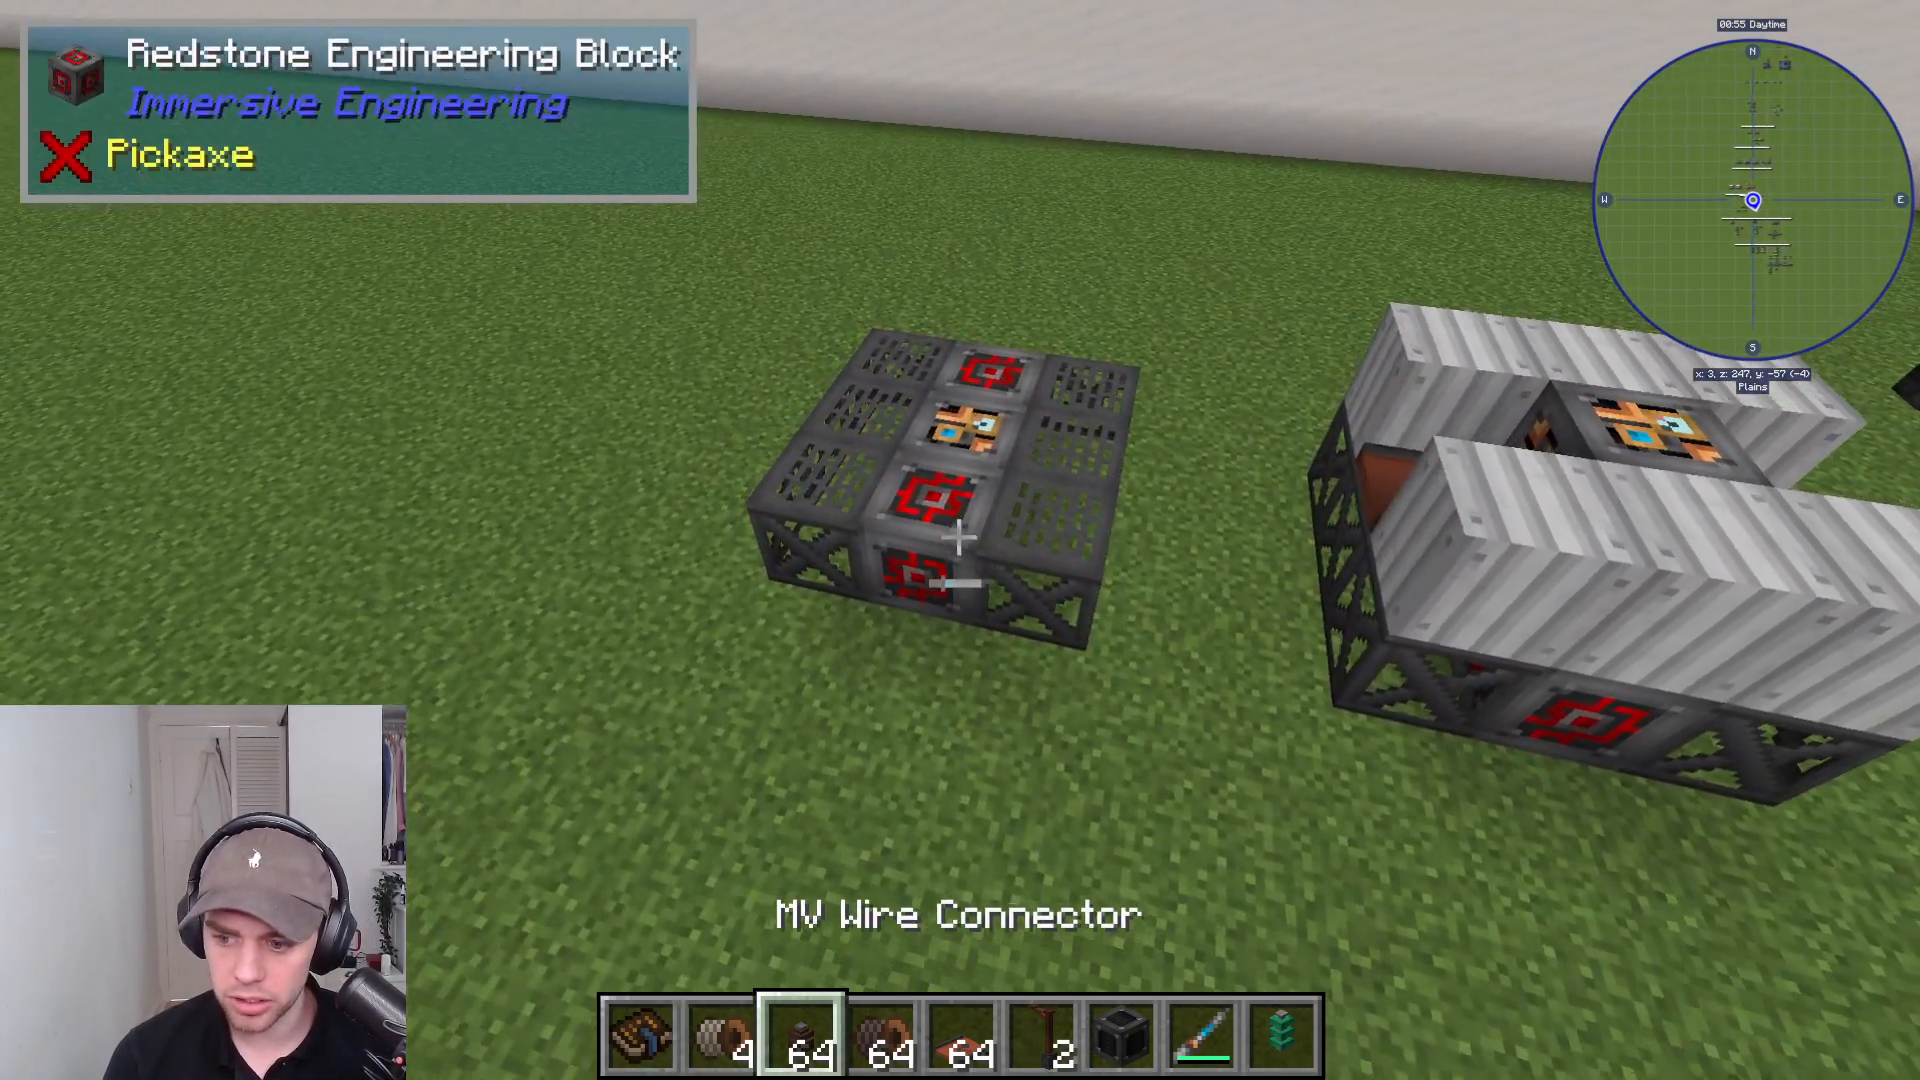
To begin constructing your Assembler, start with the base layer. You’ll need to place:
Two redstone engineering blocks
One light engineering block
Steel scaffolding positioned appropriately
Make sure to take screenshots as you build so you can reference them while constructing your own Assembler.
Middle Layer
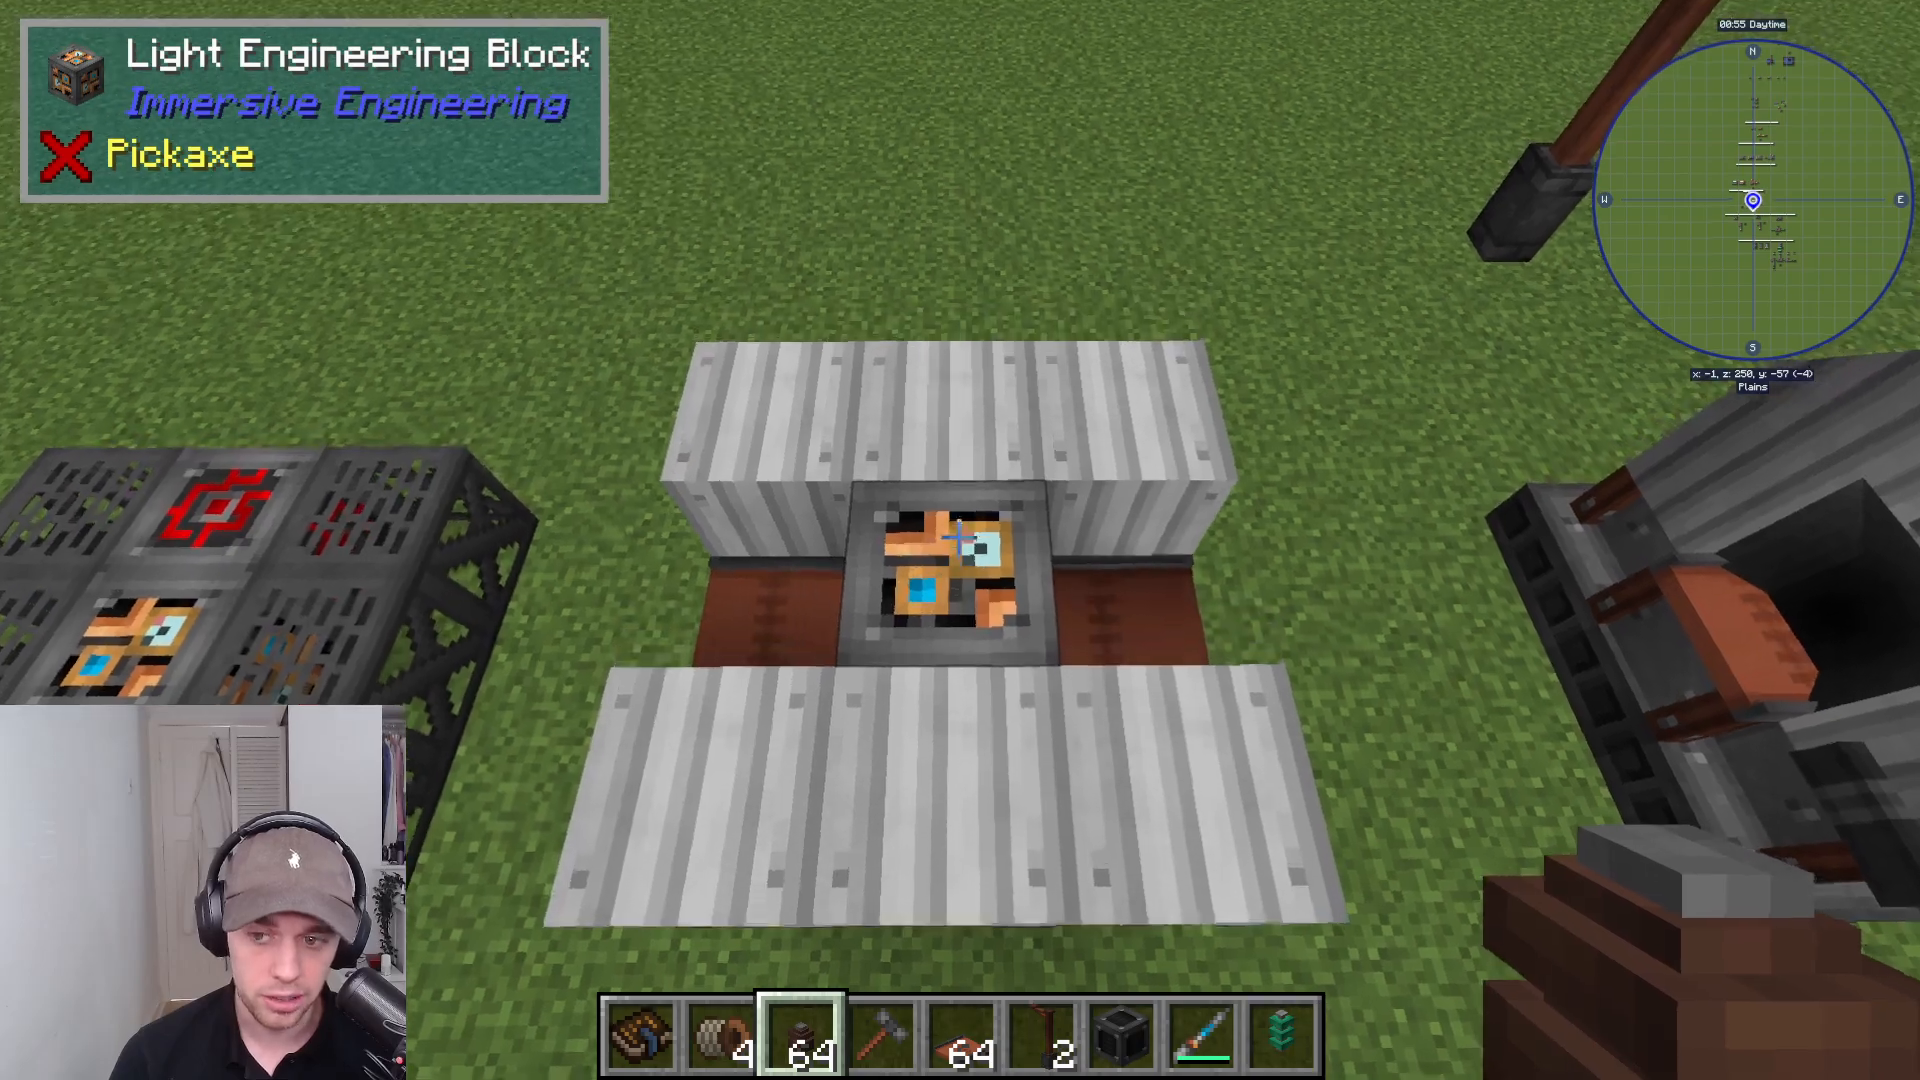
For the second layer, add another light engineering block in the middle. Then place iron sheet metal blocks on either side, followed by two conveyors positioned in the direction you want items to flow.
Top Layer
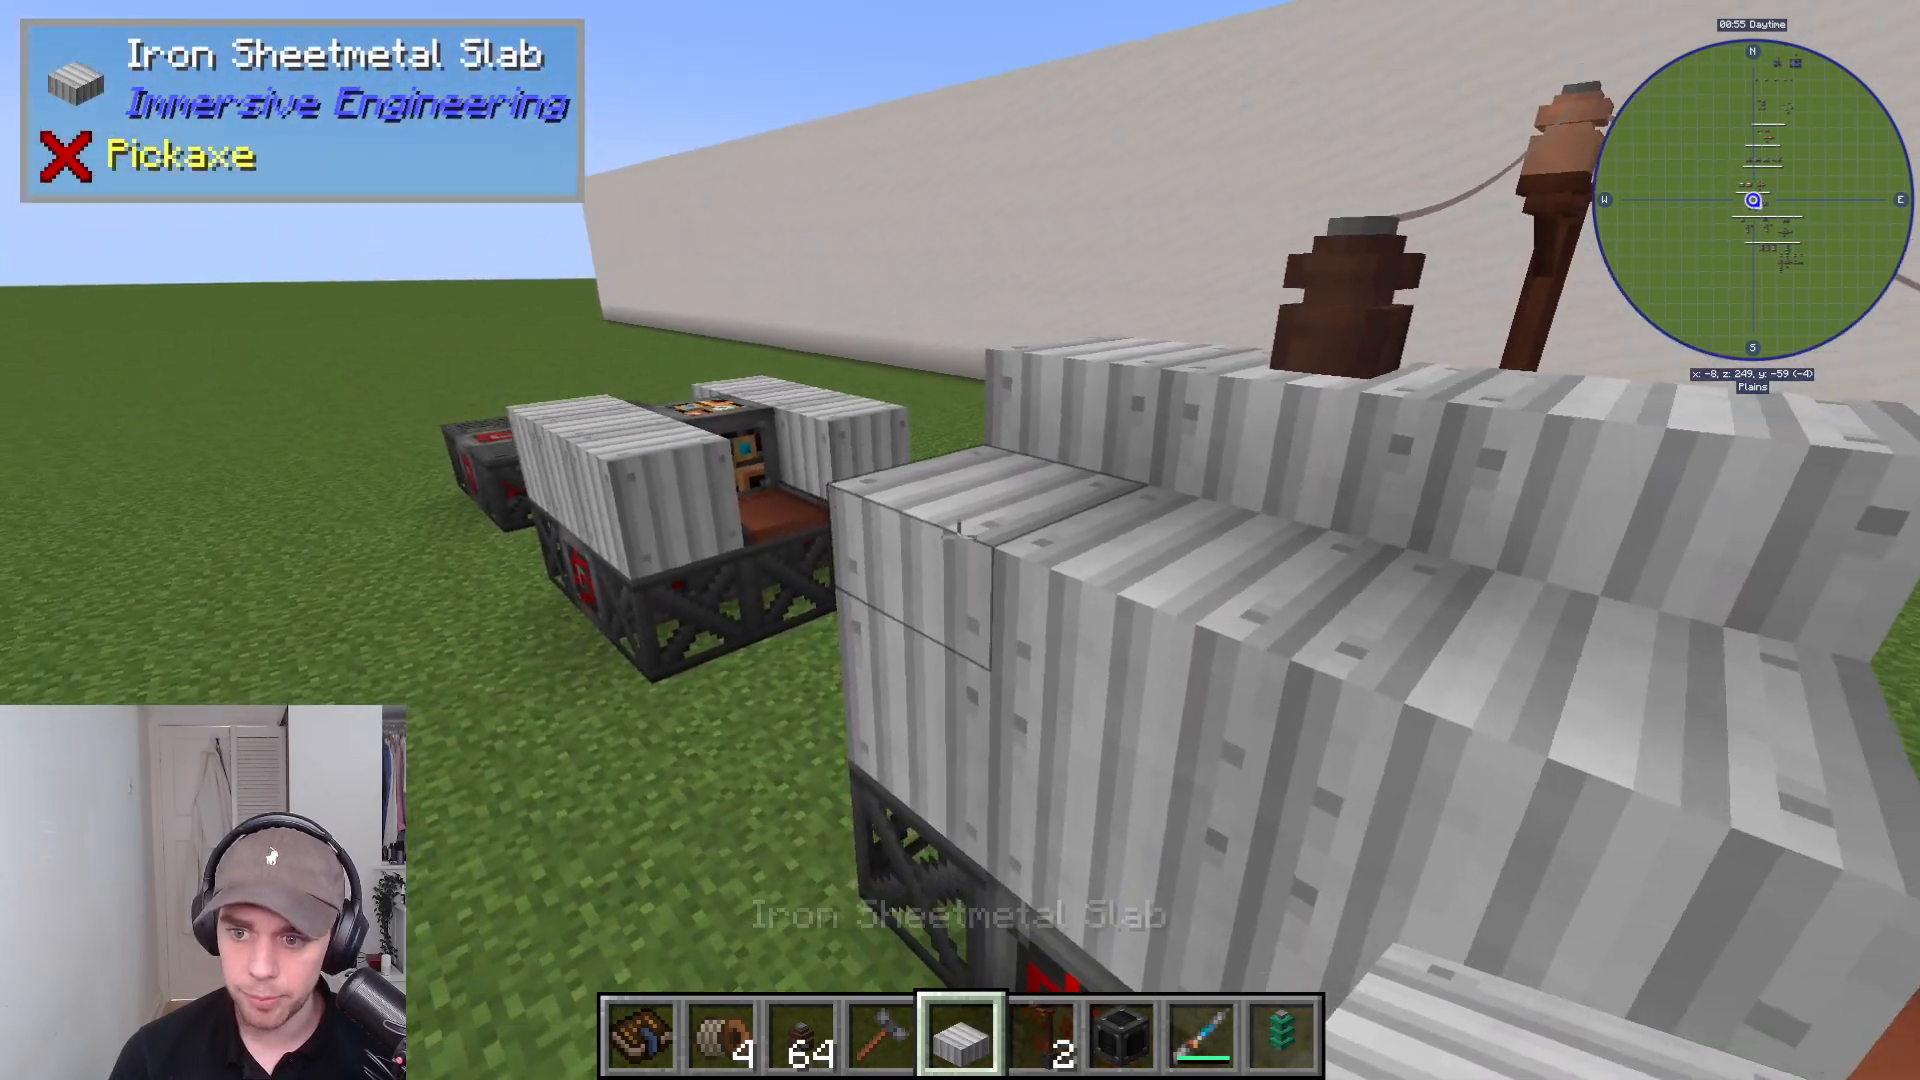
The top of your Assembler requires iron sheet metal slabs placed on both sides, with full blocks positioned in the middle. This creates the characteristic shape of a completed Assembler structure.
Activating Your Assembler
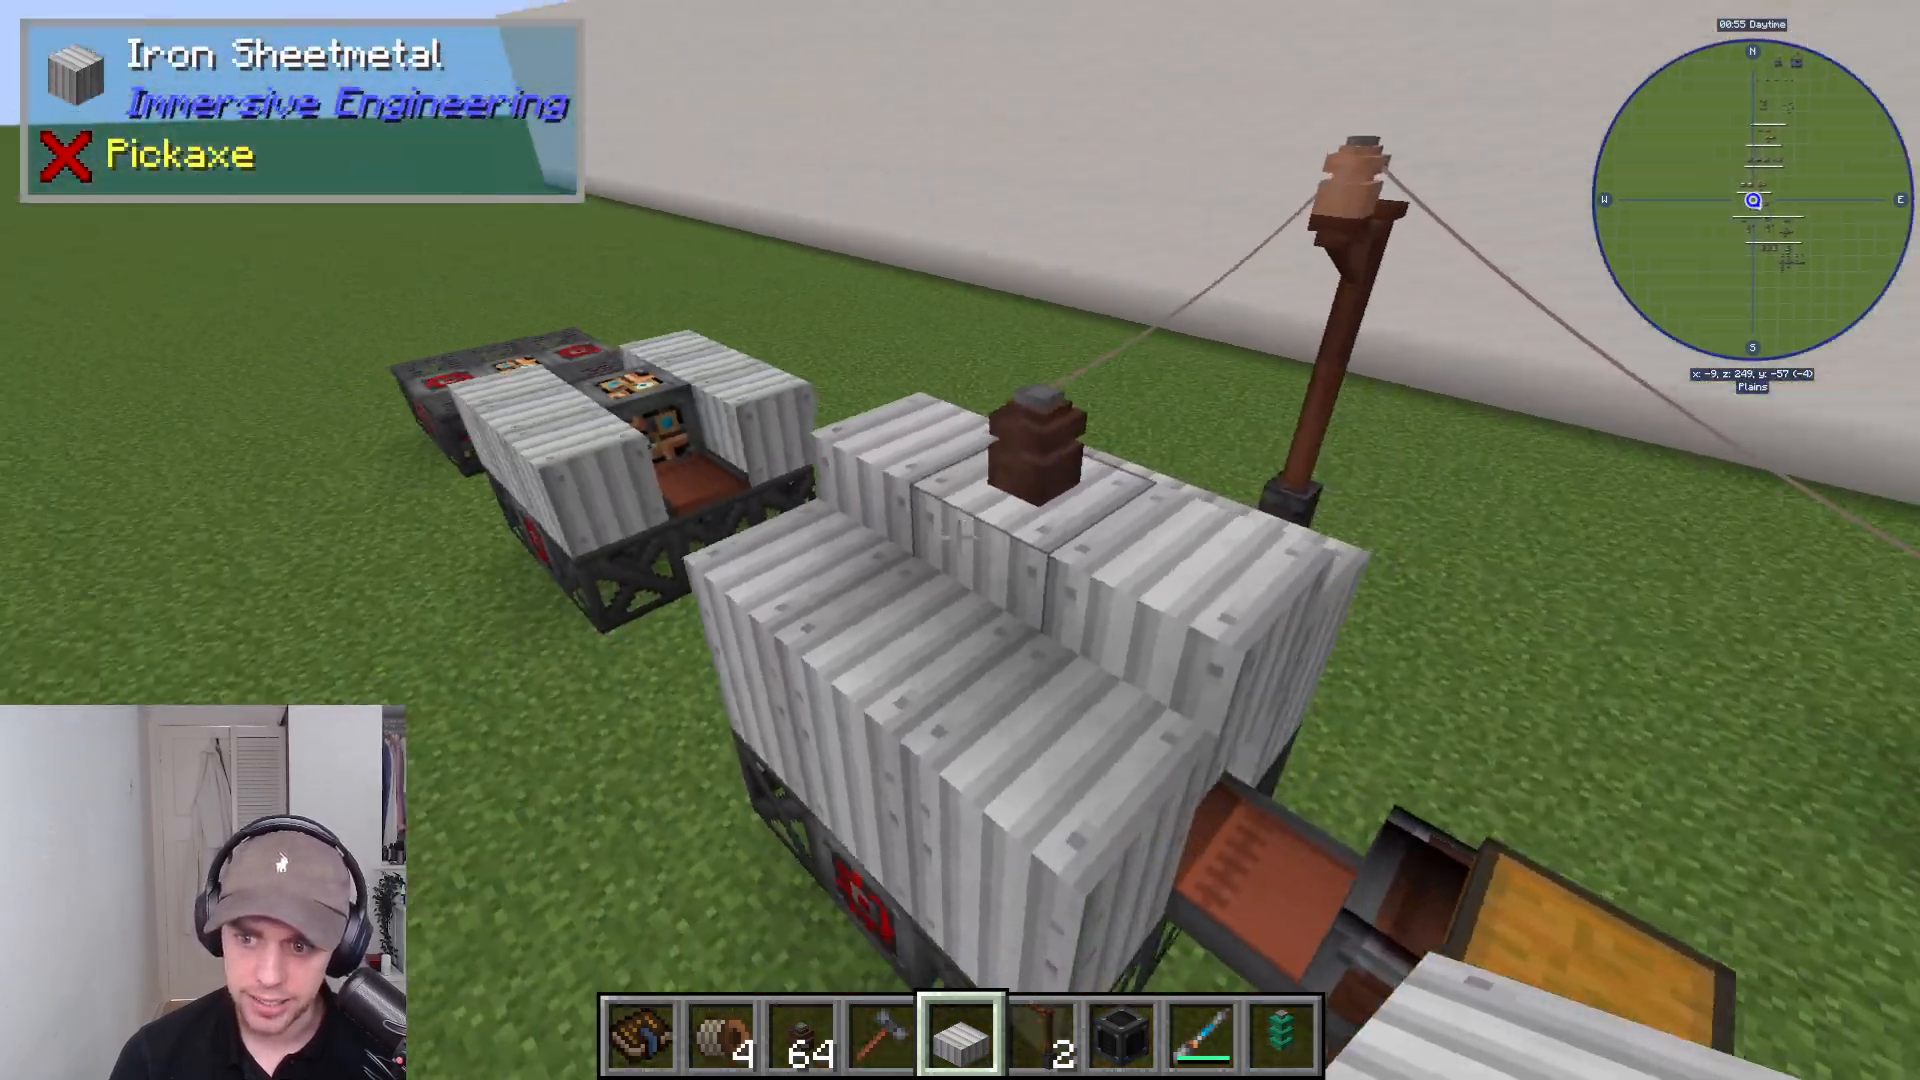
Once your structure is built, you need to activate it. To do this, right-click on the conveyor that is directly attached to the Assembler (not any other conveyor). This will initialize the machine and prepare it for operation.
Setting Up Input and Output
Item Input
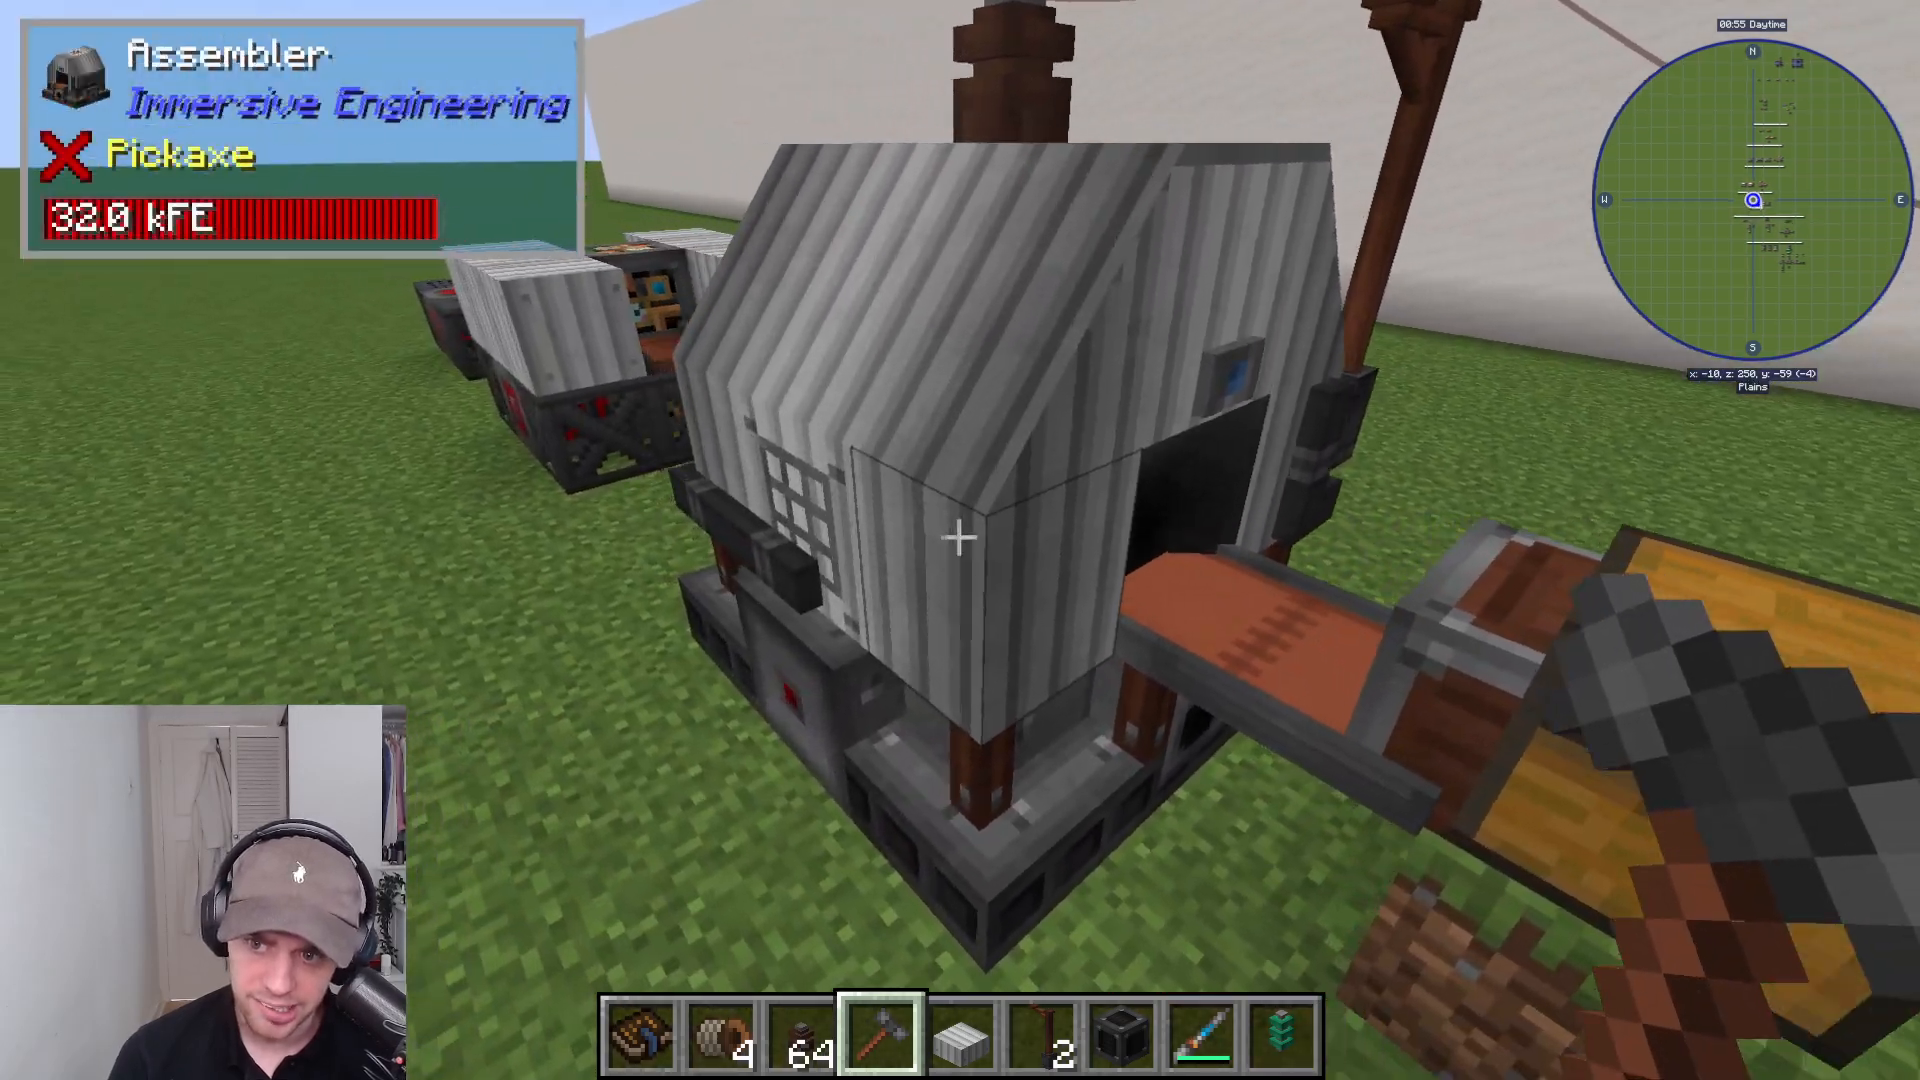
To get items into your Assembler, we recommend adding an extracting conveyor belt. This conveyor will transport items directly into the Assembler for processing.
Item Output
Items that have been crafted will exit through the output side of the Assembler. Make sure you have an inventory positioned to receive these items, or they will simply drop.
Redstone and Power Control
The Assembler features two important control points:
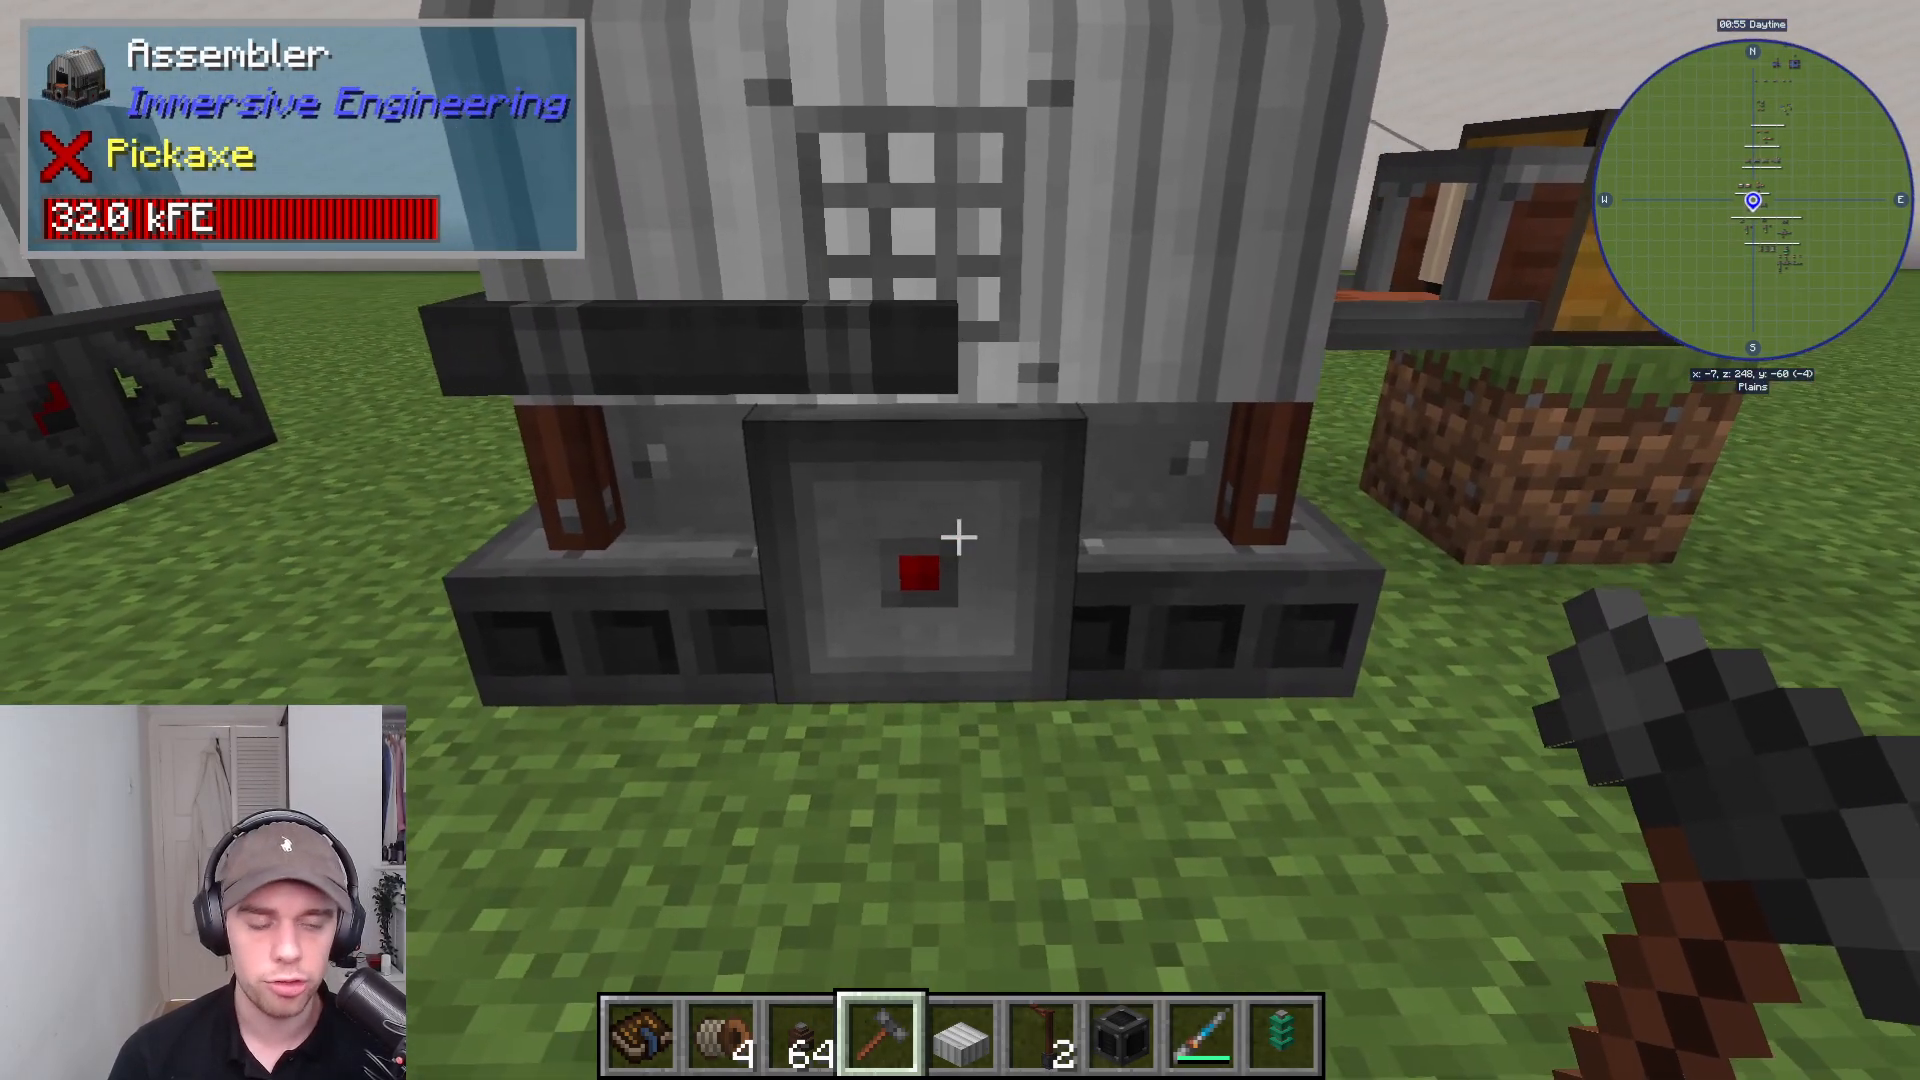
Red dot: This is where you add redstone control (using a lever or redstone signal) to start and stop the machine as needed
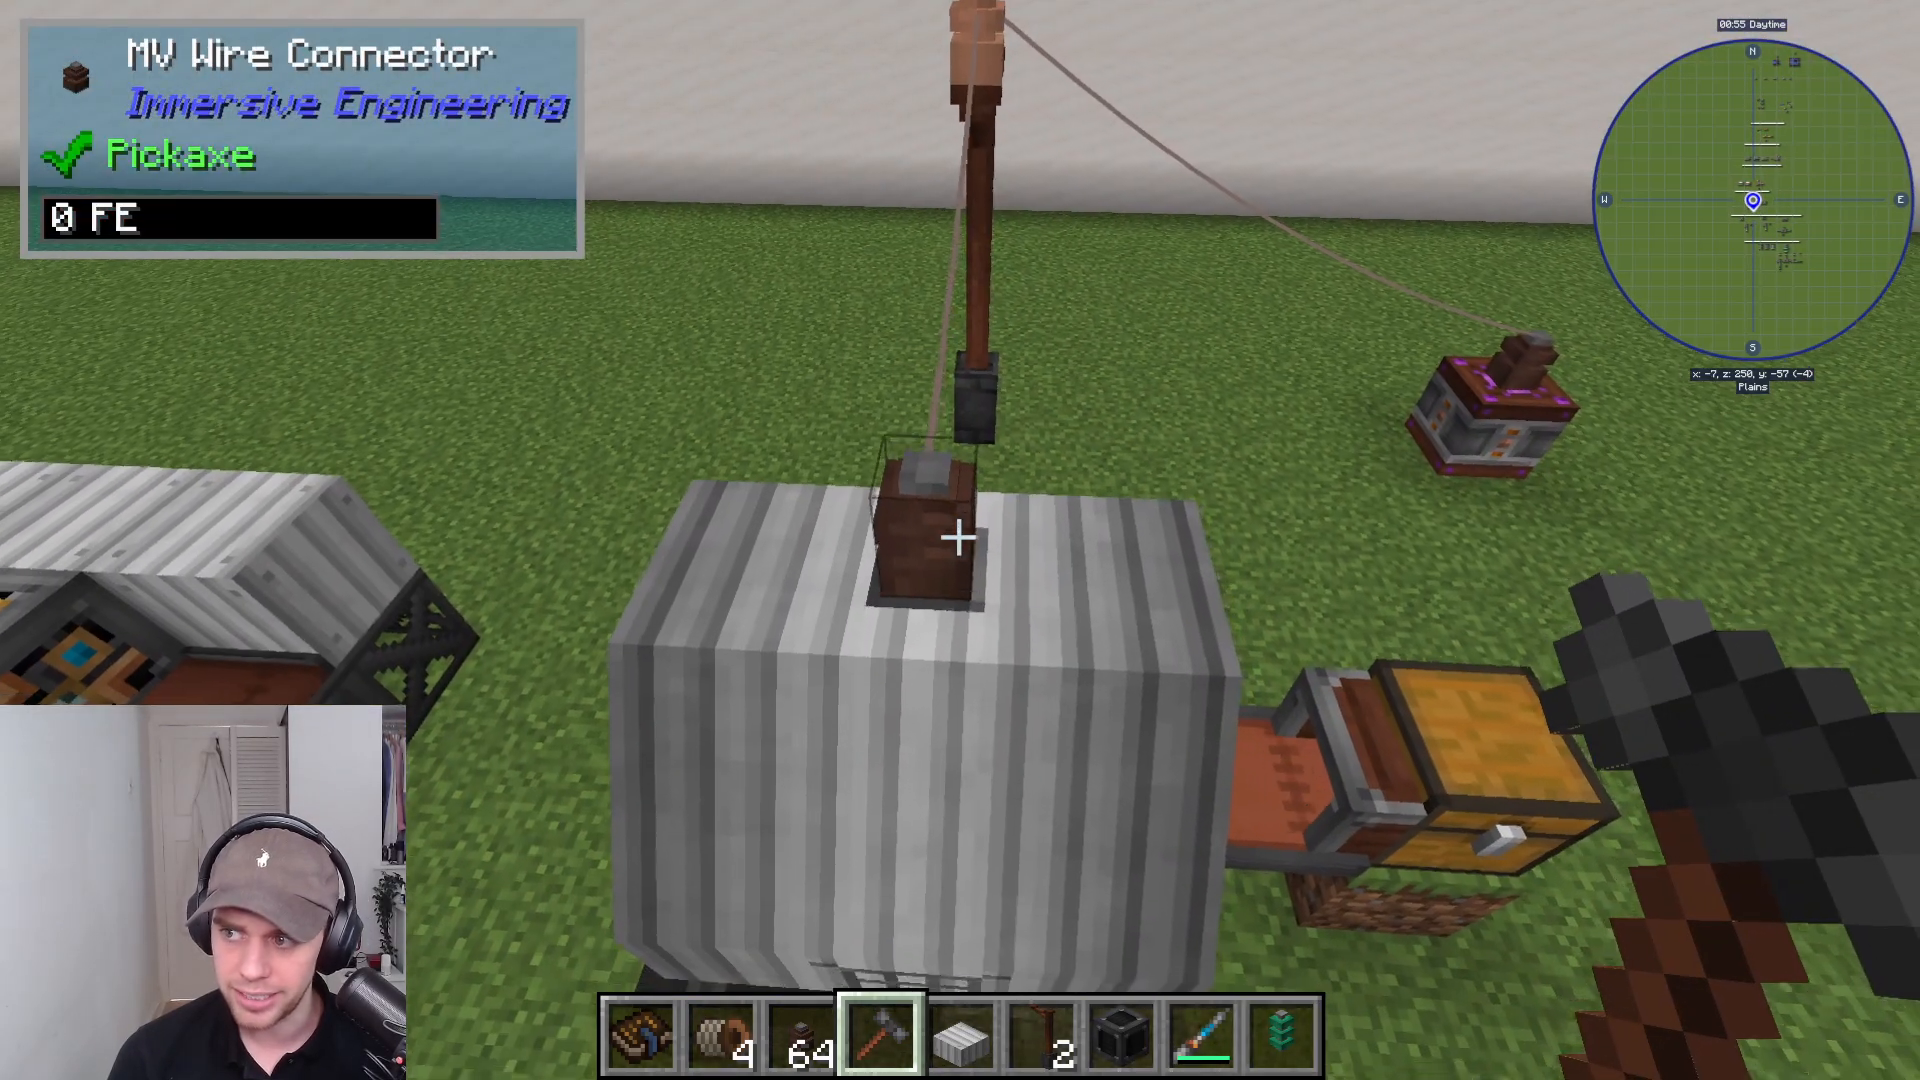
Orange dot (top): This is where you input power to operate the Assembler
Using the Recipe Interface
Understanding the Recipe Slots
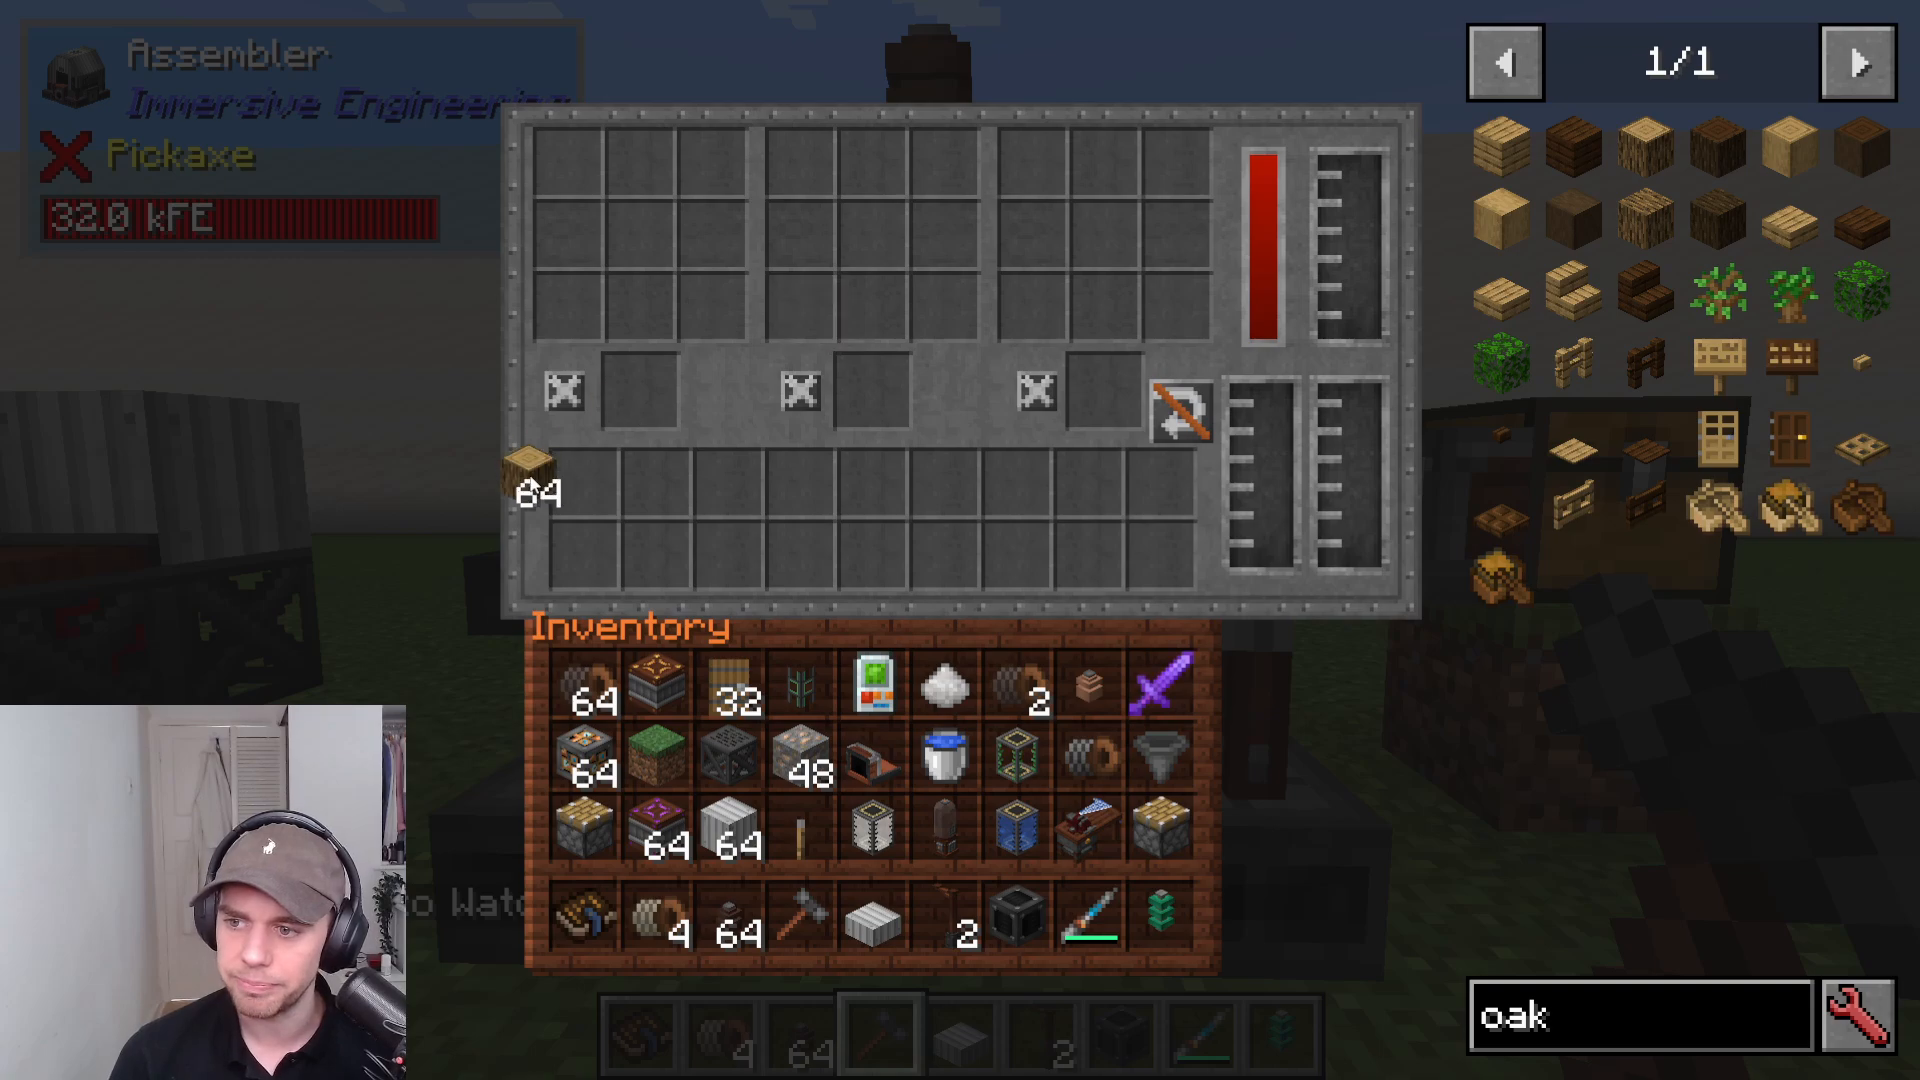
When you interact with the Assembler, you’ll see its interface with three different recipe slots available. The bottom section shows your inventory slots, which is where items are pulled from for crafting.
Creating Multi-Step Recipes
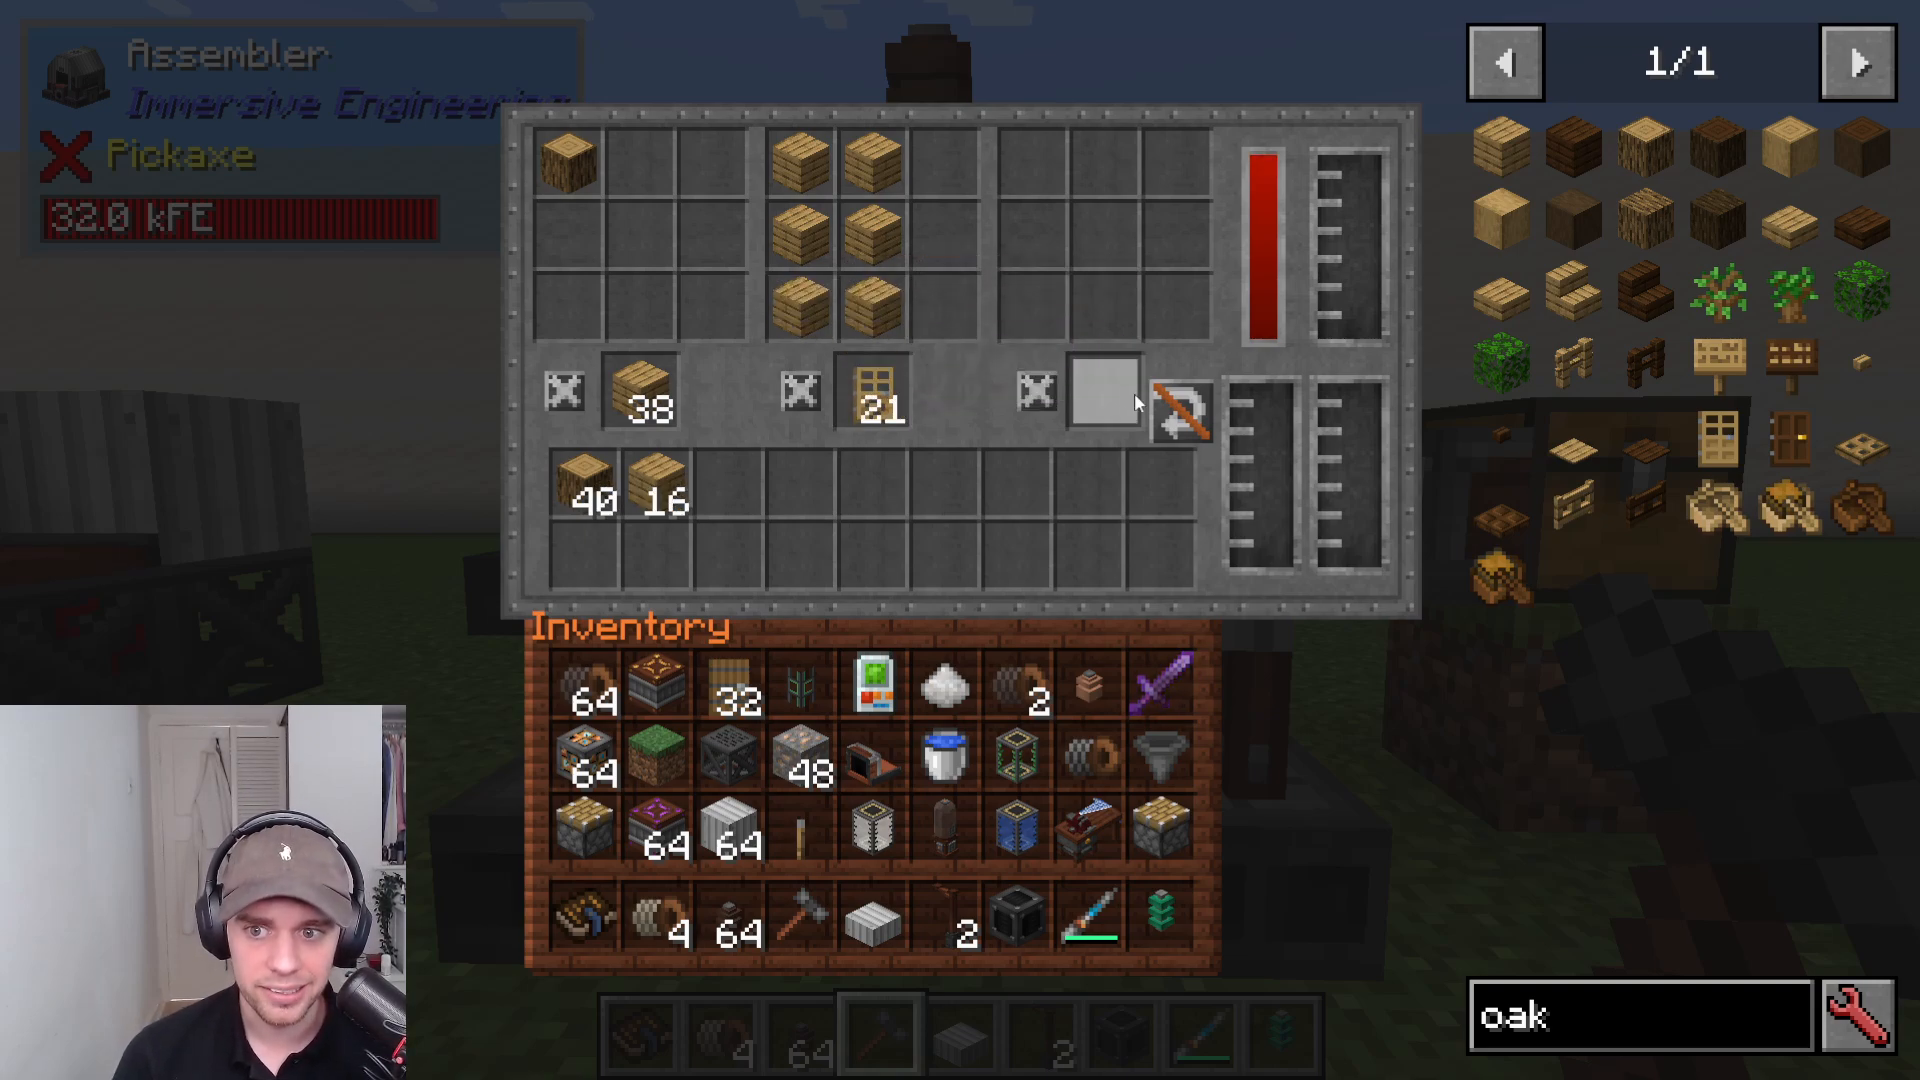
One of the most powerful features of the Assembler is its ability to handle multi-step processes. Here’s an example workflow:
Place raw materials (such as oak logs) in the inventory slots at the bottom
Add the first recipe to the top-left slot (for example, converting oak logs to oak planks)
The machine will automatically process logs into planks
Add a second recipe that uses the planks as input (for example, crafting oak doors from planks)
The Assembler will then create oak doors from the freshly-made planks
Non-Recursive Ingredient Usage
The Assembler uses non-recursive ingredient processing, which means it can reuse intermediate products from previous recipe steps. In the example above, the oak planks created in step one automatically become available as inputs for step two without any manual intervention. This allows you to create efficient two-step or even three-step production chains seamlessly.
Managing Recipes
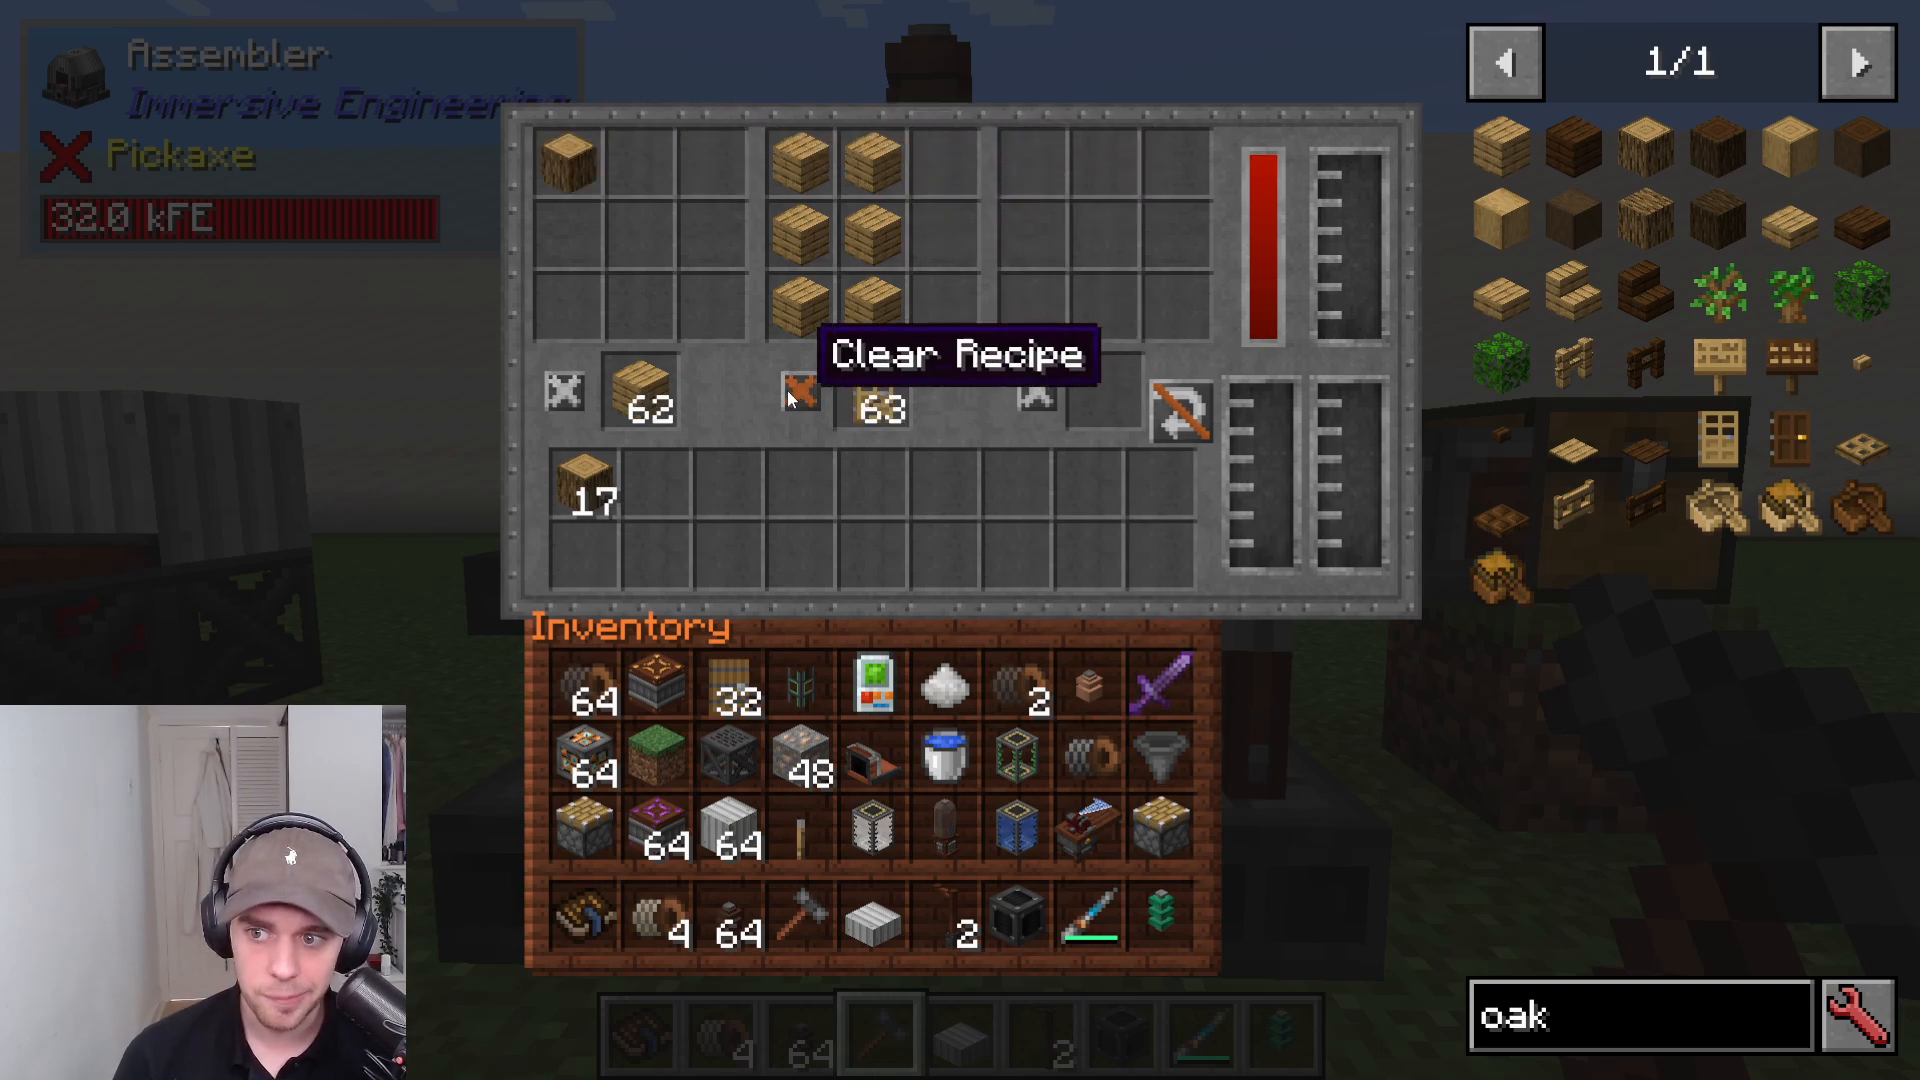
You can set up to three different recipes in the Assembler simultaneously. If you need to clear a recipe slot, simply click on it to remove it. This flexibility allows you to switch between different production chains easily.
Adding Fluid Processing
Fluid Pipe Integration
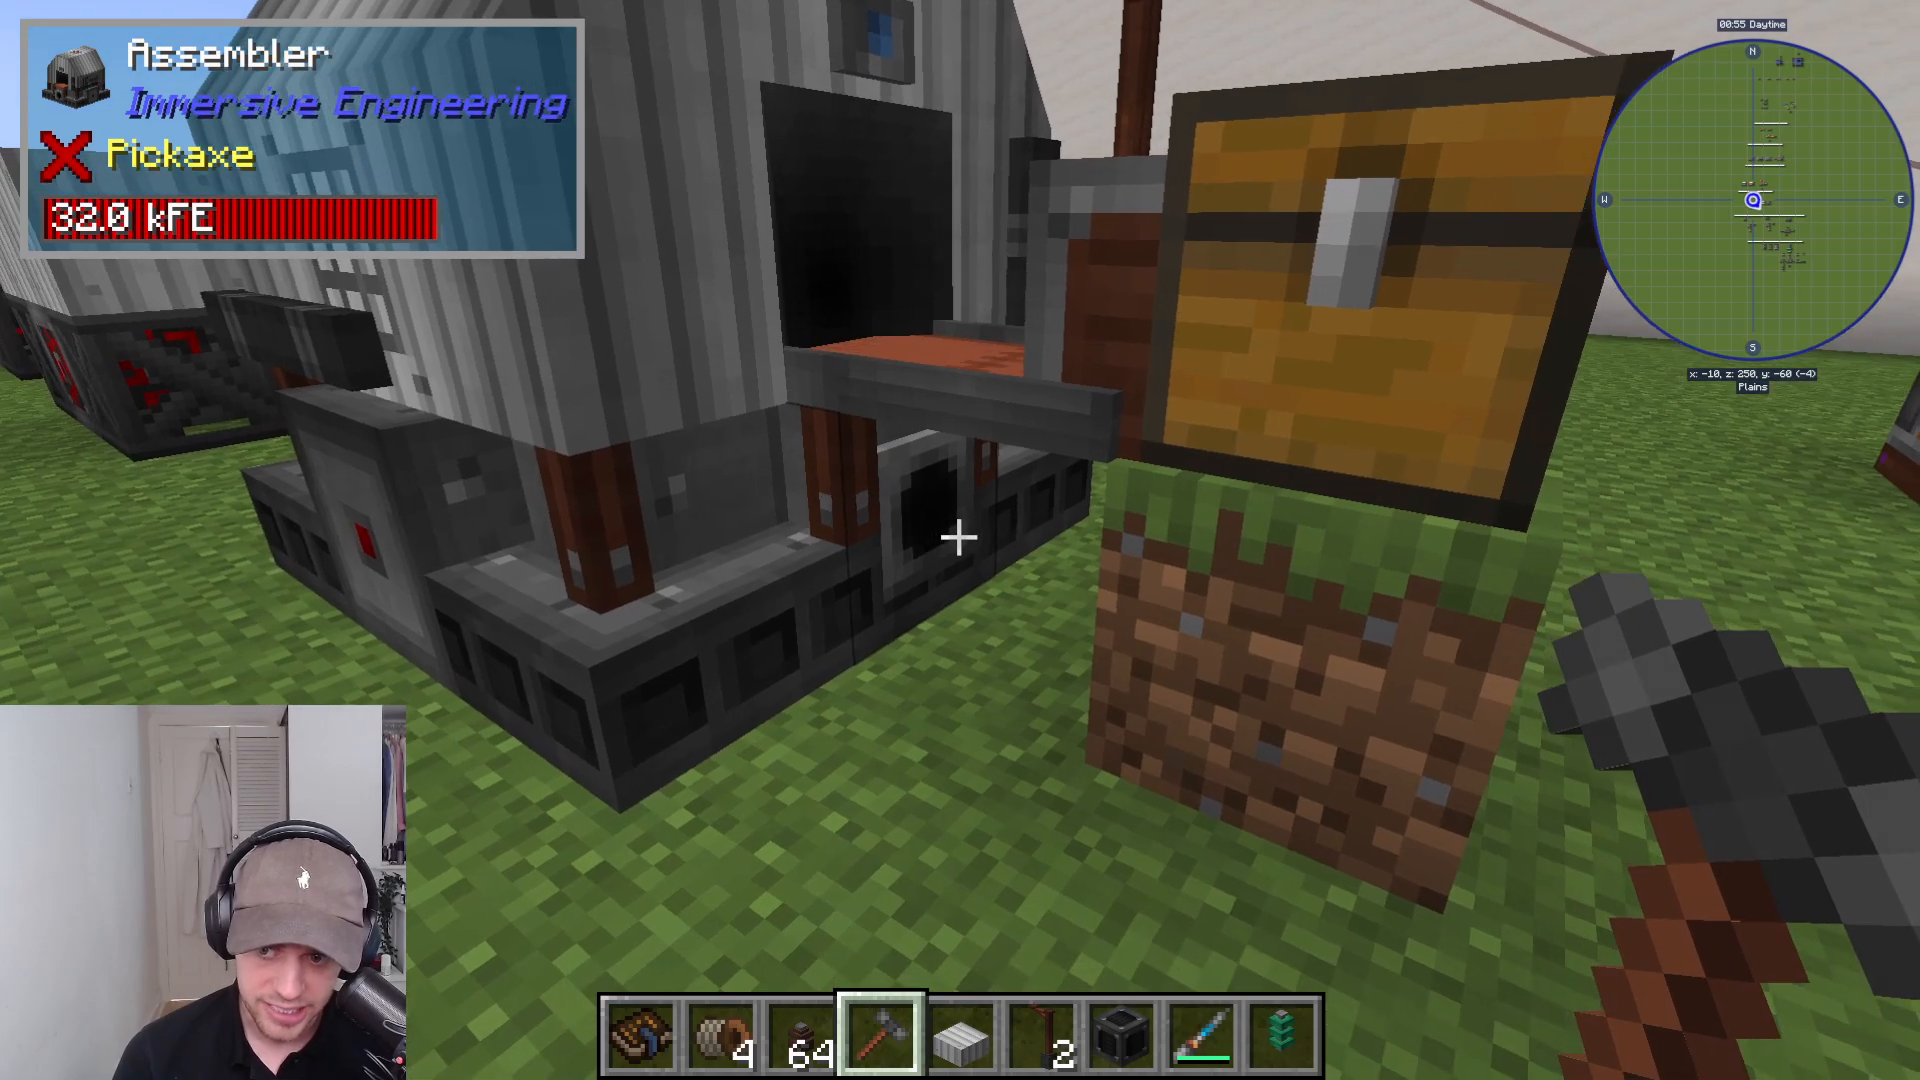
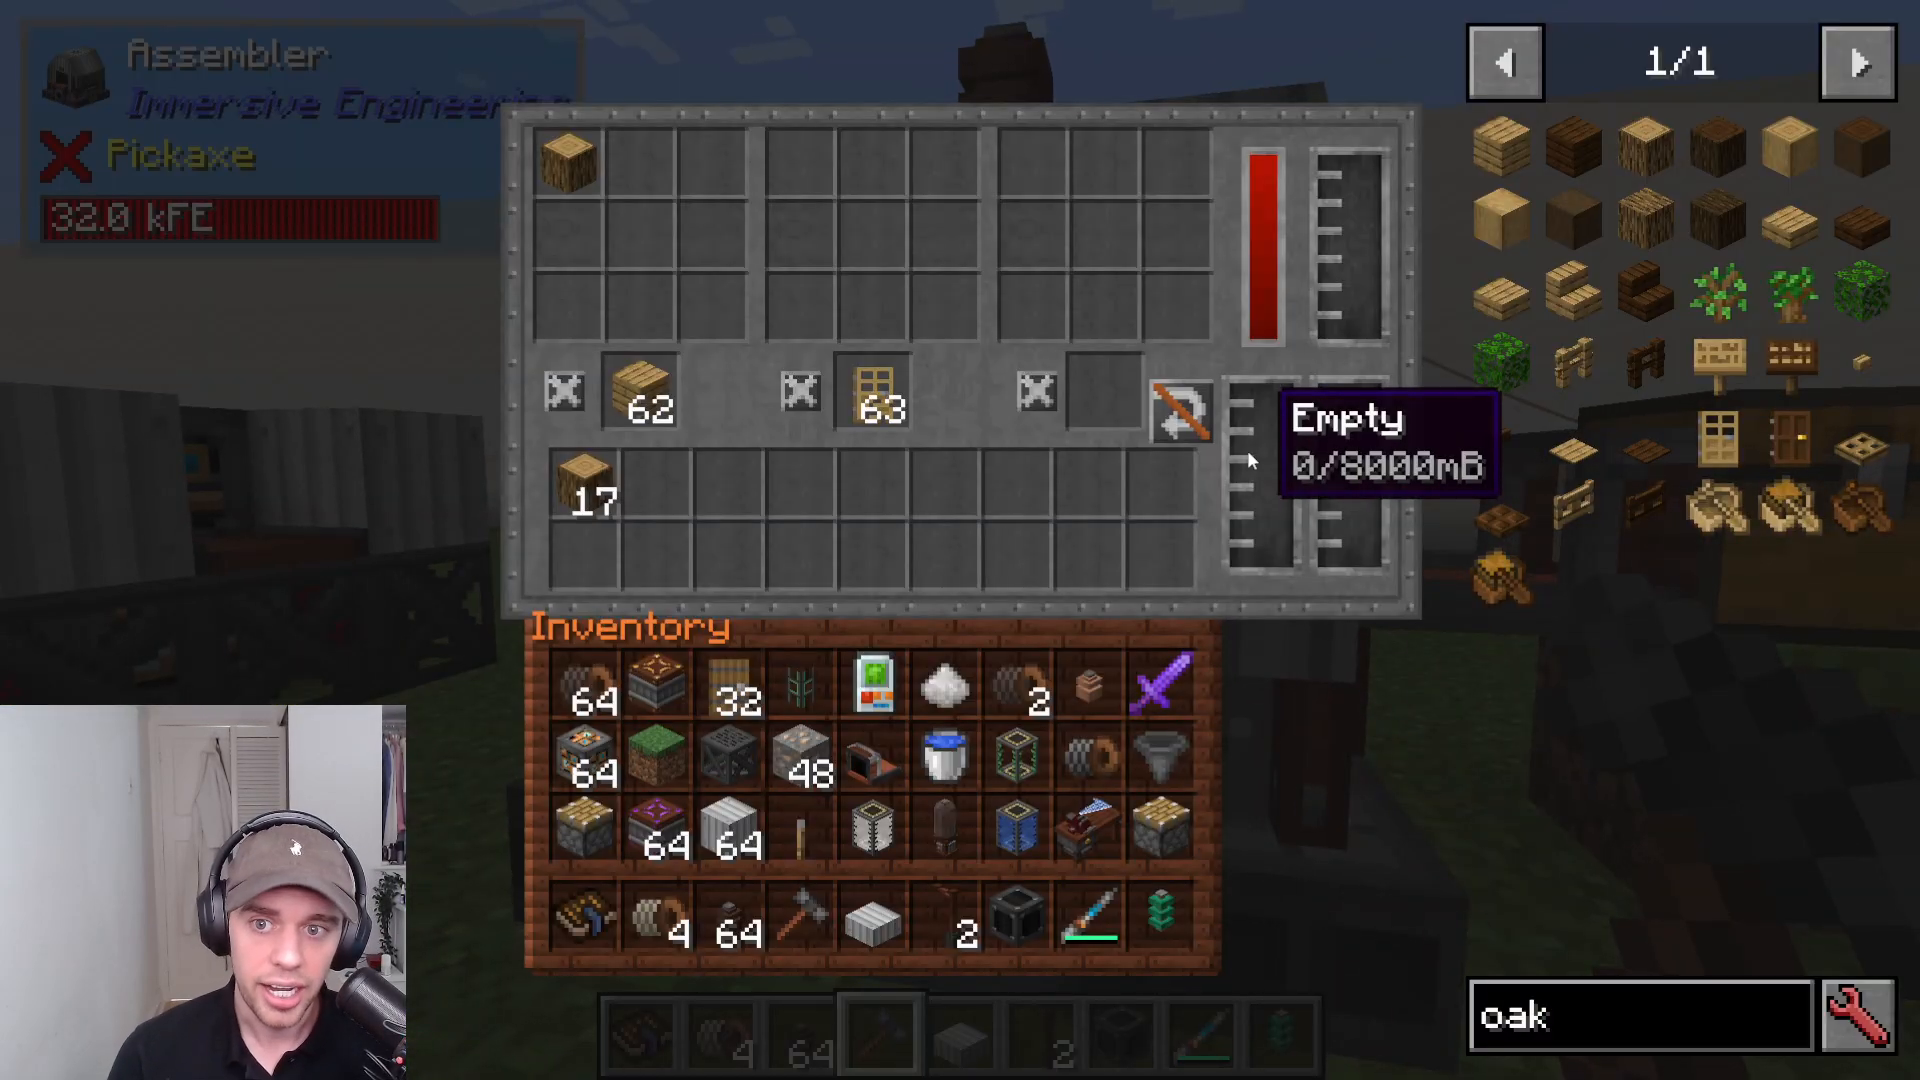
The Assembler supports fluid inputs through fluid pipes. You can see the fluid input connection points underneath the machine. By piping in fluids, you can greatly expand the types of recipes you can automate.
Bucket-Based Fluid Storage
An excellent feature of the Assembler is its ability to accept buckets of fluid (such as water buckets) in its inventory. When you place buckets in the inventory slots, the Assembler will use the fluid stored in those buckets to fulfill recipe requirements. This creates a seamless way to integrate fluid-based recipes into your automation system without needing complex piping infrastructure.
Conclusion
The Assembler is a versatile and powerful addition to any Immersive Engineering setup. With its ability to handle multi-step recipes, fluid inputs, and flexible redstone control, it opens up countless automation possibilities. Whether you’re crafting simple items or running complex production chains, the Assembler will become one of your most relied-upon machines.
— Want to Support? —
If you would like to help us continue making these guides – please consider joining our patreon here – https://www.patreon.com/c/JaviHeals
Alternatively – we host a group of MC Servers you can join here – https://discord.gg/zD7Gjt6MHF