How To Make & Use Golems In Thaumcraft 6
How To Make & Use Golems In Thaumcraft 6
Golems are one of the most powerful automation tools available in Thaumcraft 6. Once unlocked, they can harvest, collect, store, and even fight — all on their own. In this guide, we’ll walk you through everything you need to know: unlocking the Golemancy branch, building the Golem Press, crafting your first Golem, and assigning it jobs using seals. Whether you’re brand new to Thaumcraft or just need a clear walkthrough, this guide has you covered.
Unlocking Golemancy in the Thaumonomicon
Before you can build any Golems, you’ll need to unlock the Golemancy chapter inside your Thaumonomicon. This chapter doesn’t open automatically — it requires you to first complete several prerequisite research entries. Specifically, you must complete:
First Steps
Discovering Alchemy
Discovering Auromancy
Discovering Artifice
Infusion
Once all of those are completed, the Discovering Golemancy entry will unlock, which in turn opens the full Golemancy tab in your Thaumonomicon.
Navigating the Golemancy Tab
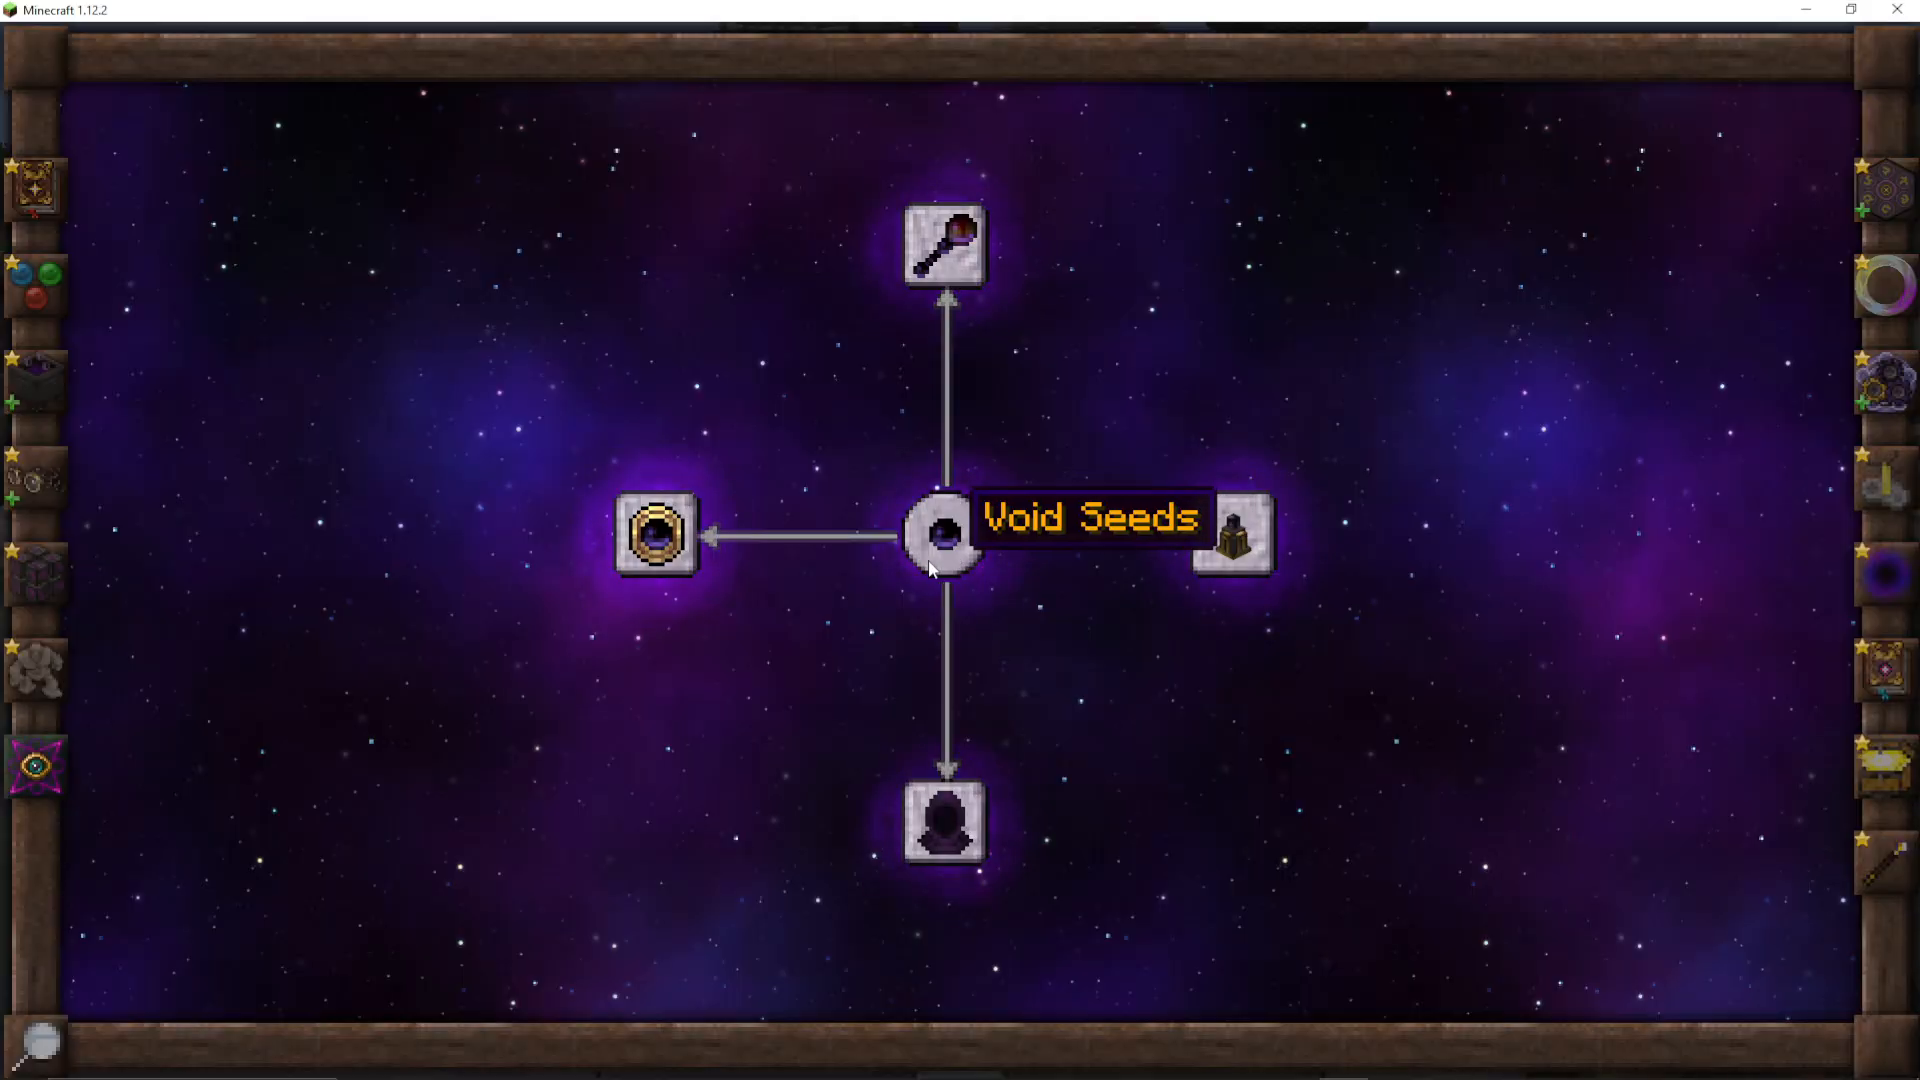
Inside the Golemancy tab, you’ll find a range of research entries. The first entry, Basic Golemancy, gives you background lore on Golems. You’ll also see an entry for Brain in a Jar — this is not needed for Golemancy itself, so you can skip it for now.
The key research entry you need is Clockwork Minds. Unlocking Clockwork Minds also gives you access to the Golem Press — the multiblock structure where all Golems are created.
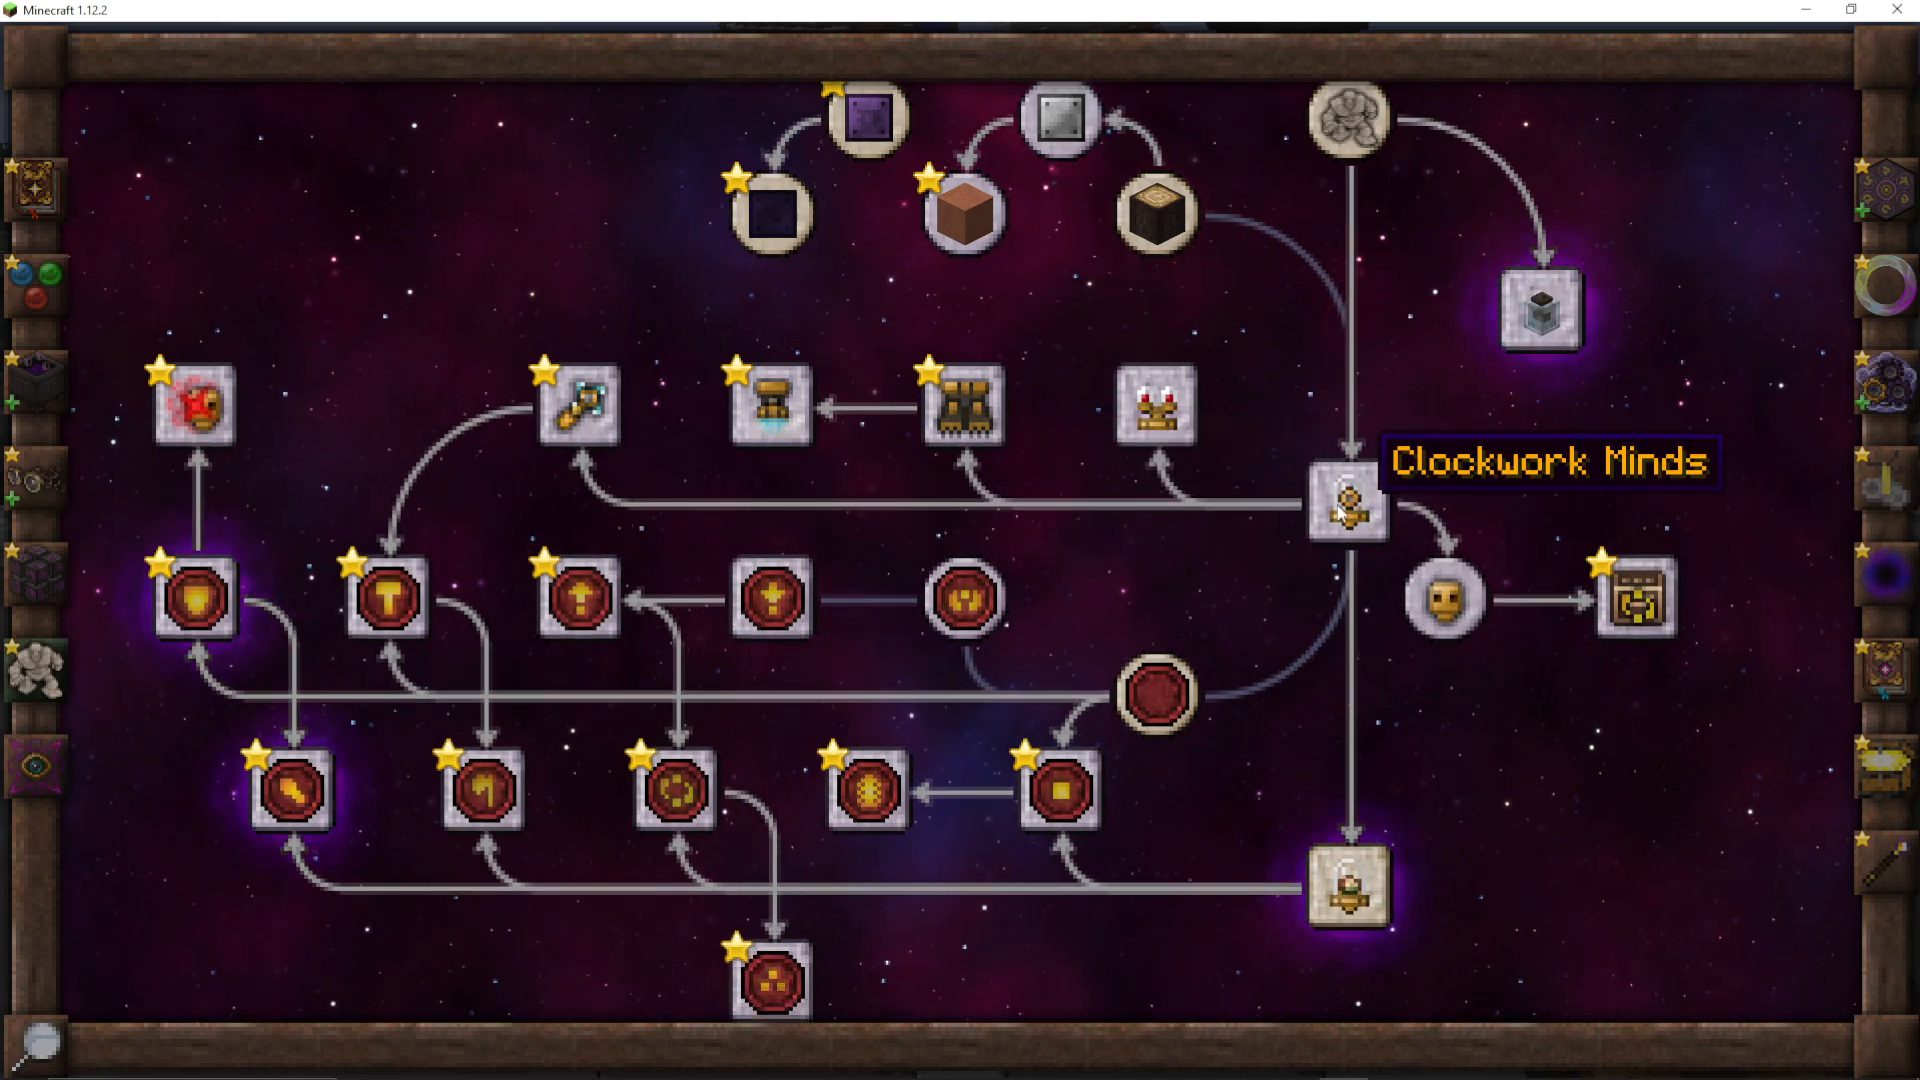
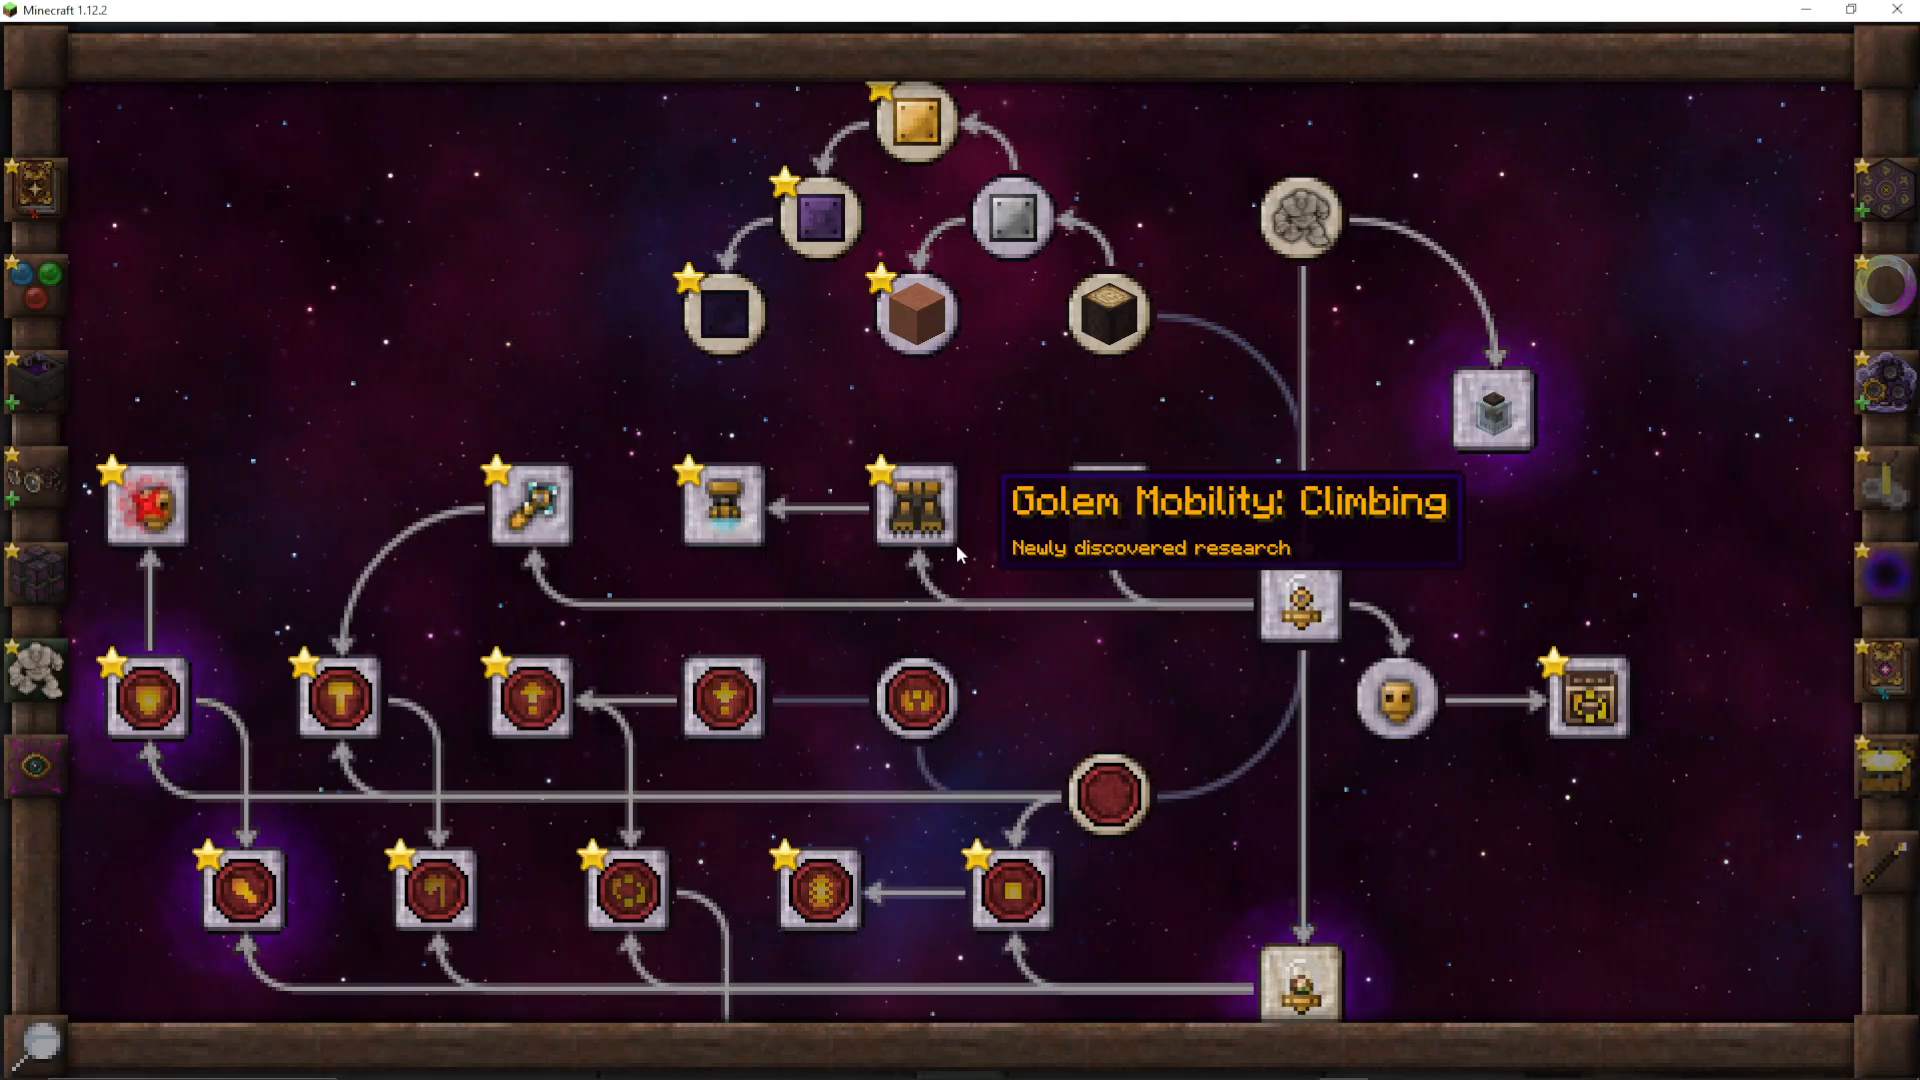
Within the Golemancy tab, you’ll notice several categories of research entries:
Orange entries — These unlock different body parts for your Golems, such as Golem Biomorphic Eyes, Climbing upgrades, and Flight.
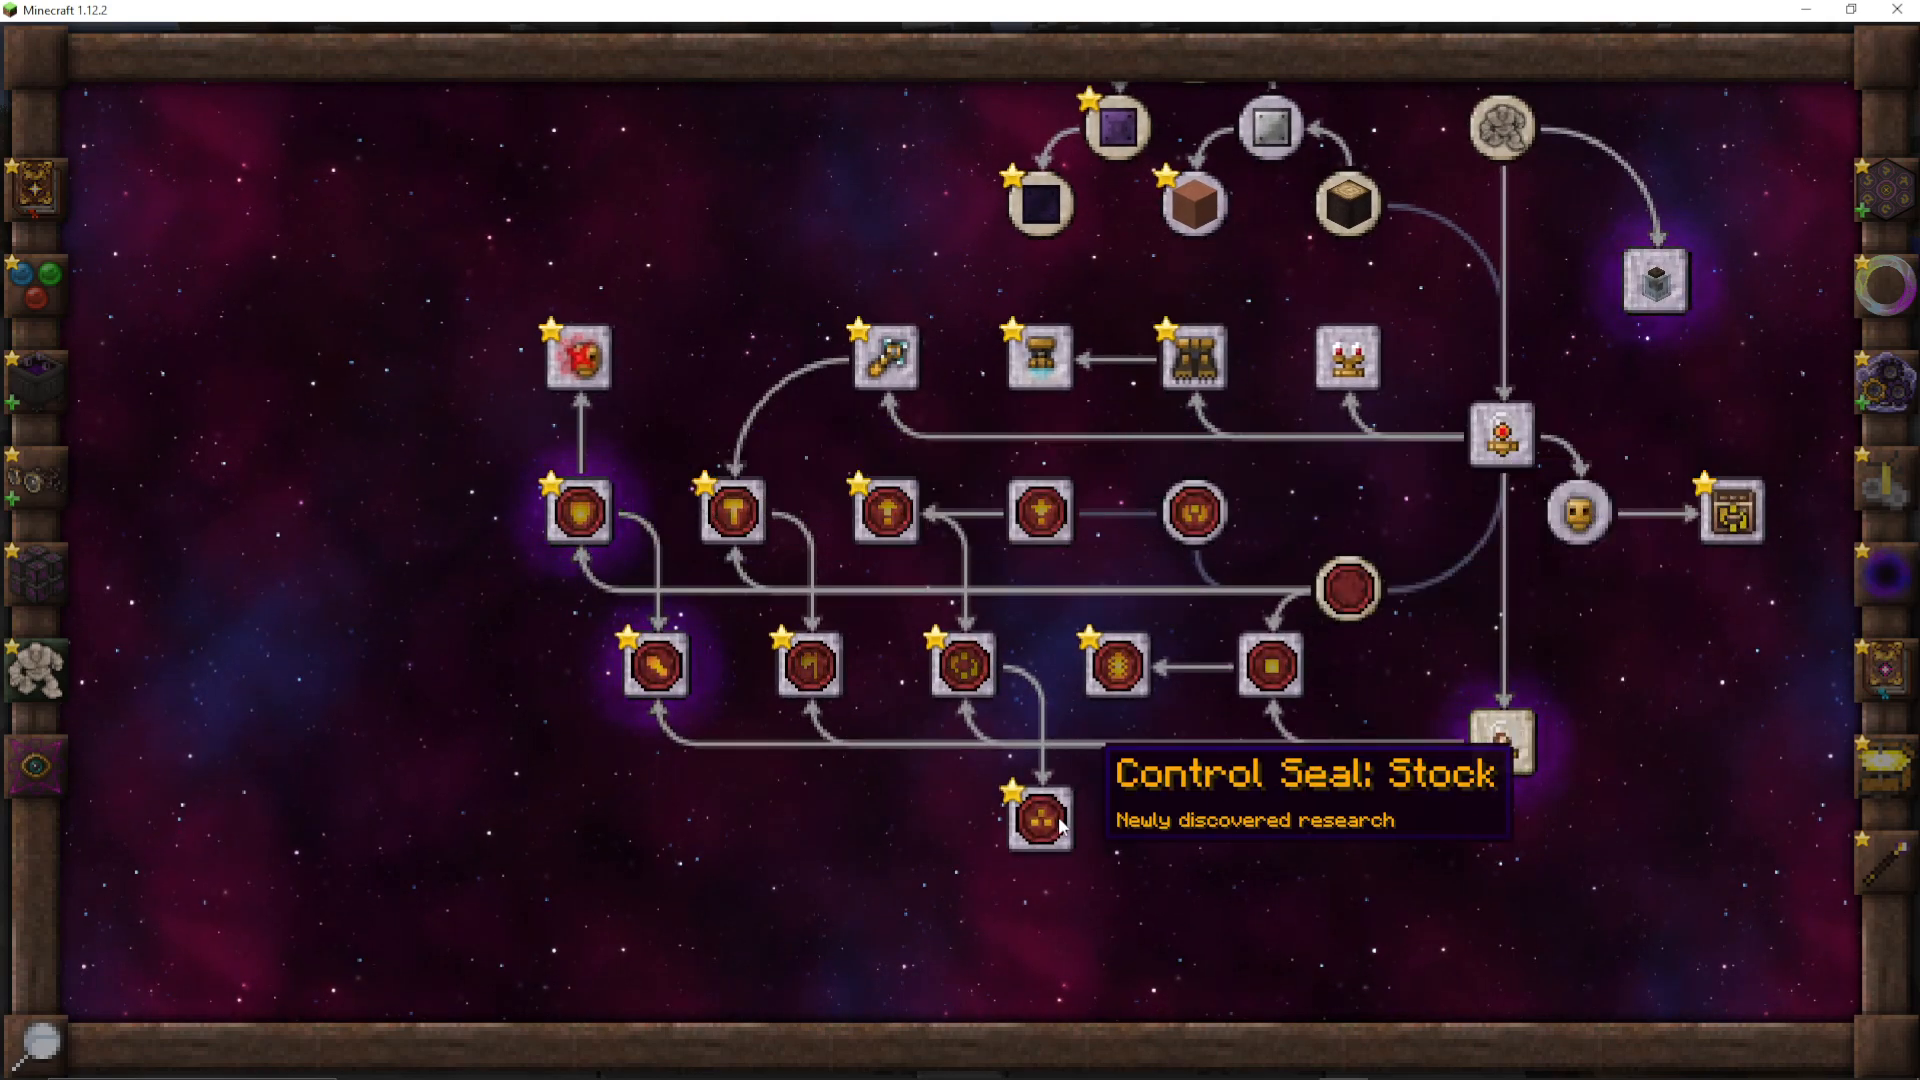
Red entries — These unlock the control mechanisms (seals) used to give your Golems jobs.
Upper entries — These unlock the materials your Golem can be built from, such as wood, iron, clay, and more.
Building the Golem Press
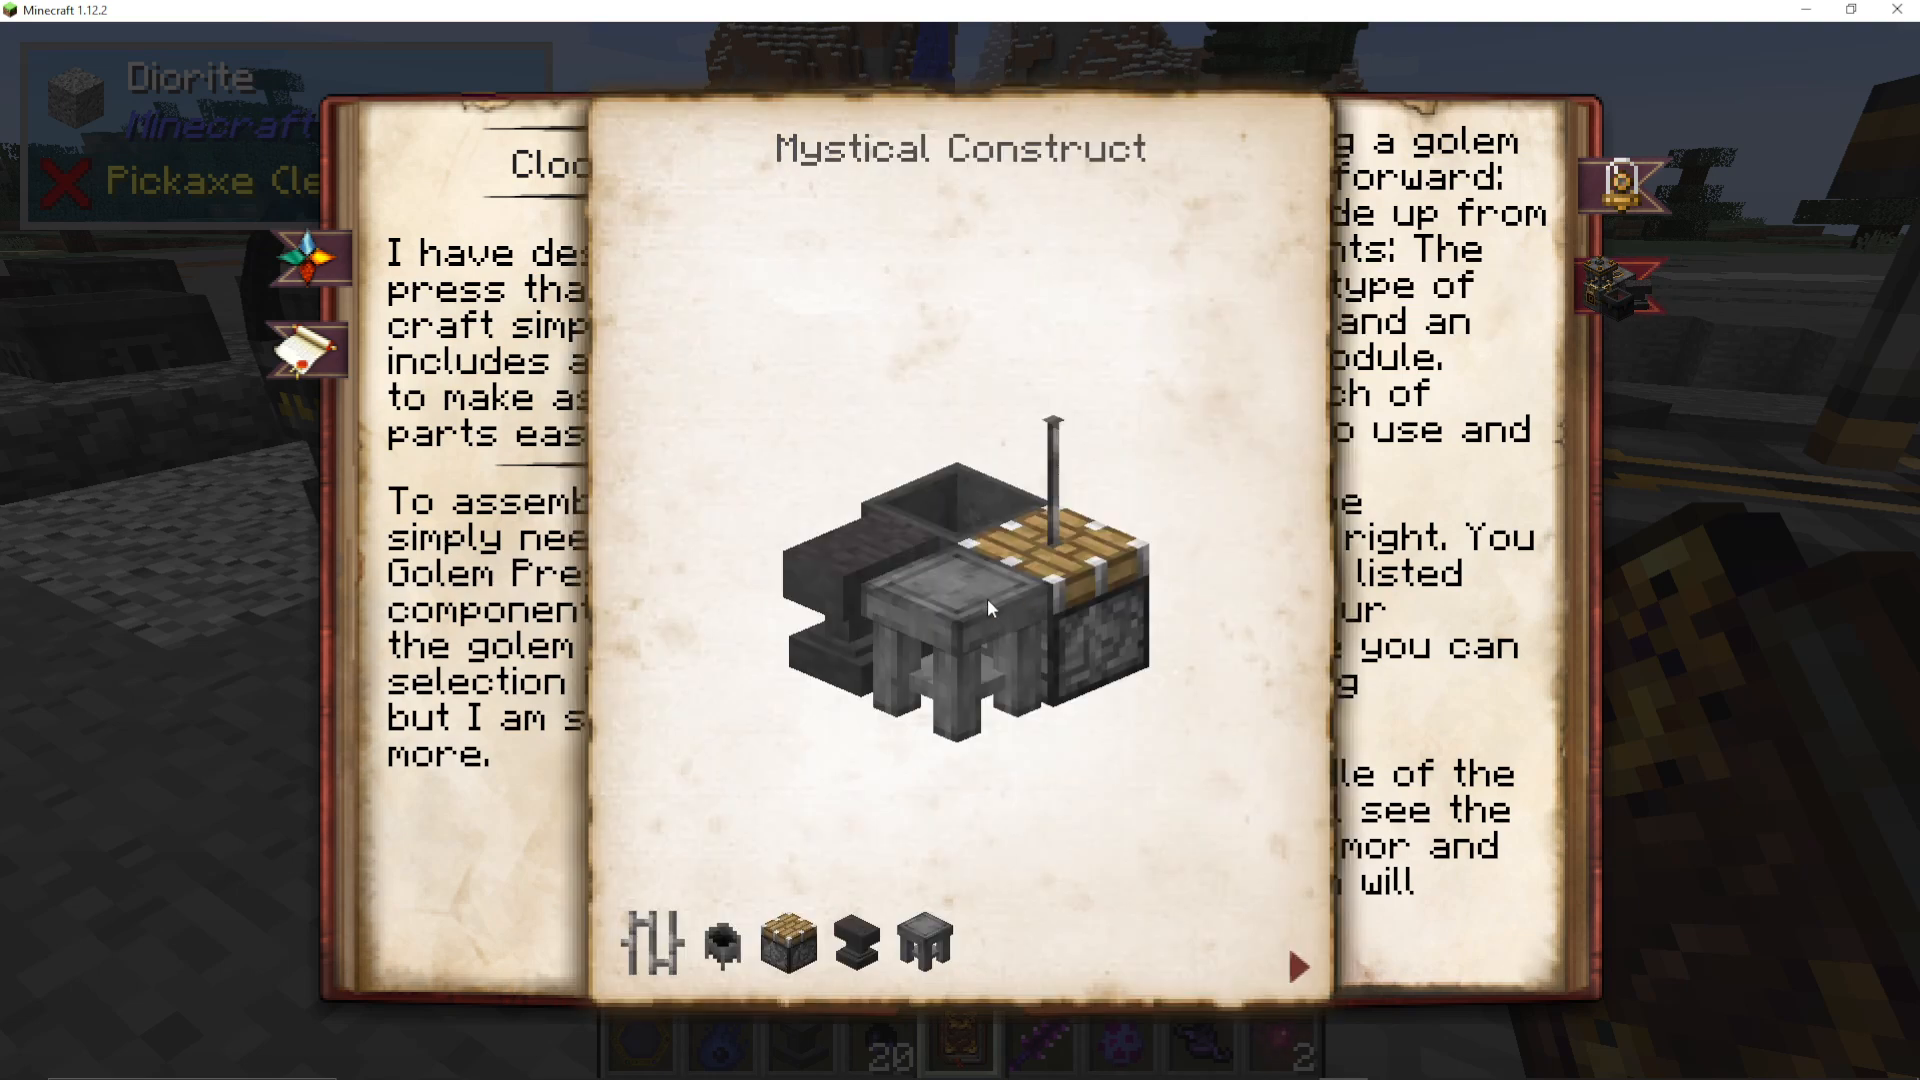
The Golem Press is a multiblock structure that you construct and then activate with Salis Mundus — the same way you create an Arcane Workbench. To build it, place the following blocks together in the correct arrangement:
1x Stone Table
1x Piston (placed next to the table)
1x Cauldron (a standard vanilla cauldron — not a Thaumcraft Crucible)
1x Anvil
1x Iron Fence (placed on top)
Once you have the structure assembled, right-click it with your Salis Mundus to transform the whole structure into the Golem Press.
Using the Golem Press
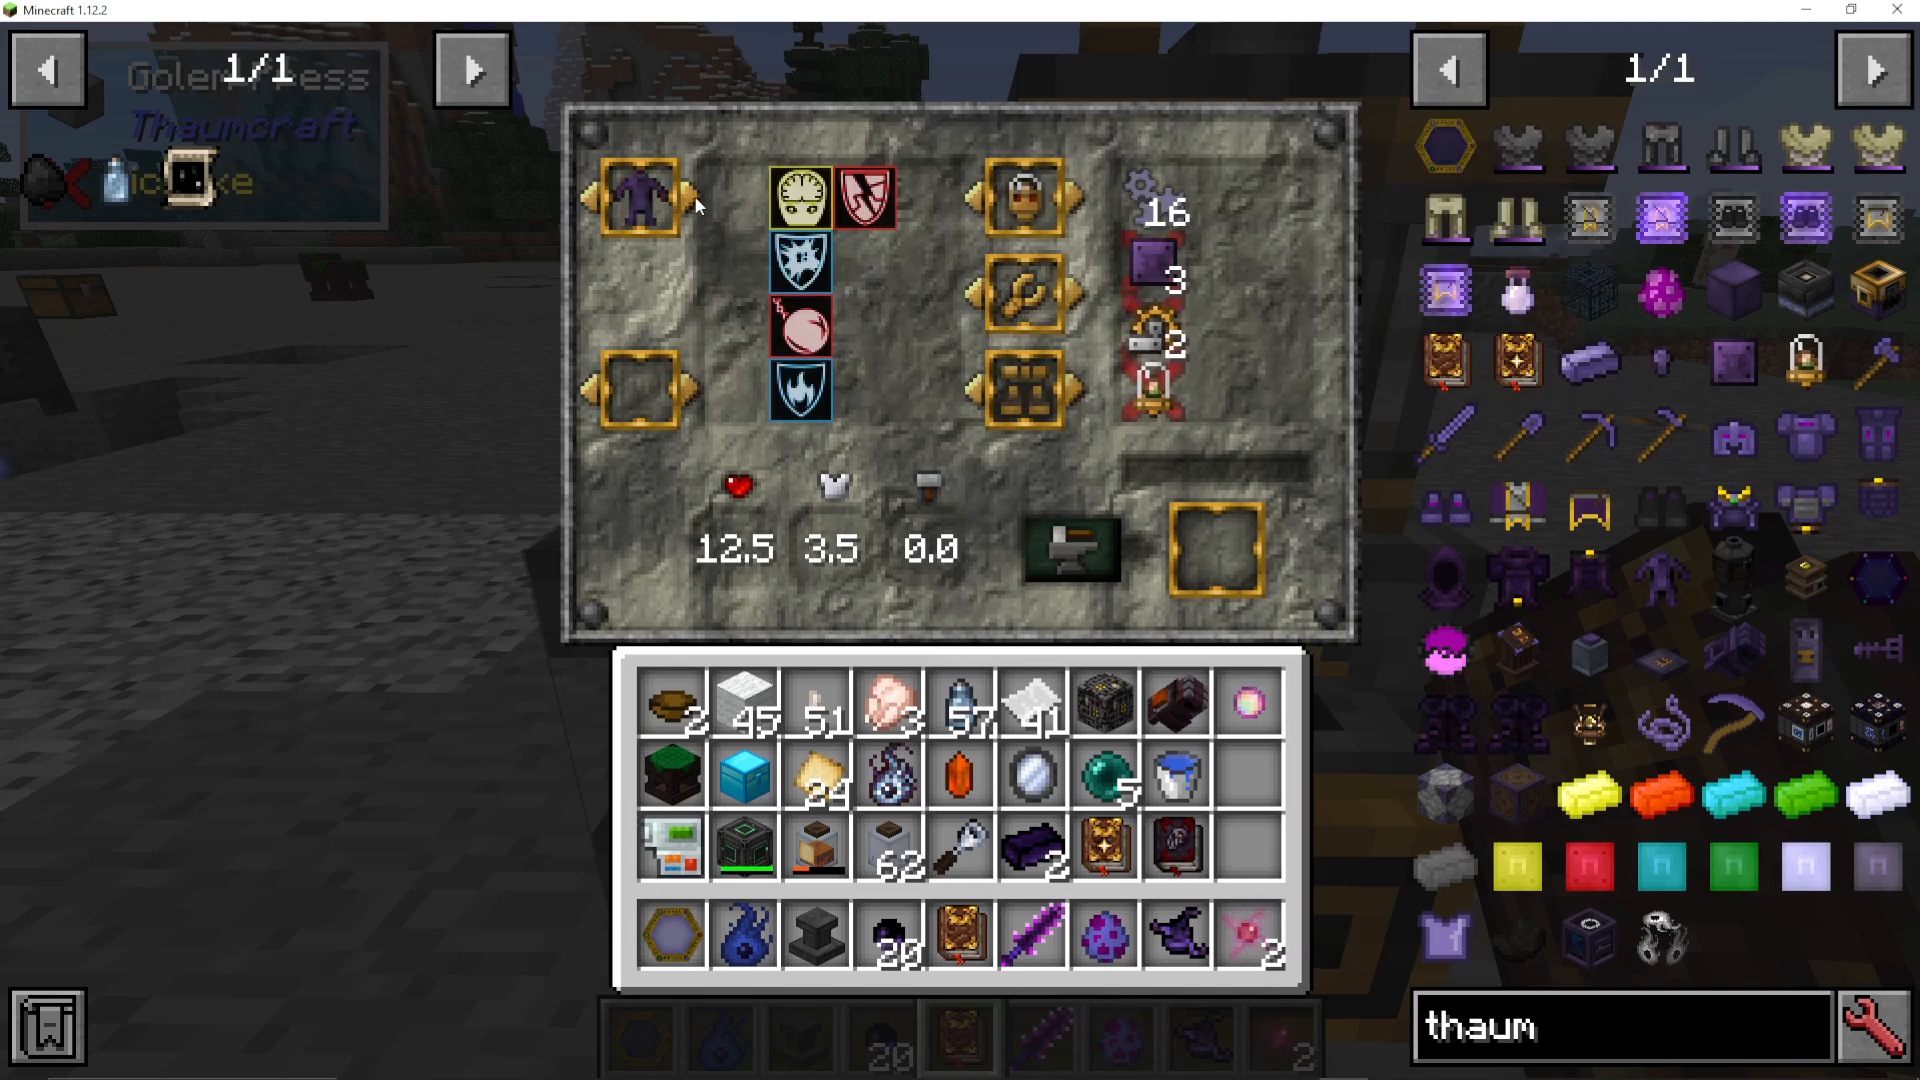
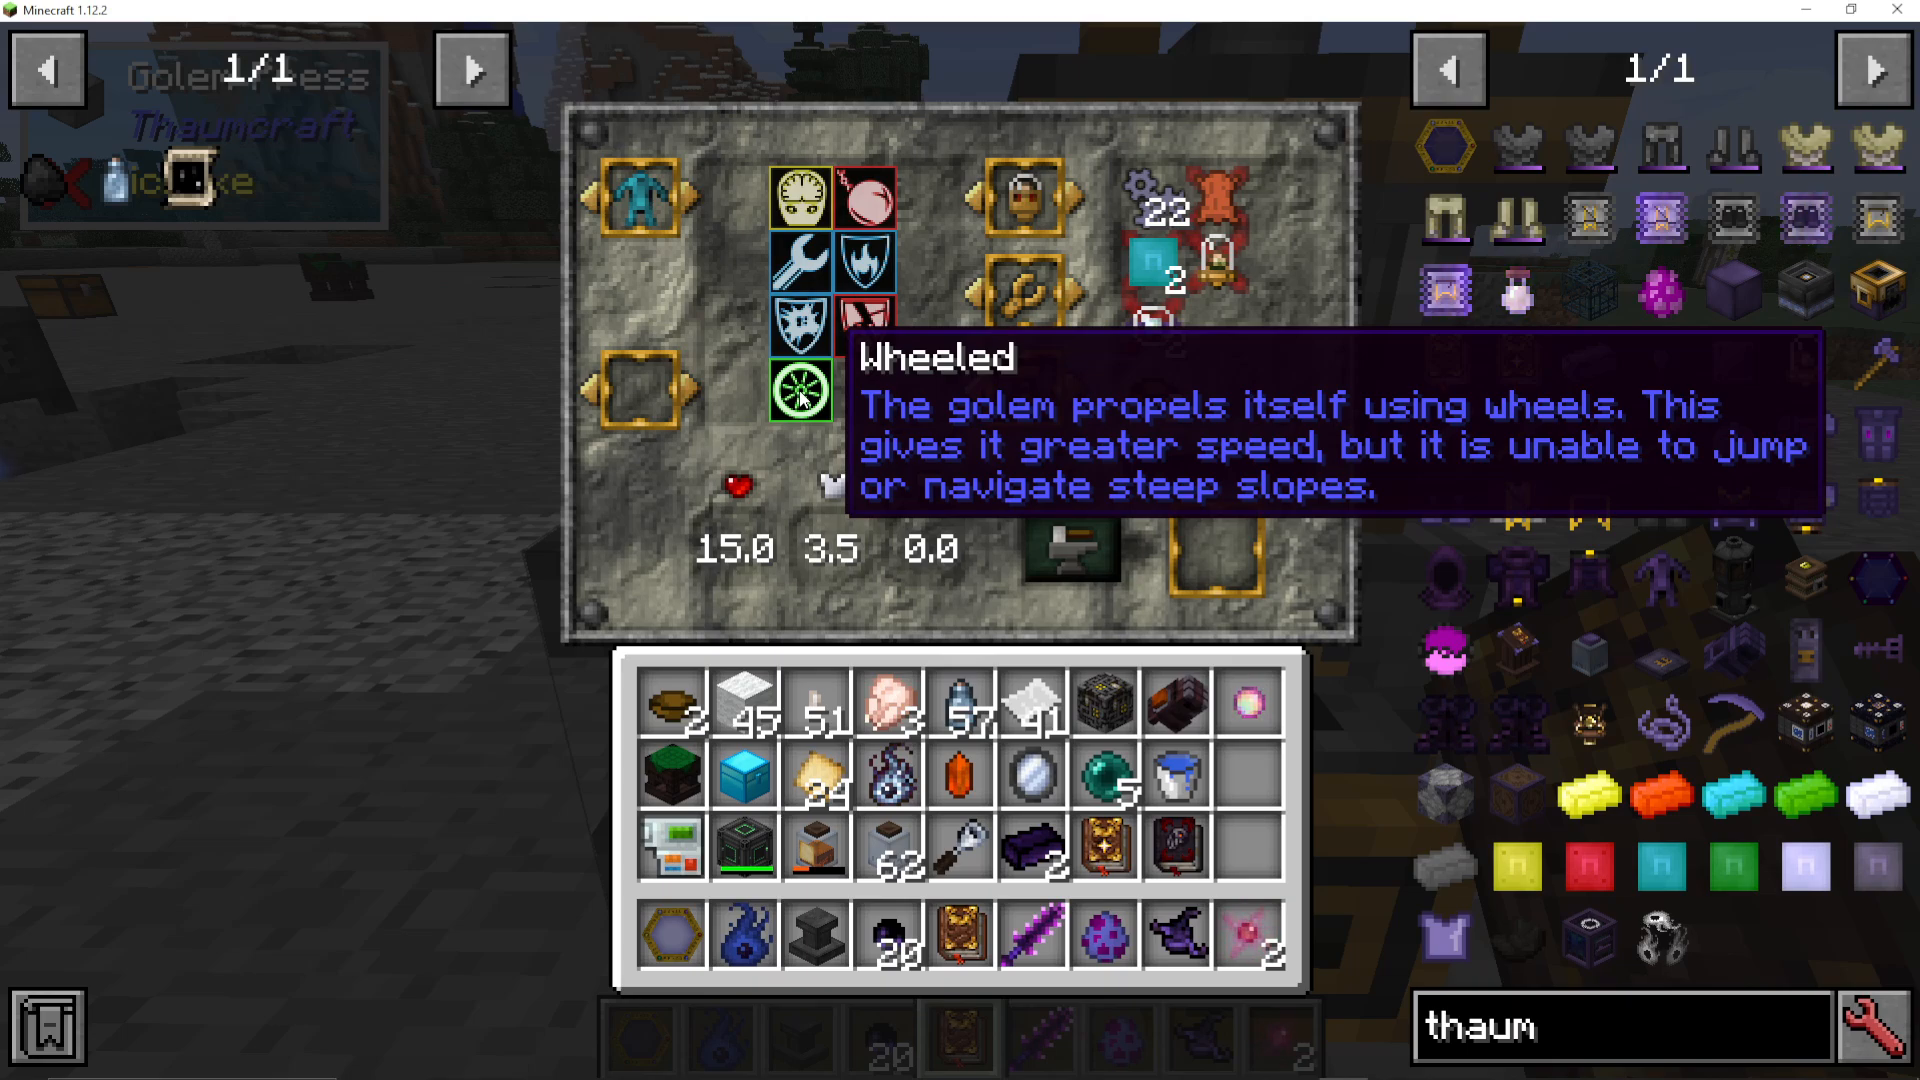
Opening the Golem Press reveals a detailed interface with many options — don’t be intimidated! Each choice you make here directly affects what your Golem can do and how it performs.
Choosing Your Golem’s Material
At the top of the interface, you select what material your Golem is made from. The material you choose determines the Golem’s core traits. For example:
Tallow — Very soft material. The Golem will be Clumsy (limited to simple tasks) and Fragile (low health and armour rating).
Greatwood — A solid mid-tier choice for a basic starter Golem.
Silverwood — Gives the Golem the Deft trait and a Light Frame, making it more capable.
Customising the Body Parts
Below the material selection, you can customise individual body parts. Each part you change updates the Golem’s attributes and resource requirements. Options include:
Legs — Basic legs can be swapped for Unilineal (wheeled) legs, which are very fast but cannot jump or climb steep slopes.
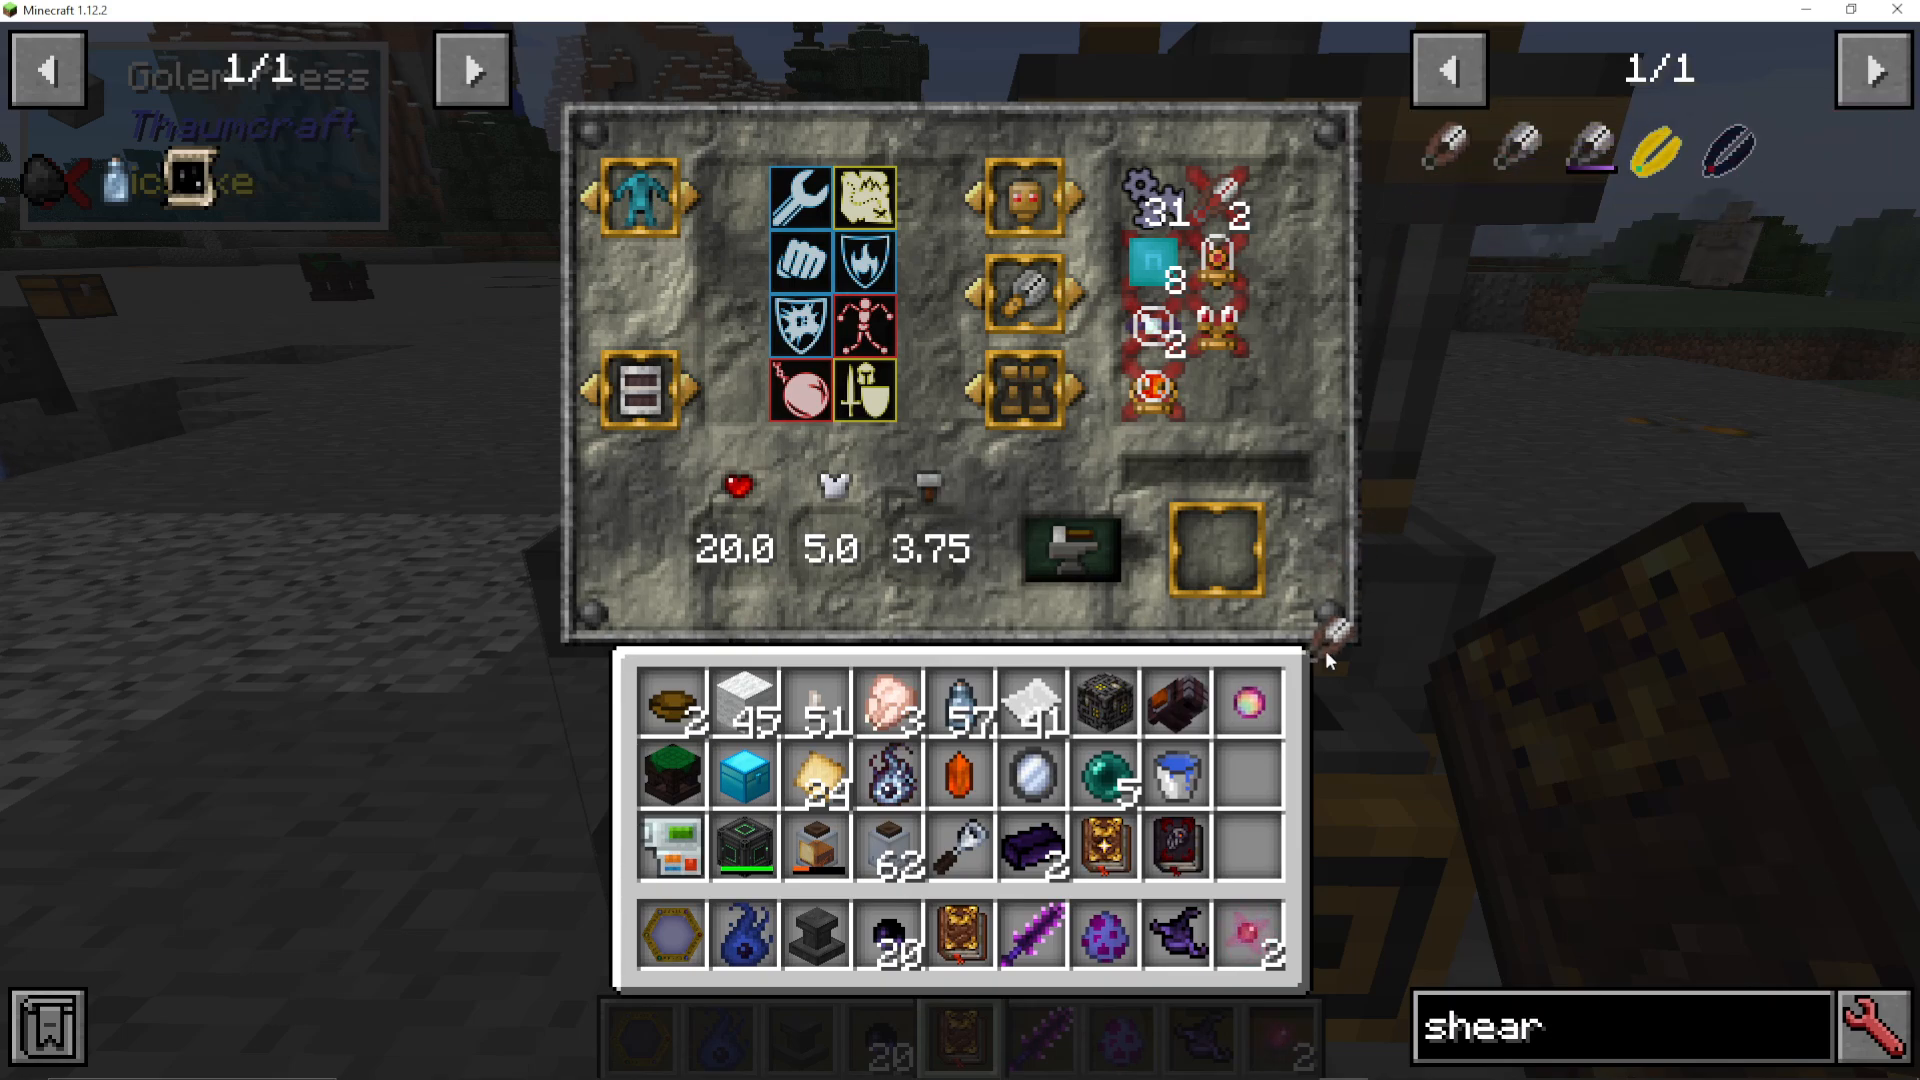
Arms — Basic arms can be upgraded to Fine Manipulators (highly dexterous) or Claw Arms (great for combat, as they give the Golem a Fighter trait).
Head — Different heads change the Golem’s sight range and interaction distance.
Armour Plating & Carry Frame — Additional options that further modify combat and carrying abilities.
Resource Requirements
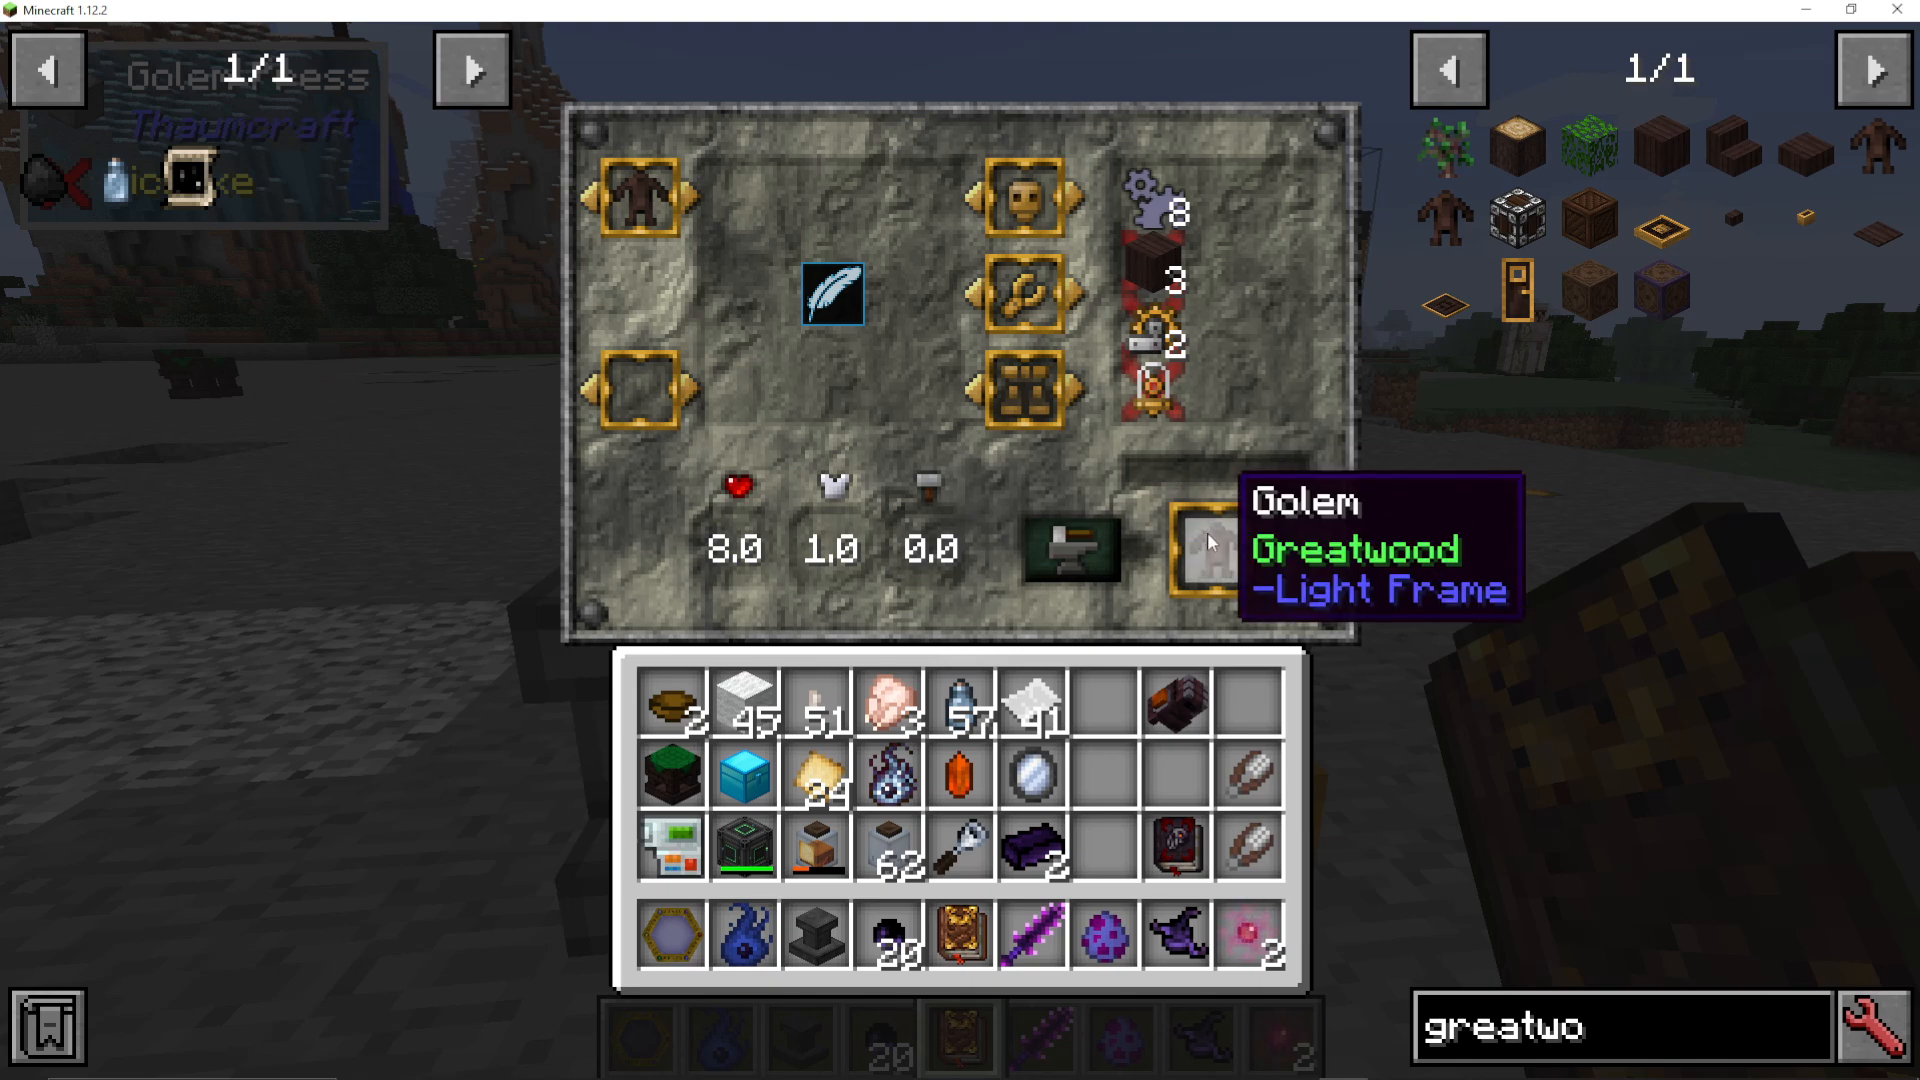
Every customisation choice changes the crafting materials required. You can see exactly what items are needed at the top of the Golem Press interface. Items marked with an X are still missing from your inventory — once you add them, the X disappears, confirming they are available.
For example, selecting Claw Arms requires two pairs of shears in your inventory.
Crafting Your First Golem: A Basic Example
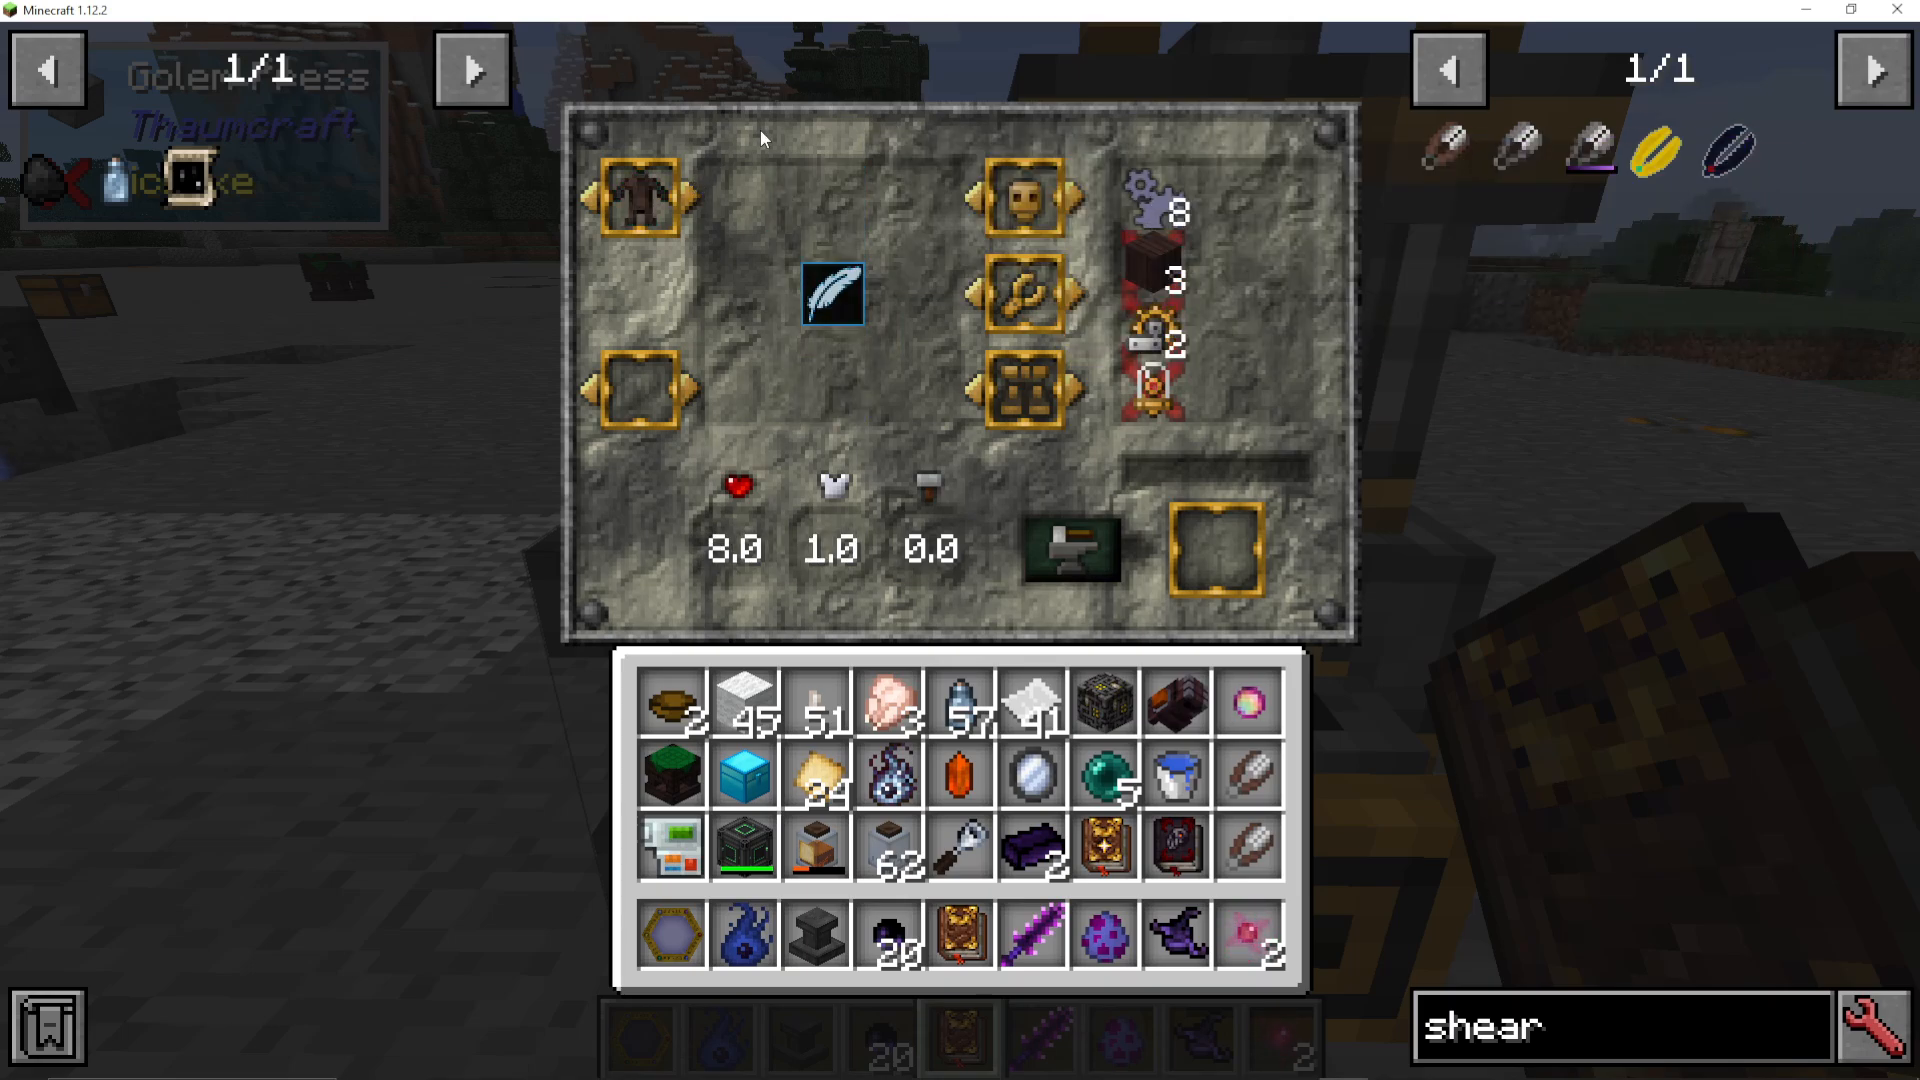
For your first Golem, a great starting point is a simple Greatwood Light-Framed Golem. To craft it, you will need:
1x Clockwork Mind
1x Simple Mechanism
3x Greatwood Planks
8x Machina (vis type — must be stored nearby in a Warded Jar)
The Machina is supplied to the Golem Press using an Eldritch Transfuser, which is found under the Alchemy research tab. There are separate tutorials available on the channel covering how to craft both the Warded Jar and the Eldritch Transfuser in detail.
Once all resources are in place and the Machina is available, press the button in the Golem Press to begin crafting. You’ll see the Machina visually flow into the Press as the Golem is assembled.
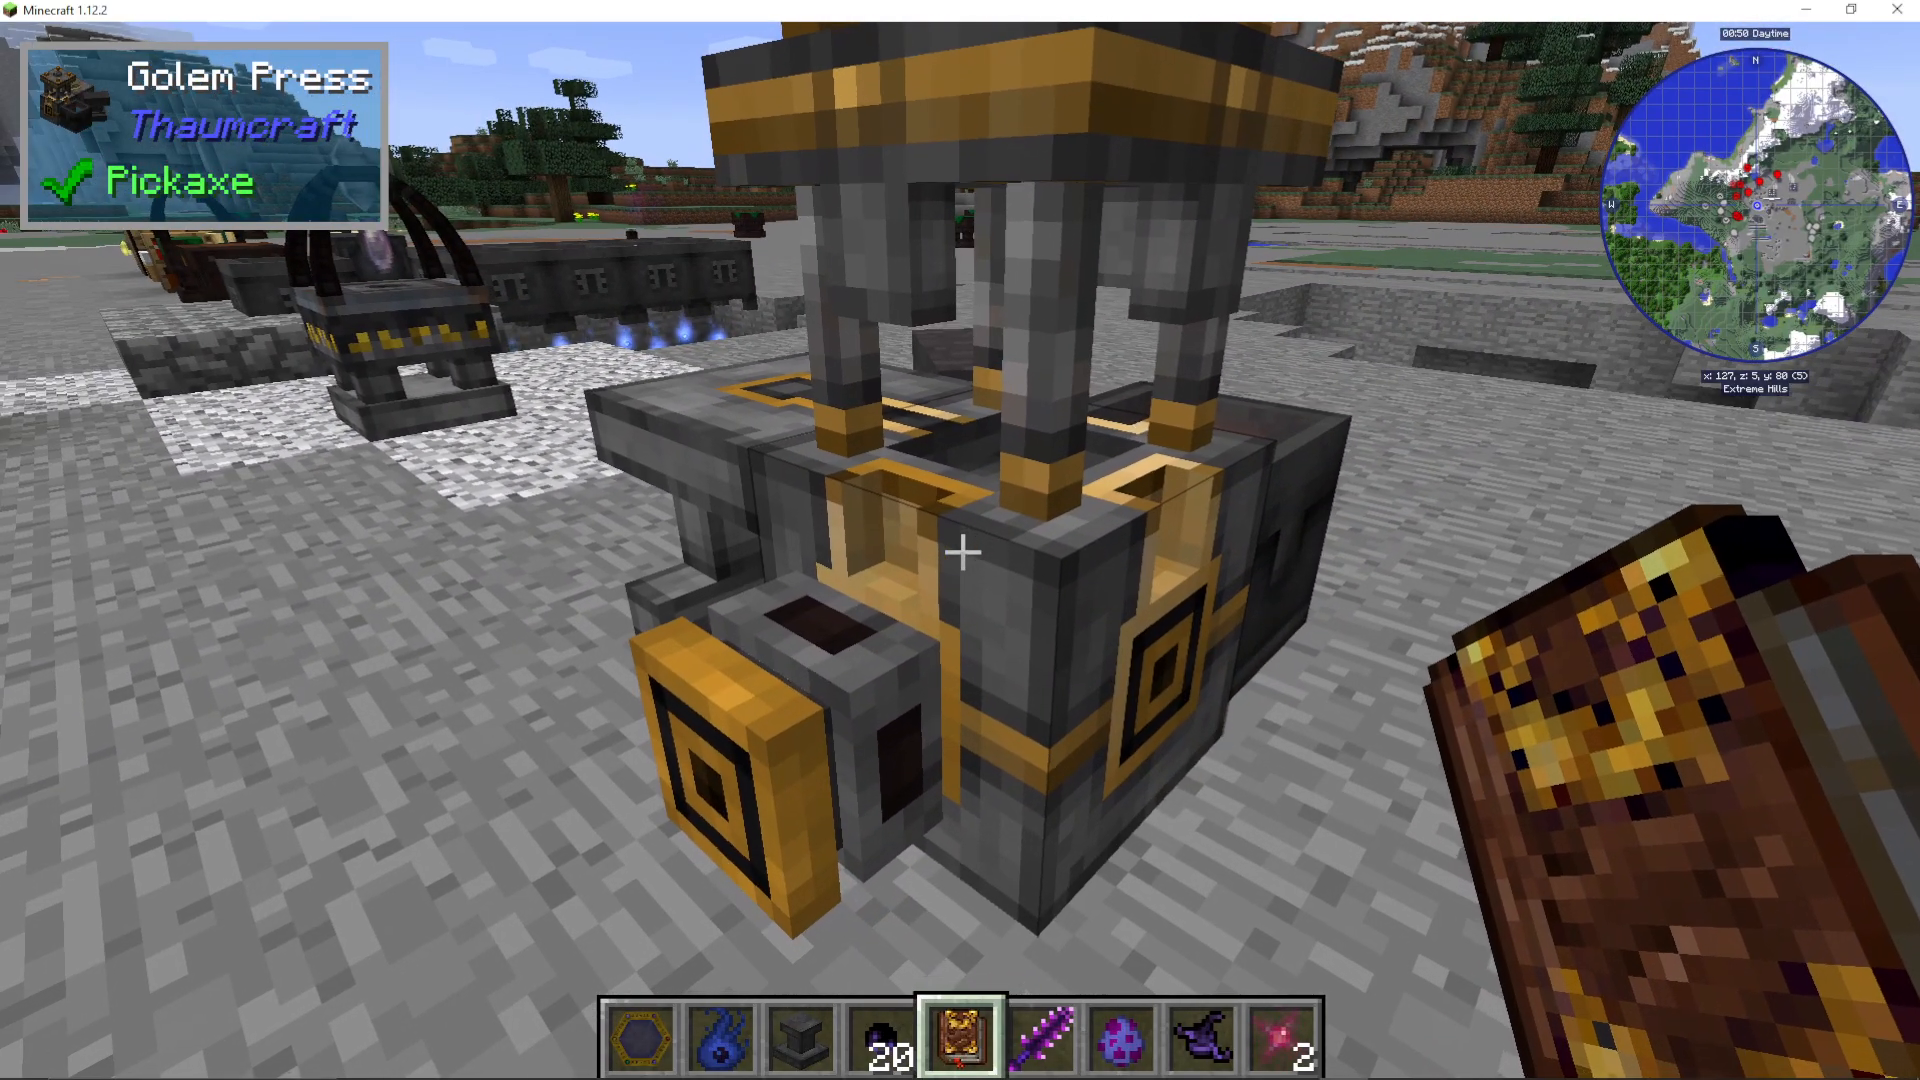
When the process is complete, your Golem will appear as an item. Right-click with it on the ground to place it in the world.
Controlling Your Golem
Making Your Golem Follow You
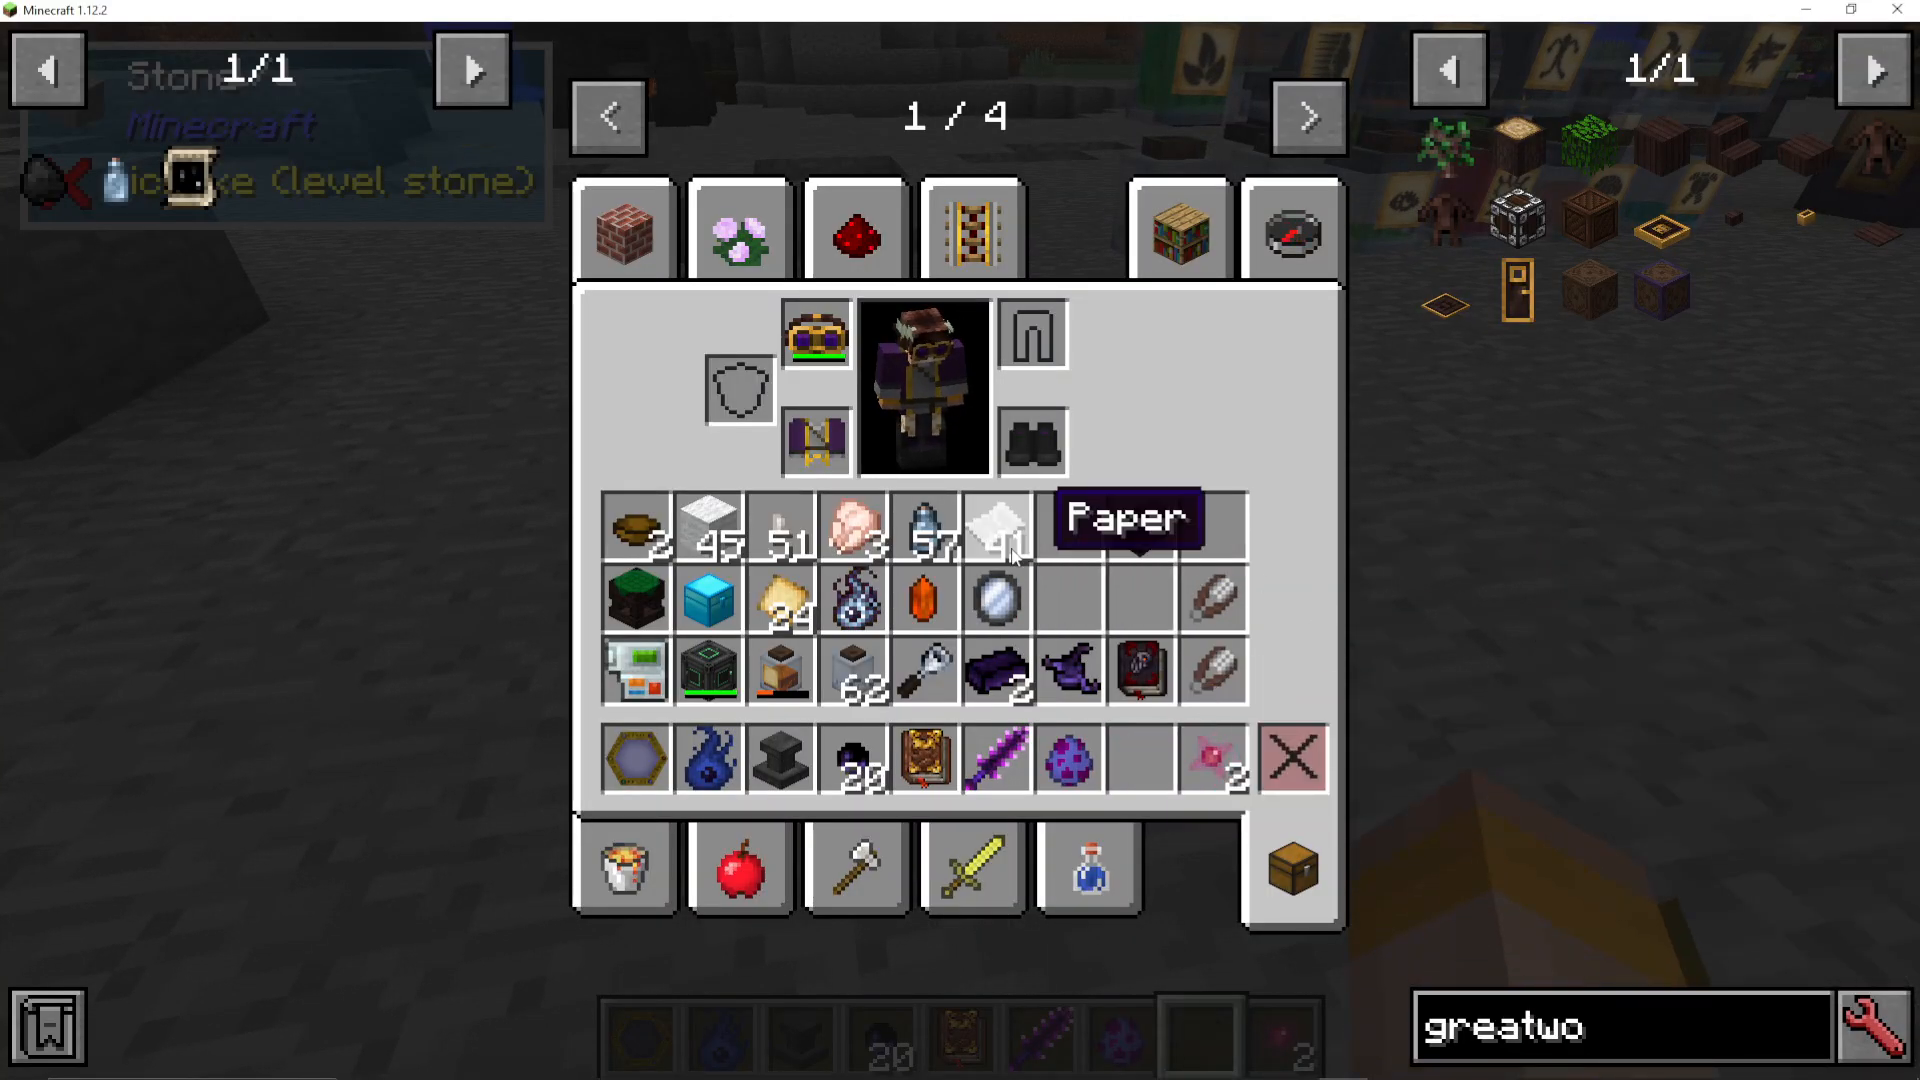
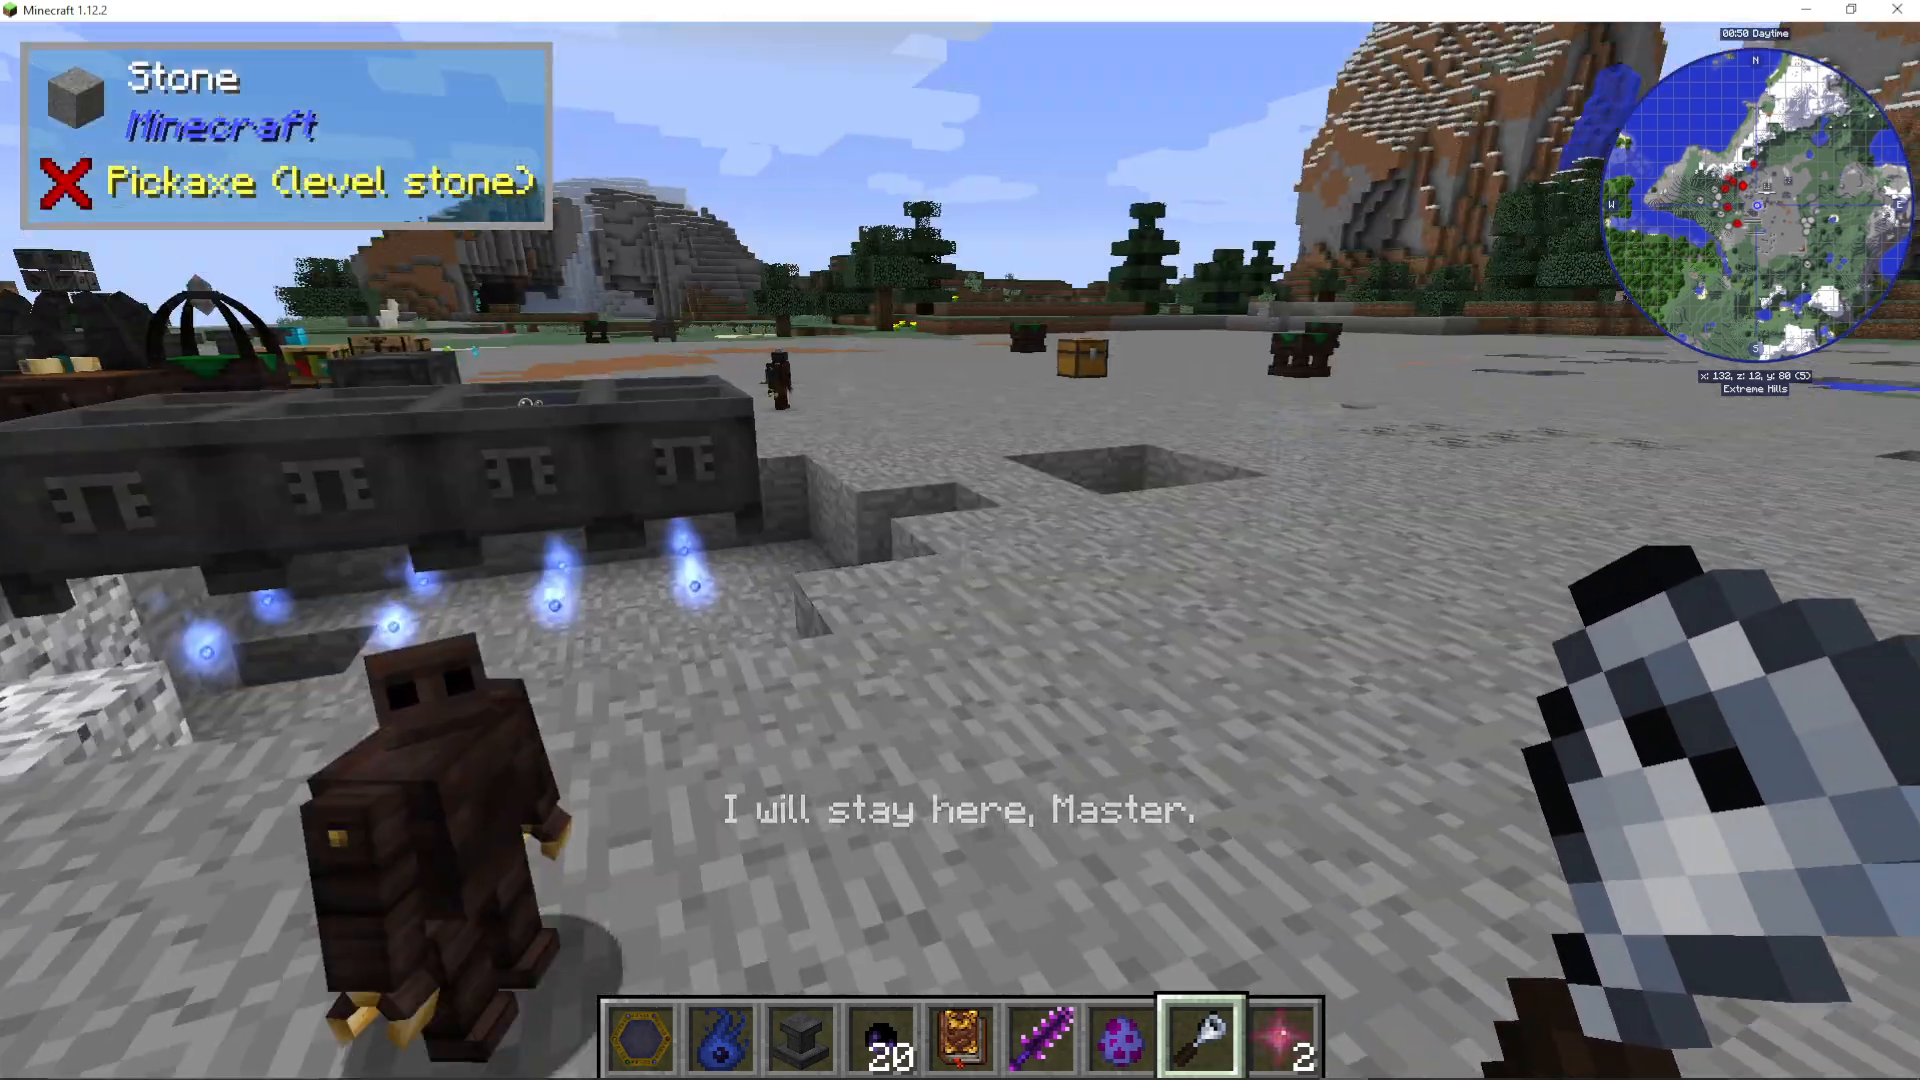
By default, wherever you place your Golem becomes its home — and it will stay there. To make it follow you, craft a Golem Binding Bell (crafted using some quartz) and right-click your Golem with it. The Golem will respond and begin following you. Right-click it again with the Bell to set its new home location.
Seeing Golem Seals
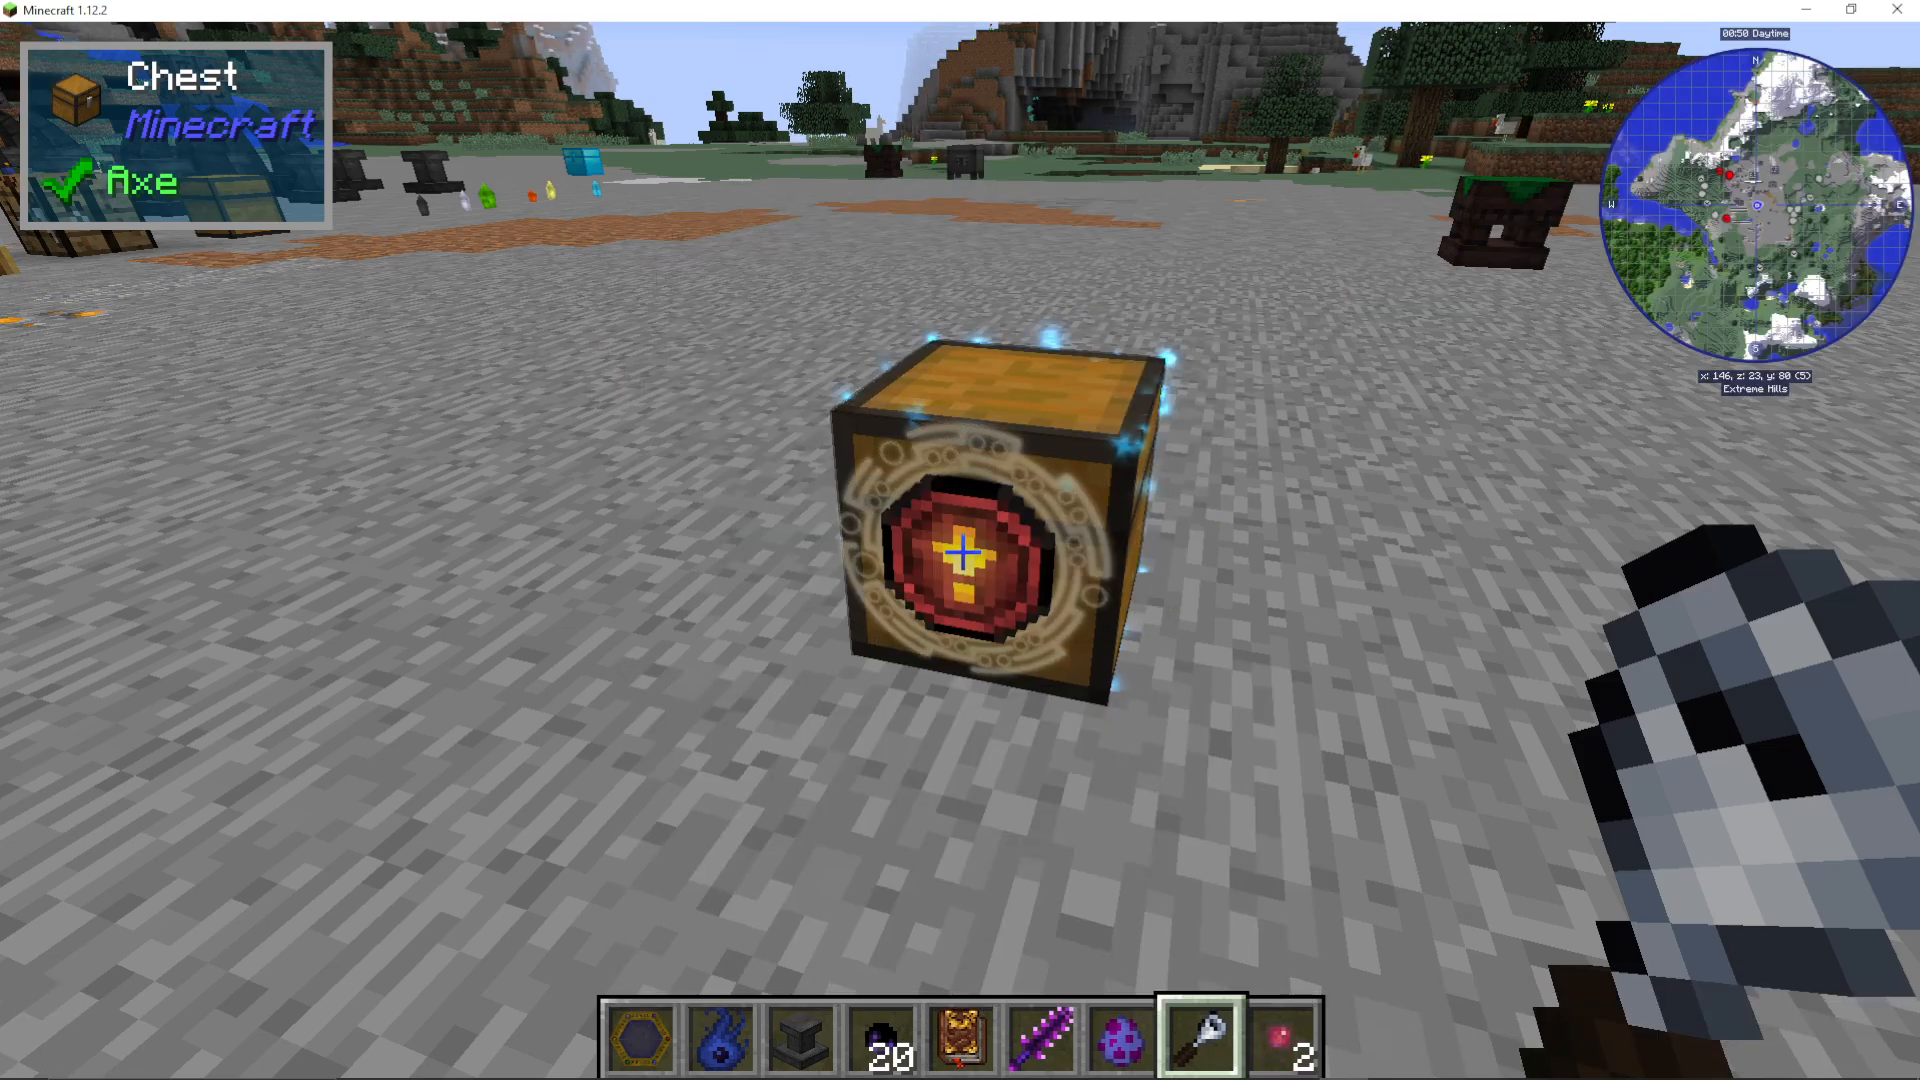
While holding the Golem Binding Bell, you’ll be able to see seals — glowing symbols placed in the world that define your Golem’s tasks. These seals are invisible unless you are holding the Bell, so always have it ready when managing your Golems.
Assigning Jobs With Seals
Seals are the core of Golem automation. Each seal defines a specific job for your Golem. The available seal types (unlocked through the red Golemancy research entries) include:
Store — Instructs the Golem to store items into a container.
Collect — Instructs the Golem to pick up items in an area.
Harvest — For farming and crop collection.
Use — Makes the Golem interact with blocks or objects.
Stock — Keeps a container stocked with specific items.
Provide — Pulls items from a container to supply elsewhere.
Lumberjack — Chops down trees.
Configuring a Seal
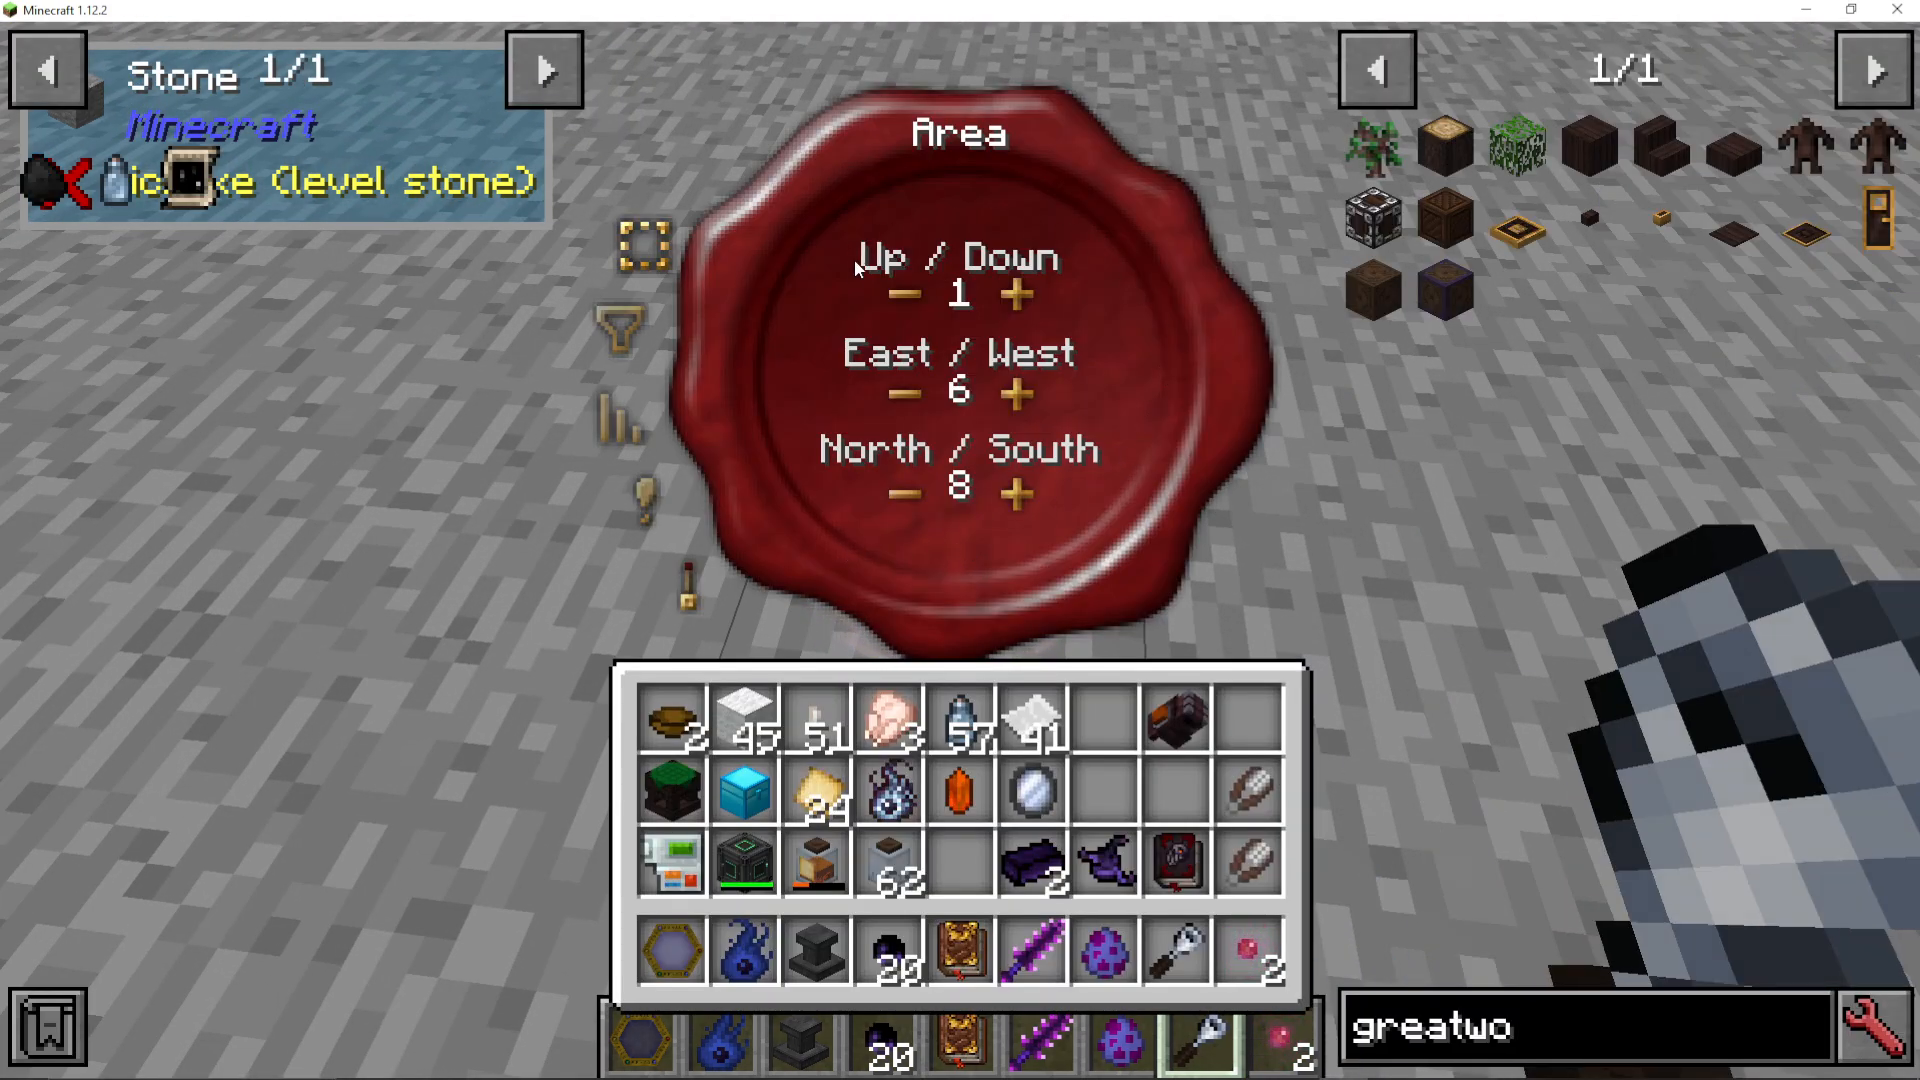
Right-clicking a placed seal while holding the Golem Binding Bell opens its configuration menu. From here you can:
Adjust the area size — Expand or shrink the zone the Golem operates in.
Set a whitelist or blacklist — Filter which items the Golem interacts with. For example, whitelisting Paper means the Golem will only collect or store paper.
Set a priority — Golems with multiple seals will complete higher-priority jobs first.
View requirements — Some seals forbid certain Golem types. For instance, a Clumsy Golem cannot use a Collect seal because it lacks the dexterity to pick items up.
A Practical Example: Collect + Store
Place a Collect seal in one area whitelisted for Paper, and a Store seal pointing to a chest, also whitelisted for Paper. When paper is dropped in the Collect seal’s zone, the Golem will automatically pick it up and deposit it into the designated chest — fully hands-free.
Running Multiple Golems With Priorities
You can run many Golems simultaneously, each assigned different jobs with different priorities. For example, if you have a Golem working a small farm and collecting paper, and paper collection is set to a higher priority, the Golem will always collect paper first before tending the farm. Scaling up with multiple Golems lets you build a surprisingly powerful automated base.
Crafting Seals
Seals themselves are straightforward to craft. You’ll need Blank Seals, which are made in an Arcane Workbench, and then crafted into specific seal types (such as a Collect Seal or an Advanced Collect Seal) using the recipes shown in your Thaumonomicon.
Summary
Golems in Thaumcraft 6 are a deep and rewarding automation system. To get started: unlock Golemancy through the Thaumonomicon by completing the prerequisite research entries, build the Golem Press multiblock using a Stone Table, Piston, Cauldron, Anvil, and Iron Fence activated with Salis Mundus, then customise and craft your Golem based on the materials and body parts you’ve unlocked. Place seals in the world to assign jobs, configure areas and filters, and set priorities to keep your Golems working efficiently. The more research you unlock, the more powerful and versatile your Golems become.
Want to Support?
If you would like to help us continue making these guides – please consider joining our patreon here – https://www.patreon.com/c/JaviHeals
Alternatively – we host a group of MC Servers you can join here – https://discord.gg/zD7Gjt6MHF