







How to Make PCB’s In PneumaticCraft
How to Make PCBs in PneumaticCraft
PCBs (Printed Circuit Boards) are essential components in PneumaticCraft that unlock advanced machinery and automation. While the process involves multiple steps, it’s straightforward once you understand the workflow. This guide will walk you through obtaining a PCB blueprint, crafting empty PCBs, and processing them through UV light boxes and etching tanks to create finished PCBs ready for use in your pneumatic builds.
Step 1: Obtain the PCB Blueprint via Amadron Tablet
The first item you’ll need is a PCB blueprint, which you can acquire through the Amadron tablet—a trading system in PneumaticCraft. Make sure you have a charging station available (you should have one from earlier pneumatic wrench usage).
To use the Amadron tablet:
Find a chest and shift right-click it to register it with the Amadron system. You’ll see a small orange square appear inside the chest interface.
Open your Amadron tablet to view the store. The PCB blueprint costs 8 emeralds.
Place 8 or more emeralds into your registered chest.
In the Amadron tablet, right-click the PCB blueprint to add it to your order basket. The counter will show “1” indicating one order.
Click “Place Order” to send a drone to collect your emeralds and deliver the PCB blueprint.
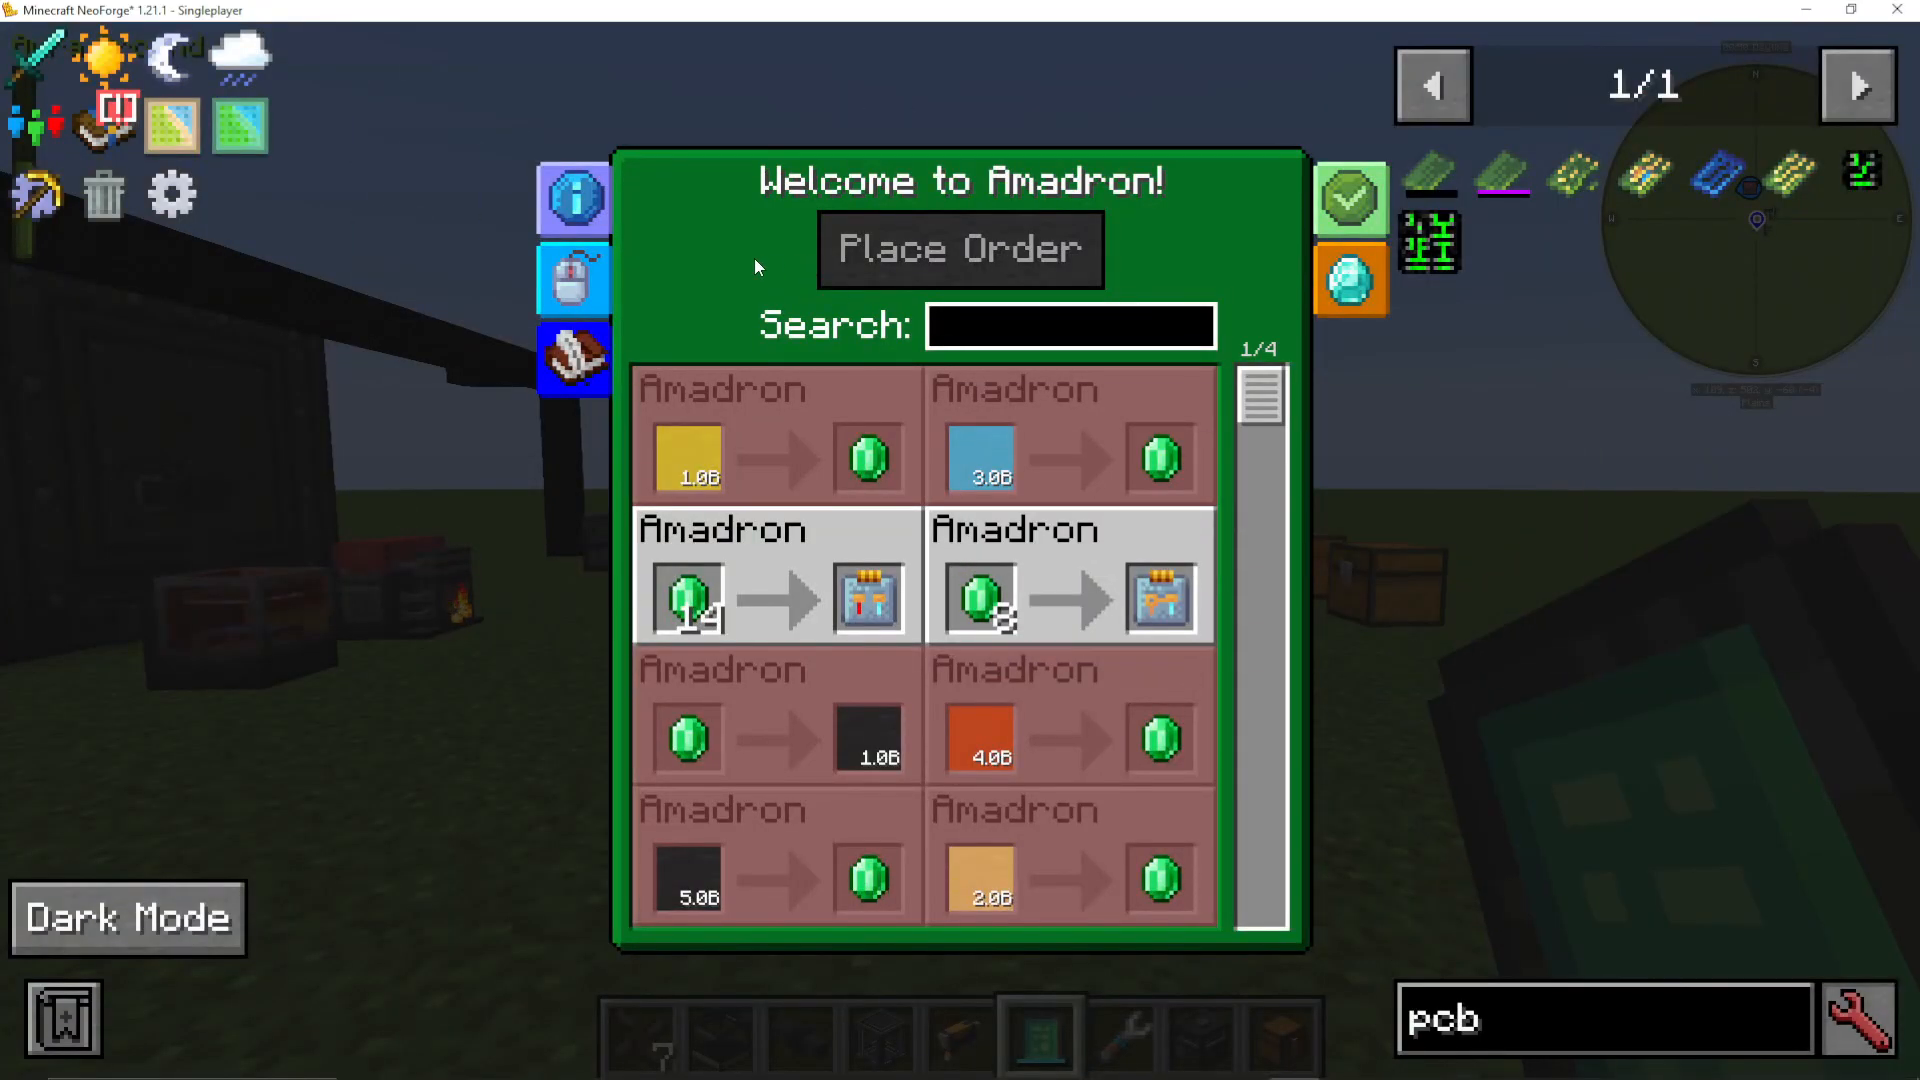
The Amadron drone system is one of the coolest features in PneumaticCraft—it automates trading with emeralds and returns your requested items efficiently.
Step 2: Craft Empty PCBs in a Pressure Chamber
Now that you have the PCB blueprint, you need to craft empty PCBs. This is done in a pressure chamber with the following recipe:
2 copper nuggets
2 redstone torches
Plastic sheets
Requires 1.5 bar of pressure
Important: If you’re using this in a ModPack, ensure you’re using PneumaticCraft’s own plastic sheets. Do not substitute plastic from other mods like IndustrialCraft.
When inputting items into the pressure chamber via mechanism pipes, note that items enter one at a time, so you may need to wait for multiple copper nuggets to cycle through before the recipe completes. The pressure chamber will output 3 empty PCBs per recipe.
Step 3: Charge Empty PCBs in a UV Light Box
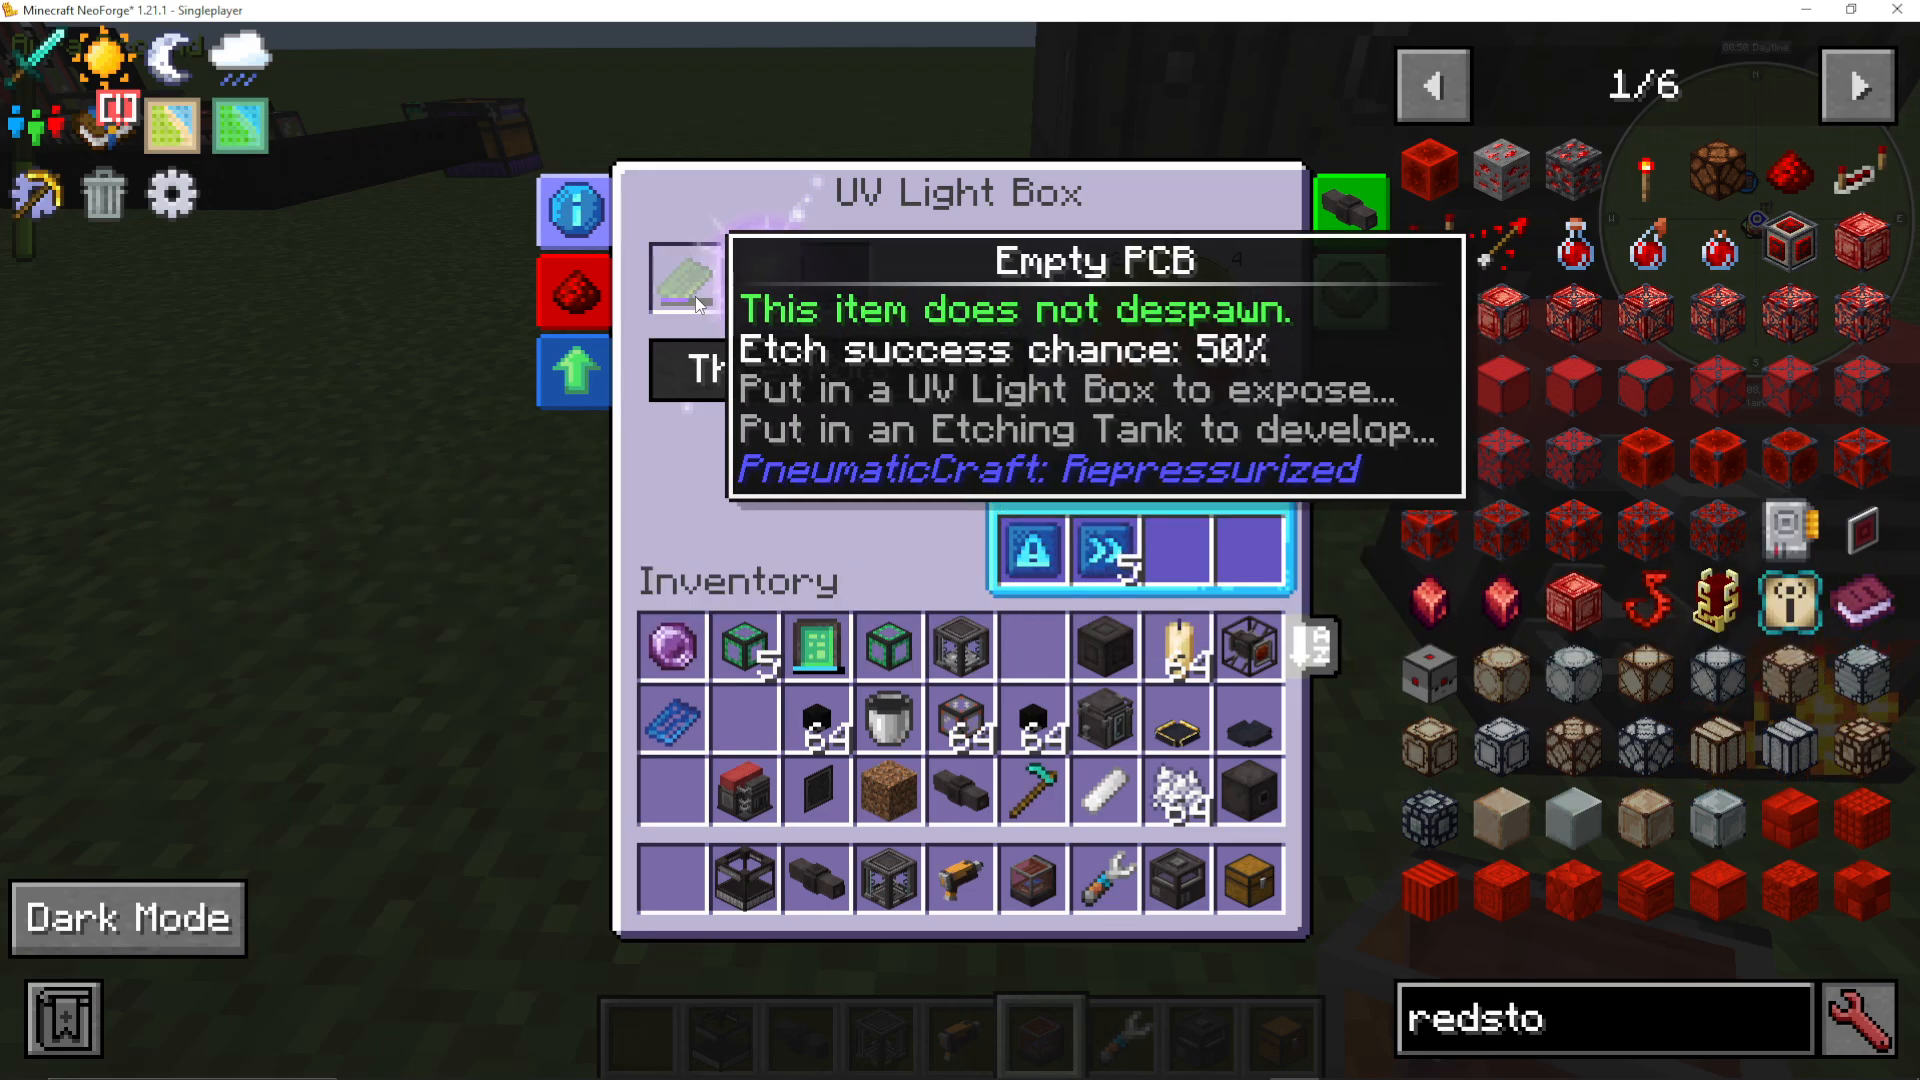
Next, you need to charge your empty PCBs with sunlight using a UV light box. This machine requires:
A PCB blueprint (which you ordered from Amadron)
Direct access to sunlight
At least 1 bar of pressure
To optimize the UV light box, consider adding:
Speed Upgrades: Significantly increase the success chance rate. Five speed upgrades will complete the process quickly.
Security Upgrade: Prevents pressure from exceeding safe levels.
The success chance starts low and increases over time. You can configure a threshold percentage to automatically output the PCB once it reaches your desired success rate (80-98% recommended). If a PCB fails during processing, you can place it in a blast furnace to recycle it.
Step 4: Create Etching Fluid in a Pressure Chamber
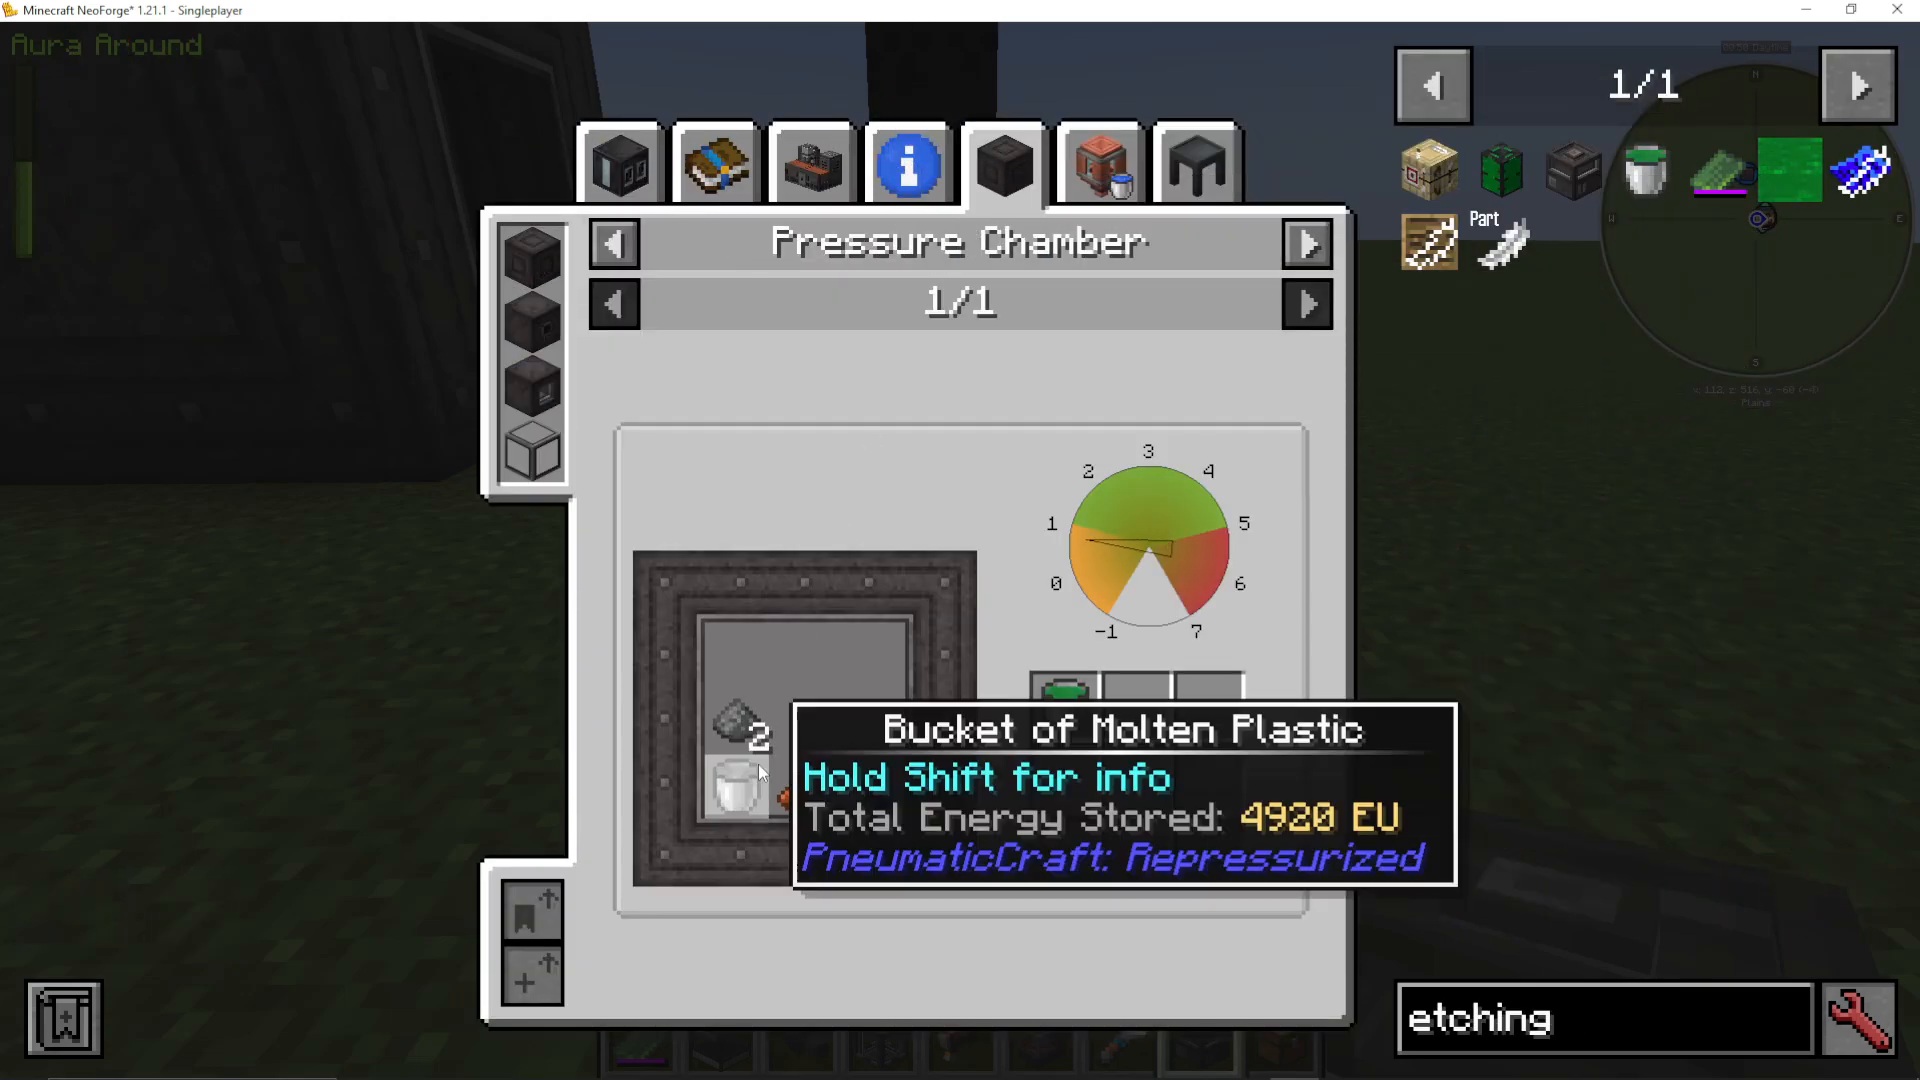
Before processing PCBs in the etching tank, you’ll need etching fluid. Create this in a pressure chamber with:
1 bucket of molten plastic (leftover from your earlier plastic sheet crafting)
2 rotten flesh
2 spider eyes
2 gunpowder
This recipe produces etching acid, which you can transfer directly into the etching tank by right-clicking the tank with the bucket.
Step 5: Etch PCBs in an Etching Tank
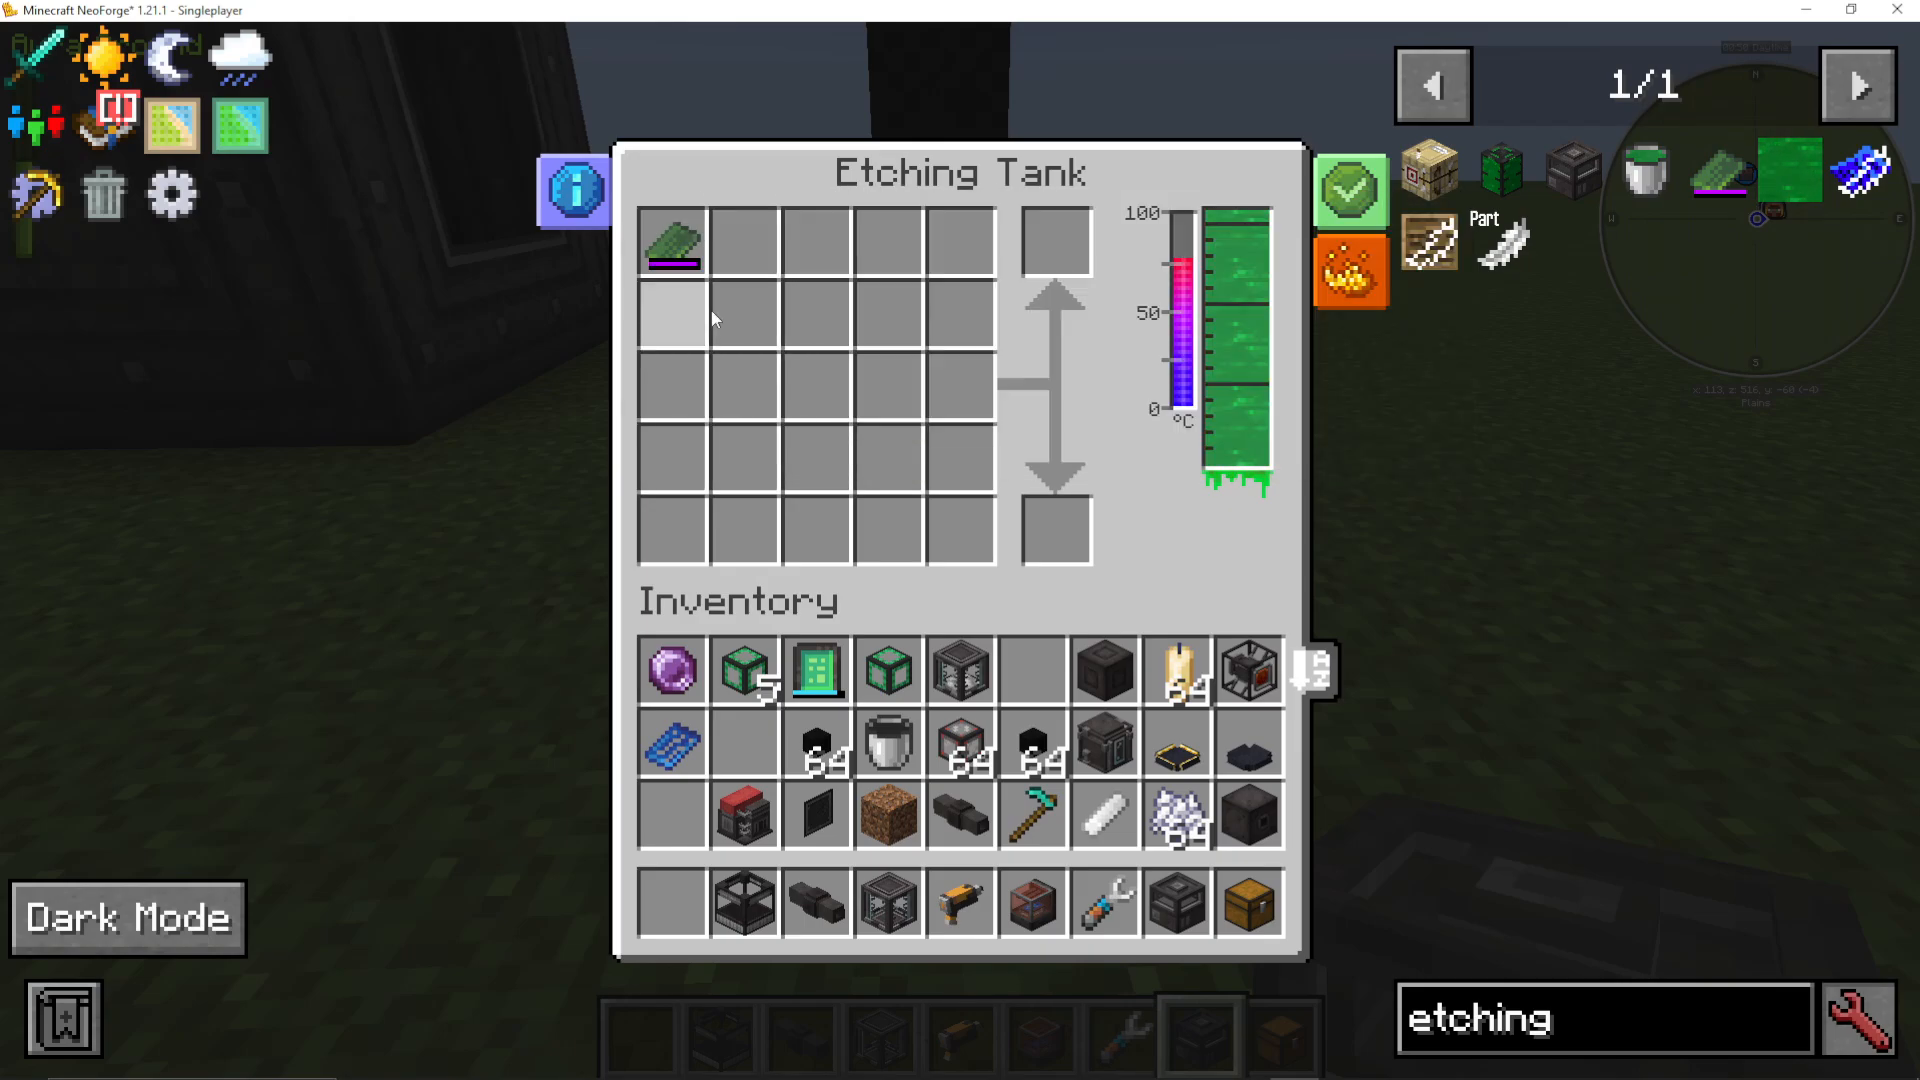
With etching acid in your tank and charged empty PCBs ready, place the PCBs into the etching tank’s grid. The etching progress will display on-screen. Once complete, you’ll receive an unassembled PCB.
Step 6: Craft Transistors and Capacitors
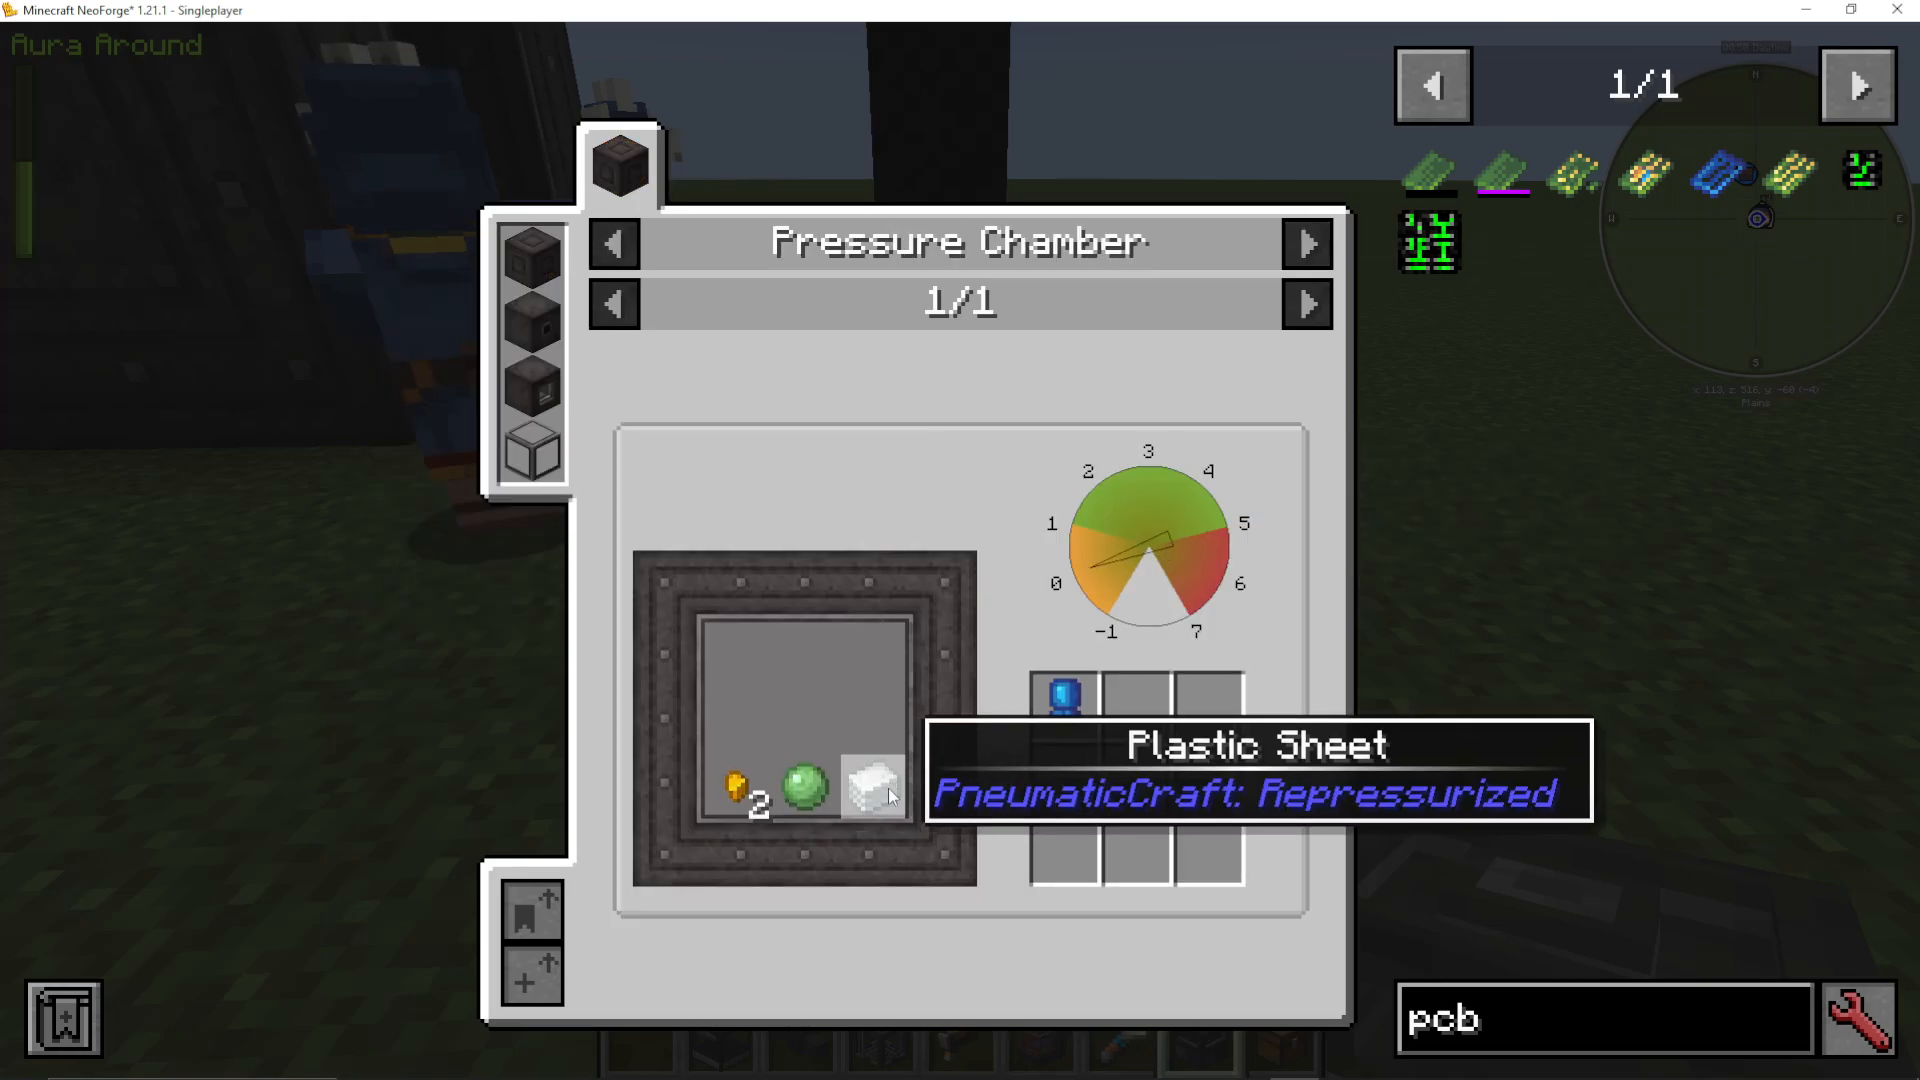
To assemble the final PCB, you need to craft transistors and capacitors in pressure chambers.
Capacitor Recipe:
1 plastic sheet
1 slime ball
Gold nuggets
Transistor Recipe:
1 plastic sheet
Redstone
Nuggets
Pro Tip: At this point in your progression, consider building multiple pressure chambers—ideally larger ones with more input slots. This allows you to process ingredients faster and run multiple recipes simultaneously.
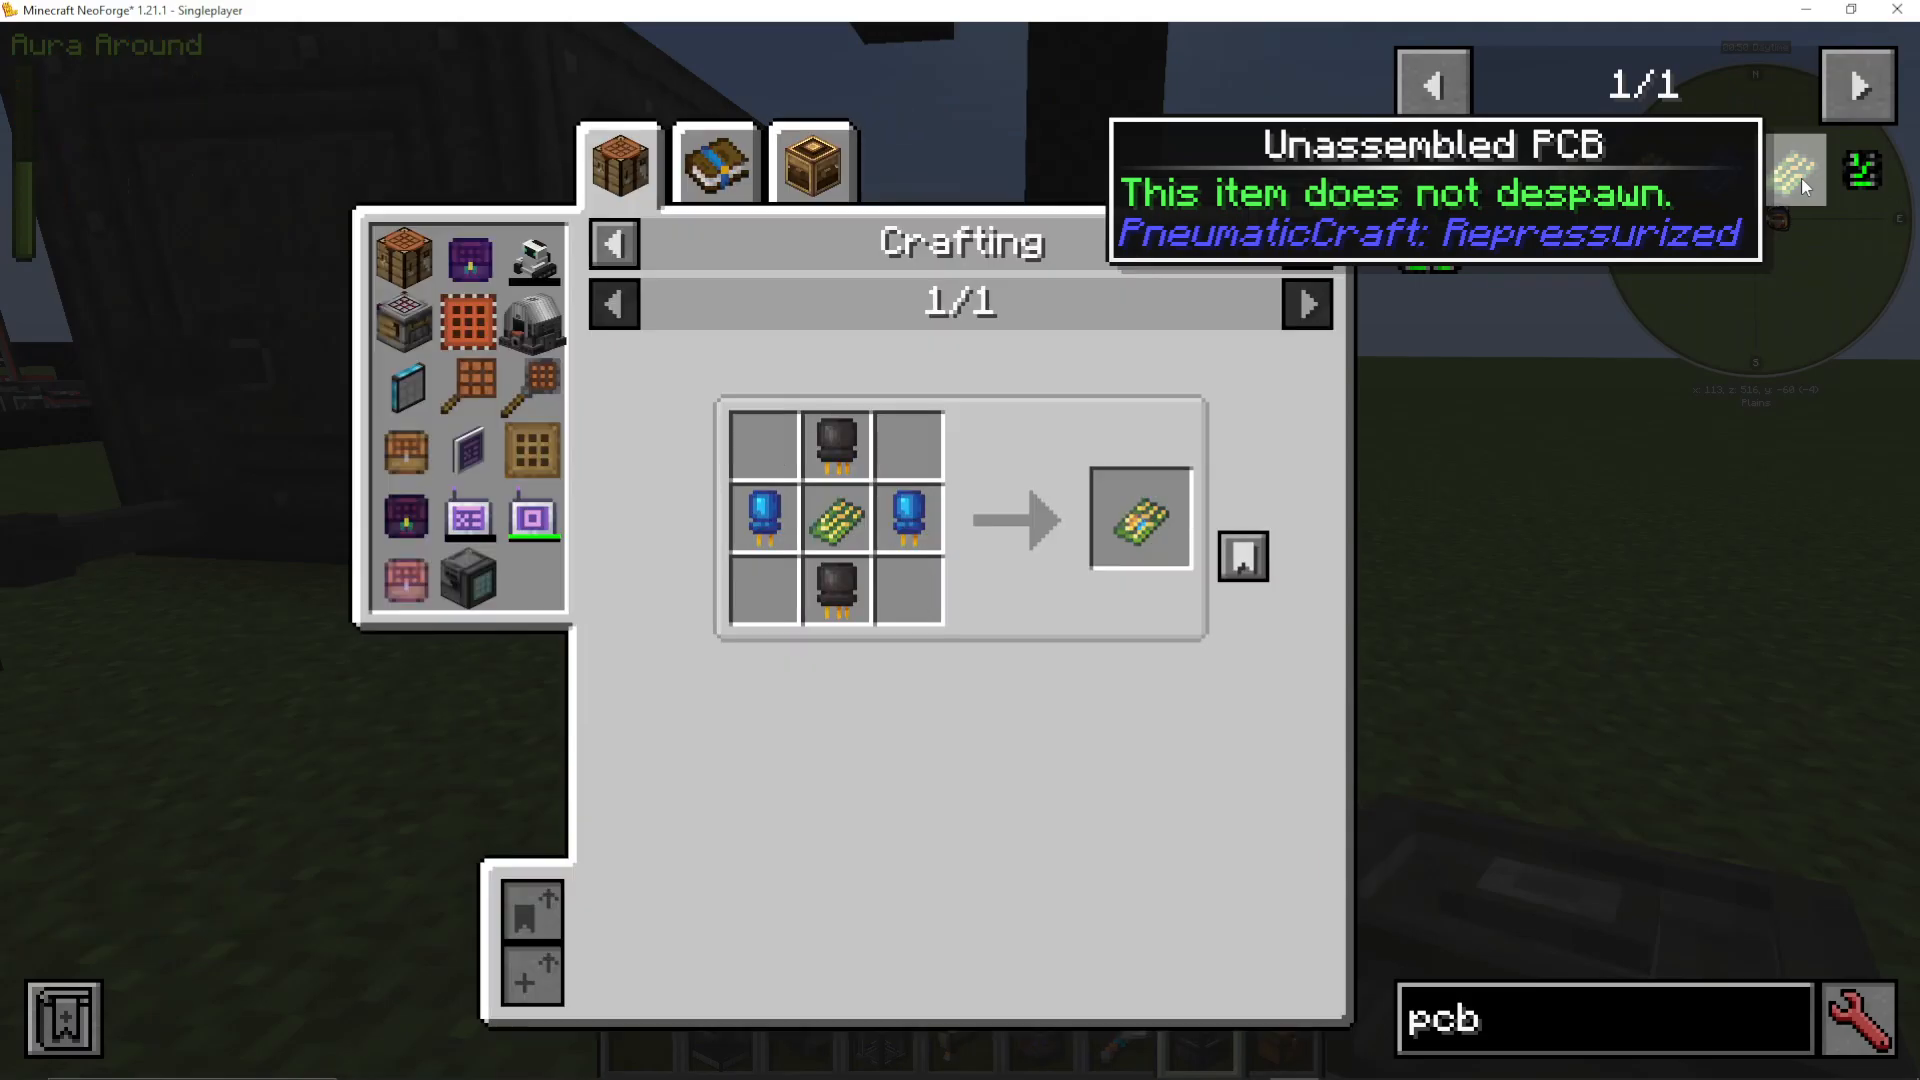
Step 7: Craft the Final PCB
Once your unassembled PCB emerges from the etching tank and you’ve crafted your transistors and capacitors, simply combine them in a crafting recipe to create the finished PCB.
What You Can Do With Finished PCBs
Finished PCBs are used in numerous PneumaticCraft machines and upgrades, including:
Programmable Controllers
Assembly Controllers and Platforms
Drone Interfaces
Chunk Loader Upgrades
Assembly Drills (for assembly lines)
Solar Compressors and Air Compressors
Flux Compressors
Micro Missiles
Pneumatic Armor pieces (Chestplate, Boots, etc.)
PCBs unlock the truly advanced and exciting features of PneumaticCraft, enabling automation, drone systems, and modular pneumatic machinery.
Summary
Making PCBs in PneumaticCraft is a multi-step but rewarding process. Start by trading emeralds for a PCB blueprint via Amadron, then craft empty PCBs in a pressure chamber. Charge them in a UV light box, etch them using etching fluid, and finally assemble them with transistors and capacitors. Once complete, your finished PCBs will enable you to build advanced pneumatic machinery and automation systems that define the mod’s endgame content.
Want to Support?
If you would like to help us continue making these guides – please consider joining our patreon here – https://www.patreon.com/c/JaviHeals
Alternatively – we host a group of MC Servers you can join here – https://discord.gg/zD7Gjt6MHF



