







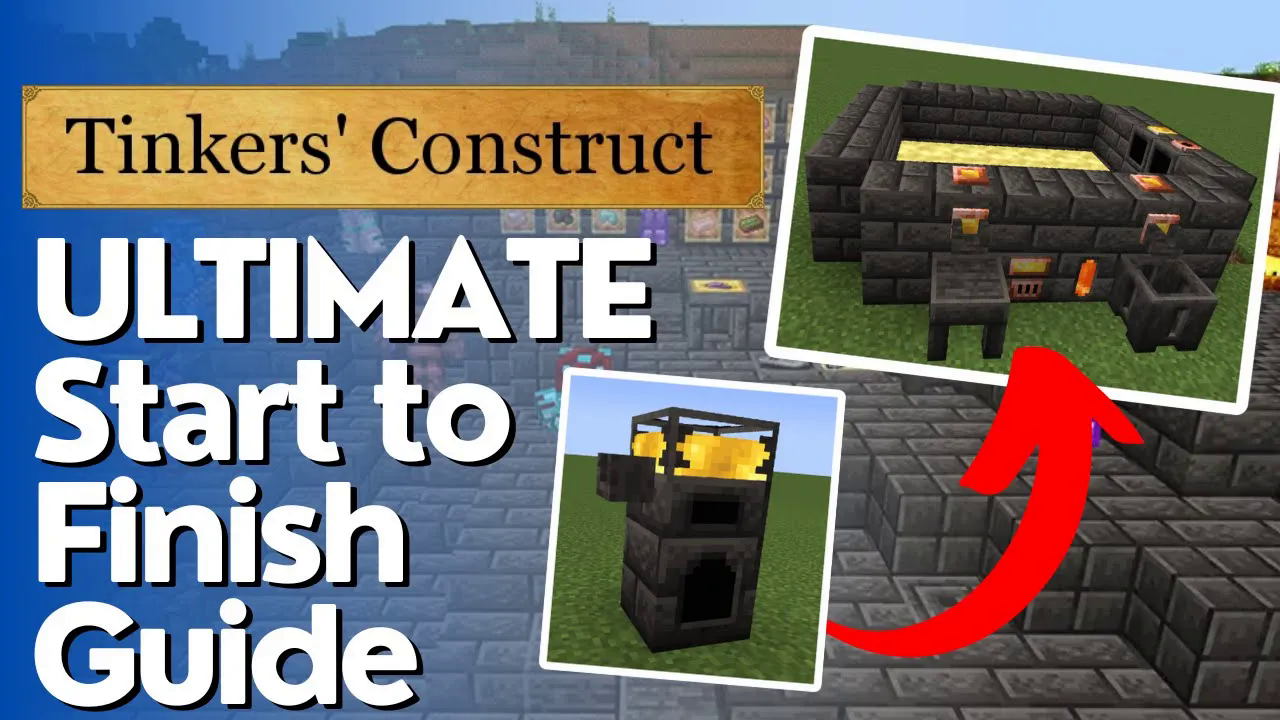
The Ultimate Guide to Tinkers Construct (MC 1.16 & Above)
“`html
The Ultimate Guide to Tinkers Construct (MC 1.16 & Above)
Welcome to the complete beginner’s guide to Tinkers Construct Renewed! This tutorial covers version 1.16 and above, where the mod received a complete overhaul. Whether you’re playing on version 1.20.1 or any version after 1.16, this guide will walk you through crafting customized tools, building a smeltry, creating advanced materials, and unlocking the full potential of this incredible mod.
Getting Started with Tinkers Construct
What is Tinkers Construct?
Tinkers Construct is a mod that allows you to craft highly customized tools and gear from a myriad of materials. The mod integrates seamlessly with other mods installed in your modpack, meaning you’ll have access to all the materials those mods add. This creates a fantastic level of tool customization that works really well across different modpacks.
Your First Item: The Materials and You Book
When you spawn into the game, you’ll likely receive a book called “Materials and You.” This is an invaluable resource that complements this tutorial. Keep it handy for reference throughout your Tinkers Construct journey.
Building Your First Workstations
Setting Up Your Workspace
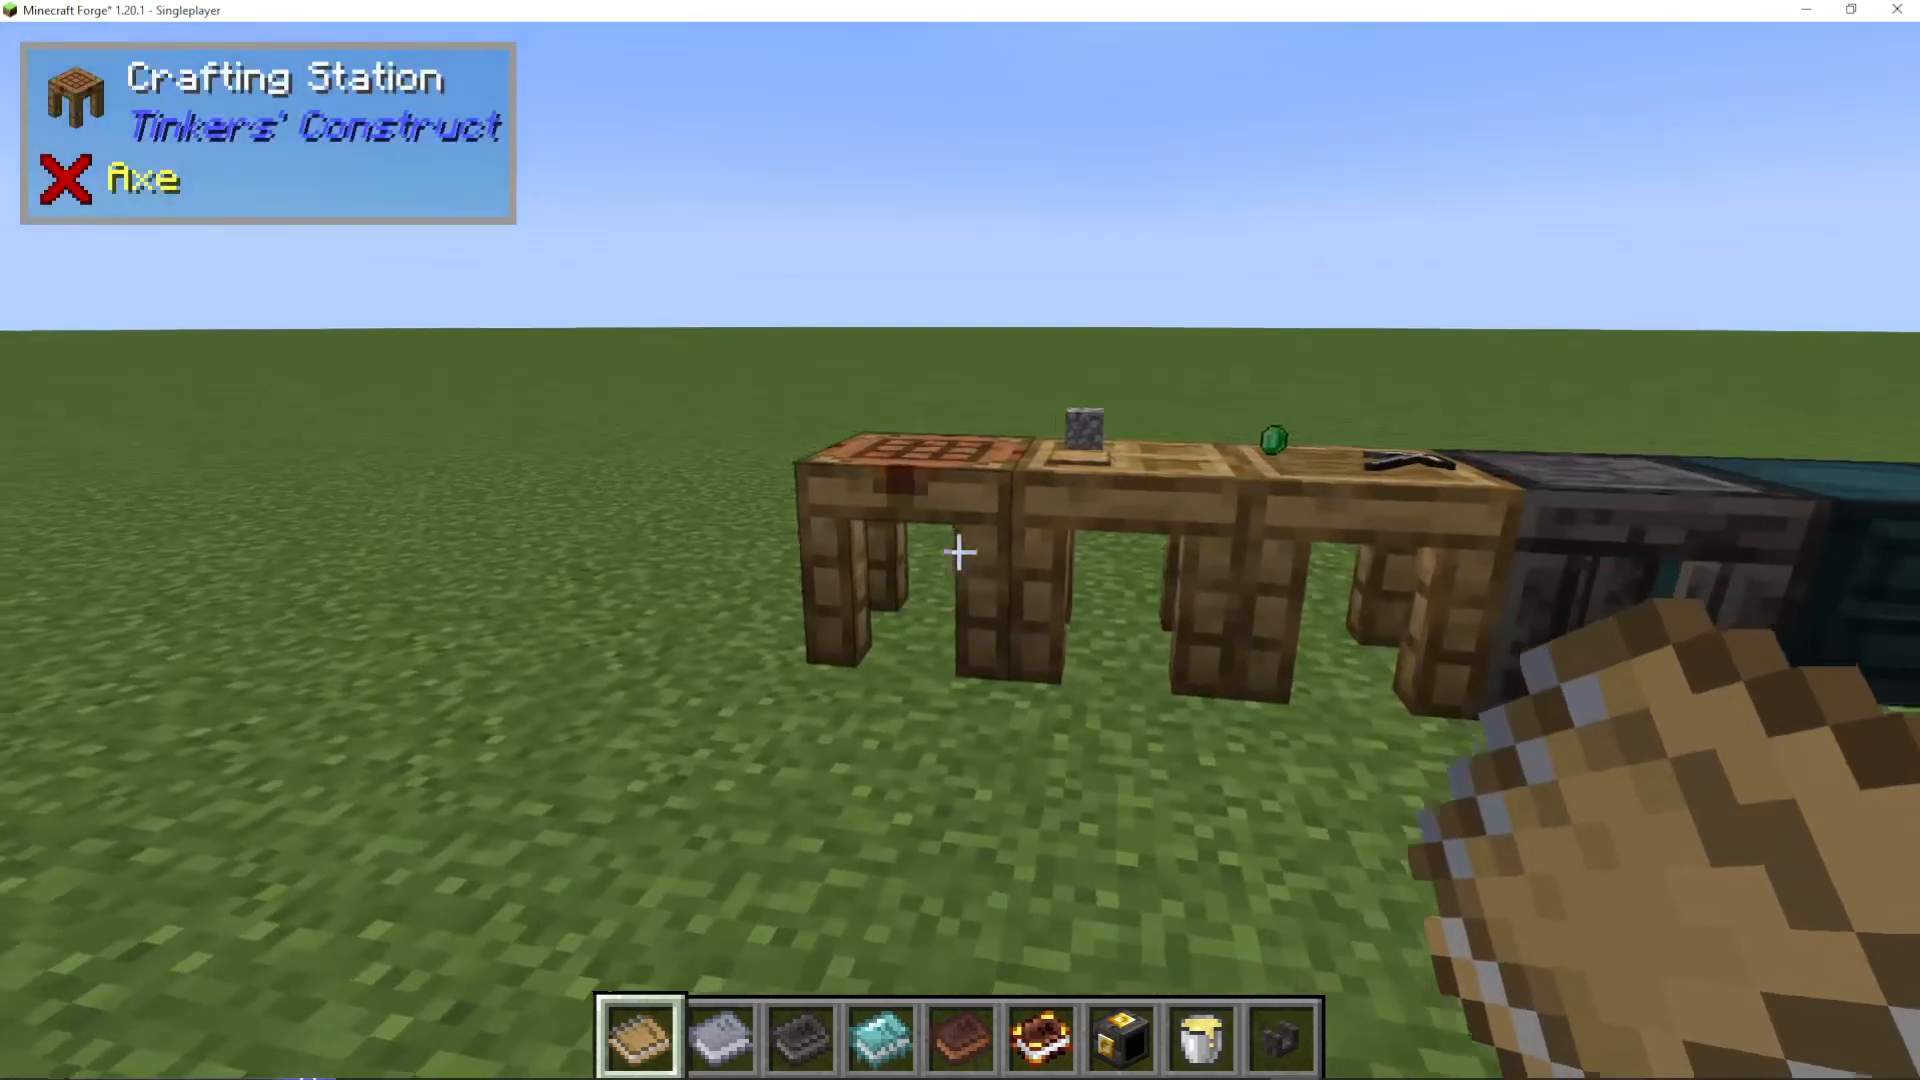
Your first priority is creating several work tables:
Crafting Station
Part Builder
Tinker Station
Modifier Work Table
Tinker’s Chest
Part Chest
Cast Chest
A key tip: place all these workstations next to each other so they connect. When you right-click on any one of them, you can access all the others from the top menu, allowing you to work from a single location without constantly moving around.
Creating the Crafting Station
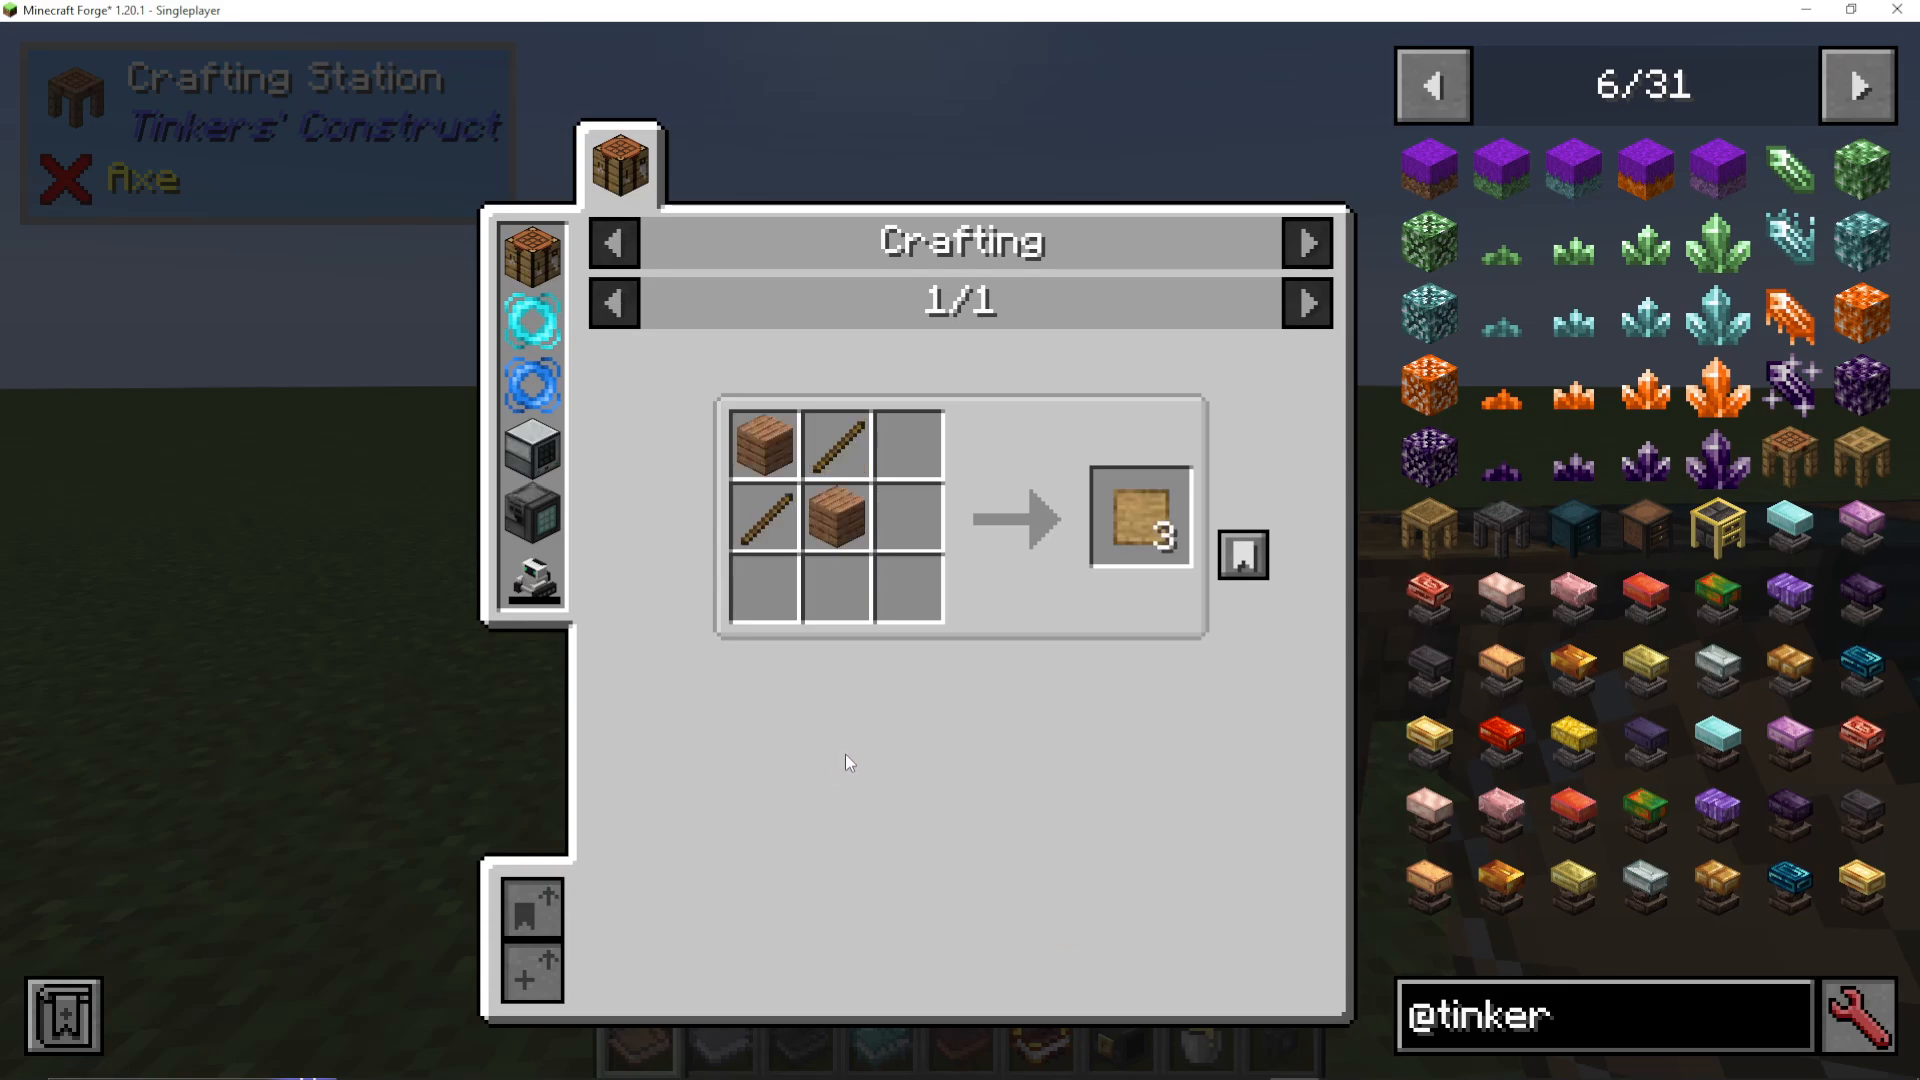
Start by making a stack of patterns. Each pattern requires two sticks and two planks. You’ll use these constantly throughout the mod.
Upgrade your regular crafting table into a Crafting Station by placing a pattern on top of it. The key advantage: items remain in the Crafting Station when you close it, unlike a regular crafting table where items return to your inventory.
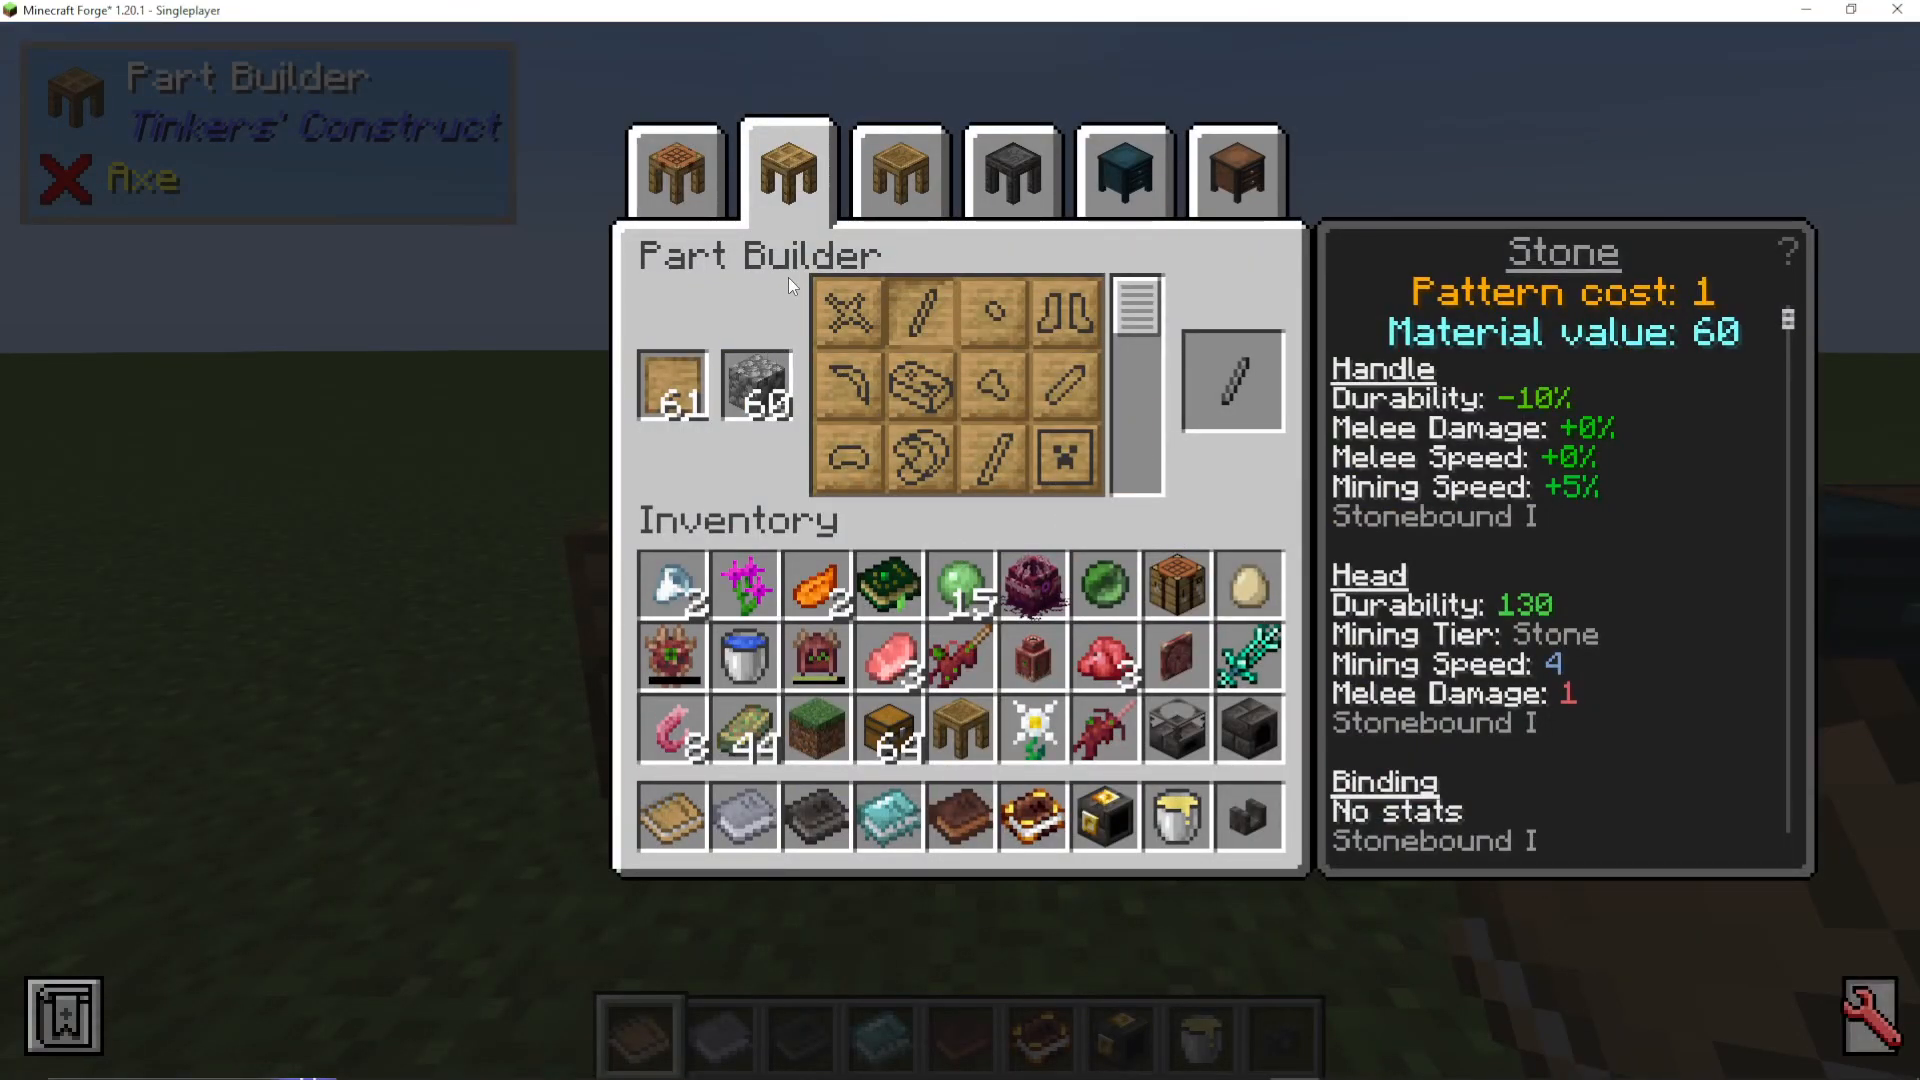
The Part Builder
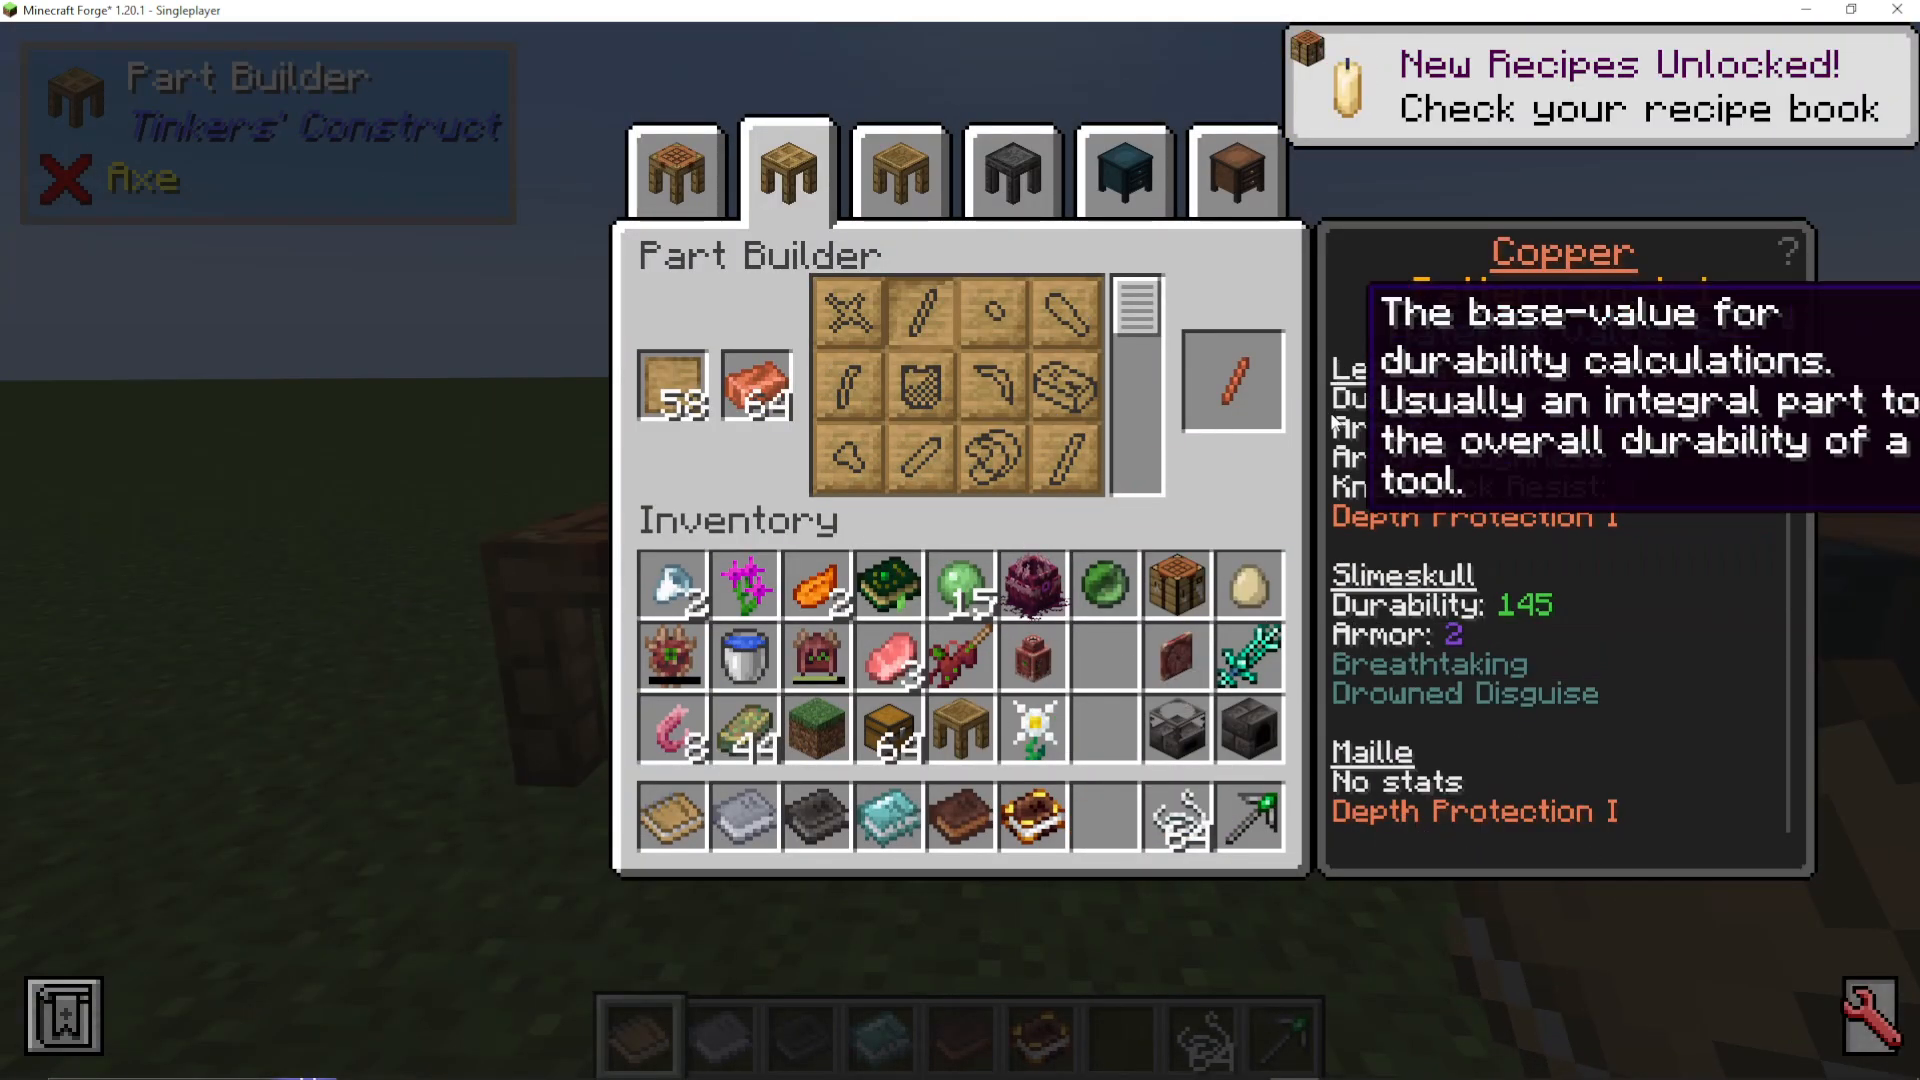
The Part Builder is where you craft individual parts for your tools. Insert blank patterns on the left side, and you’ll be able to create tool components from available materials. To begin, you’ll only have access to basic tier 1 materials.
Crafting Your First Tool
Using the Tinker Station
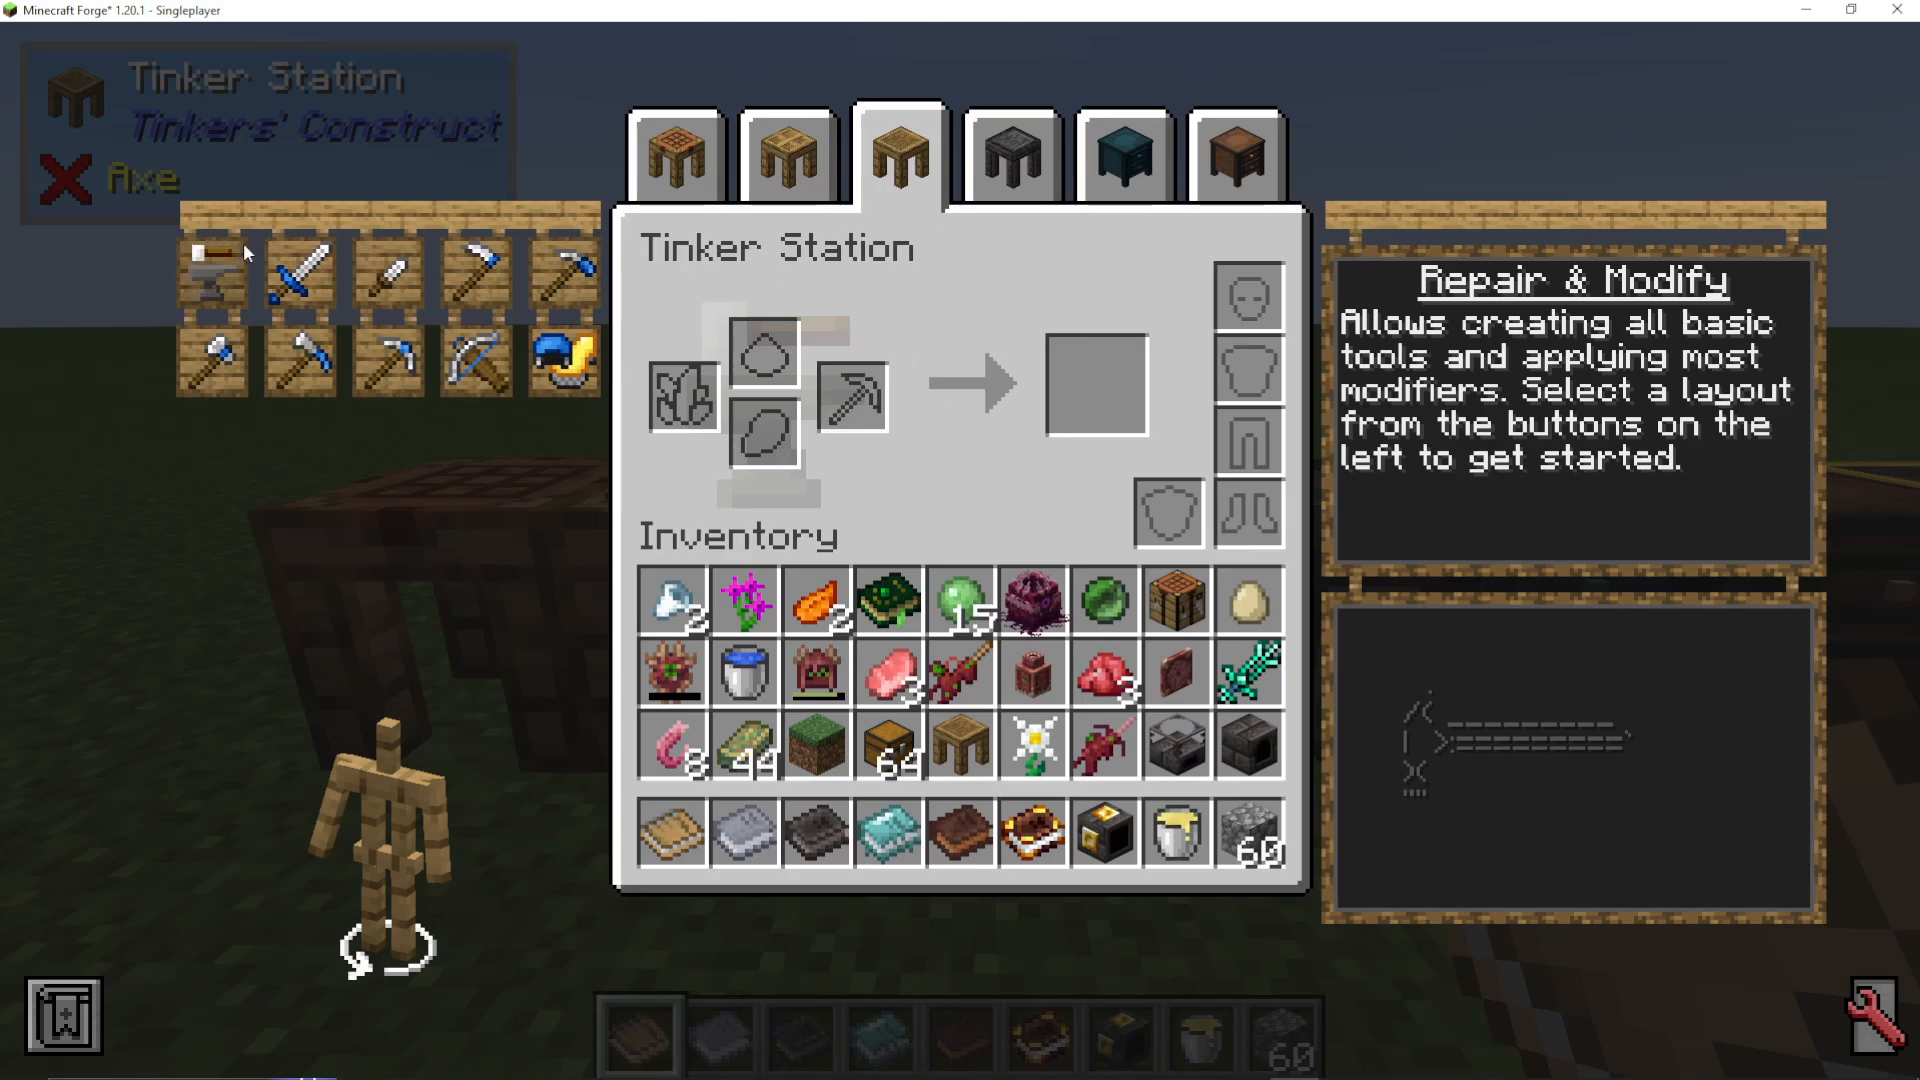
The Tinker Station is where tools are actually assembled. When you first open it, you’ll see an anvil icon on the left—this is for adding modifiers. To create a new tool, click the tool icon (for example, a pickaxe icon). The screen will show you the components needed.
For a pickaxe, you need:
Tool Head (pickhead)
Tool Handle
Tool Binding
Creating a Cobblestone Pickaxe
For this tutorial example, we’ll use cobblestone for all three components:
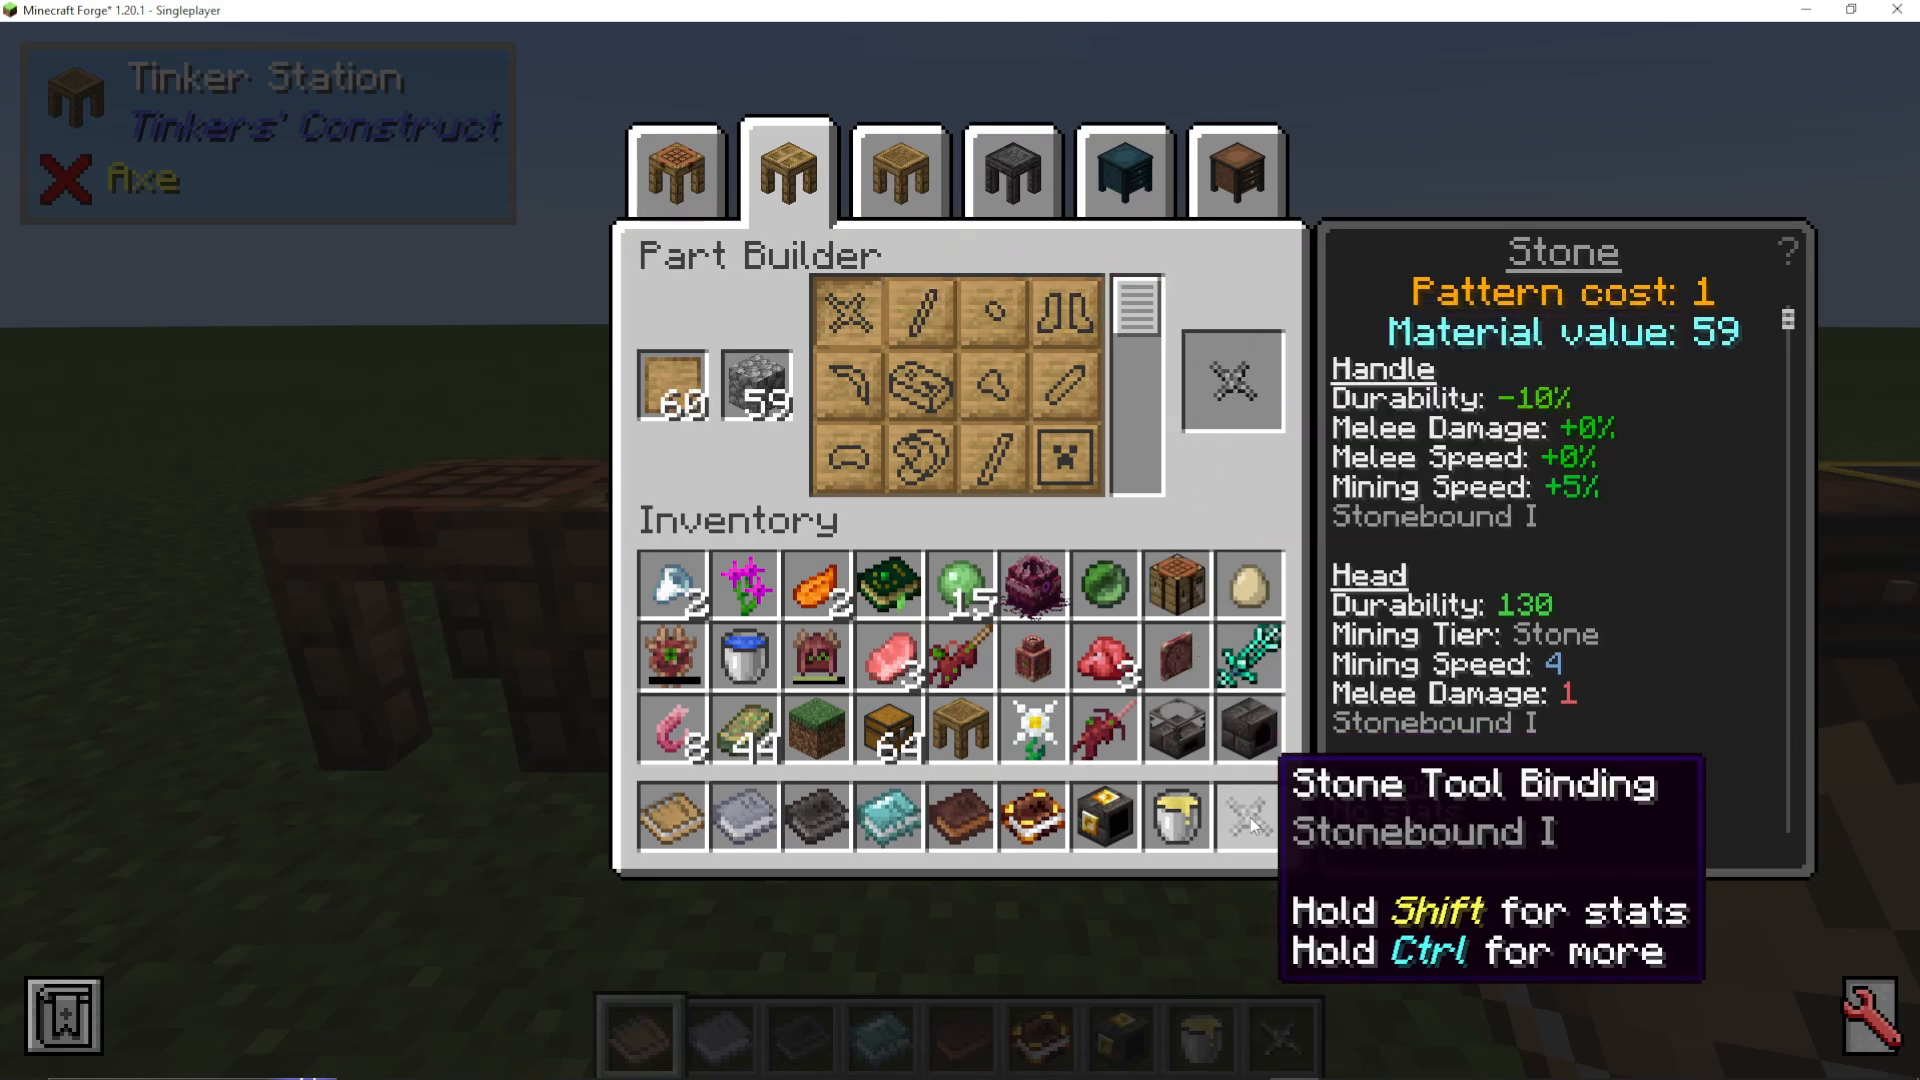
Go to the Part Builder and create one tool binding from cobblestone
Create one pickhead from cobblestone
Create one tool handle from cobblestone
Return to the Tinker Station and select the pickaxe icon
Place the pickhead in the tool head slot
Place the tool handle in the tool handle slot
Place the tool binding in the tool binding slot
Name your tool and take it out
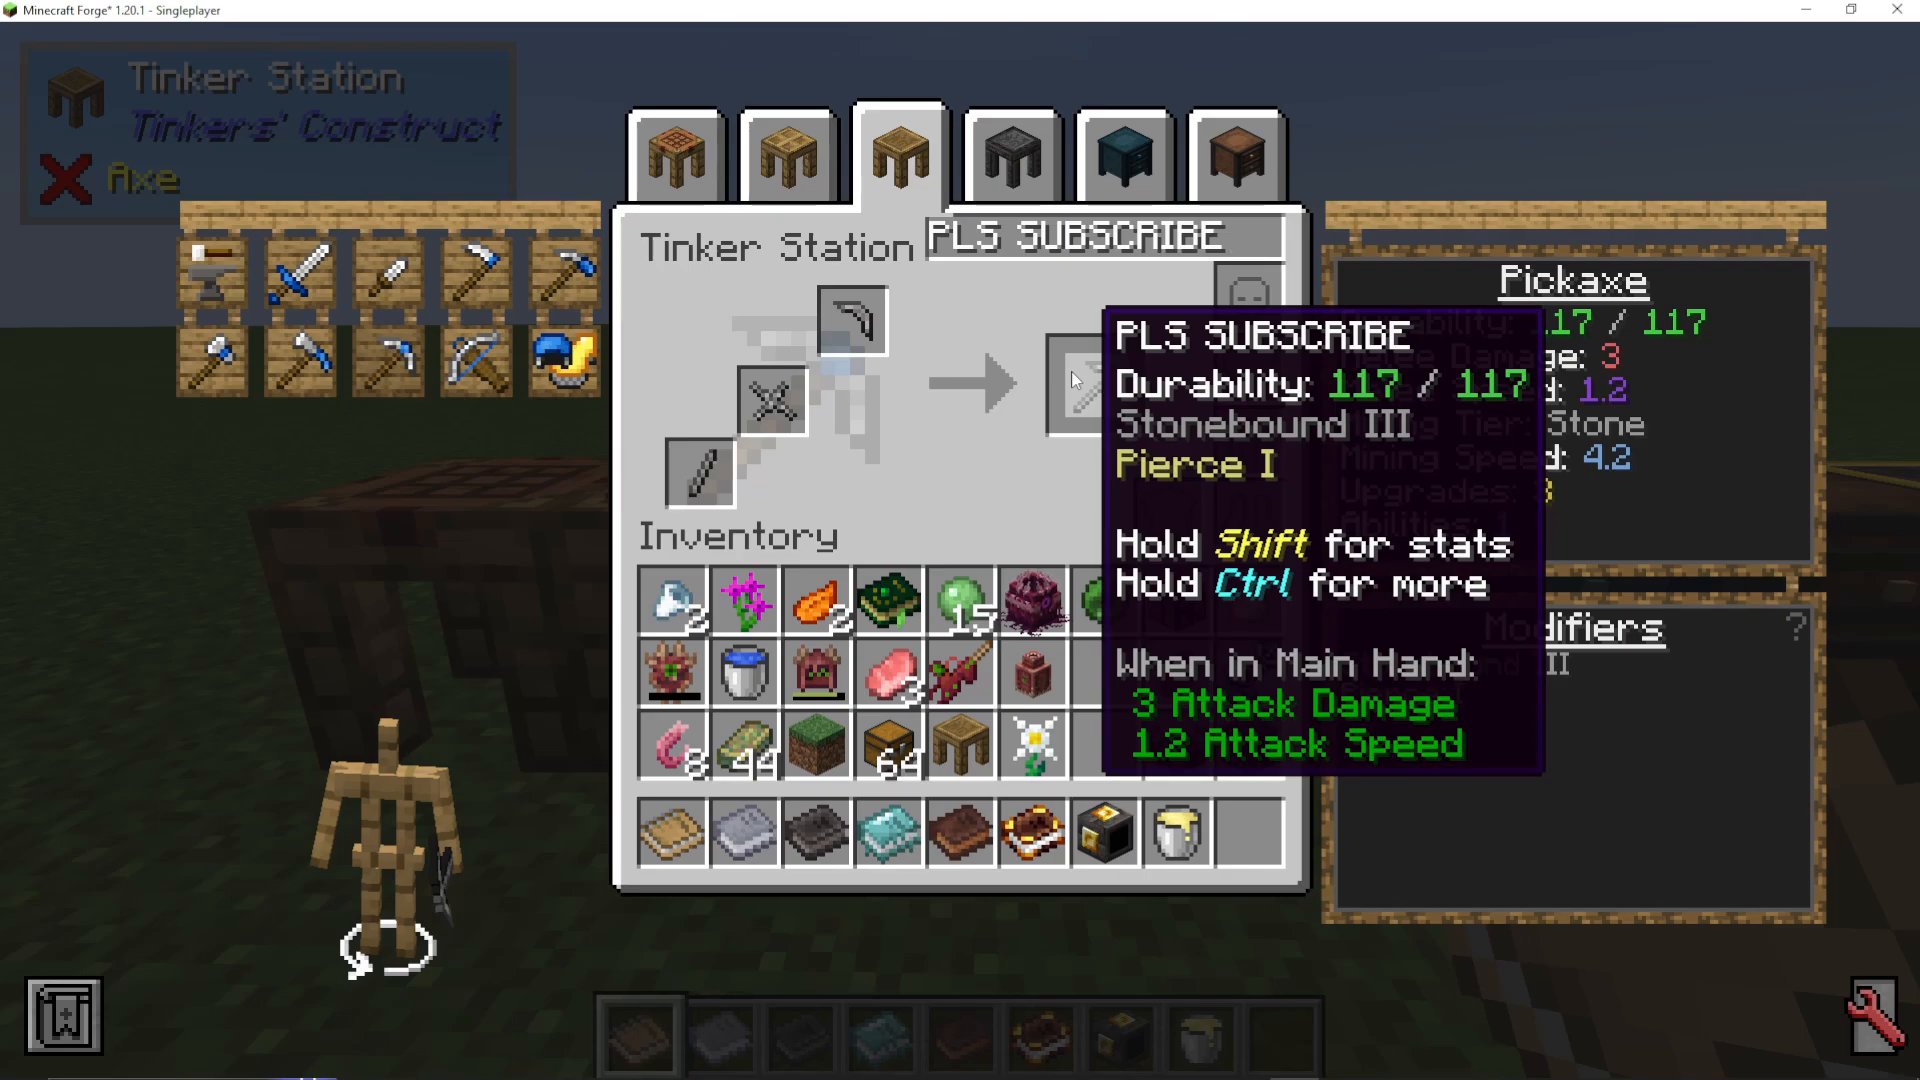
Understanding Tool Stats
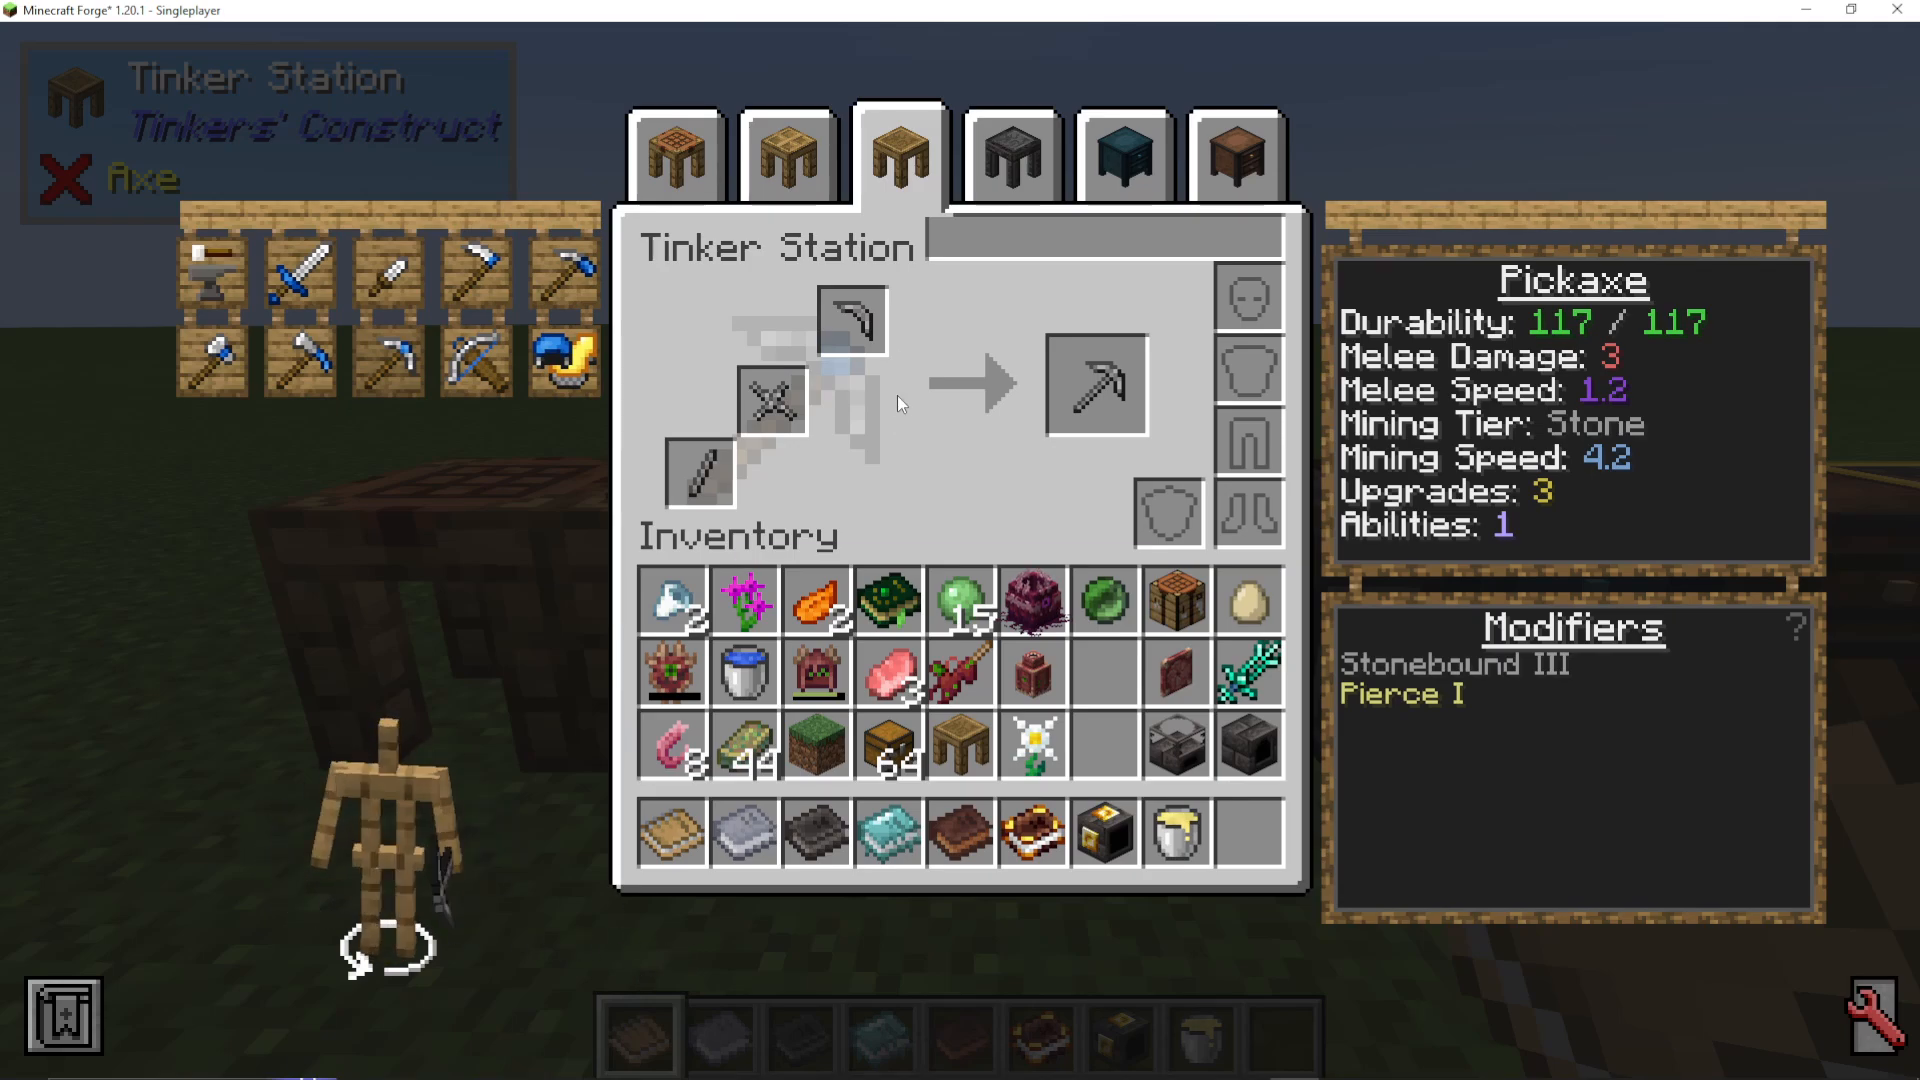
Your new tool displays important information:
Durability: How many blocks/hits before the tool breaks (in this case, 117)
Melee Damage: Damage dealt to mobs
Melee Speed: Attack speed
Mining Tier: What materials can be mined (stone, iron, diamond, etc.)
Mining Speed: How fast blocks are mined
Upgrade Slots: Number of remaining modifier slots available
Ability Slots: Special abilities that can be added
Understanding Modifiers from Materials
Your cobblestone pickaxe has two modifiers from the materials used:
Stone Bound (Free): The tool mines faster as it wears out but does less damage
Pierced (1): Attacks cancel out some of the target’s armor
These modifiers come from the material properties you selected, not from anything you added manually.
Adding Your First Modifier
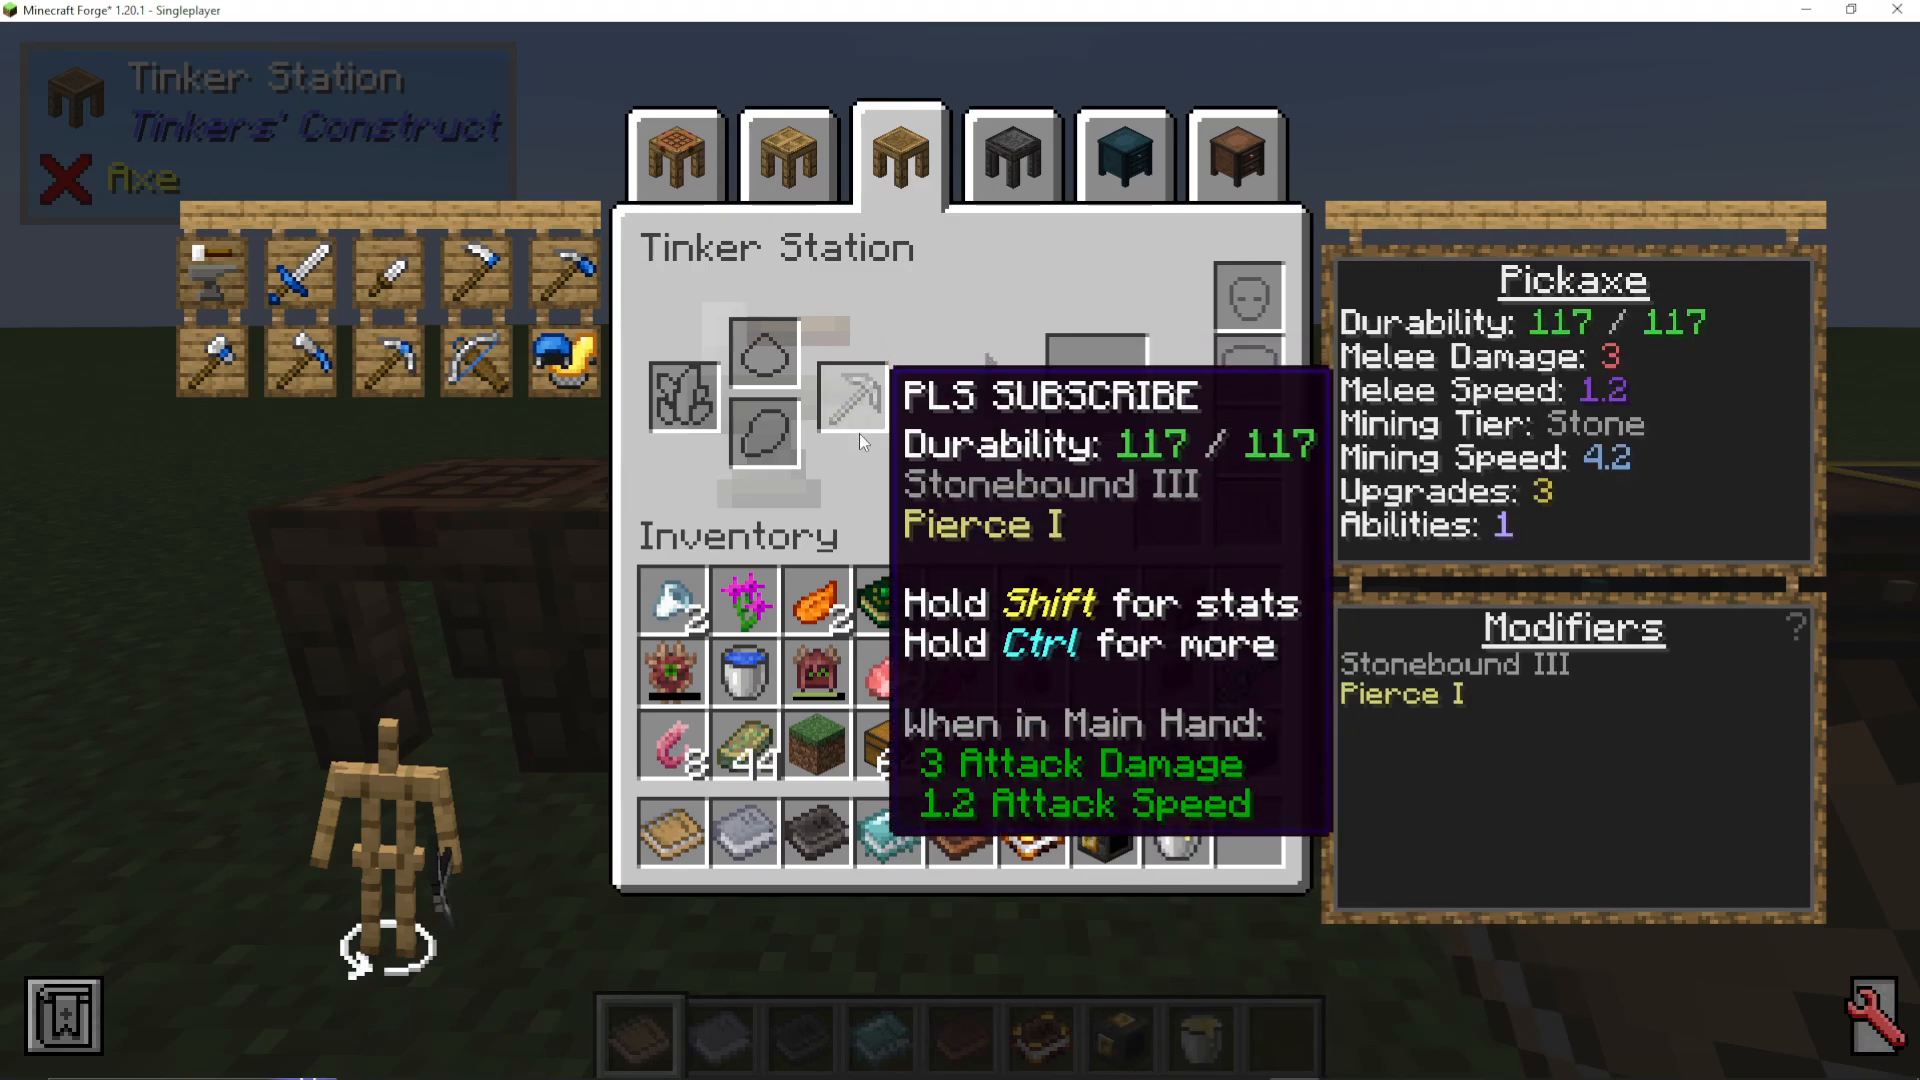
Using the Modifier Slot
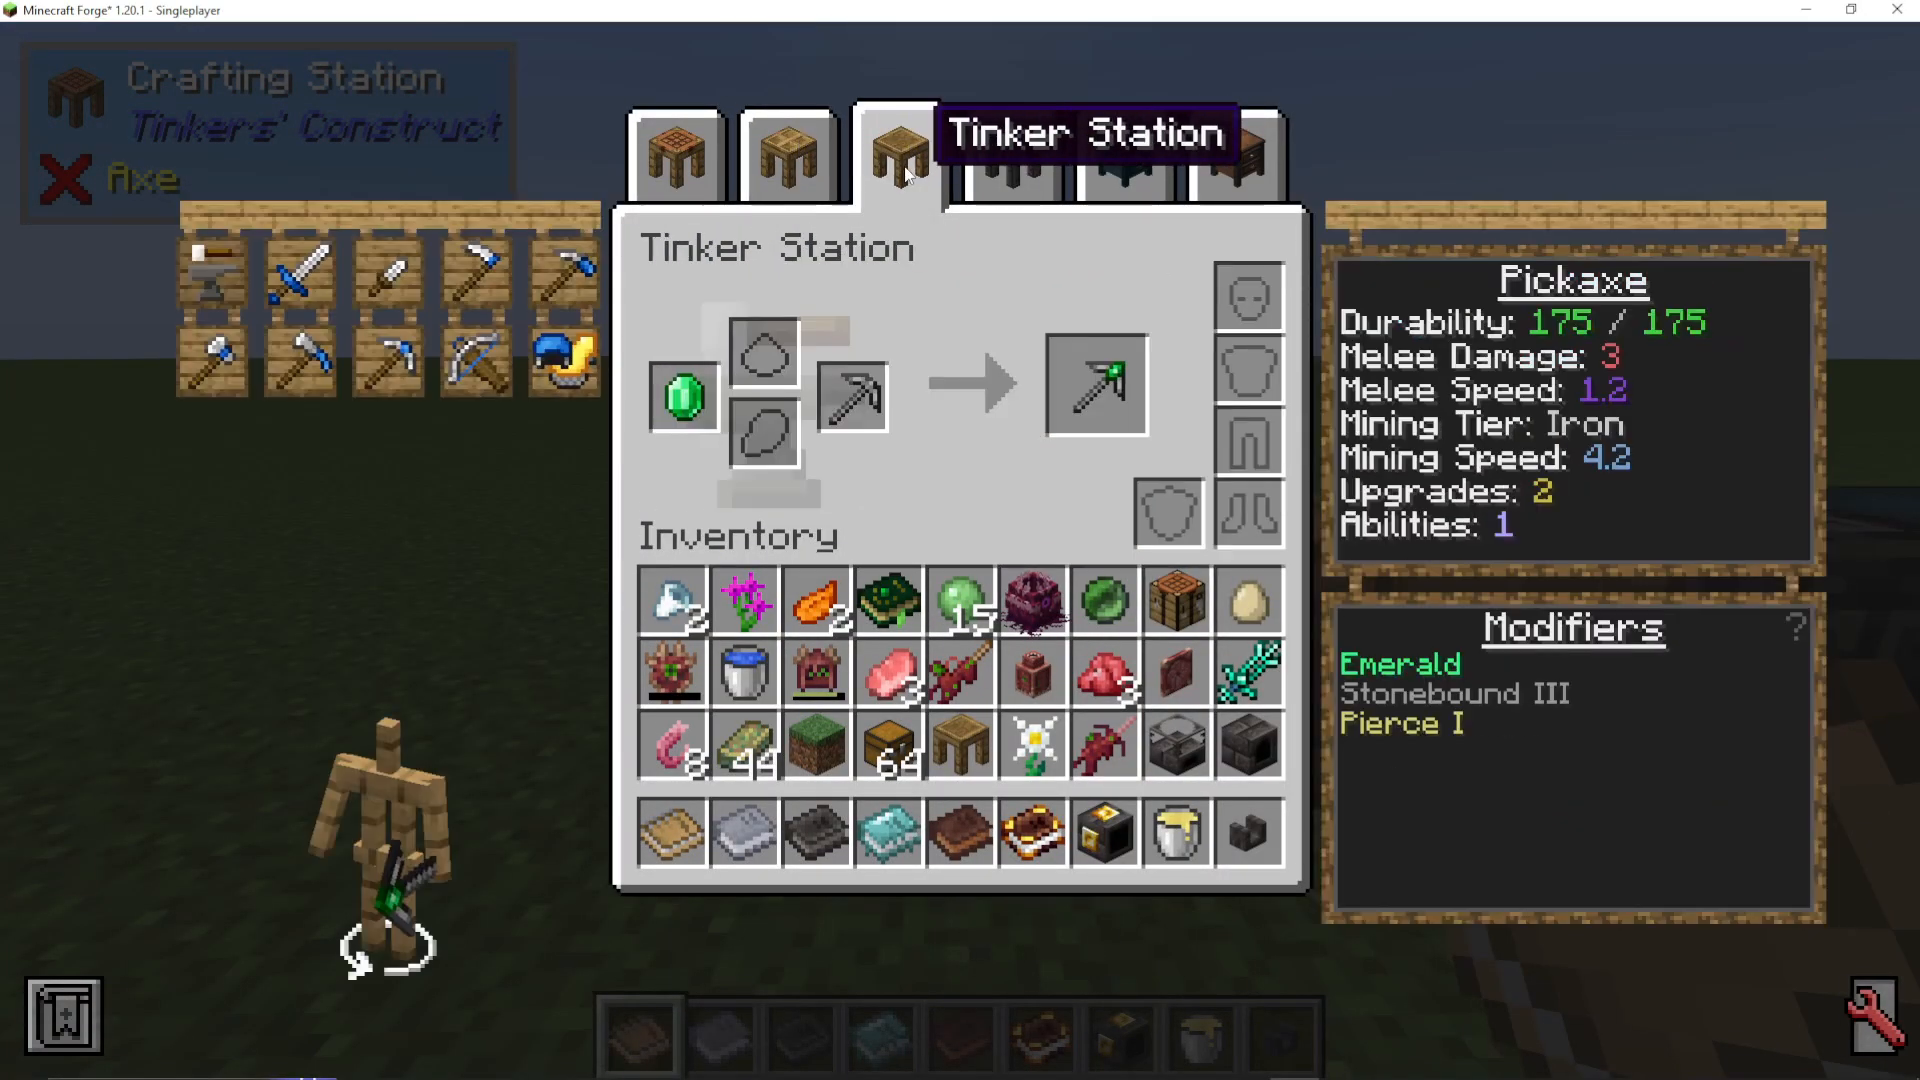
To add a modifier to your tool, click the little anvil icon at the top of the Tinker Station. Place your tool in the tool slot and add a modifier resource (for example, an emerald).
The Emerald Modifier
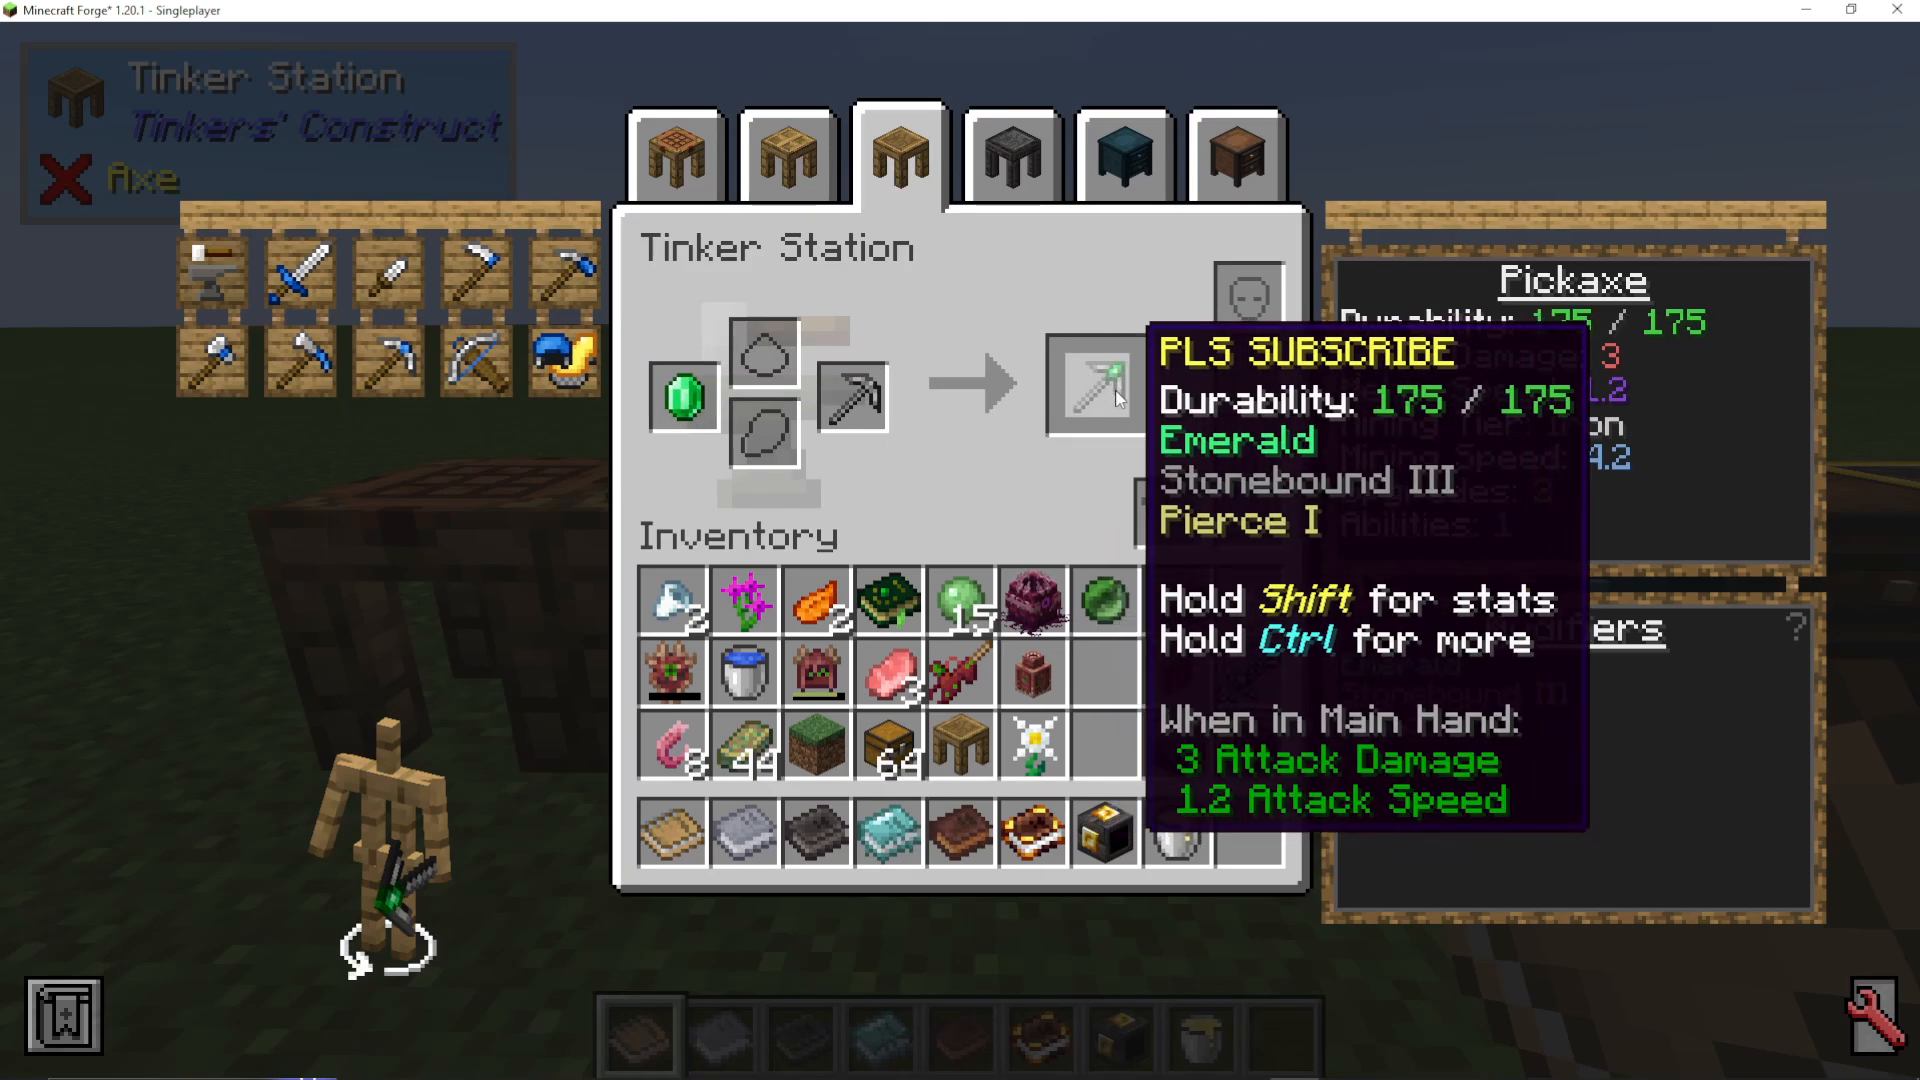
When you add an emerald to your pickaxe:
Durability increases from 117 to 175
Available upgrade slots decrease from 3 to 2 (because you used one)
Mining tier improves to iron (instead of stone)
Emerald boosts effectiveness of conditional damage and mining speed
Understanding Tier 1 Materials
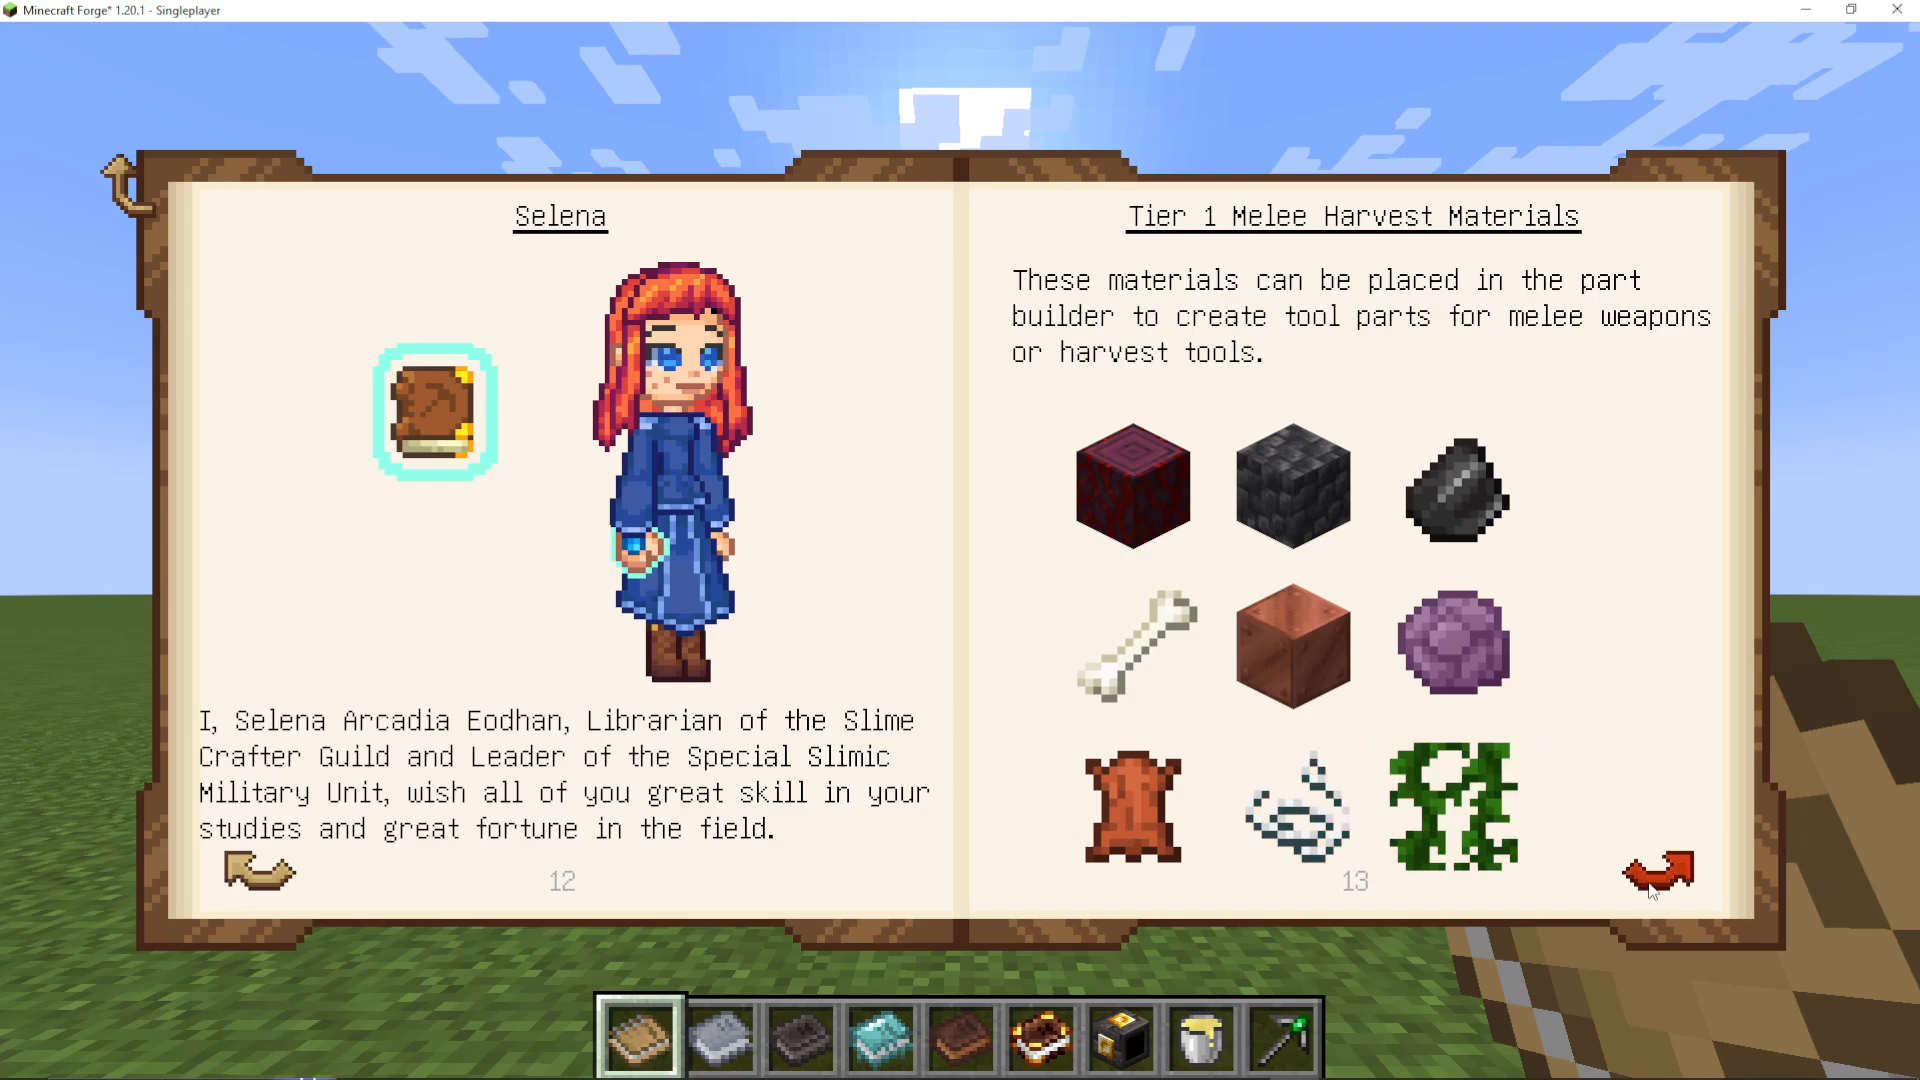
Available Tier 1 Materials
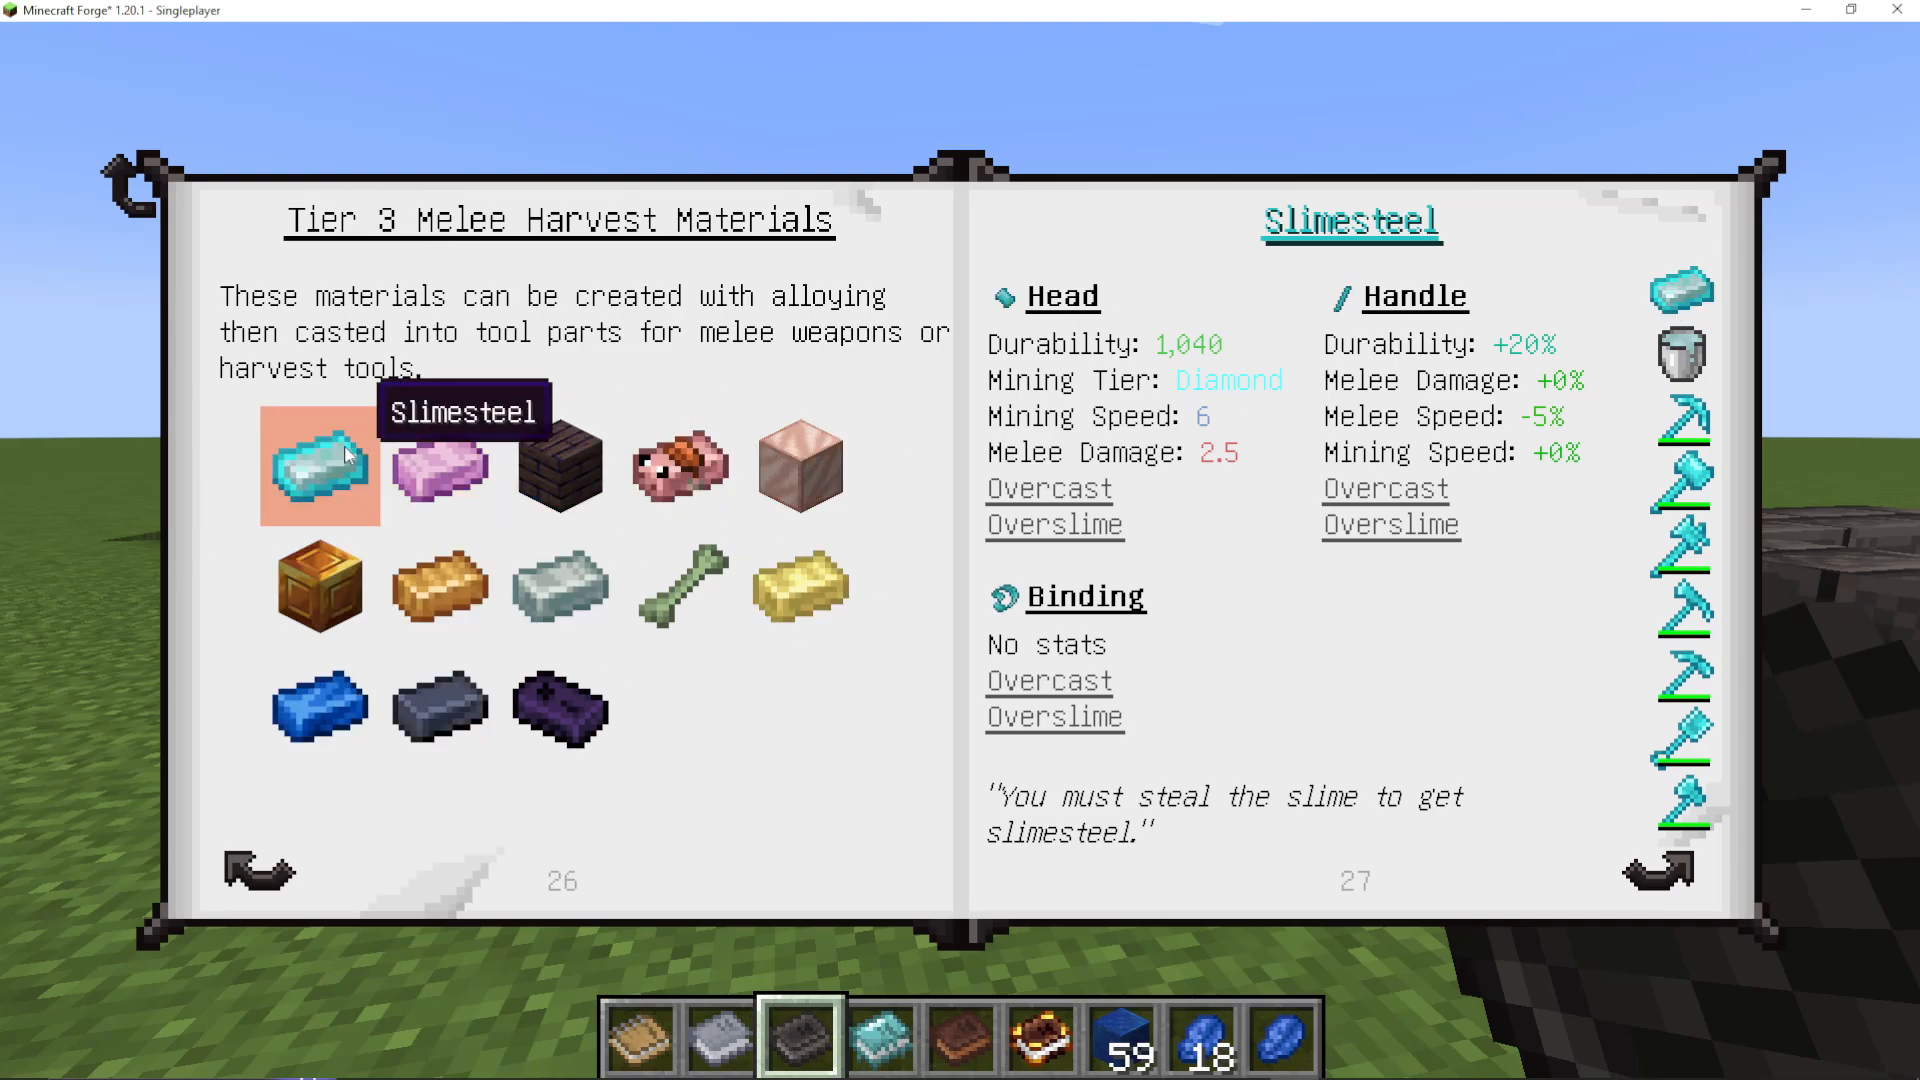
For melee weapons and tools, you have access to these basic tier 1 materials:
Wood
Rocks
Cobblestone
Flint
Bones
Copper
Chorus
Lever
String
Vines
Reading the Materials Book
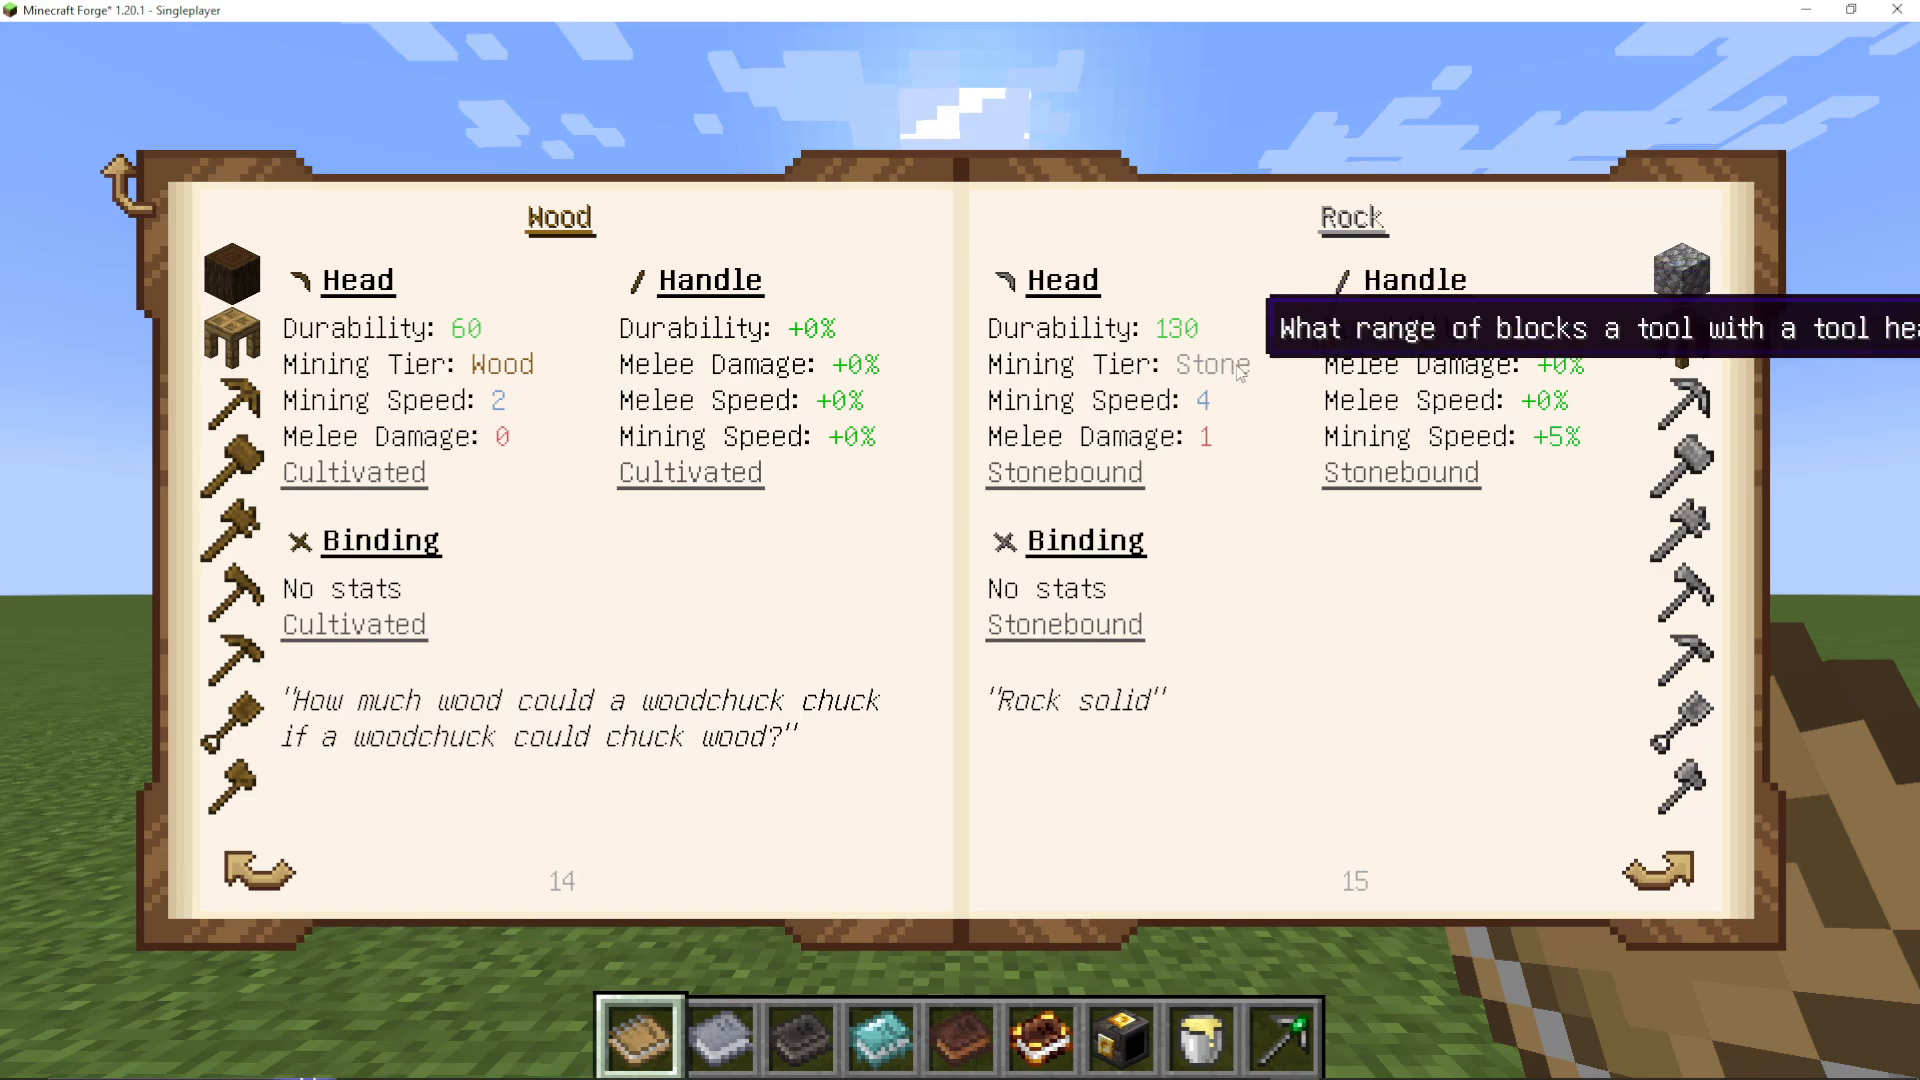
Open “Materials and You” to see detailed stats for each material. For each material, you’ll find:
Base Durability: When used on the tool head
Mining Tier: What blocks can be mined
Mining Speed: Speed multiplier for mining
Inherent Buff: A special ability tied to that material
Handle Multipliers: How durability, melee damage, melee speed, and mining speed change when used as a handle
Binding Effects: Any bonuses from using the material as a binding
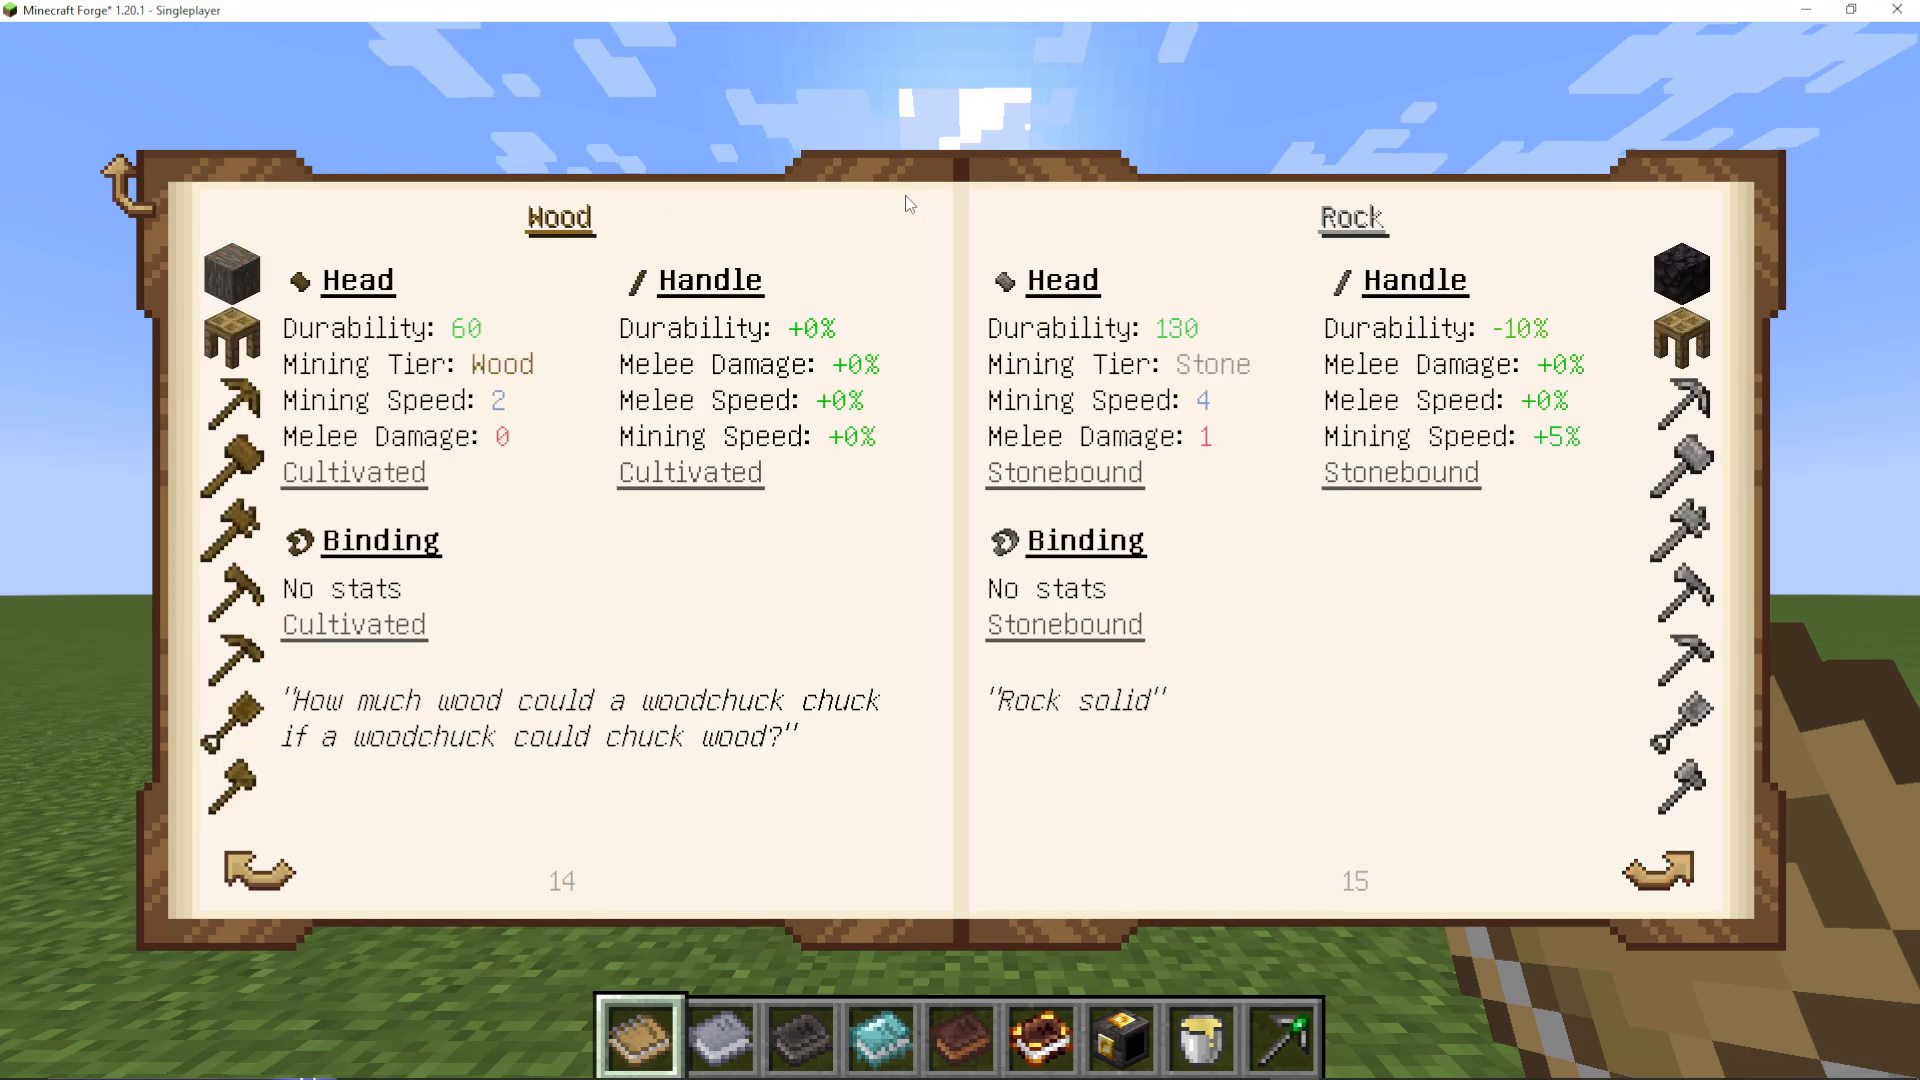
Comparing Materials: Wood vs. Stone vs. Flint vs. Bone
Wood: 60 durability, wood mining tier, 2 mining speed, cultivated buff (grows material when repairing)
Stone: 130 base durability, stone mining tier, much better mining speed, -10% durability as handle but +5% mining speed and stone bound modifier
Flint: Each point of durability lost increases damage but decreases mining speed—good for combat but poor for mining
Bone: Terrible as a handle (loses lots of durability) but good as a binding or head with pierces ability and armor bonuses
Optimizing Your First Tool: The Best Materials Approach
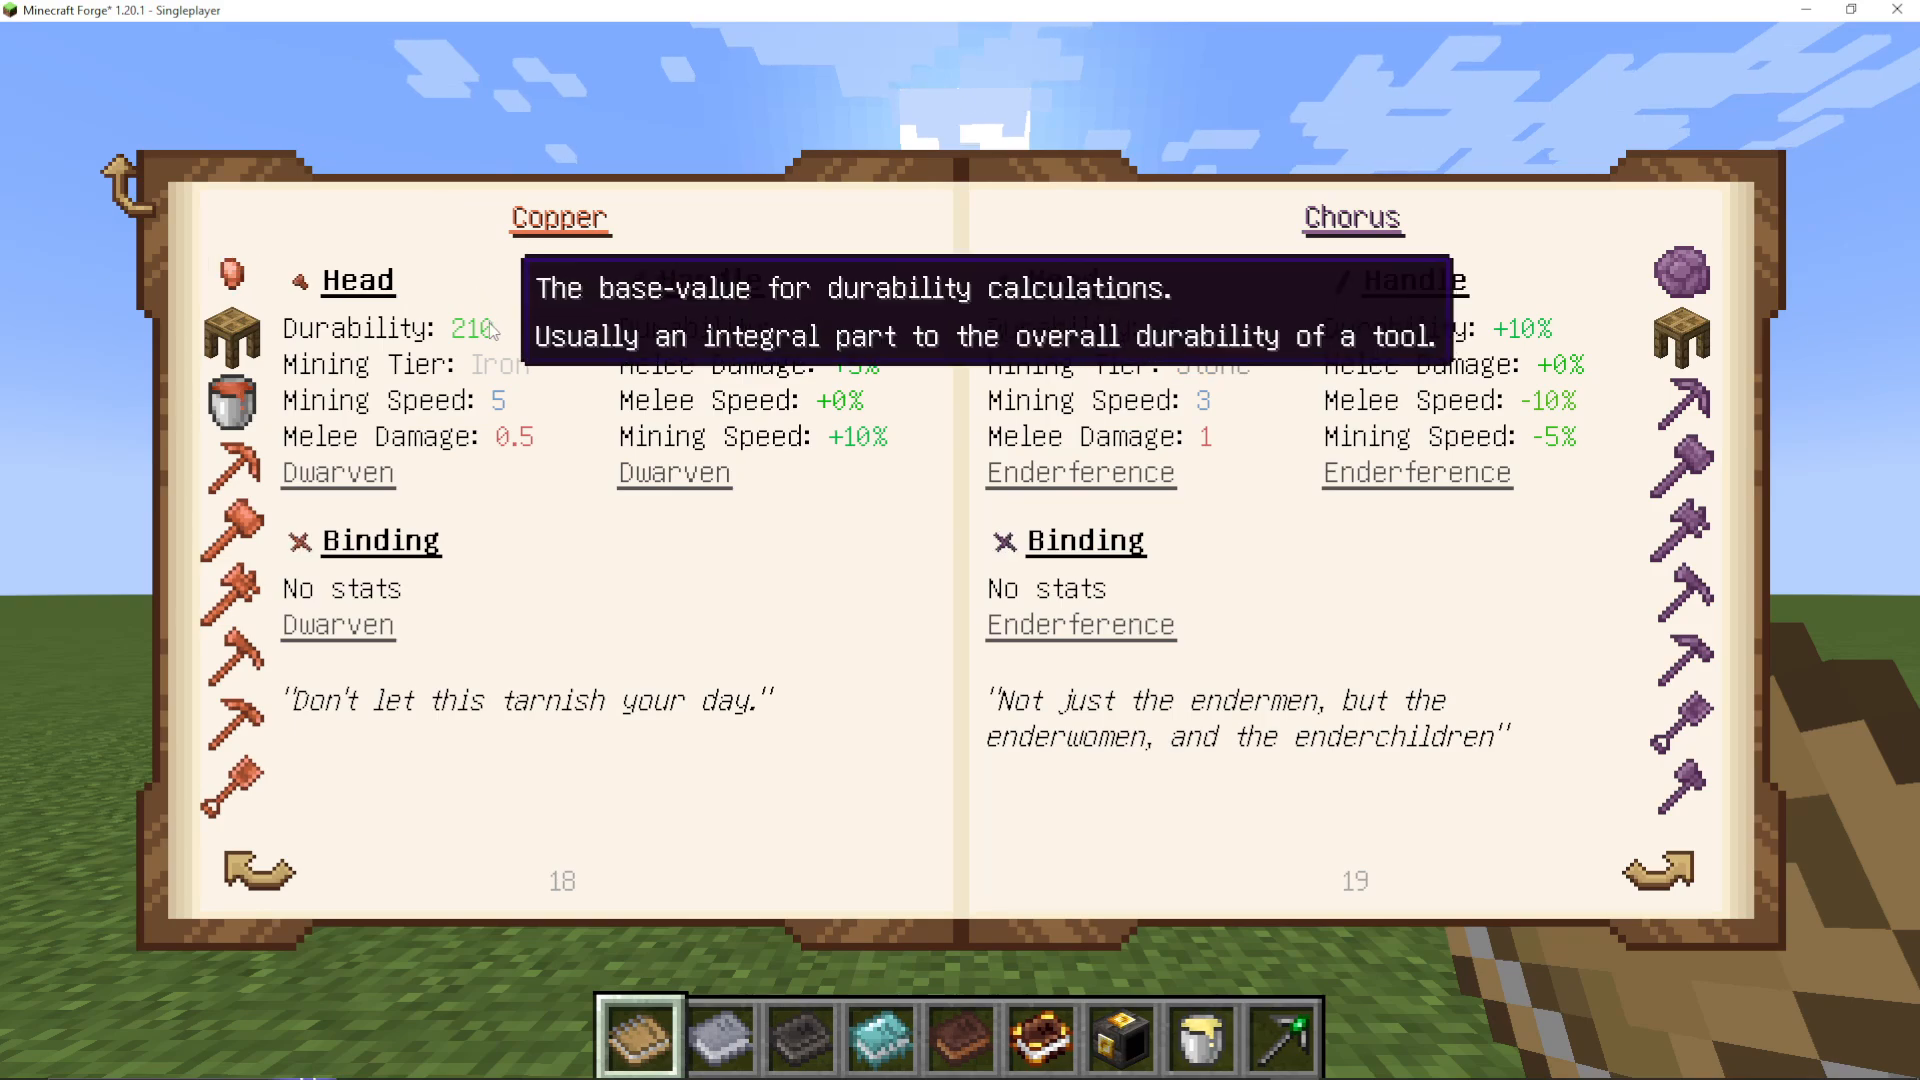
Choosing Materials for a Copper Pickaxe
For an optimized pickaxe using tier 1 materials:
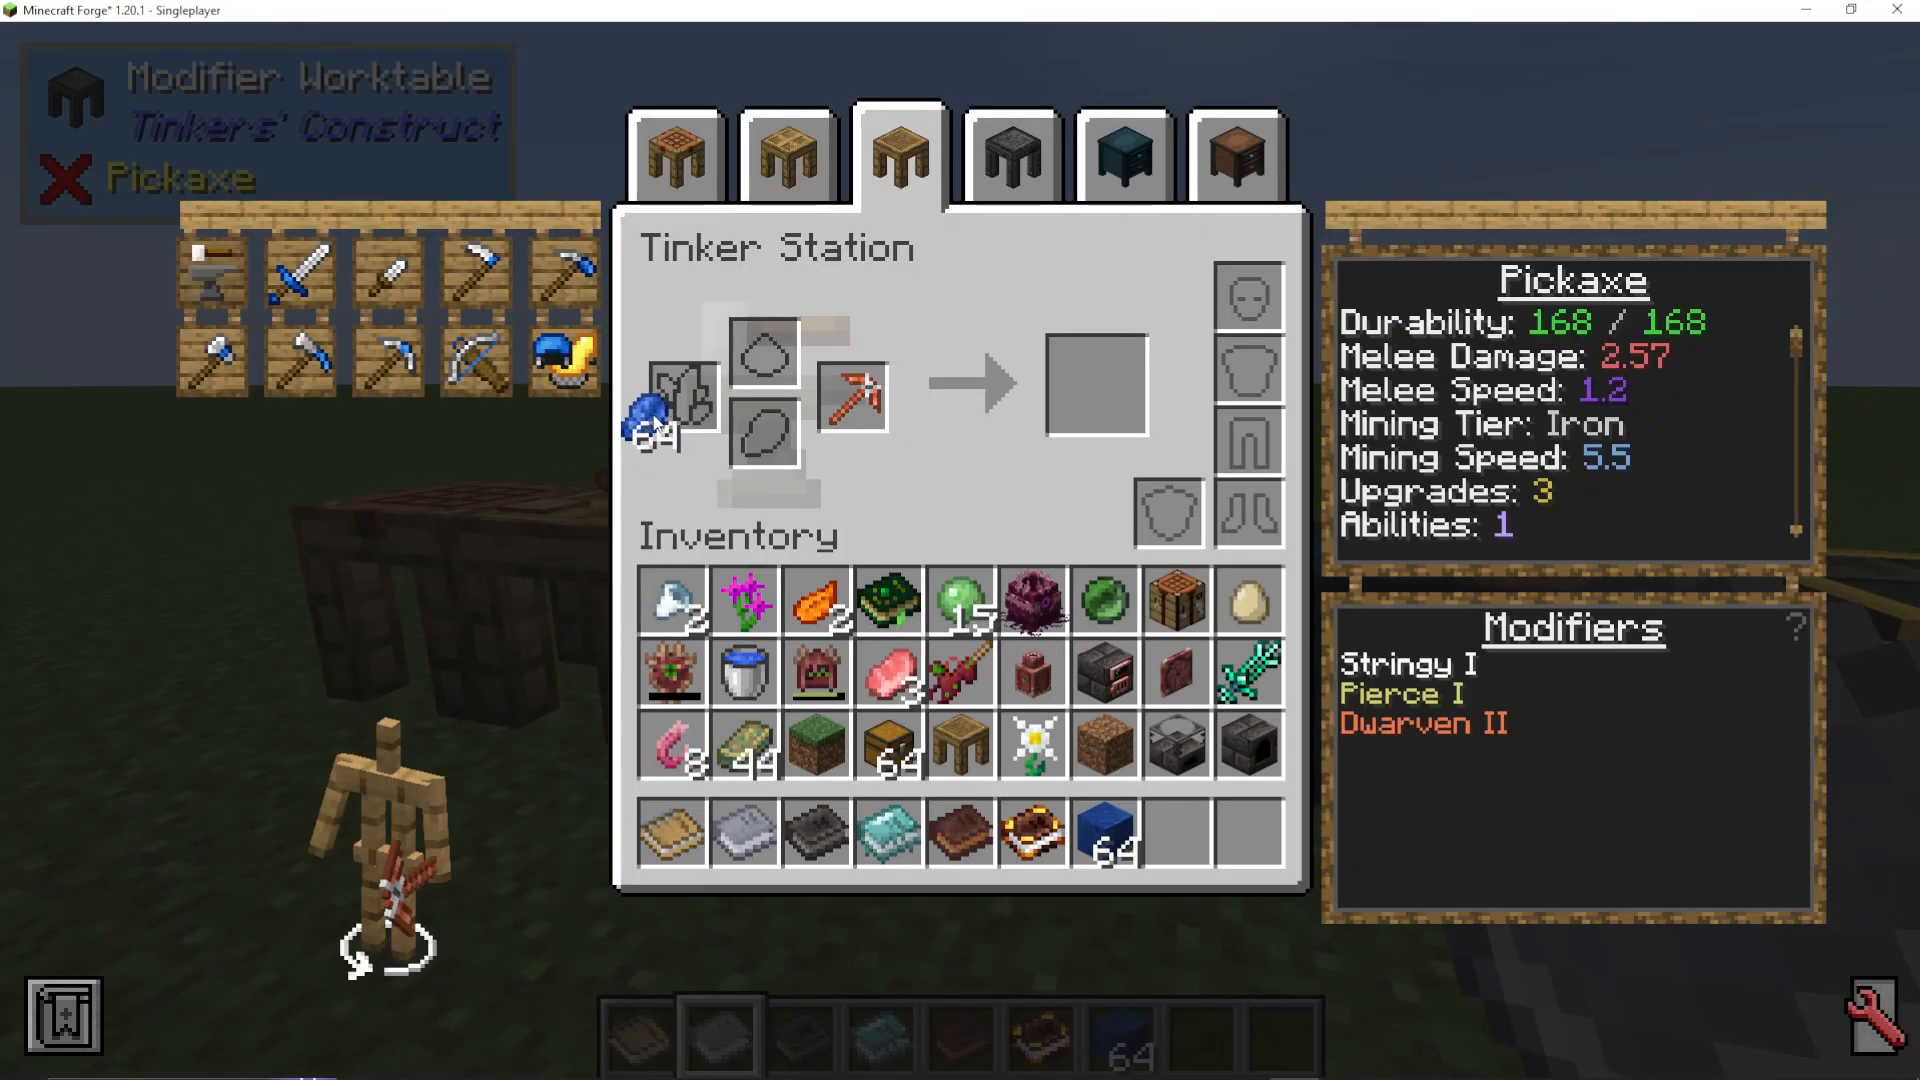
For the Head (Pickhead): Copper is best because it has 210 base durability and can already mine up to iron with 5 mining speed. It also has the Dwarven modifier (tool mines faster deeper but loses effectiveness as you mine less).
For the Handle: Copper again loses 20% durability but gains 10% mining speed. Alternatively, Chorus provides high durability with only a slight mining speed loss and 10% additional durability.
For the Binding: String is ideal because it has the Stringy modifier, allowing your tool to be repaired using string—making maintenance incredibly easy.
Building the Optimized Copper Pickaxe
Go to Part Builder and create a copper pickhead
Create a copper tool handle
Create a string tool binding
Return to Tinker Station and assemble all three components
Your new tool will have:
168 durability
Can mine iron
5.5 mining speed
Dwarven 2 modifier
Pierce 1 modifier
Stringy 1 modifier (repair with string)
Introduction to the Smeltry
What is a Smeltry?
Once you’re comfortable with basic tools, your next step is building a Smeltry. This is a structure that processes ores and creates molten metals, allowing you to craft tier 2 and higher materials. Tier 2 materials are usually alloys and ingots that are significantly more powerful than basic materials like wood and stone.
Creating Seared Bricks
To build a Smeltry, you first need Seared Bricks, which are made by smelting grout in a regular furnace. Grout is crafted from:
Sand
Gravel
Clay
You can craft grout as either a combination of all three or by clicking each item individually. Making a few stacks of grout early on is recommended, as this is typically one of the most tedious parts of starting Tinkers Construct in any modpack.
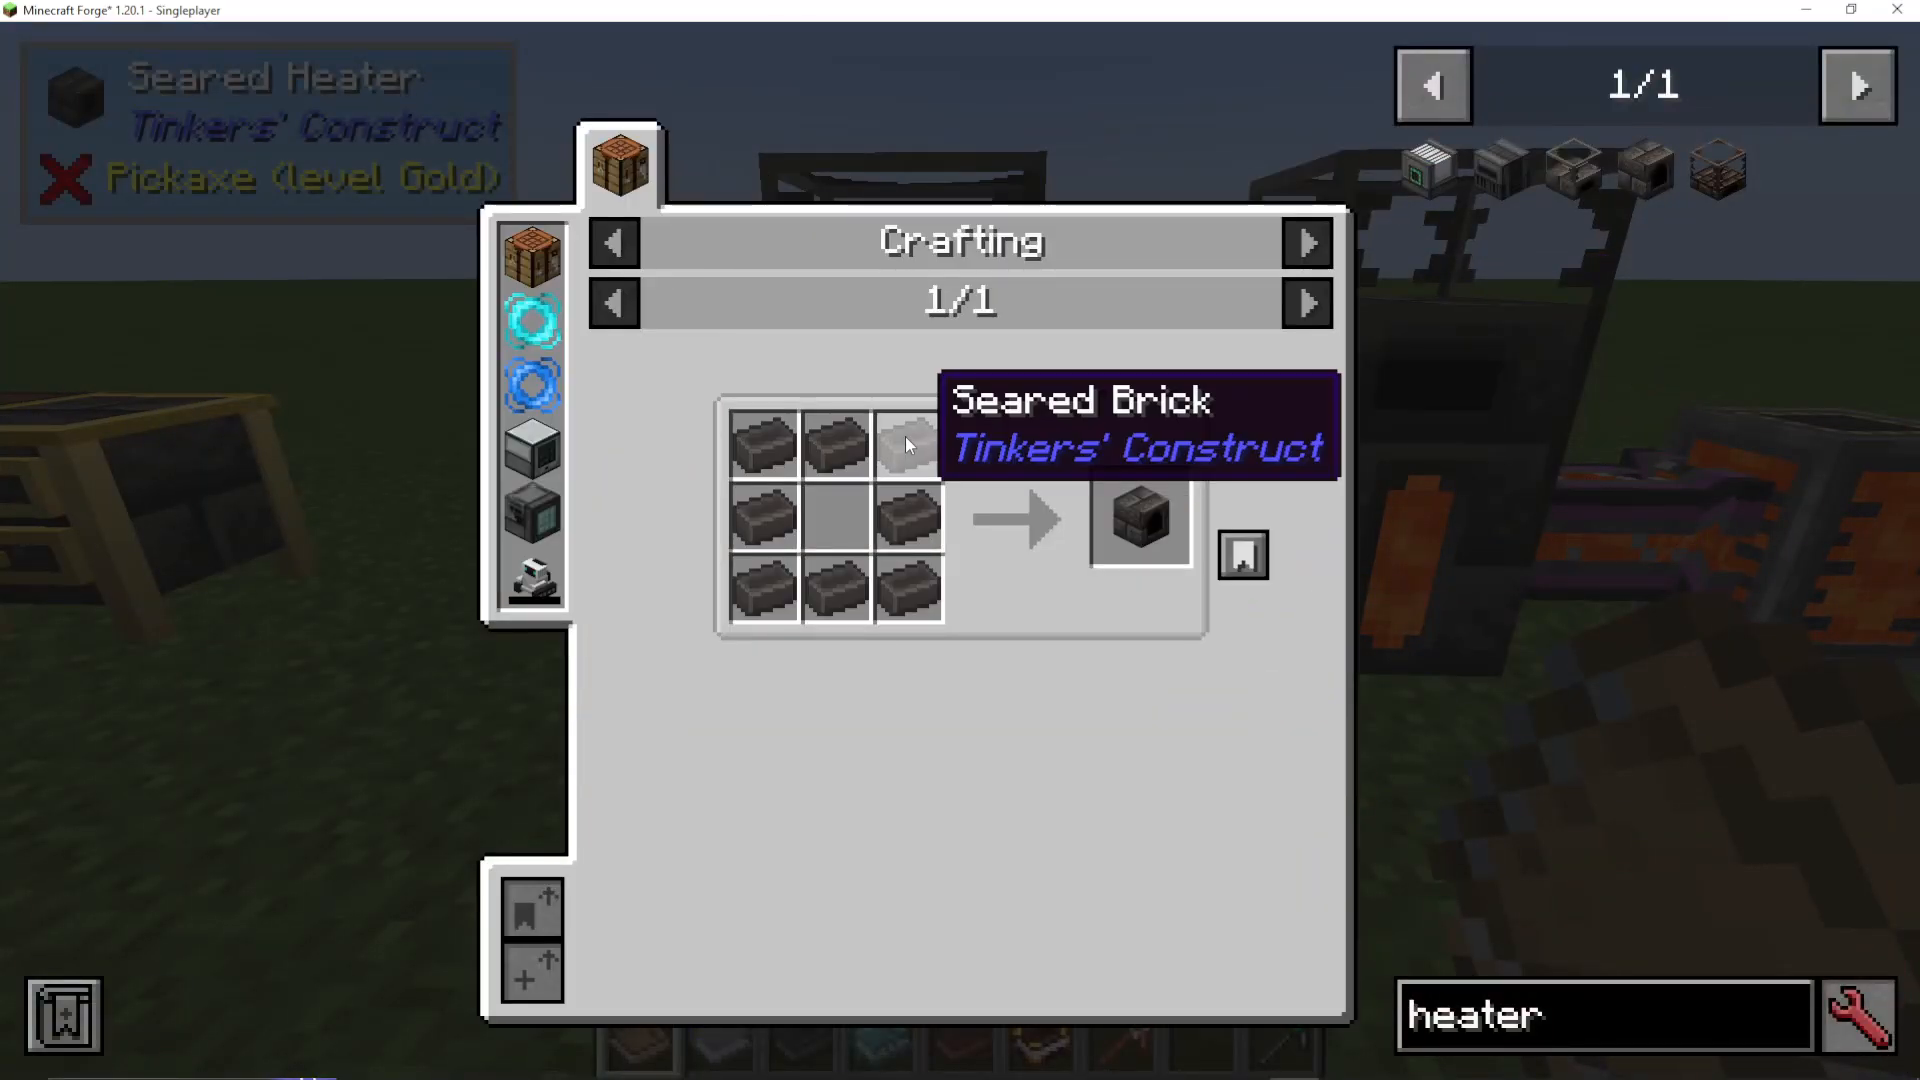
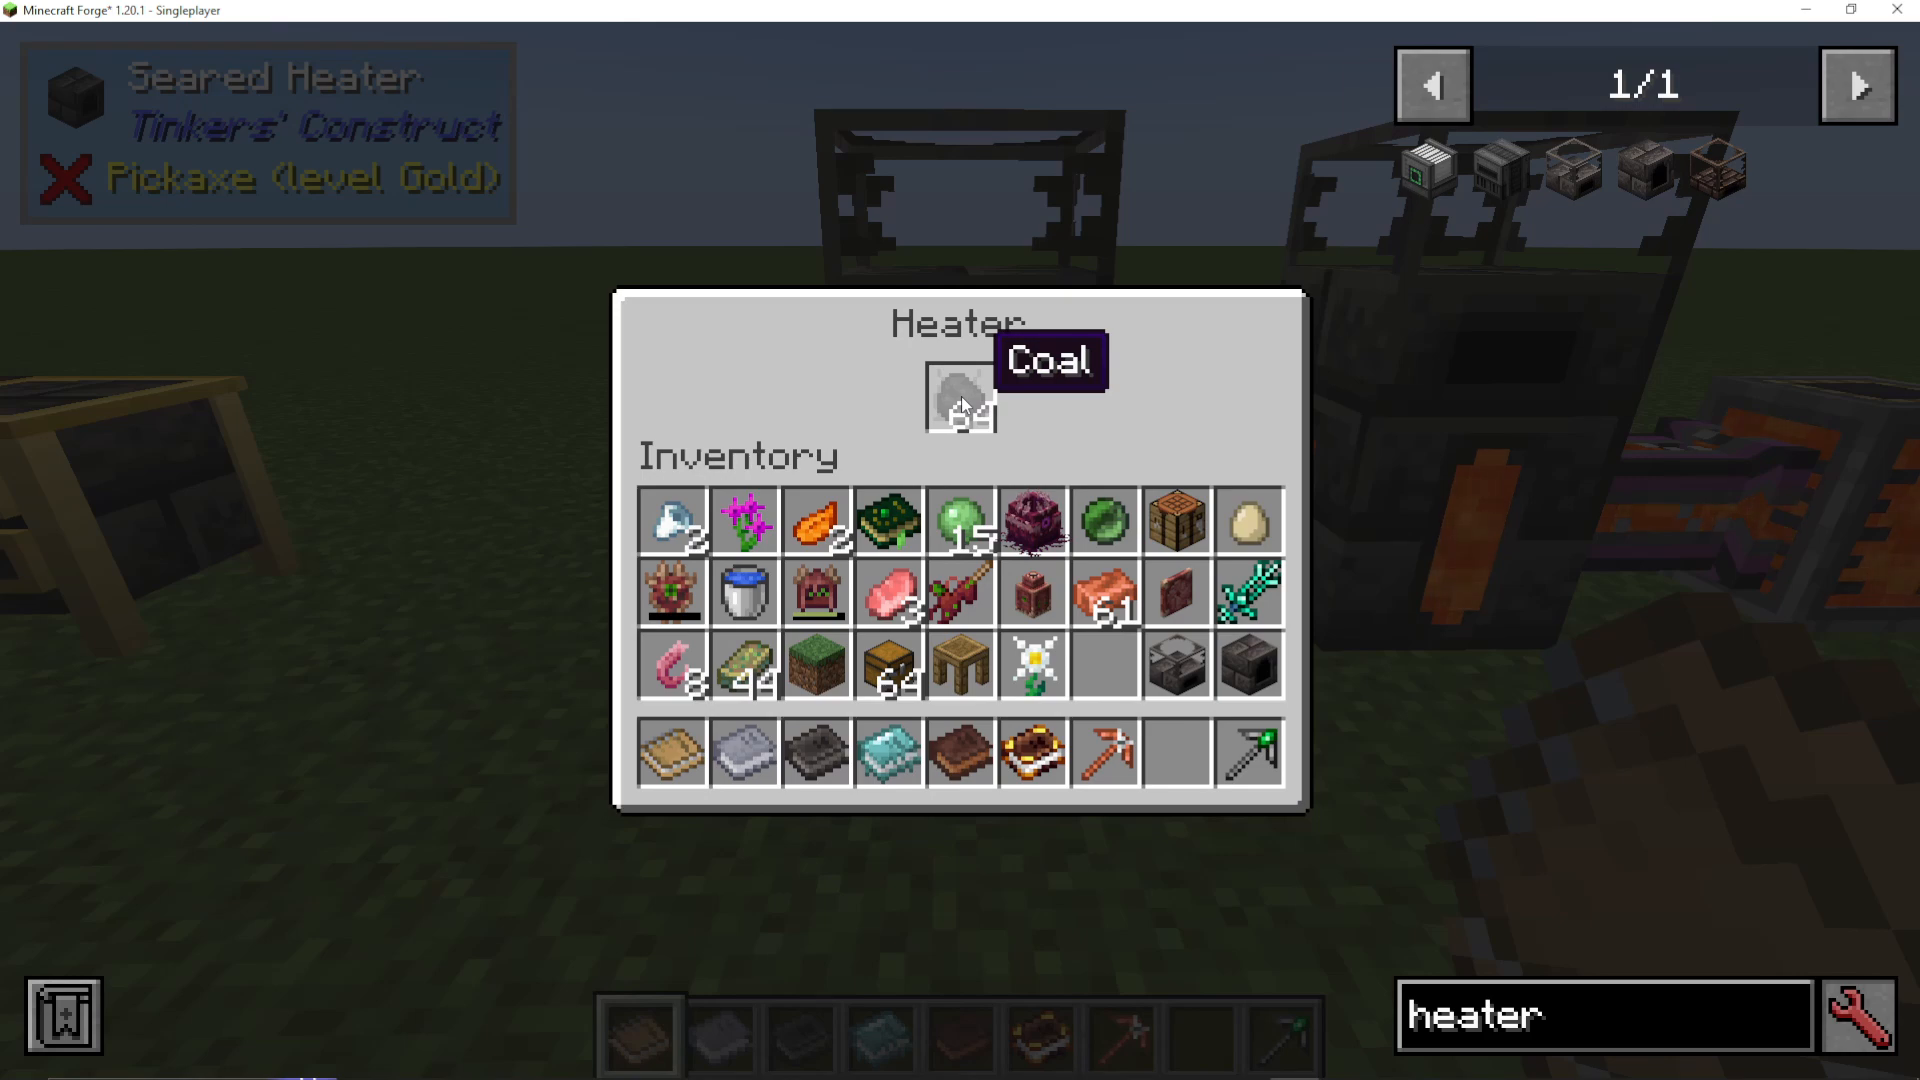
The Seared Heater vs. Seared Fuel Tank
Seared Heater: Uses coal or other solid burnable fuel to heat a melter on top of it. Good for starting out.
Seared Fuel Tank: Uses lava as fuel. Some ingots require specific heat levels that only lava can provide. Ideally, go straight for the fuel tank if possible.
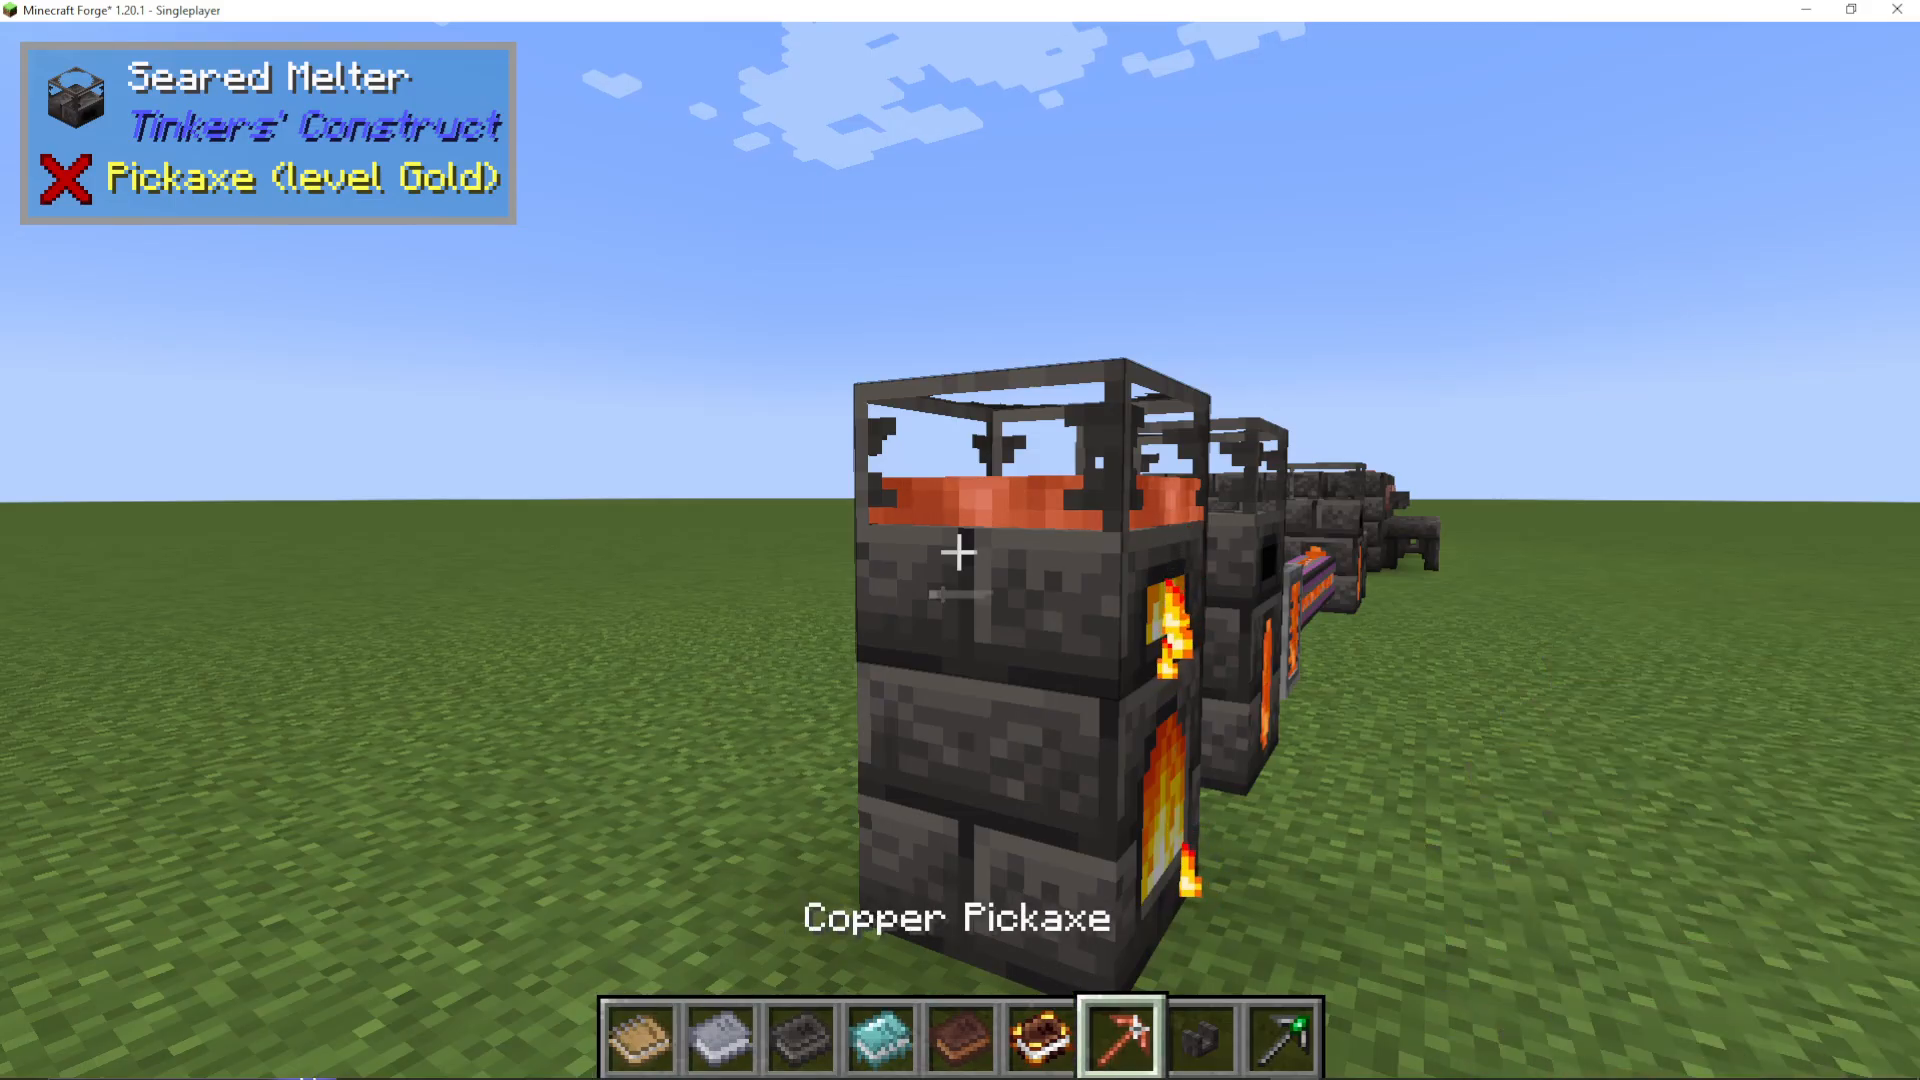
On top of either of these, place a Seared Melter where you’ll put your ores.
The Casting Table and Creating Tool Casts
Basic Casting Setup
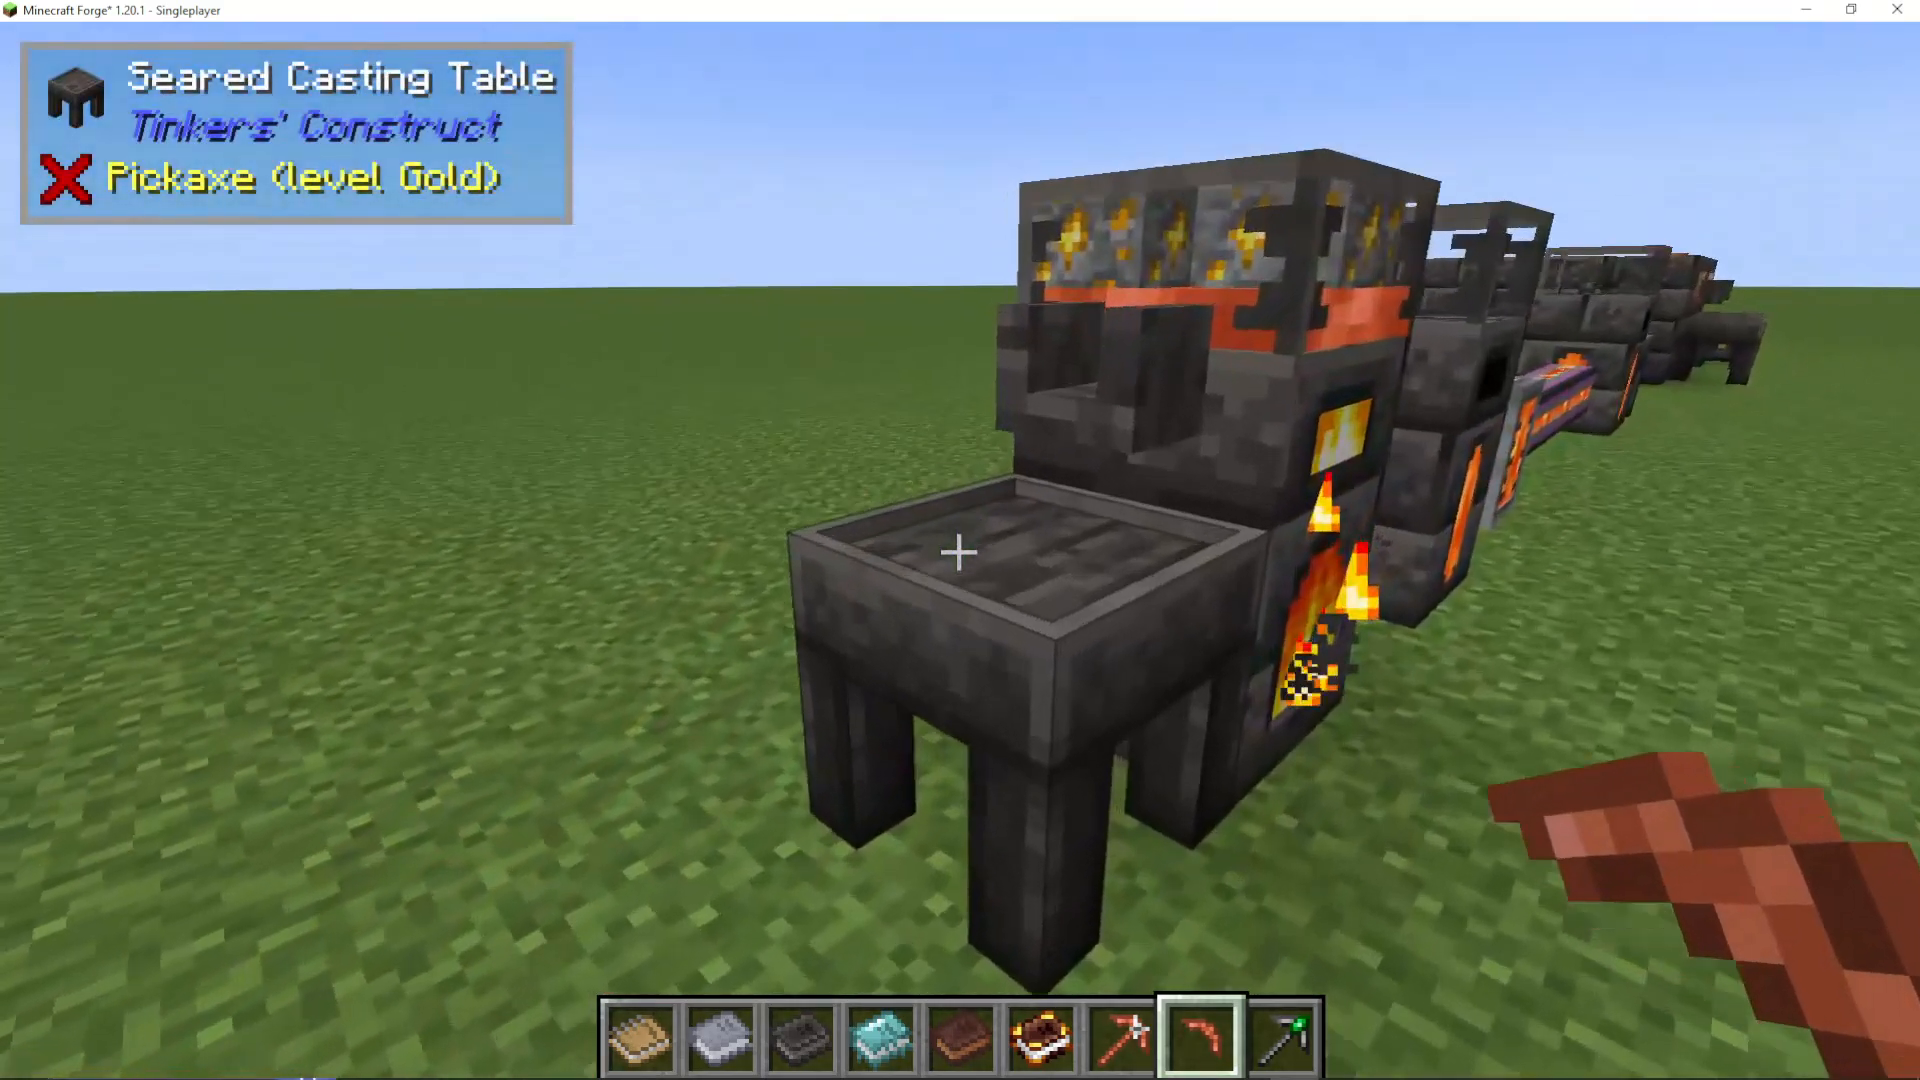
Once you have molten copper (or another metal) in your Seared Melter, you can use a Seared Faucet to pour it. Set up a Seared Casting Table below the faucet to create casts.
Place a tool part (like a pickhead made from cobblestone) into the casting table, then right-click the faucet to pour molten metal around it. This creates a gold cast
Using Gold Casts for Mass Production
Once you have a gold cast, you can pour different molten metals into it repeatedly to create parts from different materials without having to remake molds. For example, pour molten iron into your copper pickhead cast to create an iron pickhead.
Building a Full Smeltry Structure
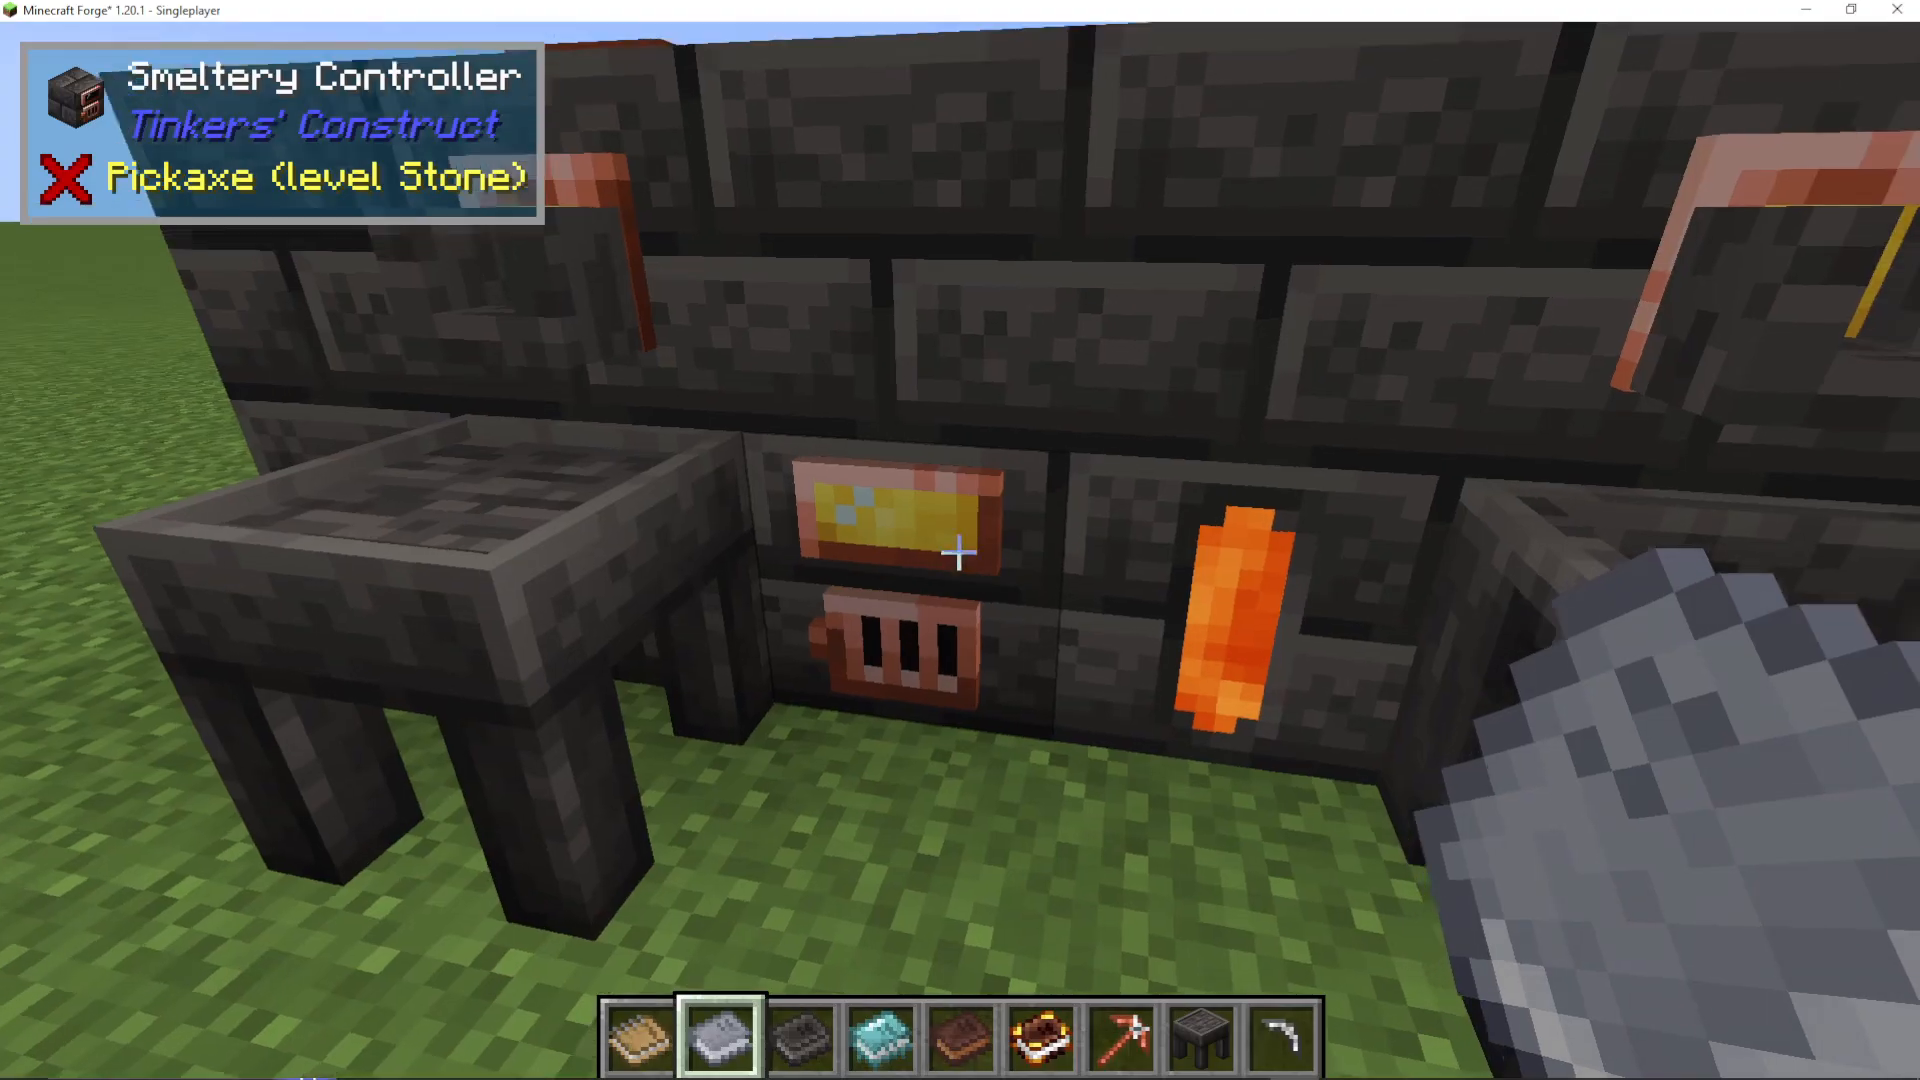
Smeltry Layout and Components
A Smeltry is a multi-block structure you can customize in size (for example, 3×3 or larger). The requirements are:
All walls and floors made of Seared Bricks (or Seared Cobblestone)
No corner blocks needed, but interior must be hollow
A Smeltry Controller (the main block that controls the structure)
A Seared Fuel Tank (to heat the structure)
Multiple Seared Drains (to extract liquids)
Seared Casting Tables and Casting Basins (for molding)
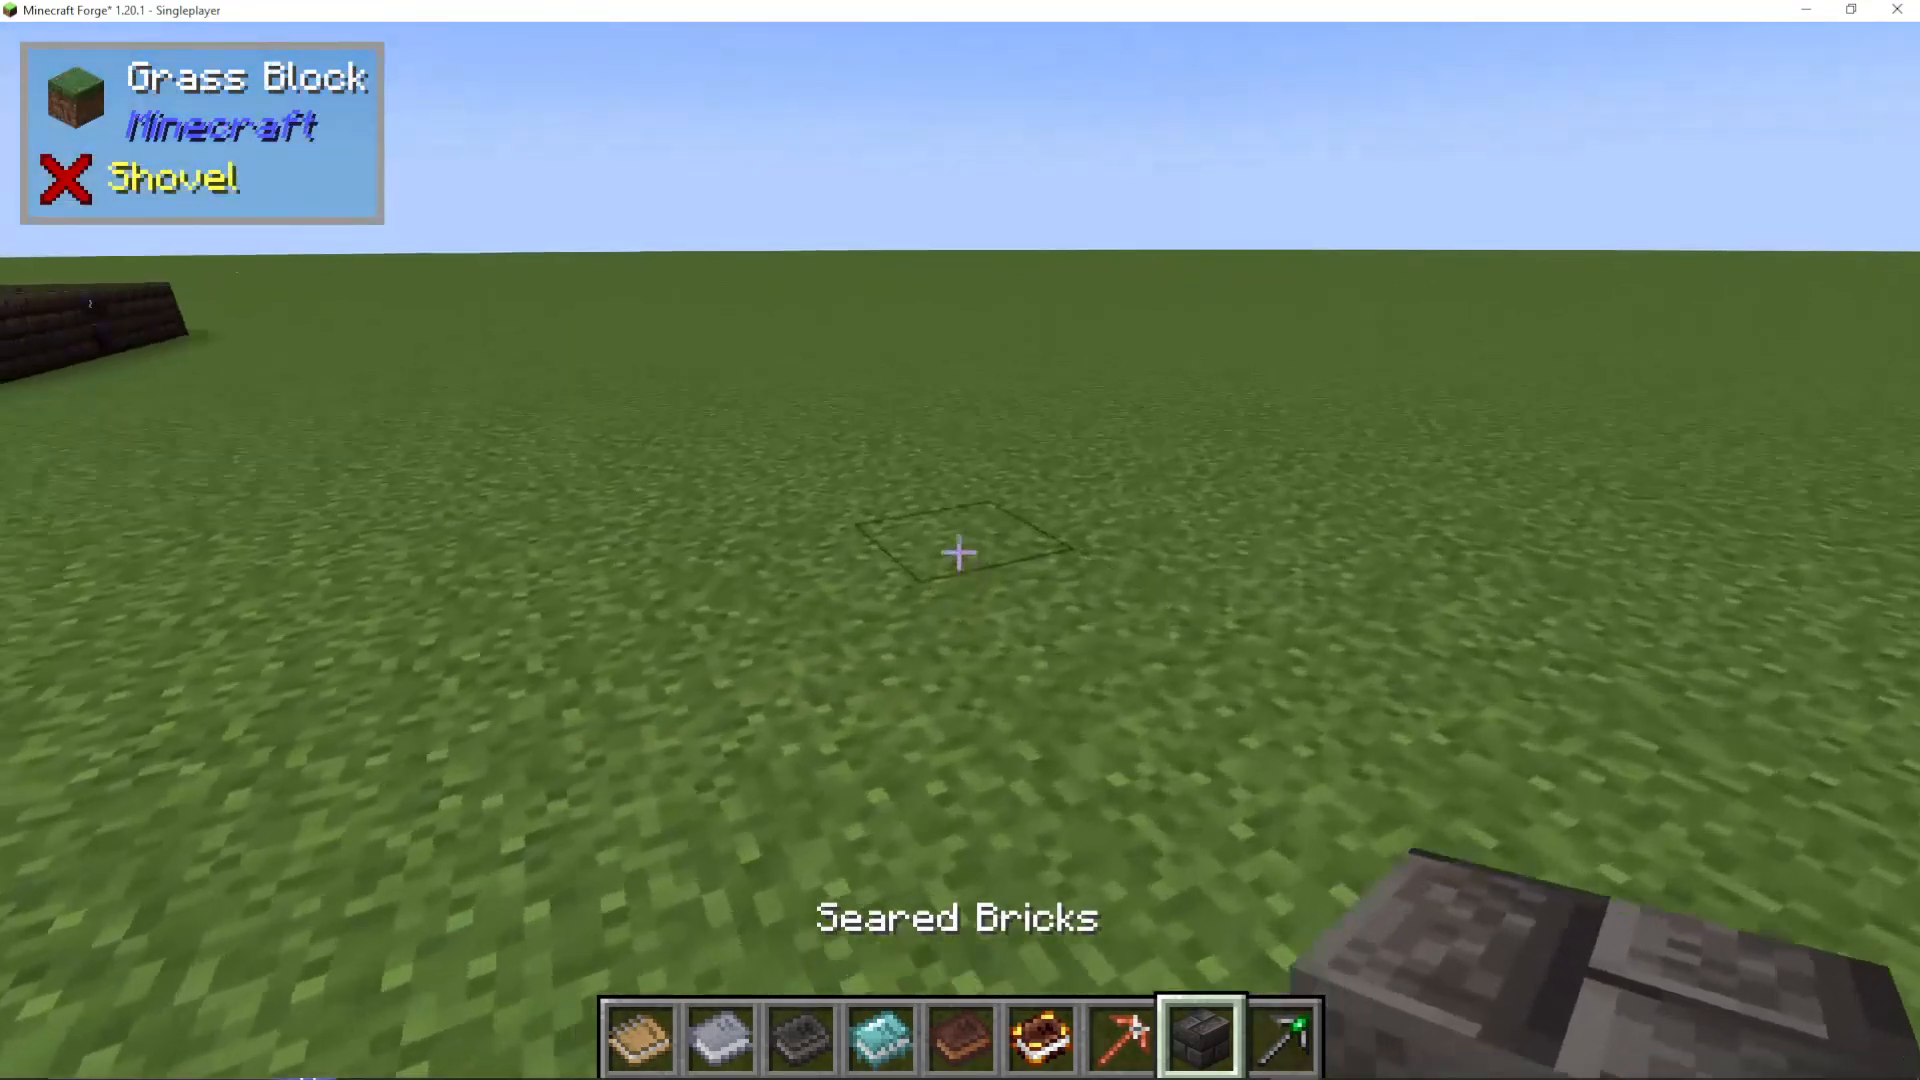
Making the Smeltry Controller
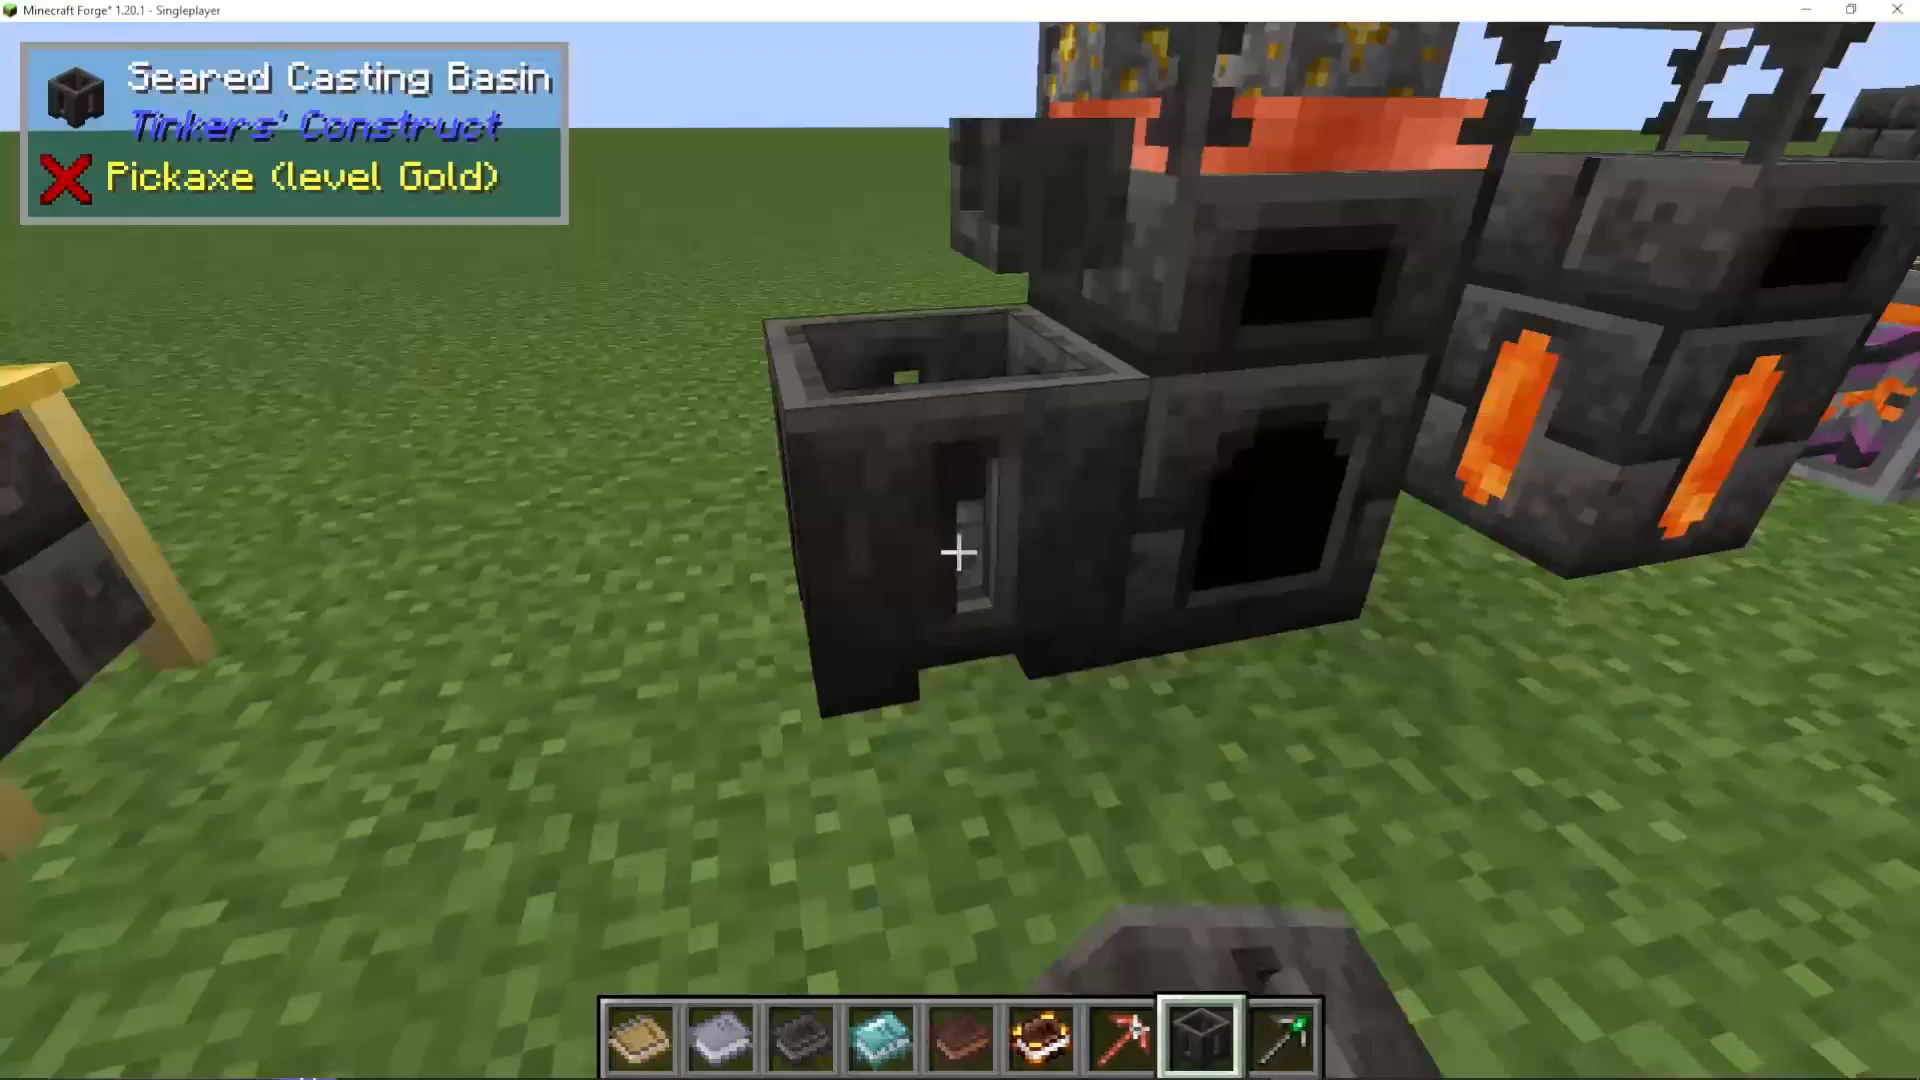
To create a Smeltry Controller:
Place a Seared Casting Basin
Put a Seared Brick inside it
Pour molten copper over the brick using a Seared Faucet
Wait for it to cool
Right-click the basin to retrieve the Smeltry Controller
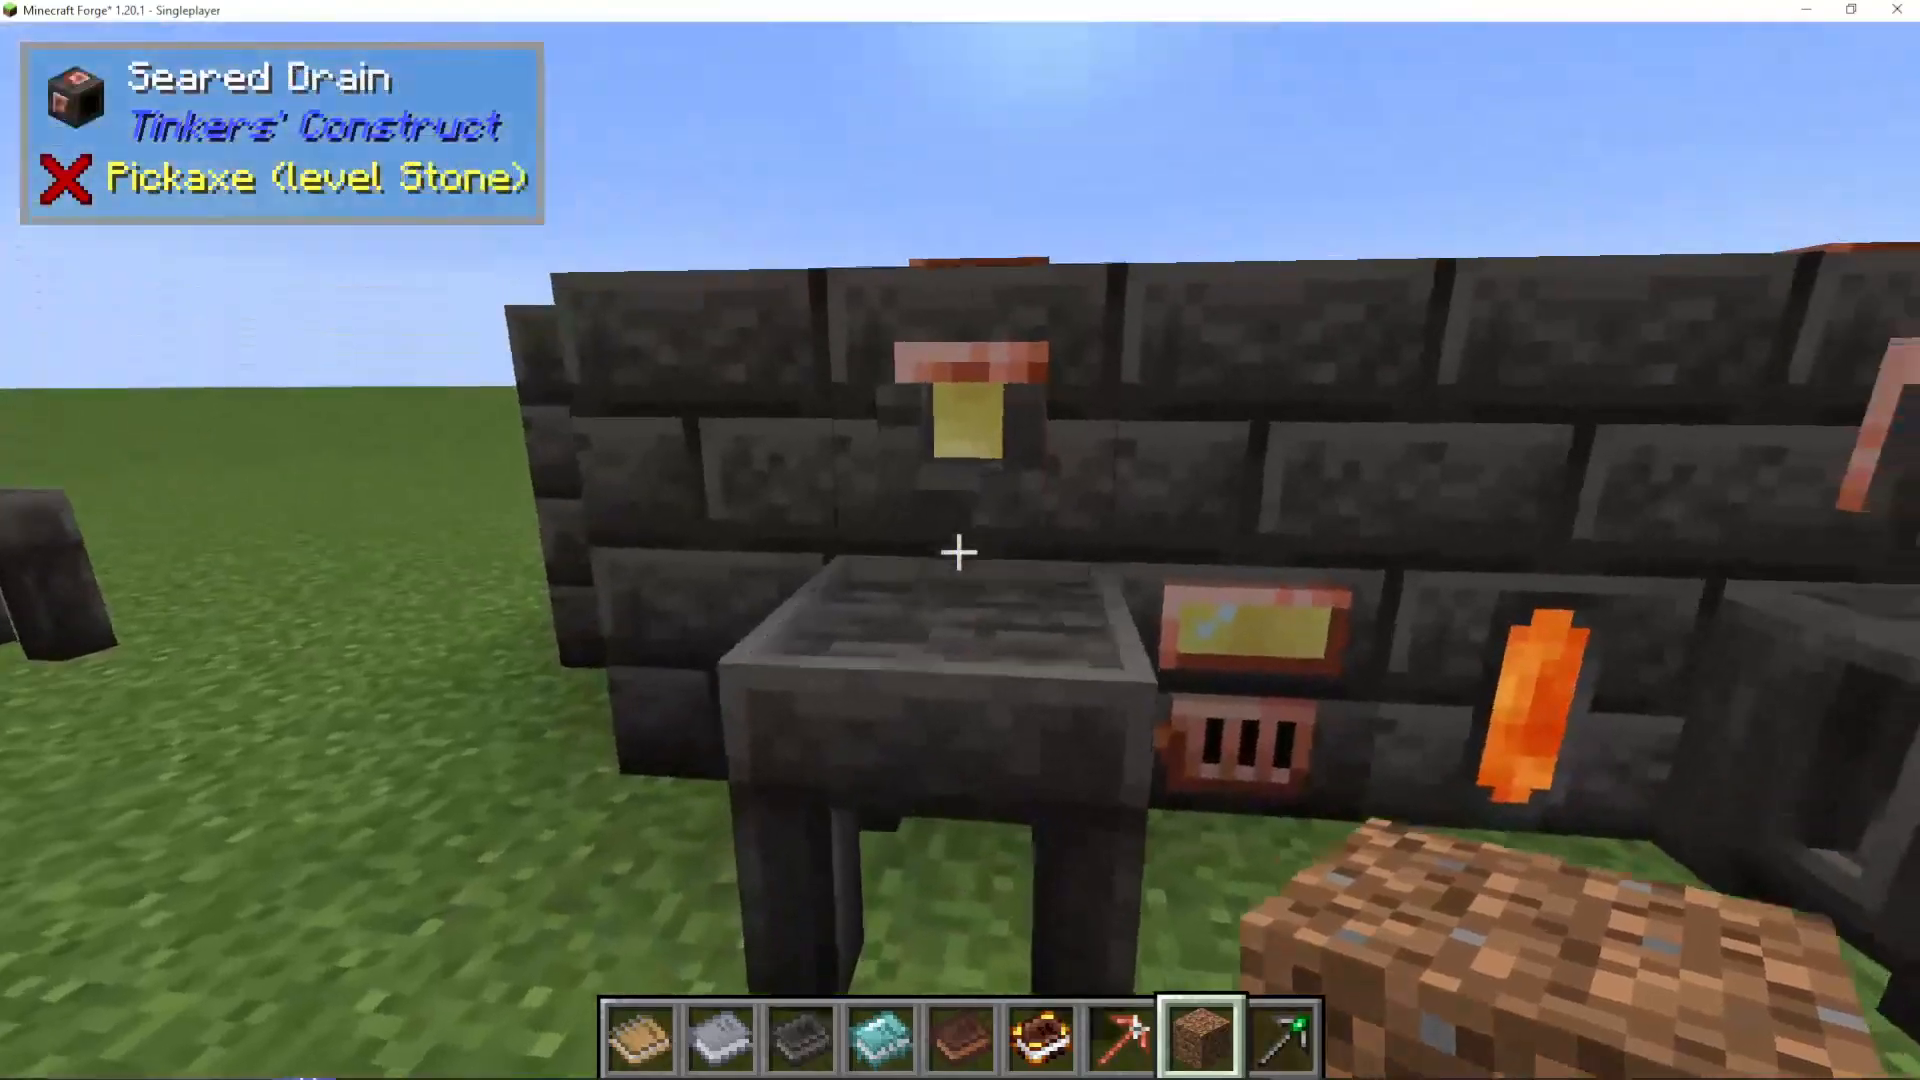
Seared Drains and Faucets
Seared Drains are made from two copper ingots and one Seared Brick. These drains let you extract liquids from the Smeltry. Attach Seared Faucets to the drain holes so liquid can flow out into casting tables or basins.
You’ll want multiple drains: one for the casting basin and one for the casting table.
Advanced Casting and Metal Management
Storing and Sorting Molten Metals
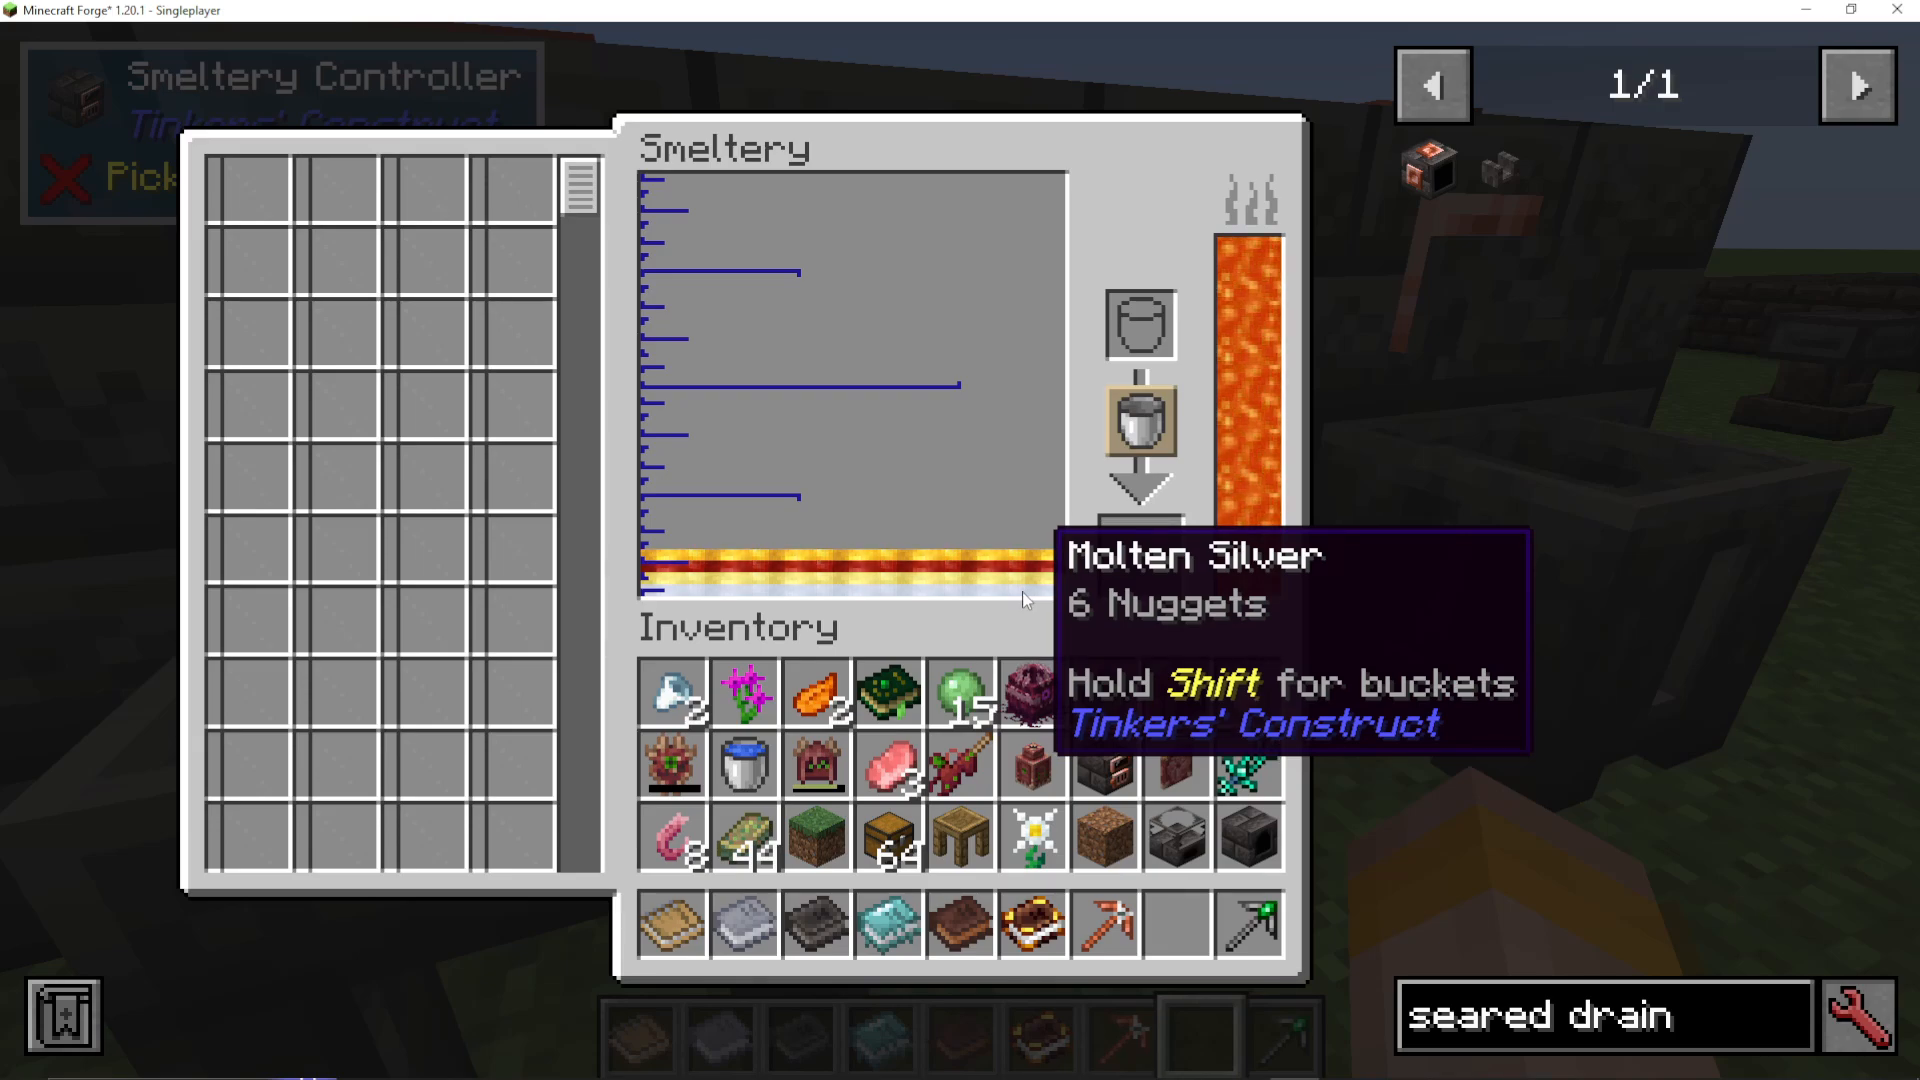
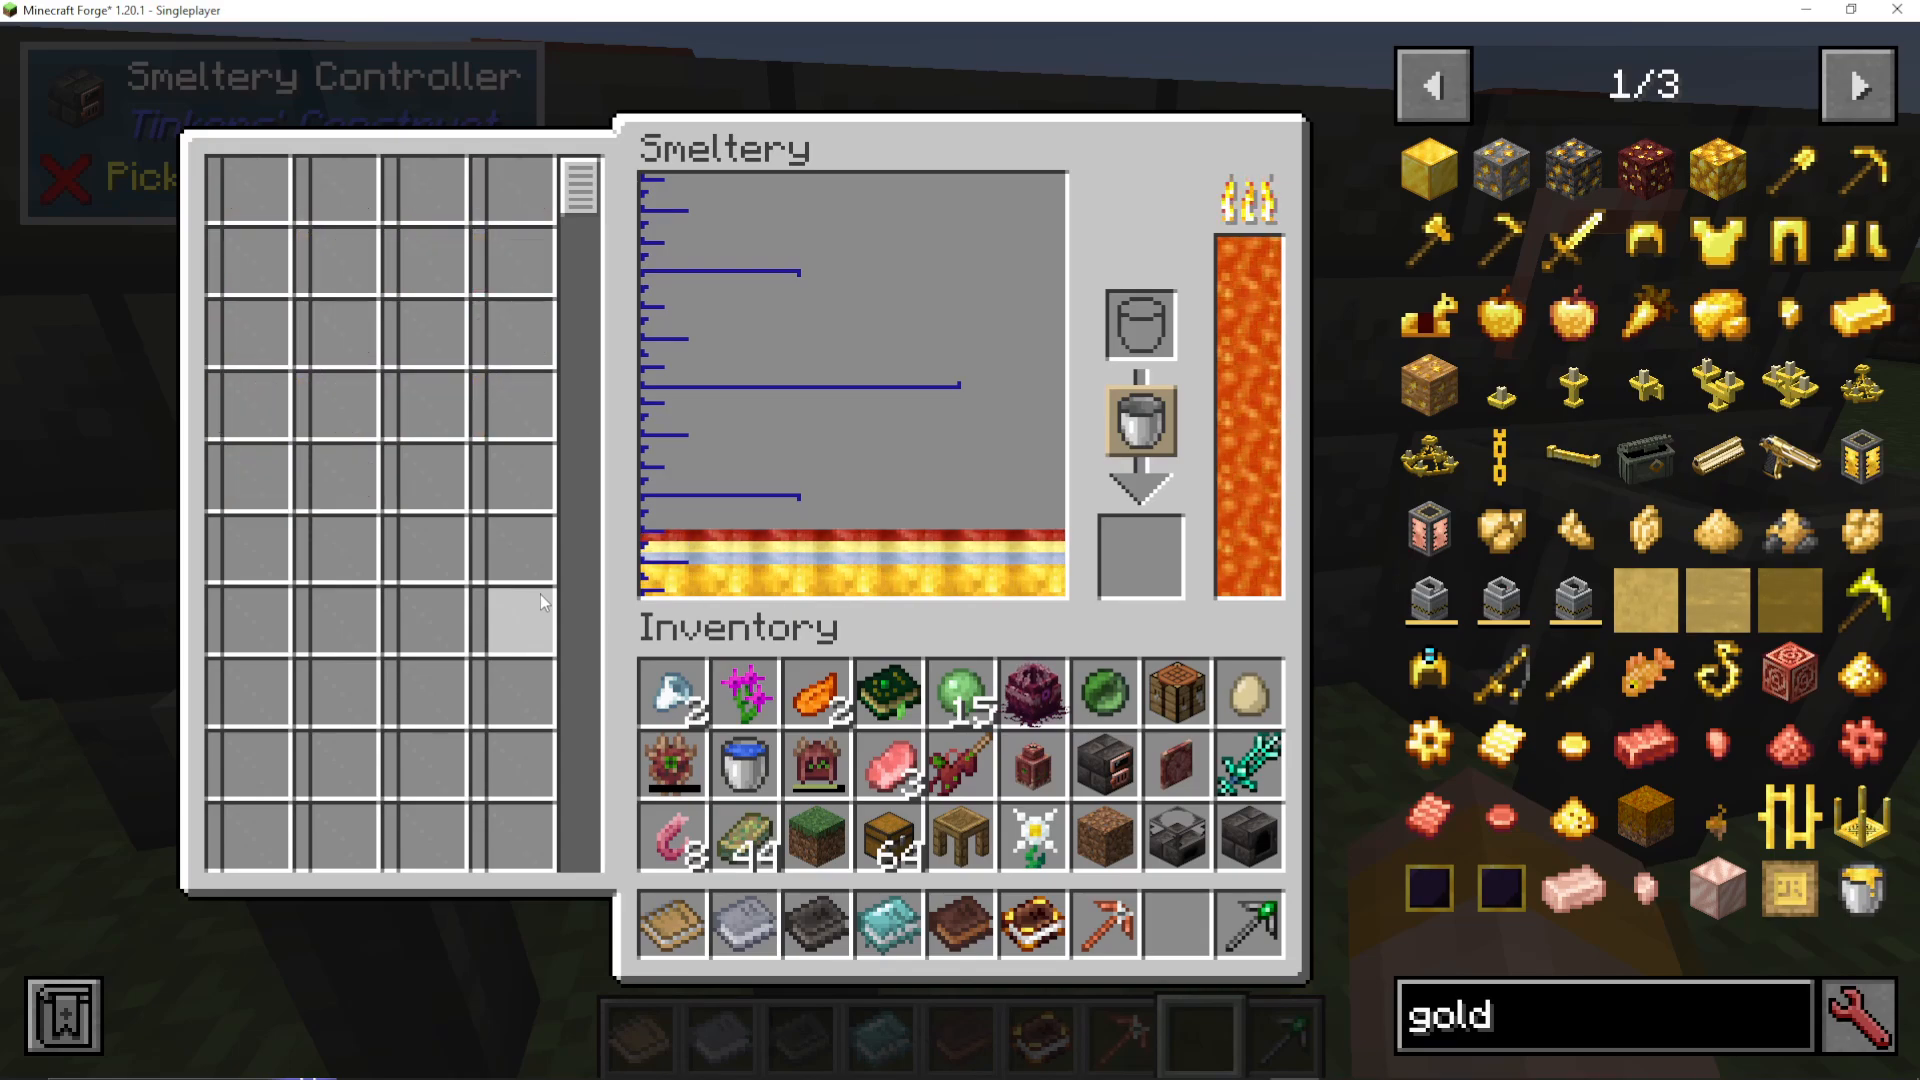
The Smeltry can hold enormous amounts of molten metal at once. You can see all molten materials stacked in the tank, with the bottom one being what will flow out next.
To change which metal comes out:
Left-click any molten metal in the list to move it to the bottom (next in queue)
Understanding Alloys
When you combine certain molten metals in the Smeltry, they automatically alloy together. For example:
Molten Gold + Molten Silver = Molten Electrum
Important: The Smeltry is the only way to create alloy ingots in Tinkers Construct. Sometimes you want alloys, but sometimes you don’t—be careful when smelting multiple metals at once.
Making Blocks from Molten Metal
Instead of making ingots, you can pour molten metal into a Seared Casting Basin to create full blocks. This is useful for building or storing large quantities of metal.
The Cast Chest and Modifier Work Table
Storing Your Casts
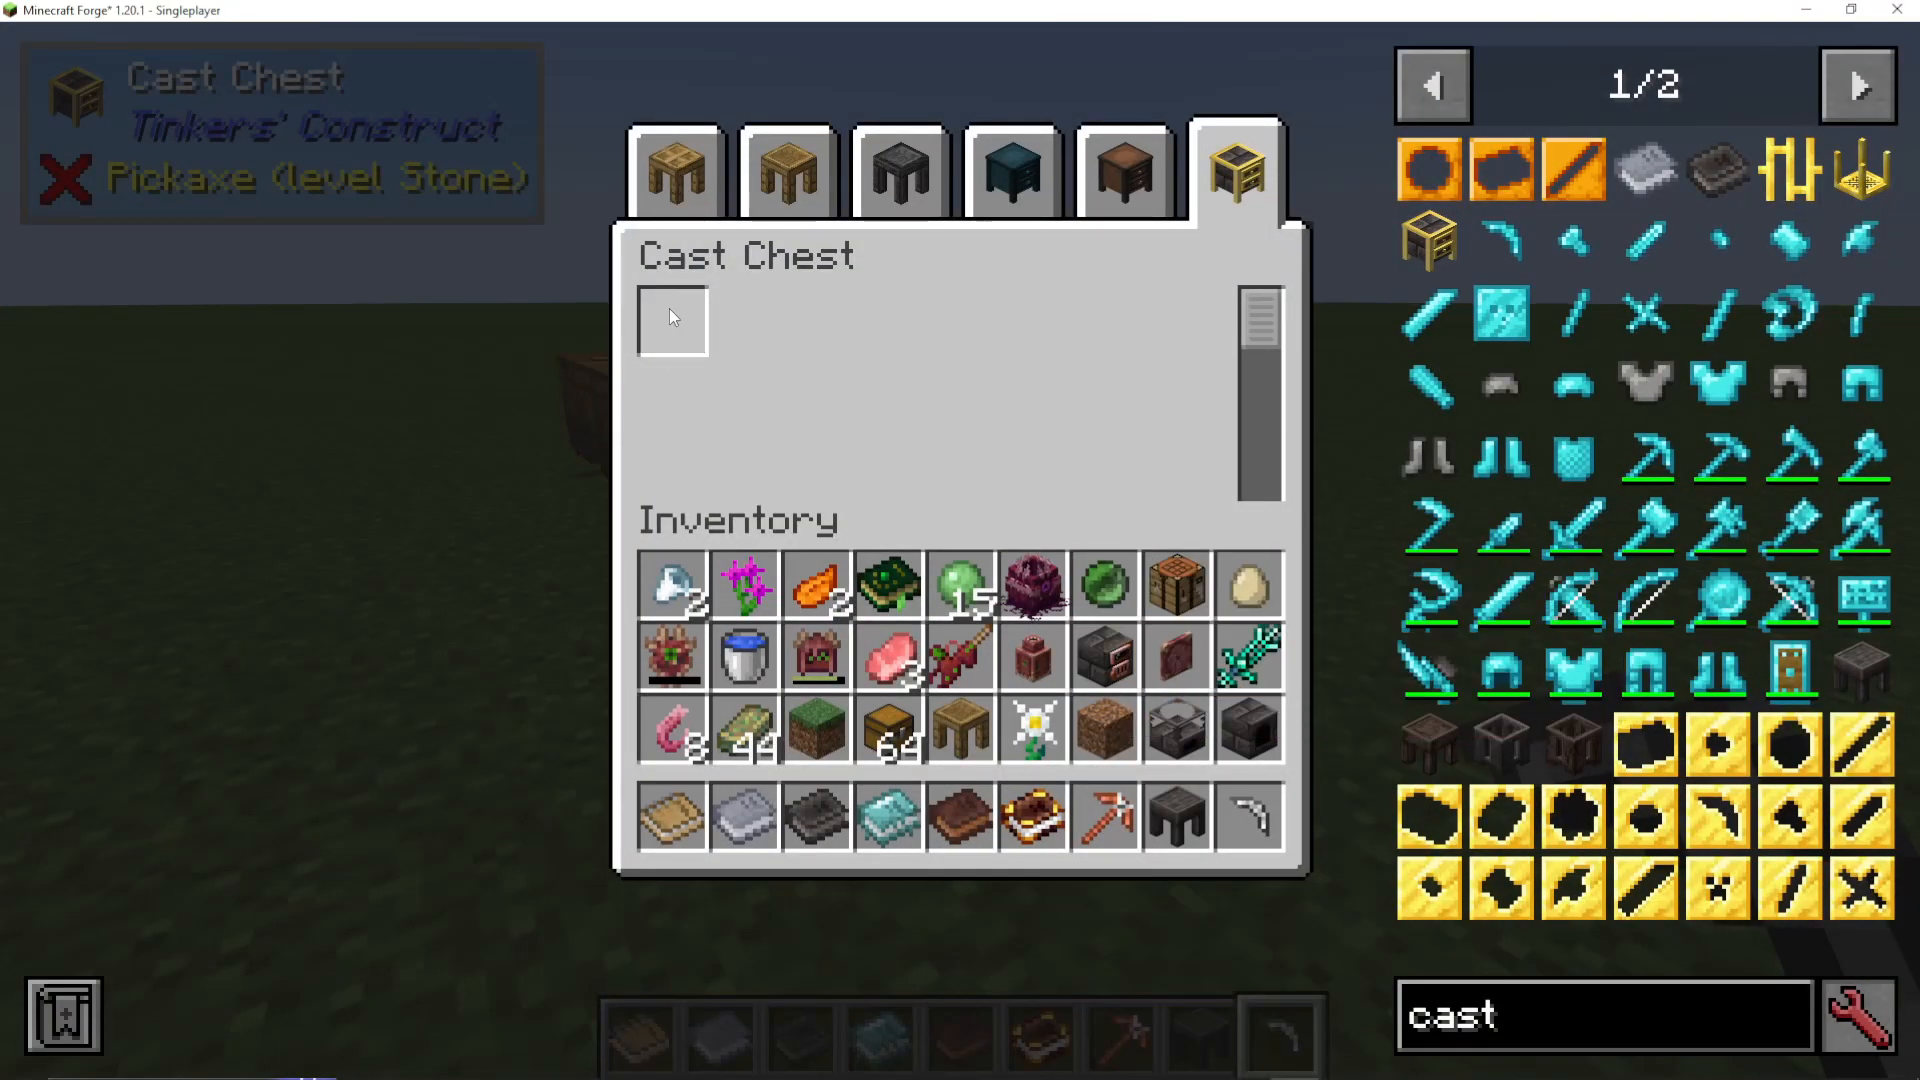
A Cast Chest is designed specifically to store all your tool casts. Simply place your casts into the chest, and it will organize them automatically. This keeps your inventory clean and organized.
Upgrading to the Modifier Work Table
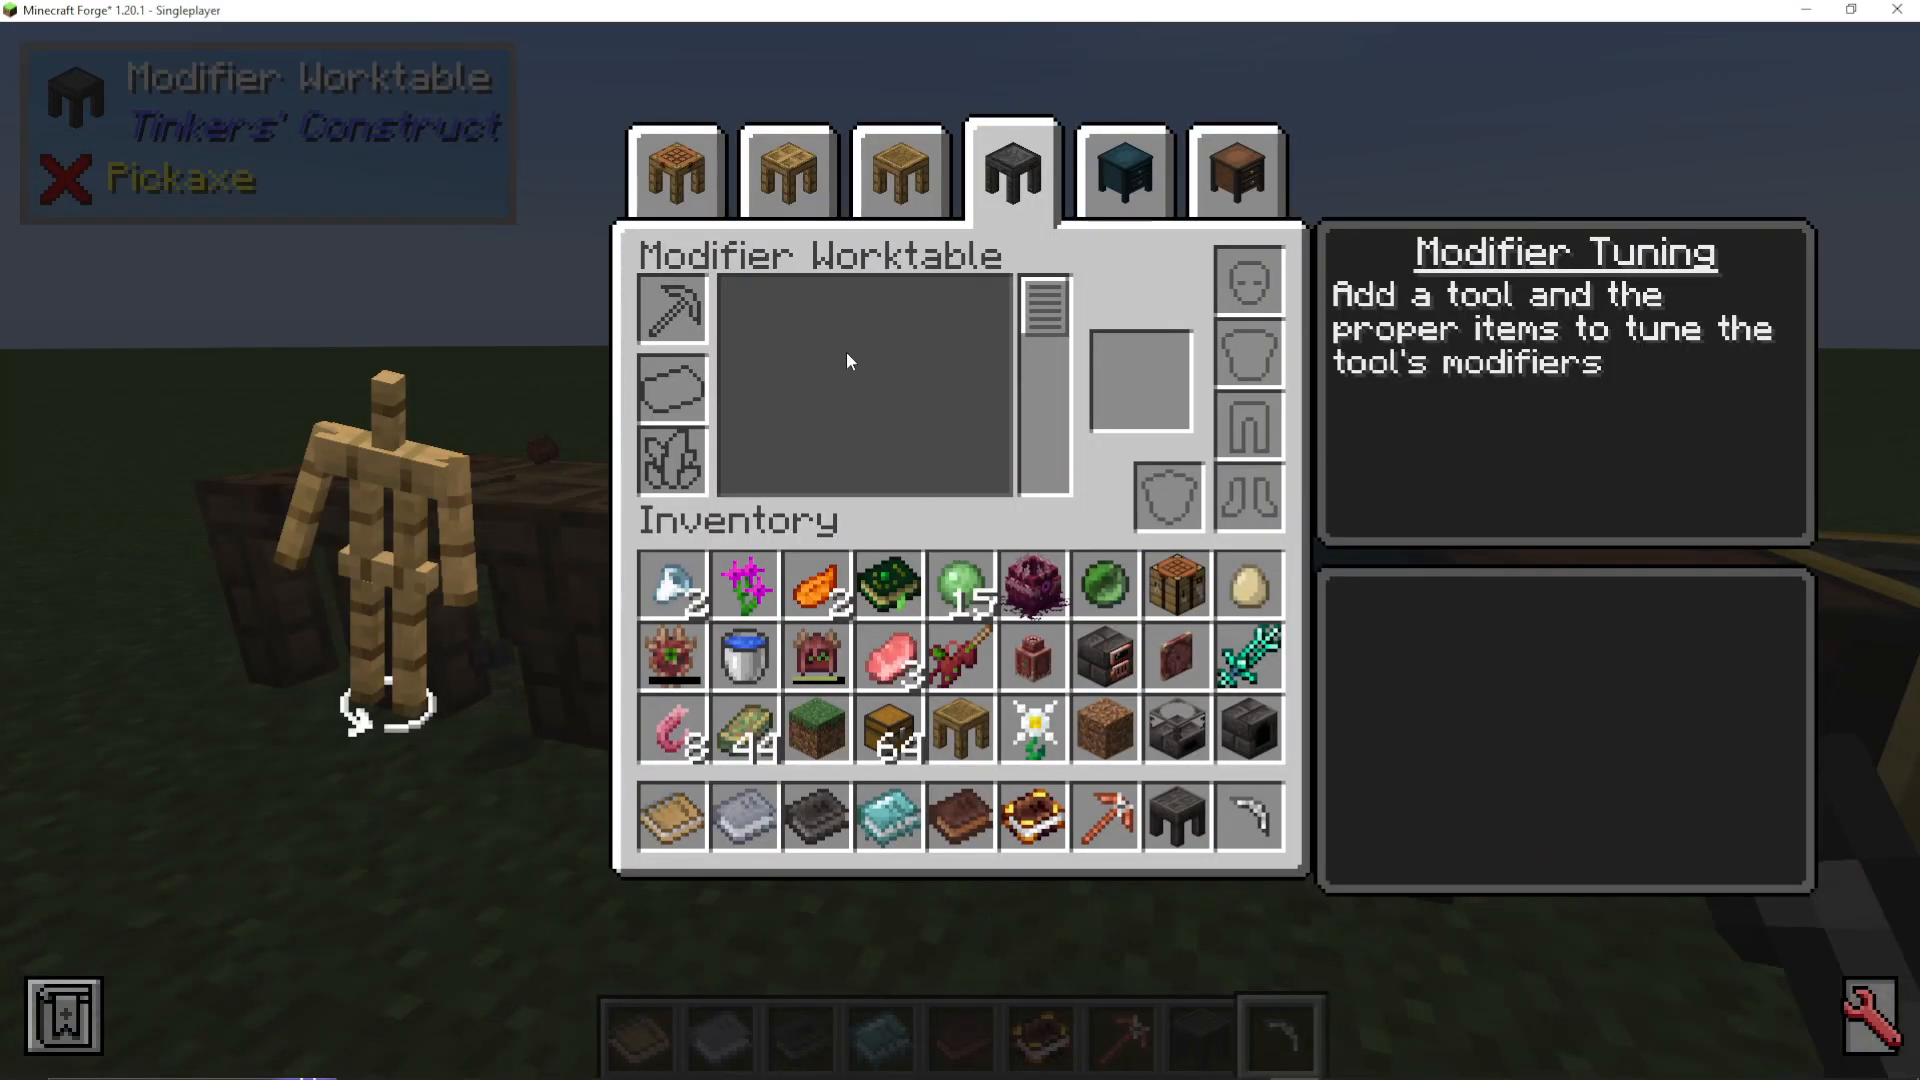
Once you have Seared Bricks, you can craft the Modifier Work Table, which is a much more advanced version of the Tinker Station. It provides many more options for adding and managing modifiers on your gear.
Tier 2 Materials
Available Tier 2 Materials
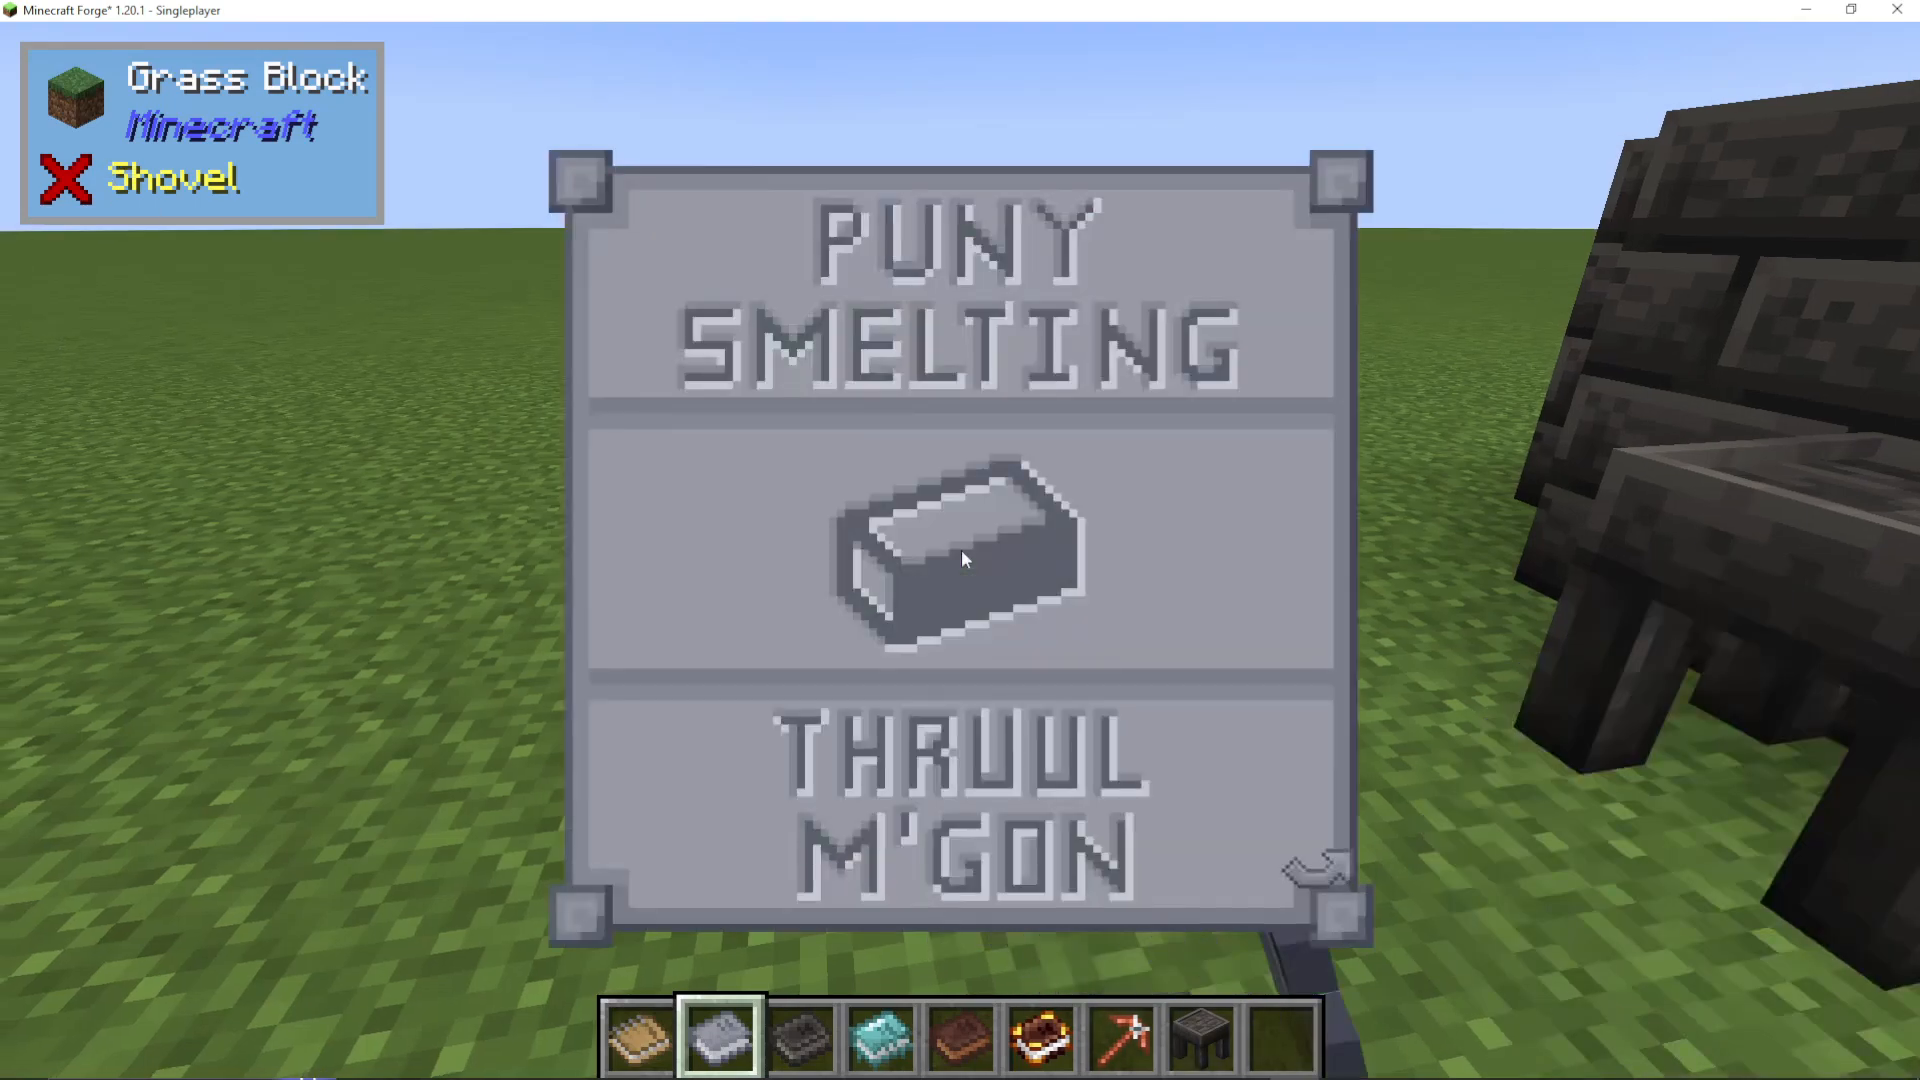
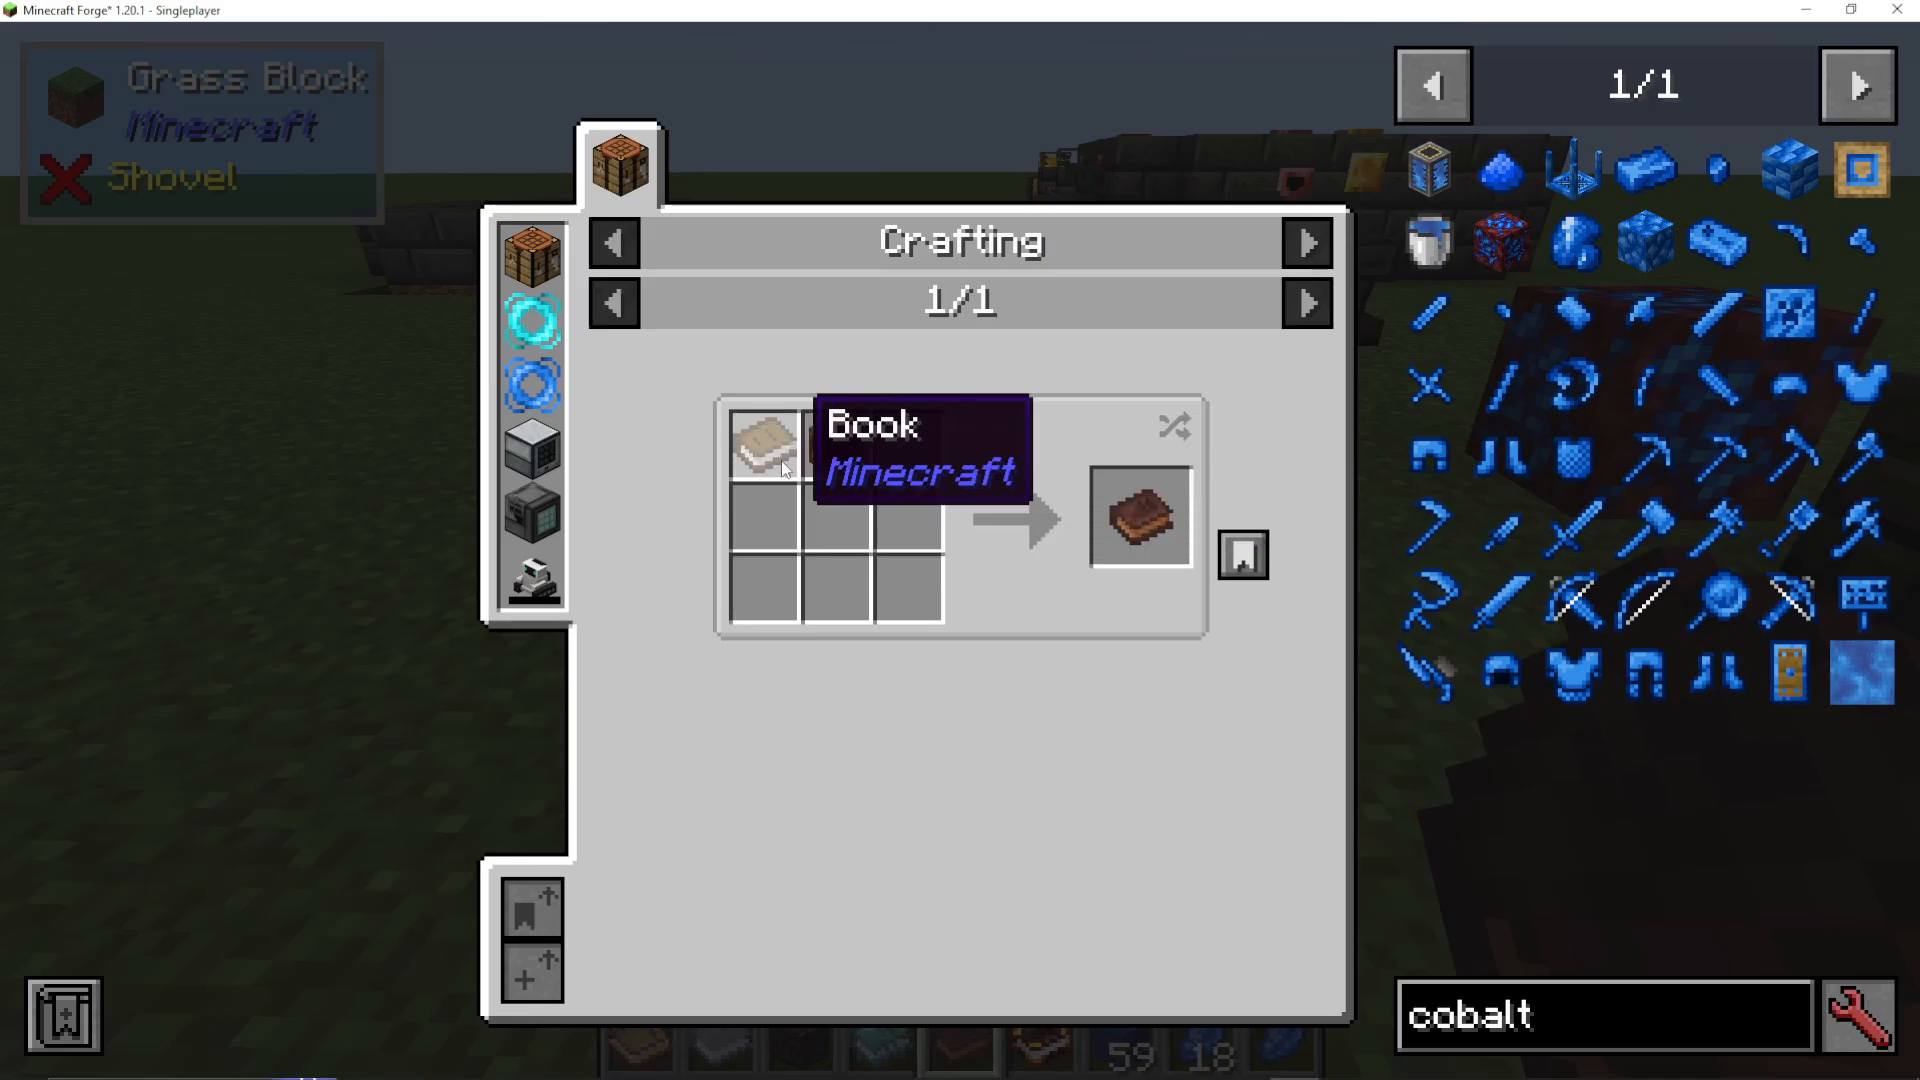
The “Puny Smelting” book (crafted from grout + book) details all tier 2 materials. Some examples include:
Iron
Seared Stone
Venom Bone
Slimewood
Osmium (if Mekanism is installed)
Lead
Silver
Necotic Bones
Scorched Stone
End Stone
Note: Available tier 2 materials depend on what mods are installed in your modpack. For example, Osmium only appears if Mekanism is present.
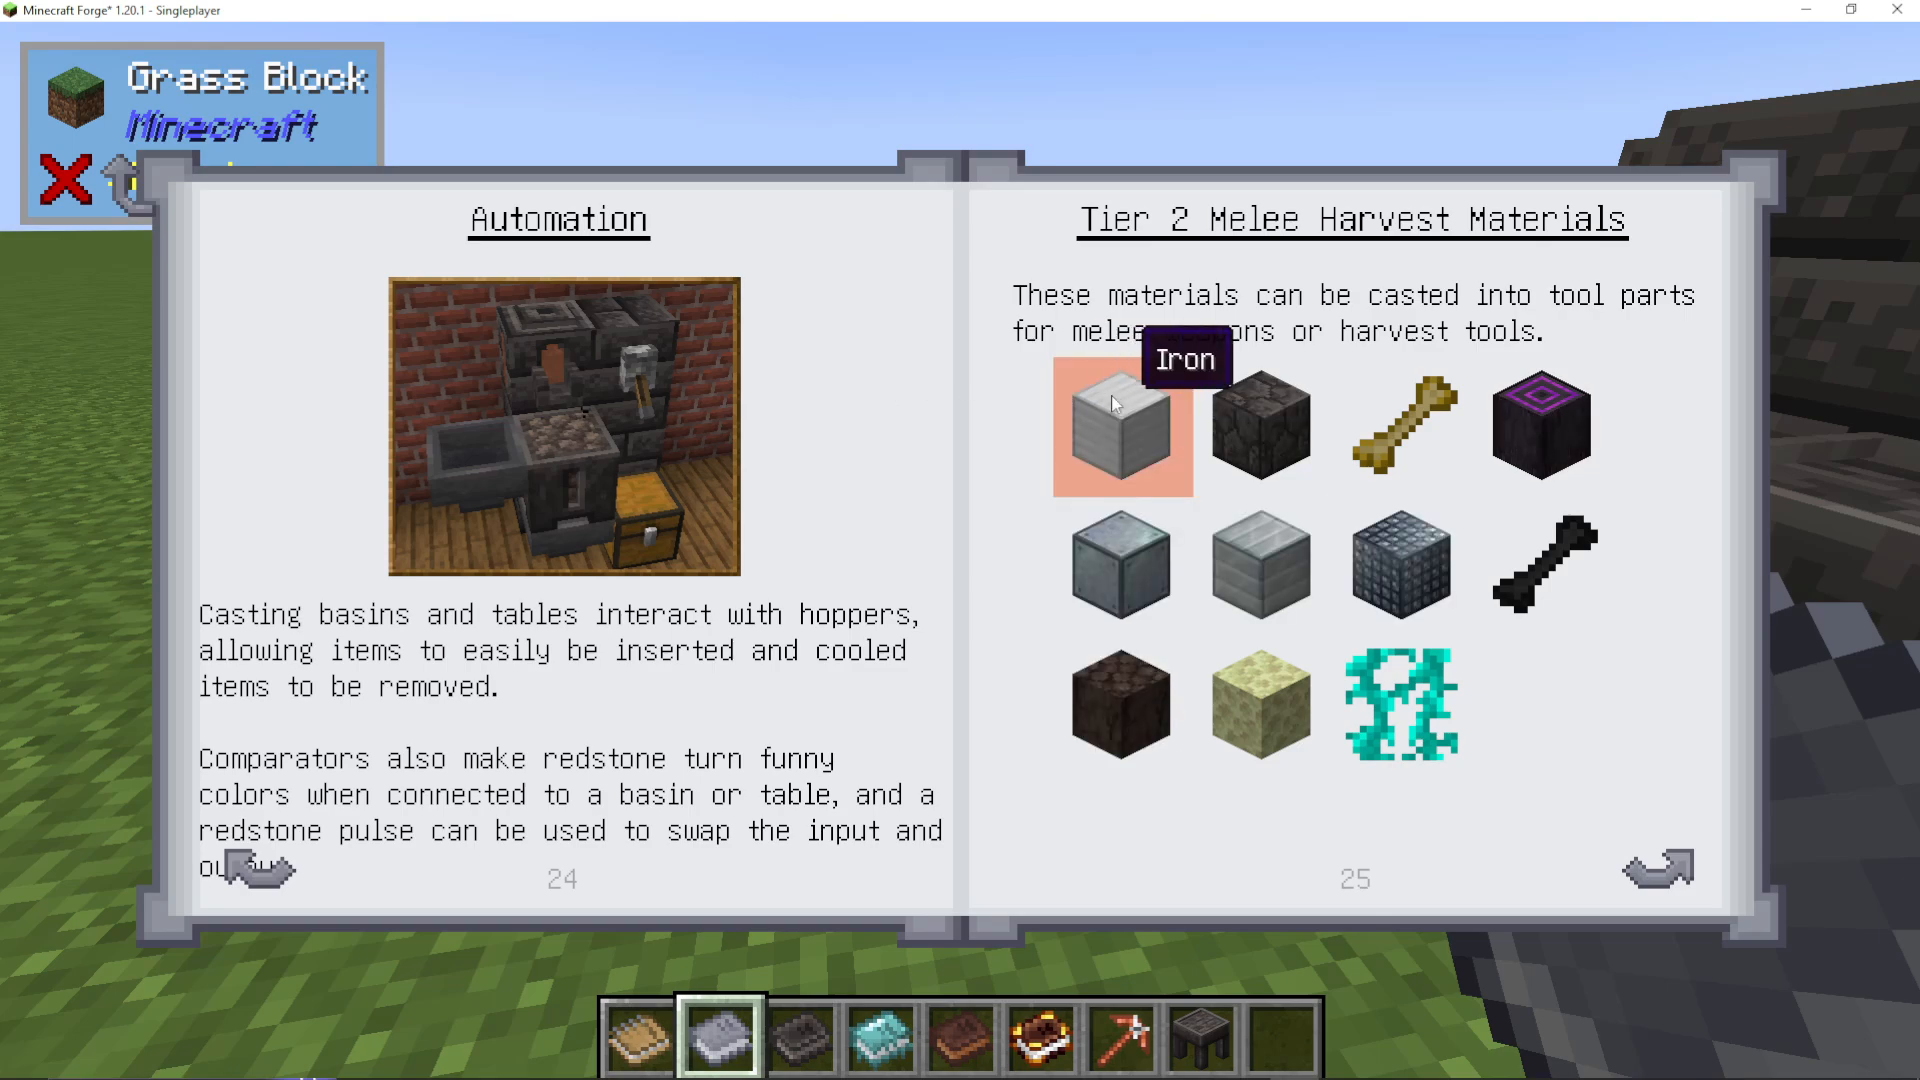
Using the Puny Smelting Book
The Puny Smelting book provides detailed information about:
Smeltry structure and operation
Melter setup with levers and hoppers for automation
Properties and stats of all tier 2 materials
Ranged weapon materials
Armor materials
Available modifiers and their effects
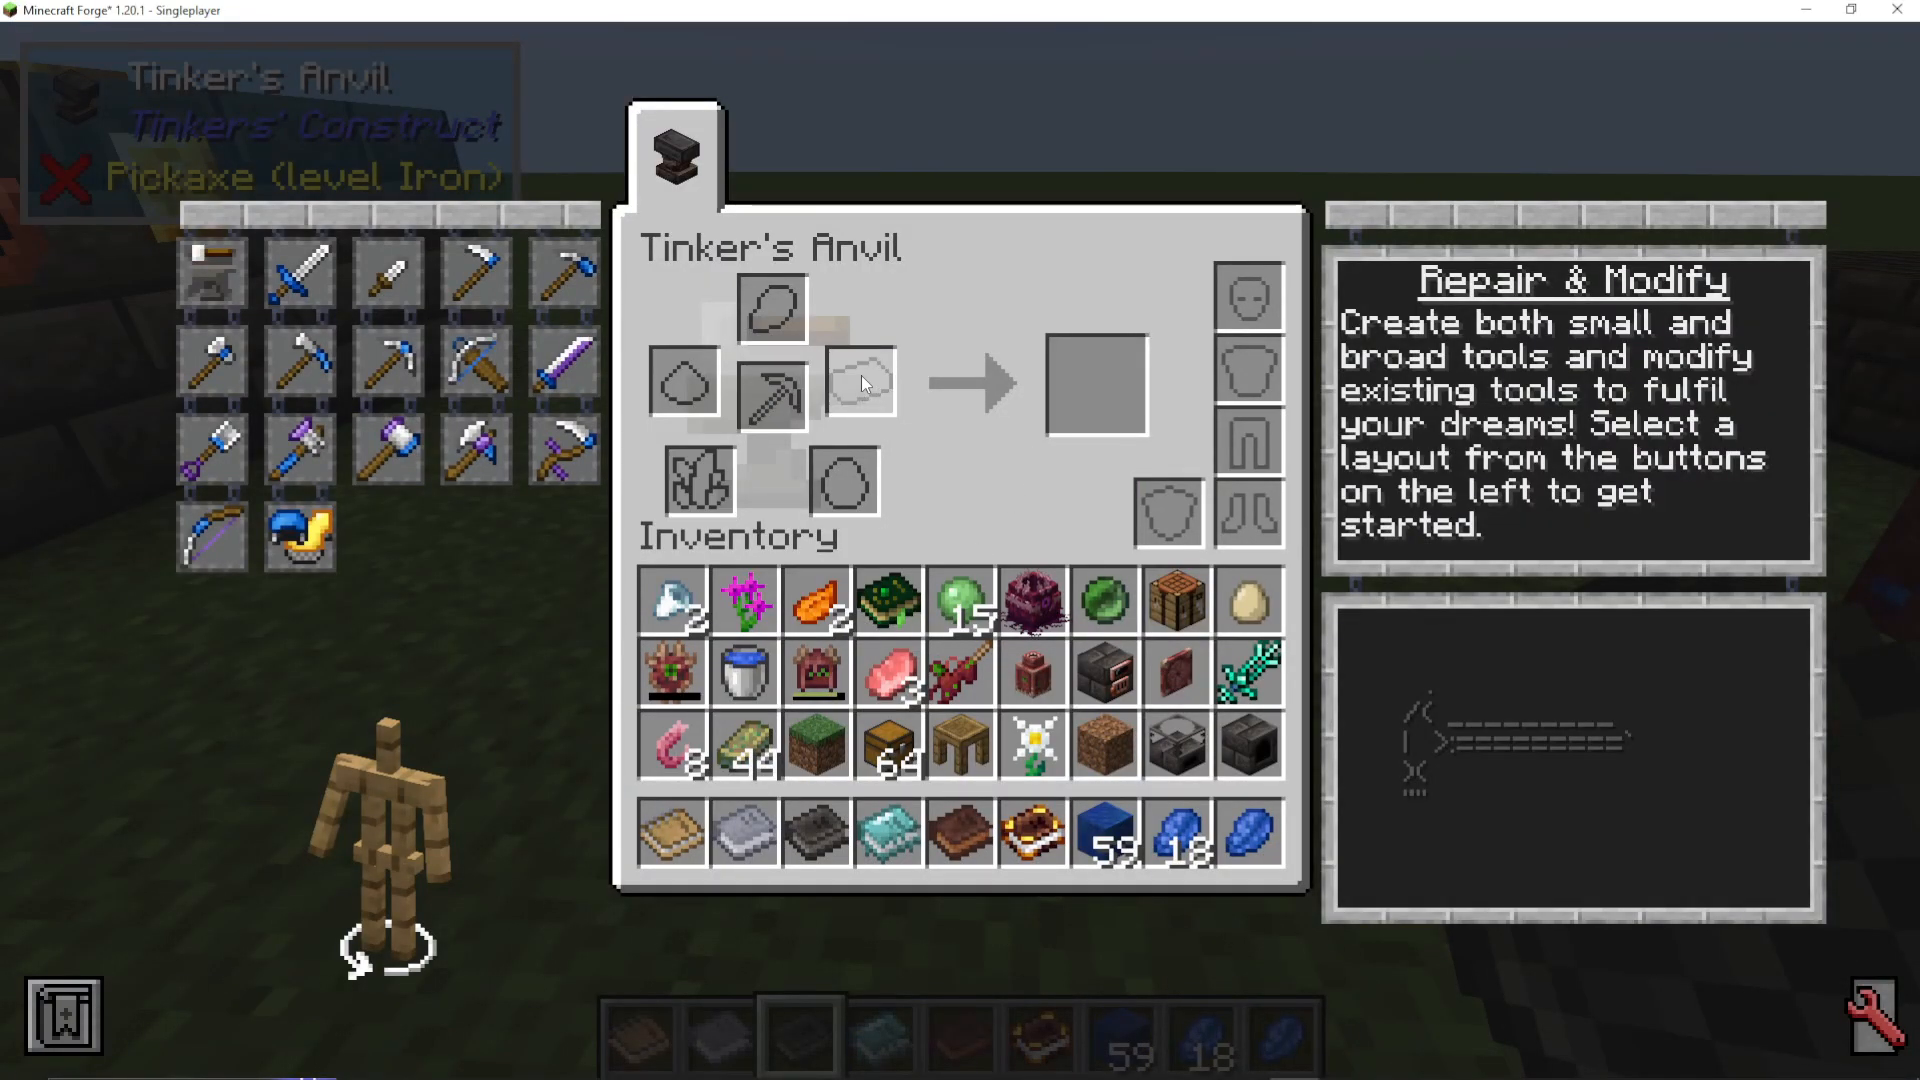
Advanced Tool Crafting with the Tinkers Anvil
What is the Tinkers Anvil?
Once you’ve progressed to tier 3 materials, you can craft a Tinkers Anvil—a much more advanced version of the Tinker Station. This anvil allows you to create much larger, more powerful tools.
Large Tool Types
The Tinkers Anvil lets you craft:
Sledgehammer: Mines in a 3×3 area and is highly effective against undead mobs.
Vein Hammer: A broad mining tool that harvests any connected blocks of the same type, useful for ore vein mining.
Broad Axe: Fell small trees with a single swing and makes quick work of large trees.
Excavator: Digs in a 3×3 area and is perfect for dirt and gravel blocks.
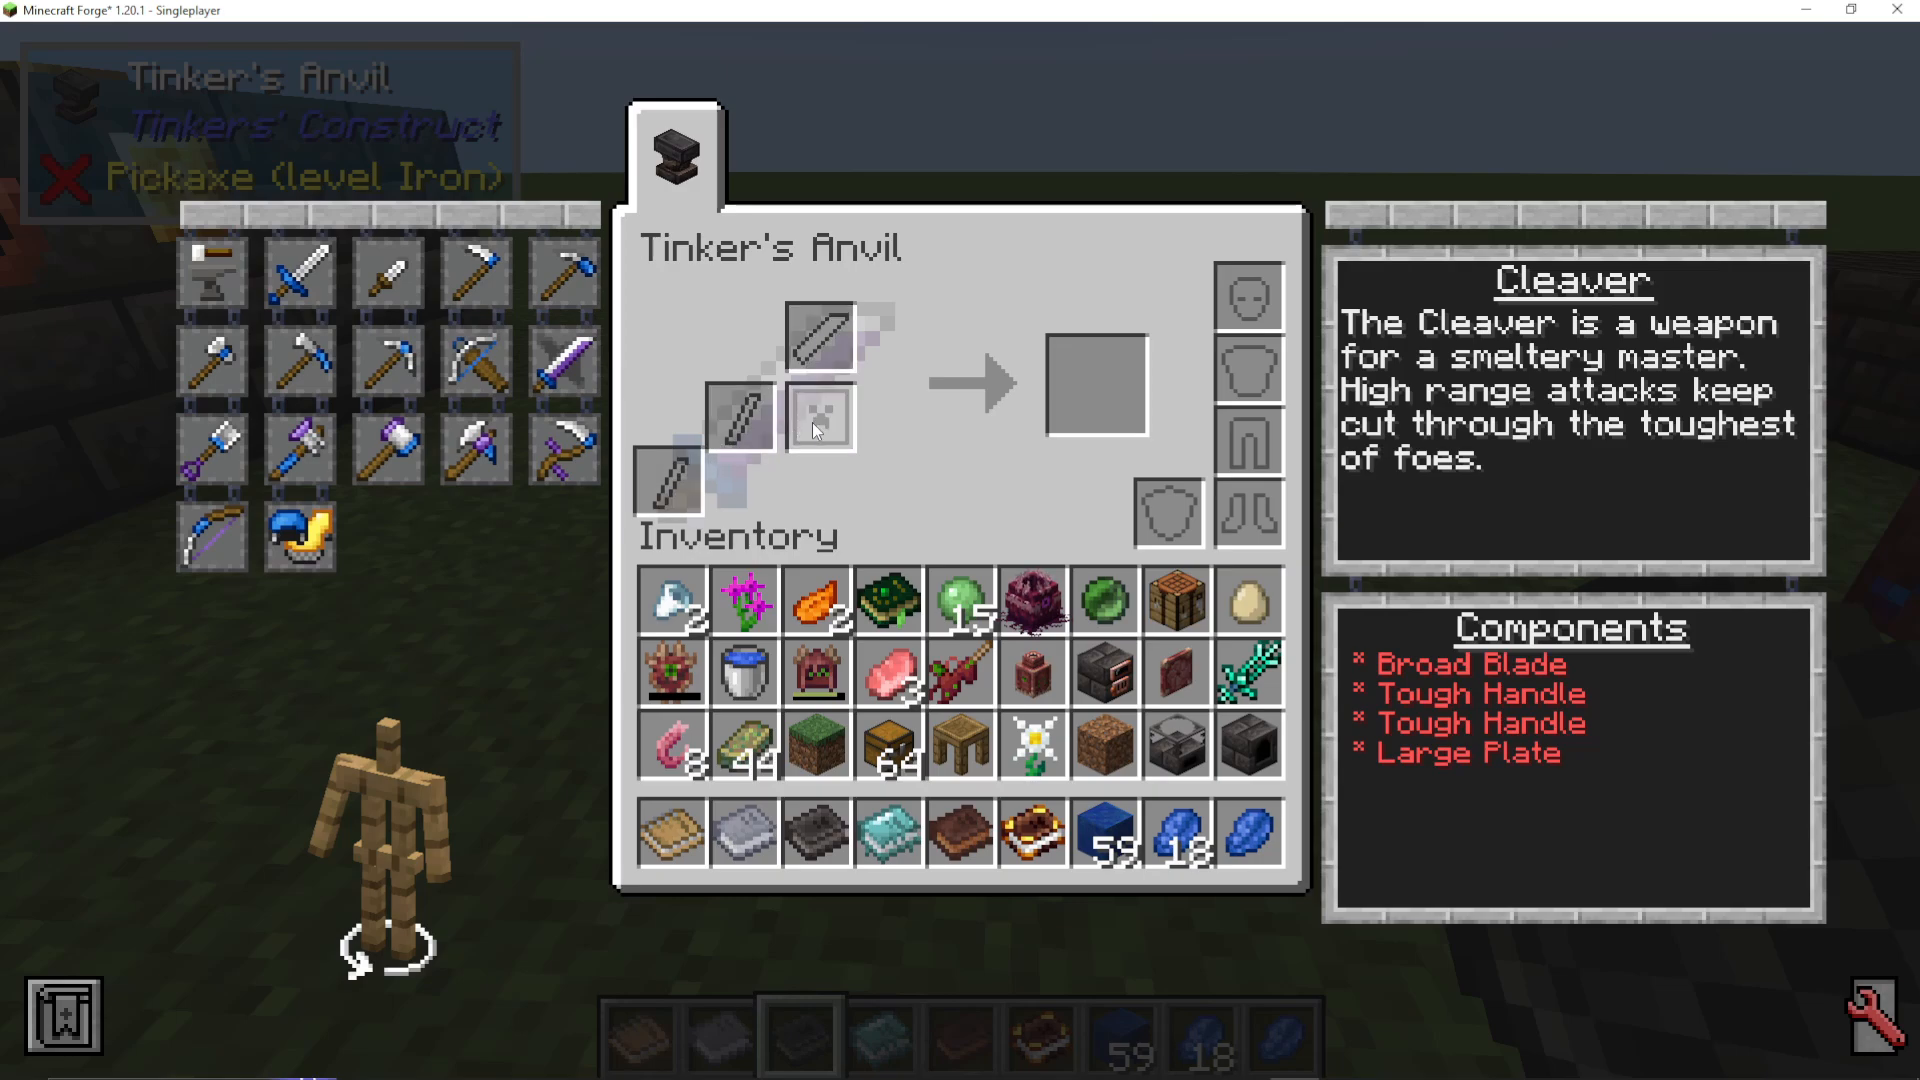
Cleaver: A gargantuan melee weapon, looks like an oversized cleaver and is excellent for dealing damage.
Material Requirements for Large Tools
Large tools like the Cleaver require significantly more materials than standard tools. For example:
Large Plates (approximately 8 materials each)
Tough Handles (approximately 3 materials each)
This makes crafting large tools much more material-intensive but also more powerful.
Building a Tinkers Anvil
You can construct a Tinkers Anvil from various materials depending on your modpack:
Refined Glowstone
Invar
Netherite
Rose Gold
Signalum
Refined Obsidian (if Mekanism is installed)
Bronze
Electrum (silver + gold—probably the easiest option)
Tier 4: The Nether and the Foundry
Entering the Nether for Tier 4 Materials
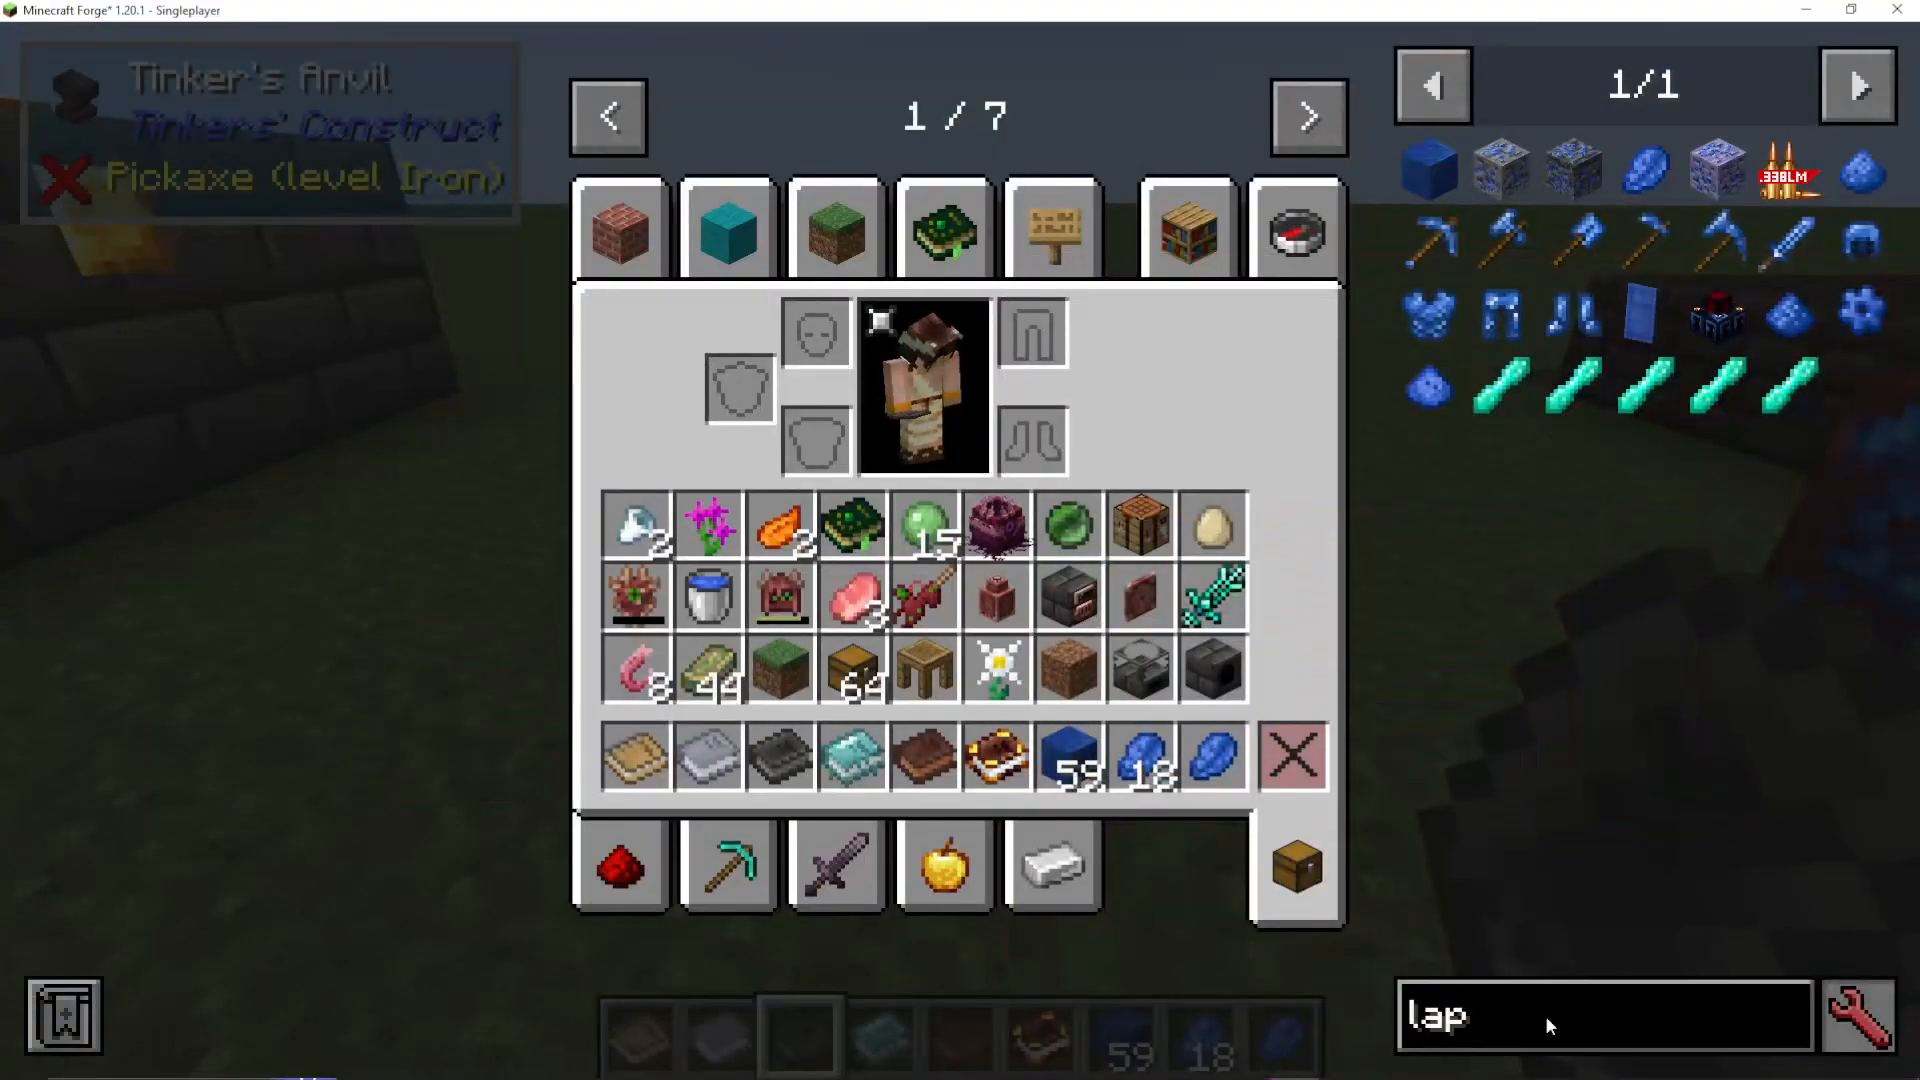
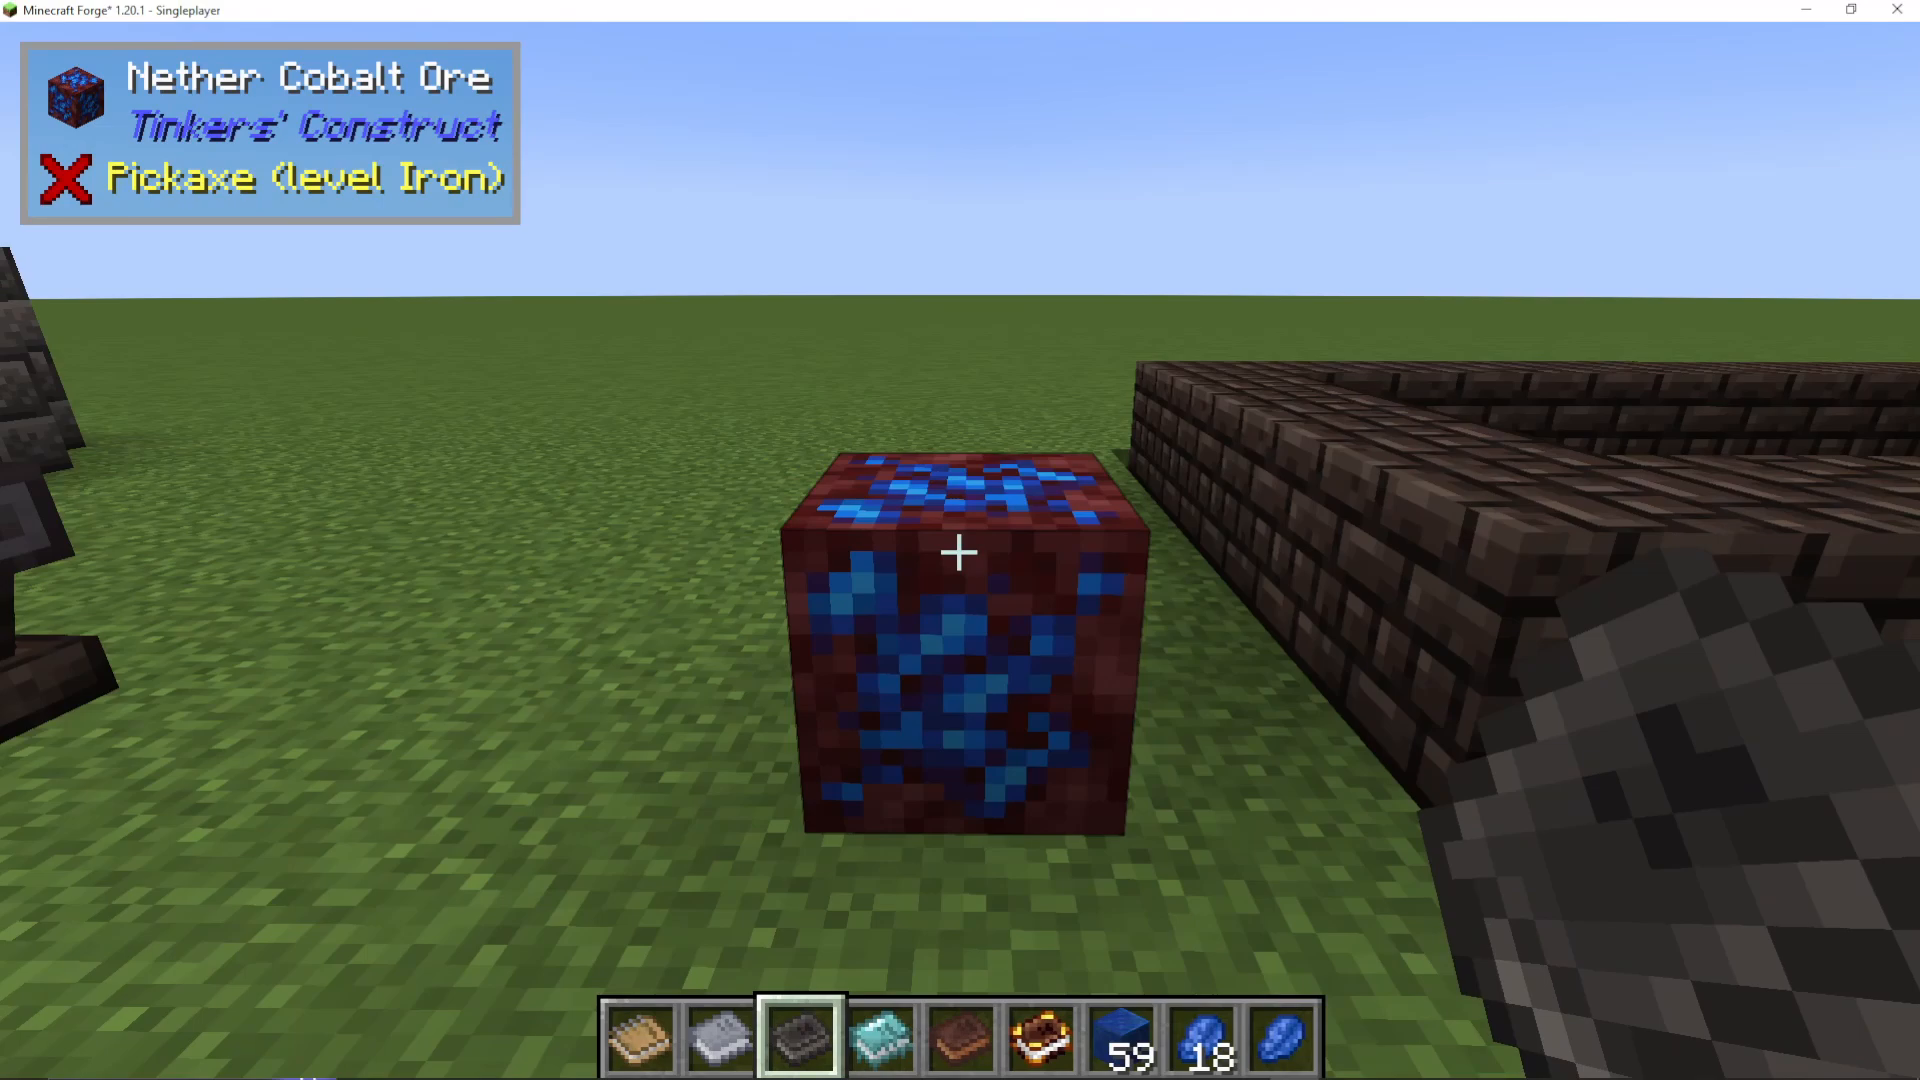
To access tier 4 materials, you must venture into the Nether. The primary material you’ll find is Netherite Cobalt, which appears near lava deposits and deep within the Nether.
However, Netherite Cobalt has a unique requirement: regular lava is not hot enough to smelt it. You need something much hotter—Blazing Blood.
The Foundry: Tier 4 Smelting
The Foundry is the tier 4 equivalent of the Smeltry. It functions similarly but with important differences:
Key Difference: The Foundry does NOT alloy metals together. If you smelt silver and gold simultaneously, they remain separate instead of combining into electrum.
Building a Foundry
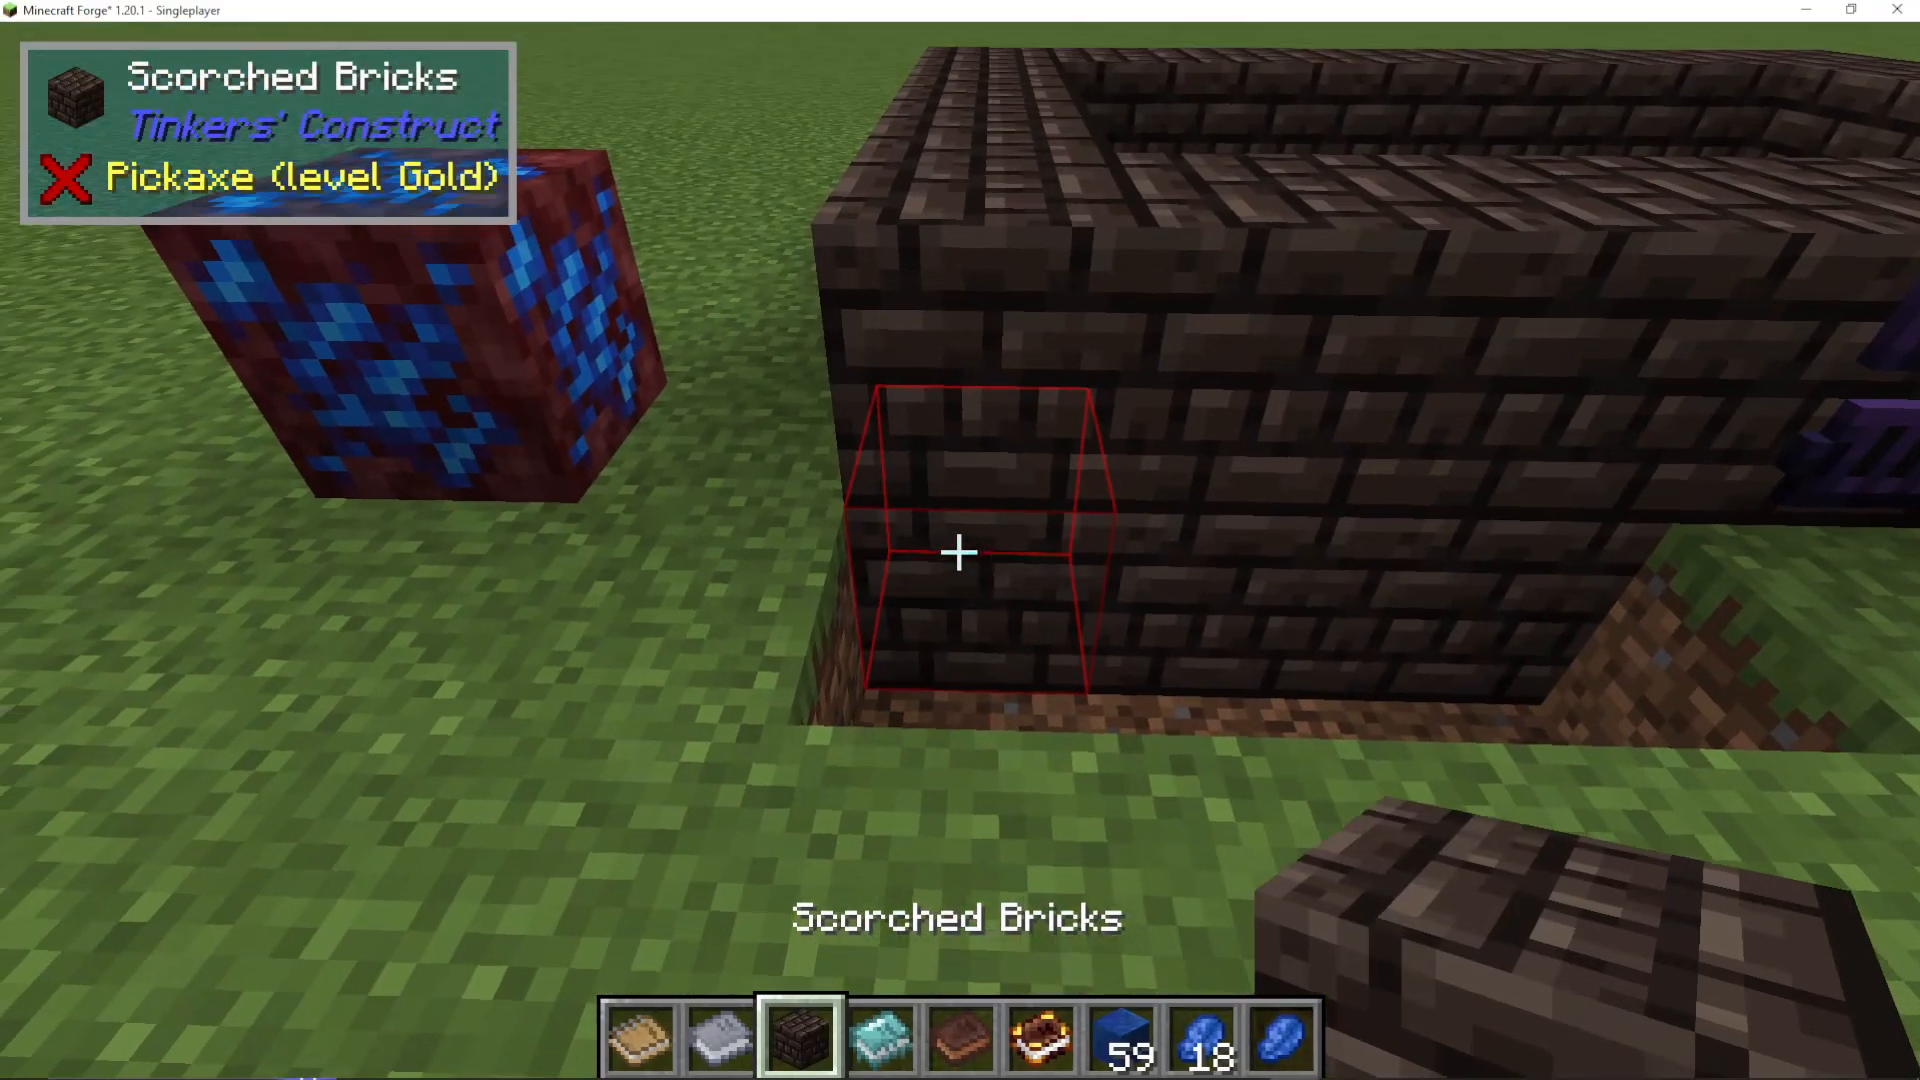
Foundries are built using Scorched Bricks instead of Seared Bricks. Scorched Bricks are crafted from:
Nether Grout (made from magma blocks, soul sand, and gravel)
Foundry structure requirements:
All walls and floors made of Scorched Bricks
Corner blocks ARE required (unlike the Smeltry)
Walls must extend to the floor (no floating structures)
Foundry Controller as the main block
Scorched Fuel Tank (for heating)
Scorched Drains and Faucets
Obtaining Blazing Blood
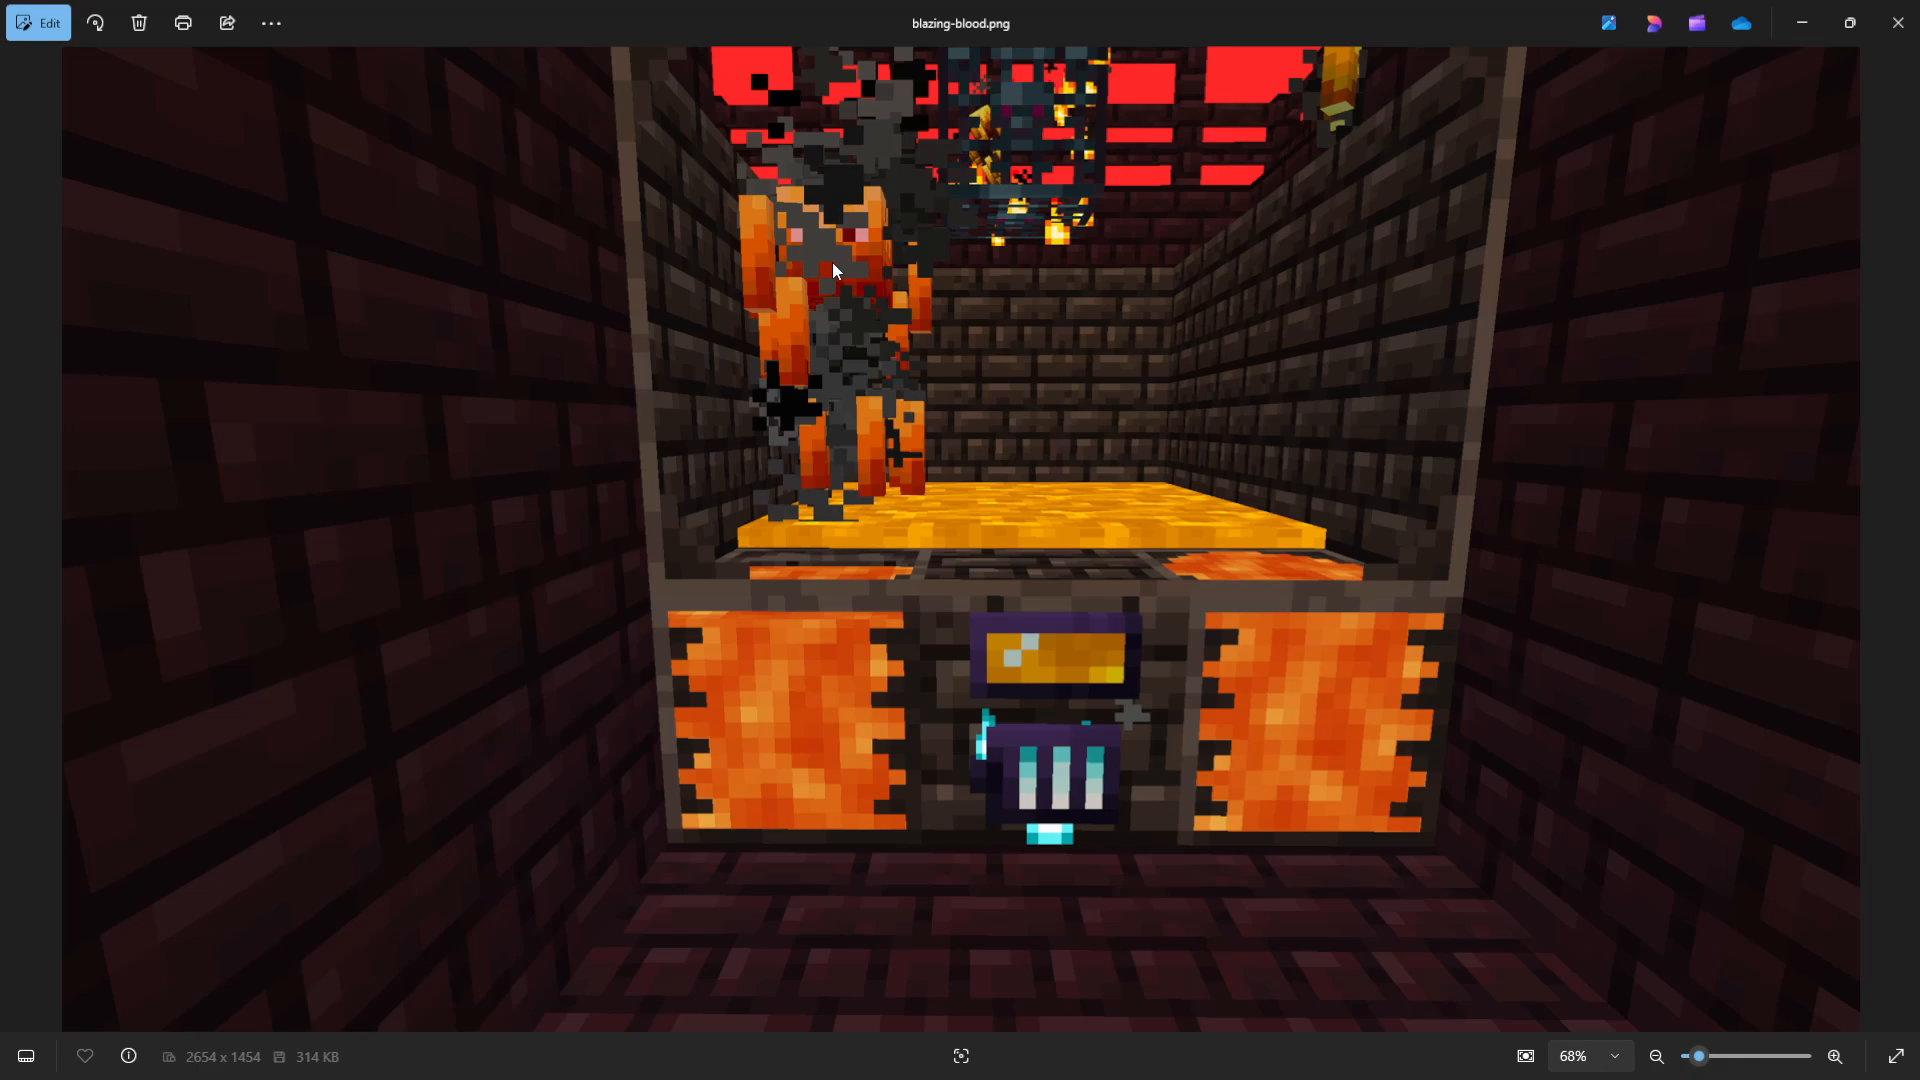
Blazing Blood is the hottest fuel source in Tinkers Construct. There are several ways to obtain it:
Method 1 – Blaze Spawner Setup: Build a Foundry around a Nether Fortress Blaze Spawner so that blazes fall directly into the Foundry and burn up, dropping Blazing Blood.
Method 2 – Blaze Heads: Use the Severing modifier on a melee weapon (like a Cleaver) to cut off blaze heads. Melt these heads in the Foundry to get Blazing Blood.
Method 3 – Piglin Trading: Trade with Piglins using Oca balls. However, this is a bootstrapping problem: you need some Blazing Blood to create an Oca Crystal Crusher, which is required to smelt Oca balls.
Tier 4 Materials and Alloys
Using Blazing Blood in the Foundry, you can smelt:
Netherite Cobalt: The primary tier 4 ore material
Molten Manulin: Created by alloying Molten Cobalt + Molten Debris (ancient debris)
Molten Hepatazzium: Created by combining Molten Cobalt, Molten Quartz, and Molten Copper
Molten Queens Slime: Alloyed from Molten Gold, Molten Magma, and Molten Cobalt
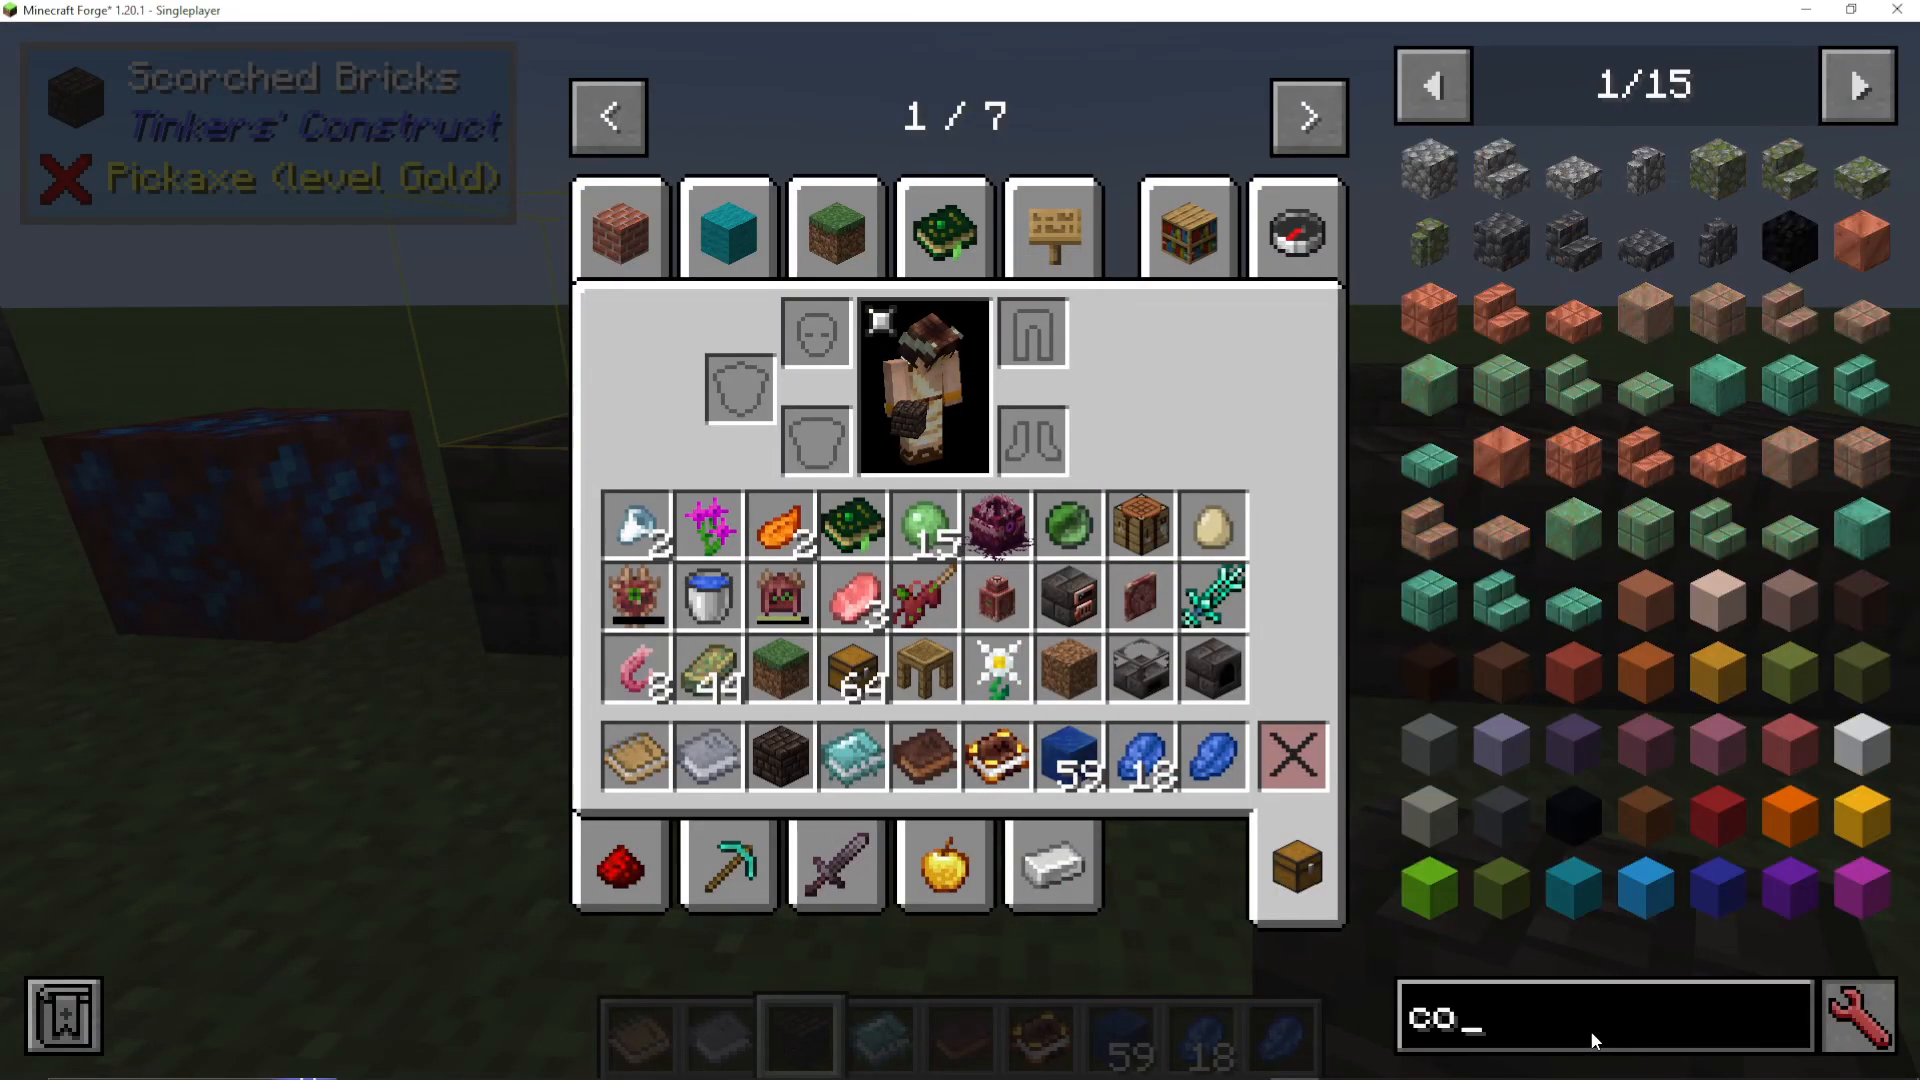
The Fantastic Foundry Book
The “Fantastic Foundry” book (crafted from Nether Grout + book) details:
Foundry structure and operation
All tier 4 materials and their properties
Methods for obtaining Blazing Blood
Advanced material combinations
Tool modifications and improvements
Food, Utilities, and Miscellaneous Items
Slime Cakes and Special Foods
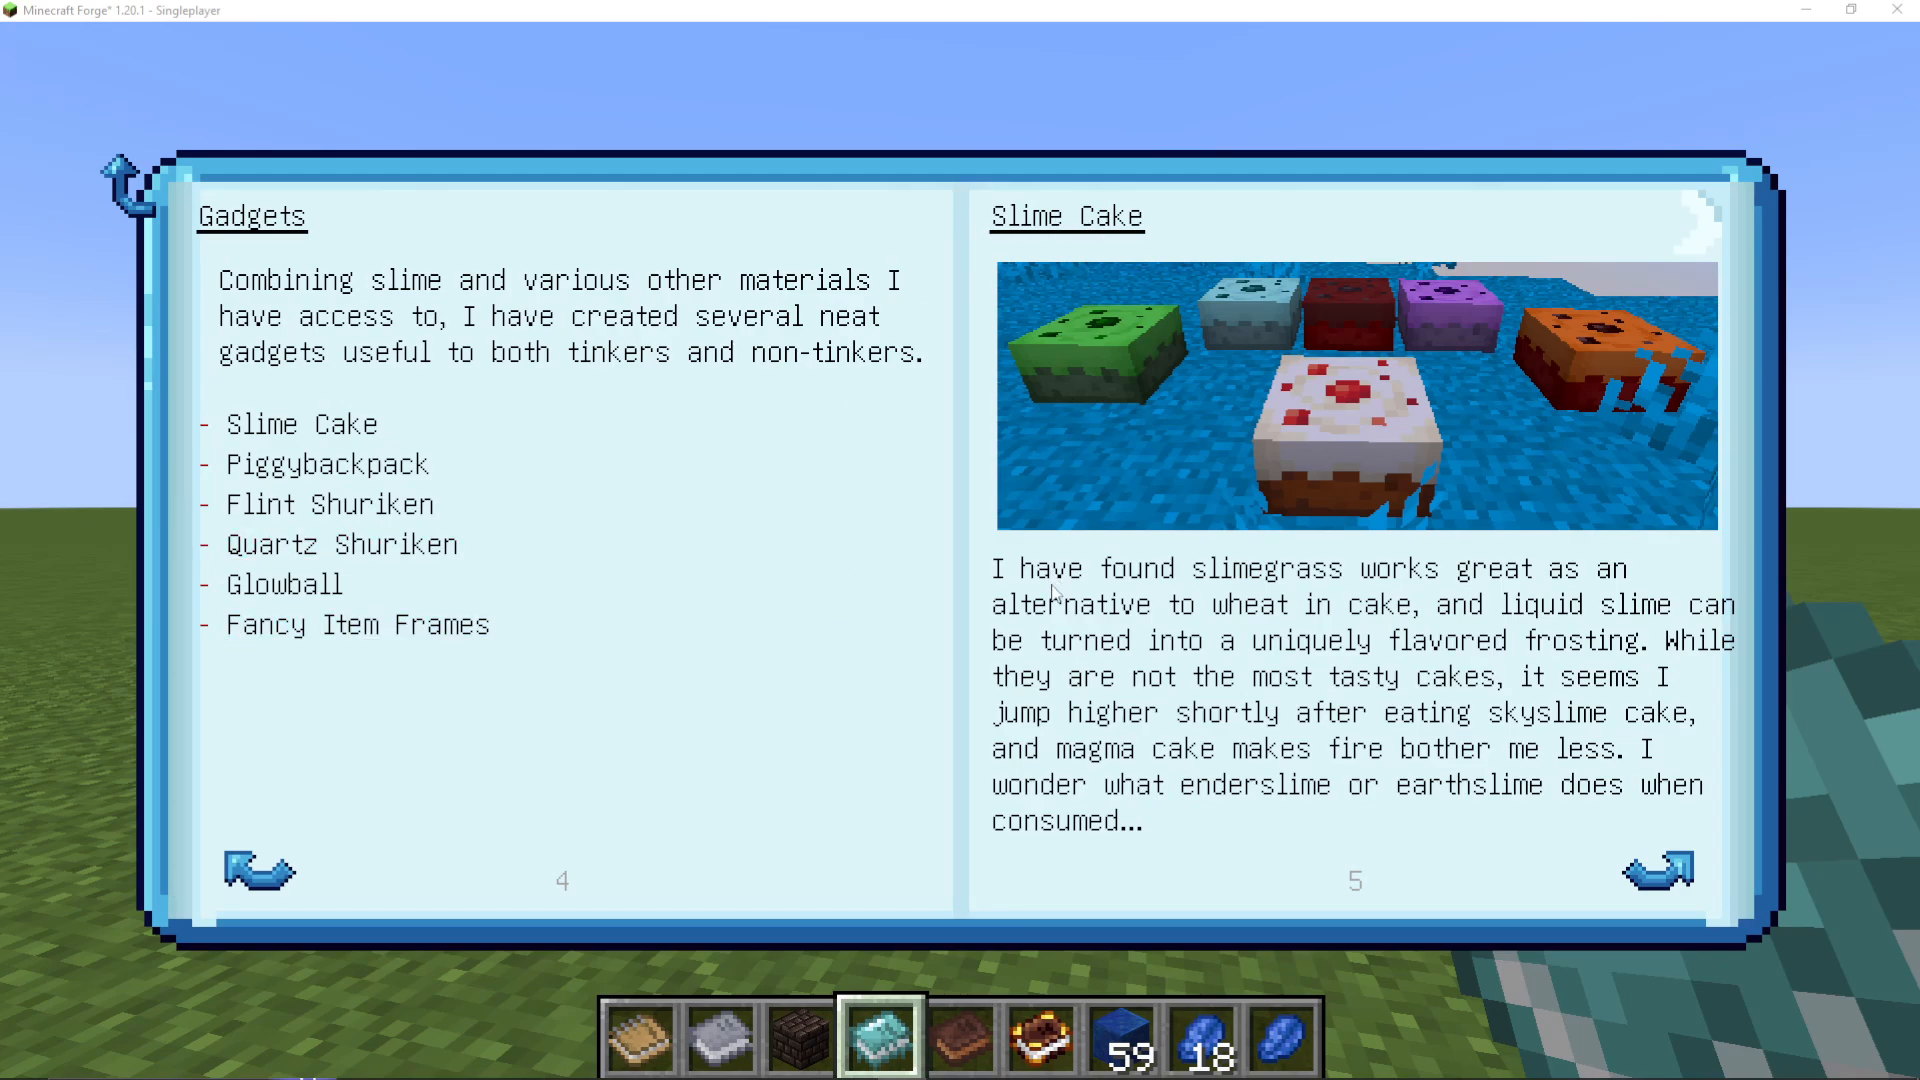
Sky Slime Cake: Mix slime grass and apply the result to food. Eating it grants the Jump Boost effect for a short duration.
Magma Cake: Crafted with magma blocks. Provides Fire Resistance when eaten.
Cheese: Created by pouring milk into a Seared Casting Table with an ingot cast. Removes a random negative effect when eaten.
Jeweled Apple: Pour molten diamond onto an apple in a casting table. Grants Haste and Resistance effects.
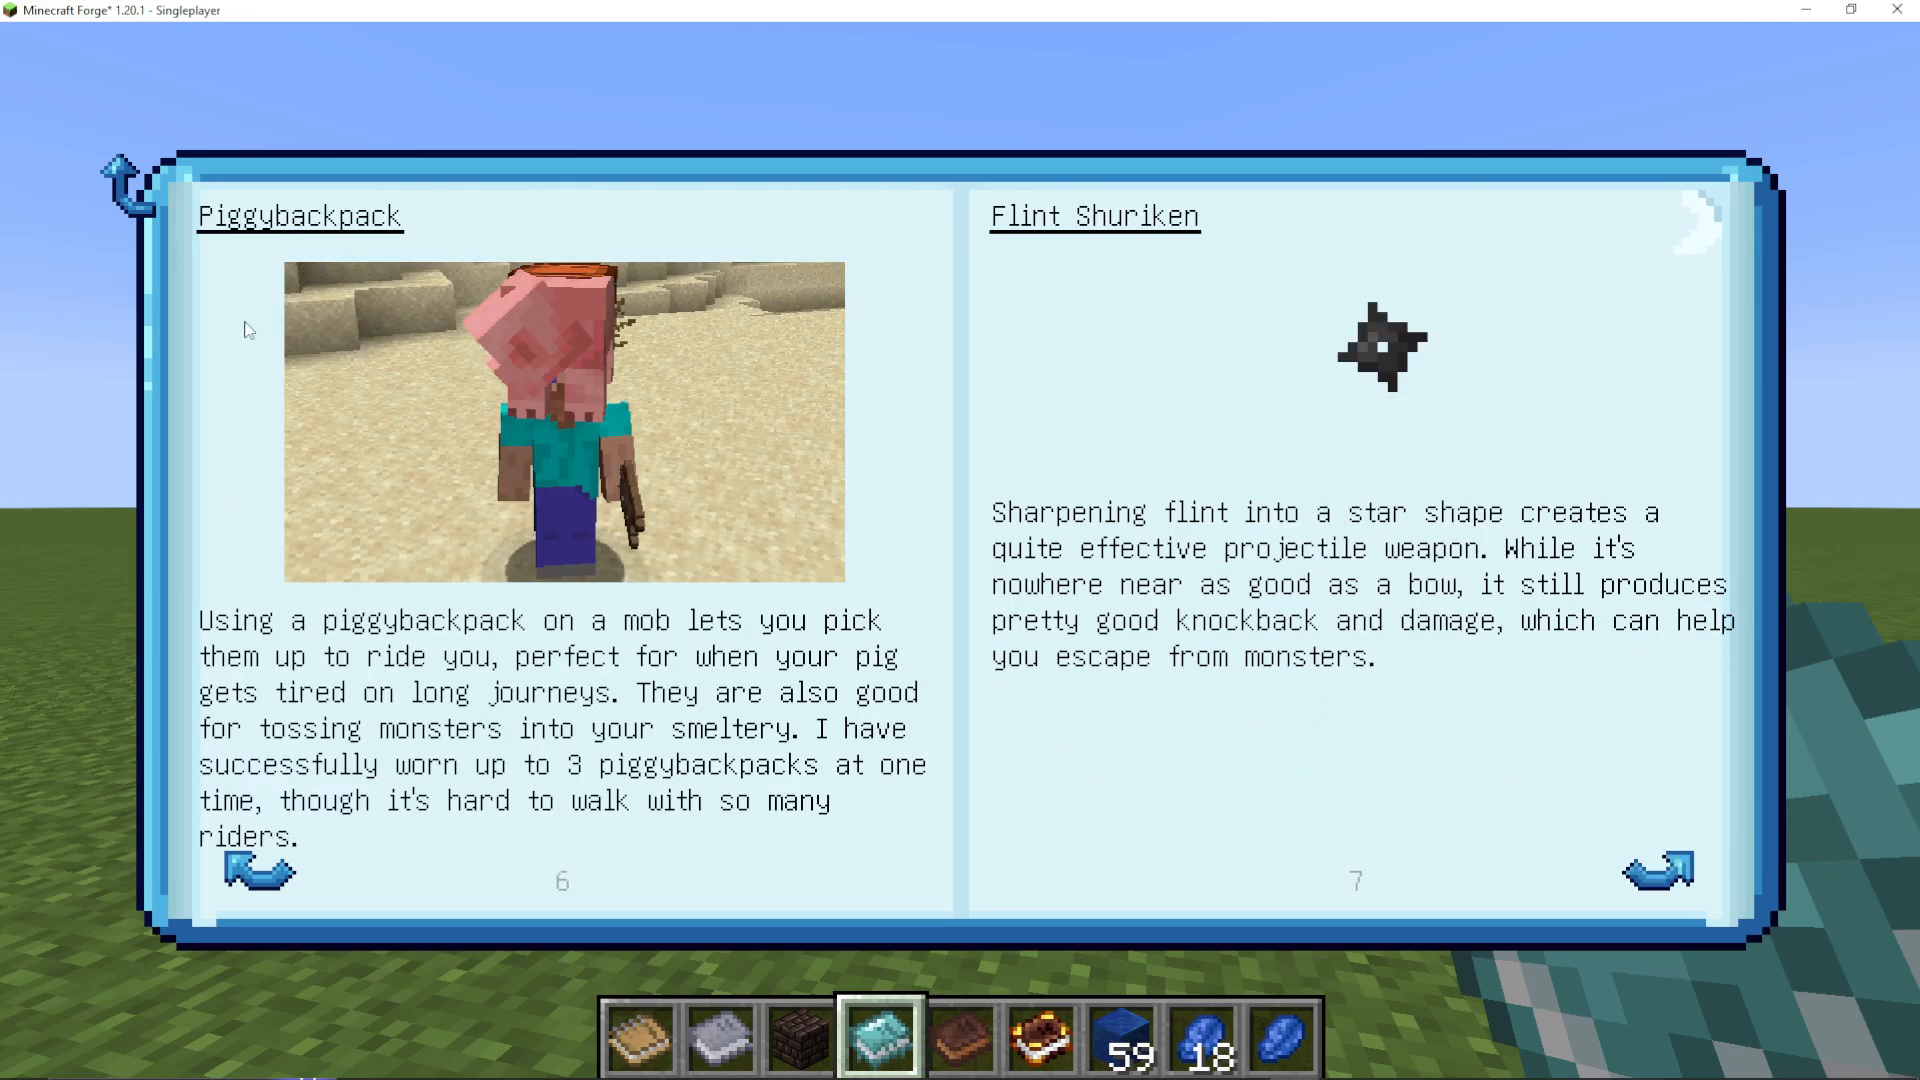
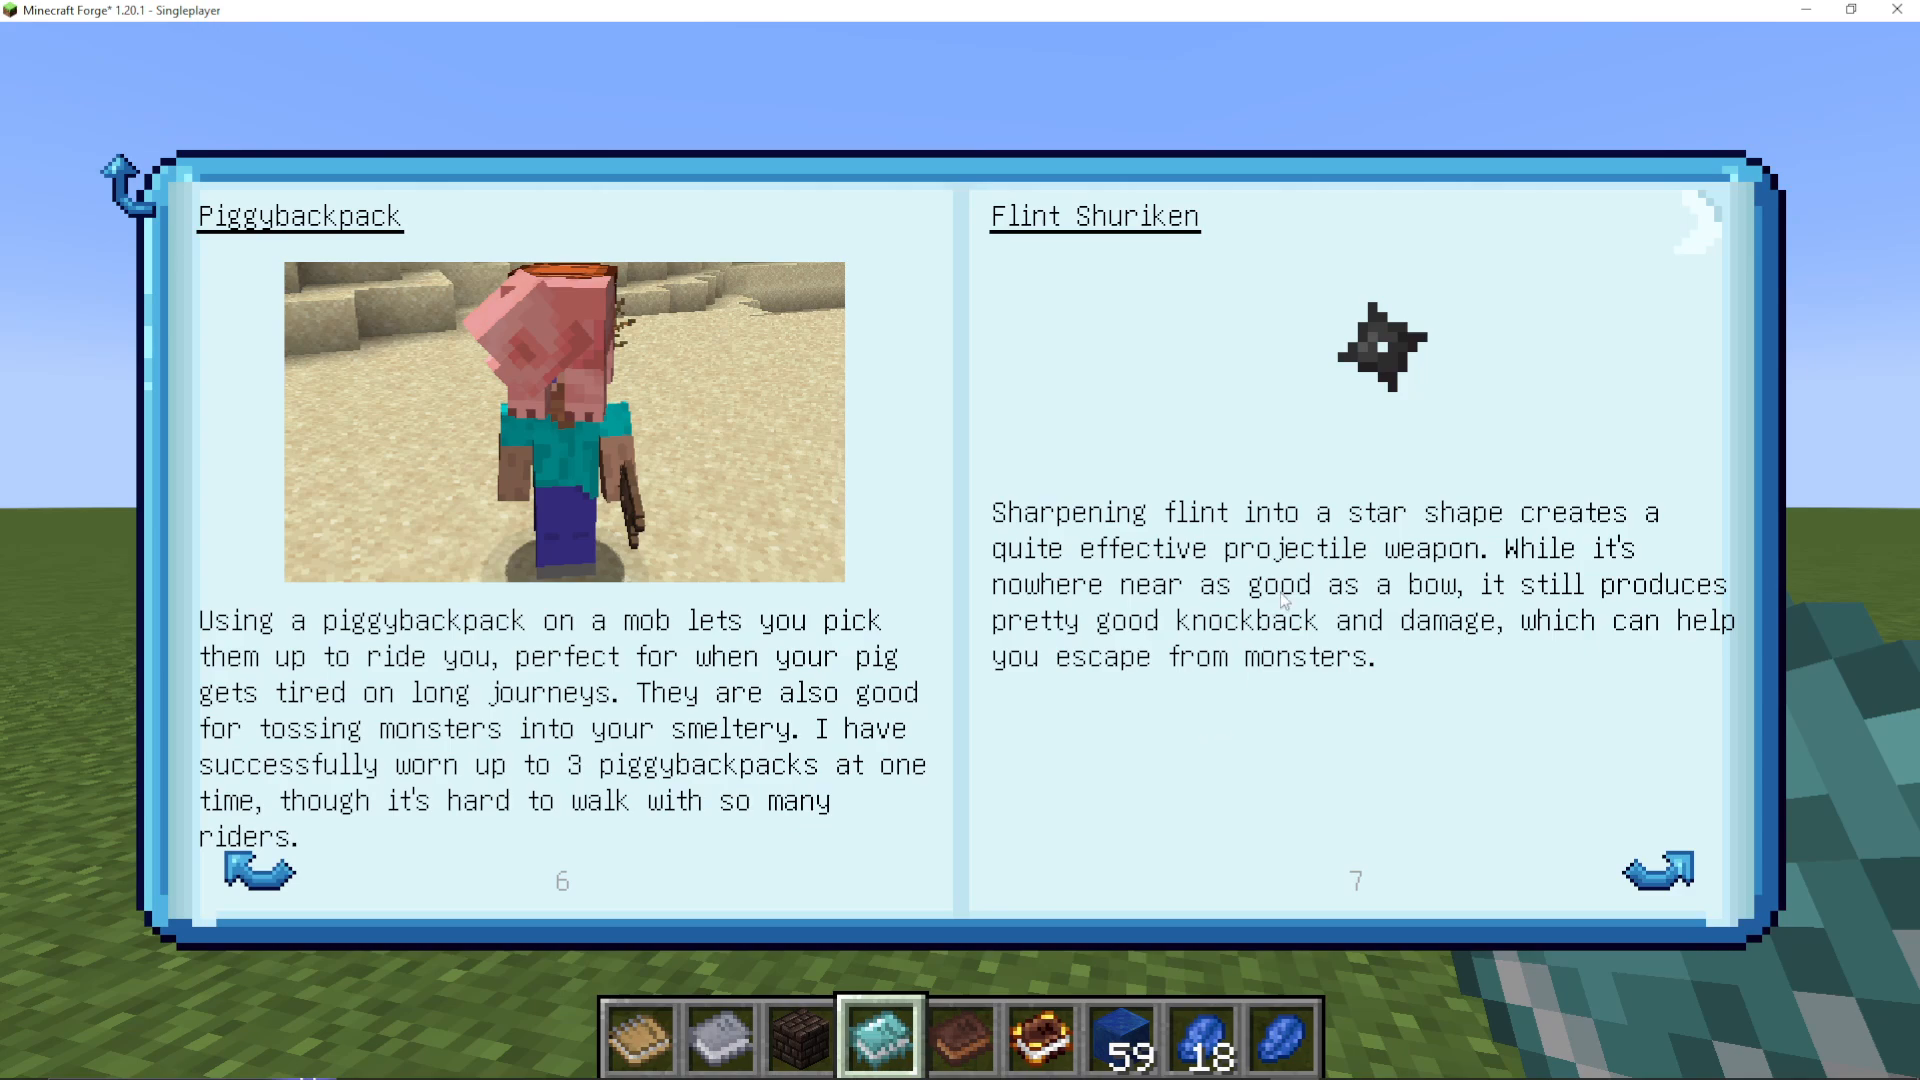
The Piggy Backpack
Place a Piggy Backpack on a mob to pick it up and carry it, allowing you to ride passive mobs over long journeys. This is also incredibly useful for getting blazes into the Foundry—you can carry them directly into the smelting chamber.
Projectile Weapons
Flinchuriken: Craft flint into a star shape to create a throwable projectile. Good knockback and decent damage, useful for quick escapes.
Quartz Version: More damage than flint but less knockback.
Glow Ball: Made from glowstone and snowballs. A throwable light source for illuminating areas you can’t reach with a torch.
Decorative Items and Blocks
Tinkers Construct adds many decorative items and glass panes. You can create colored glass panes for aesthetic builds.
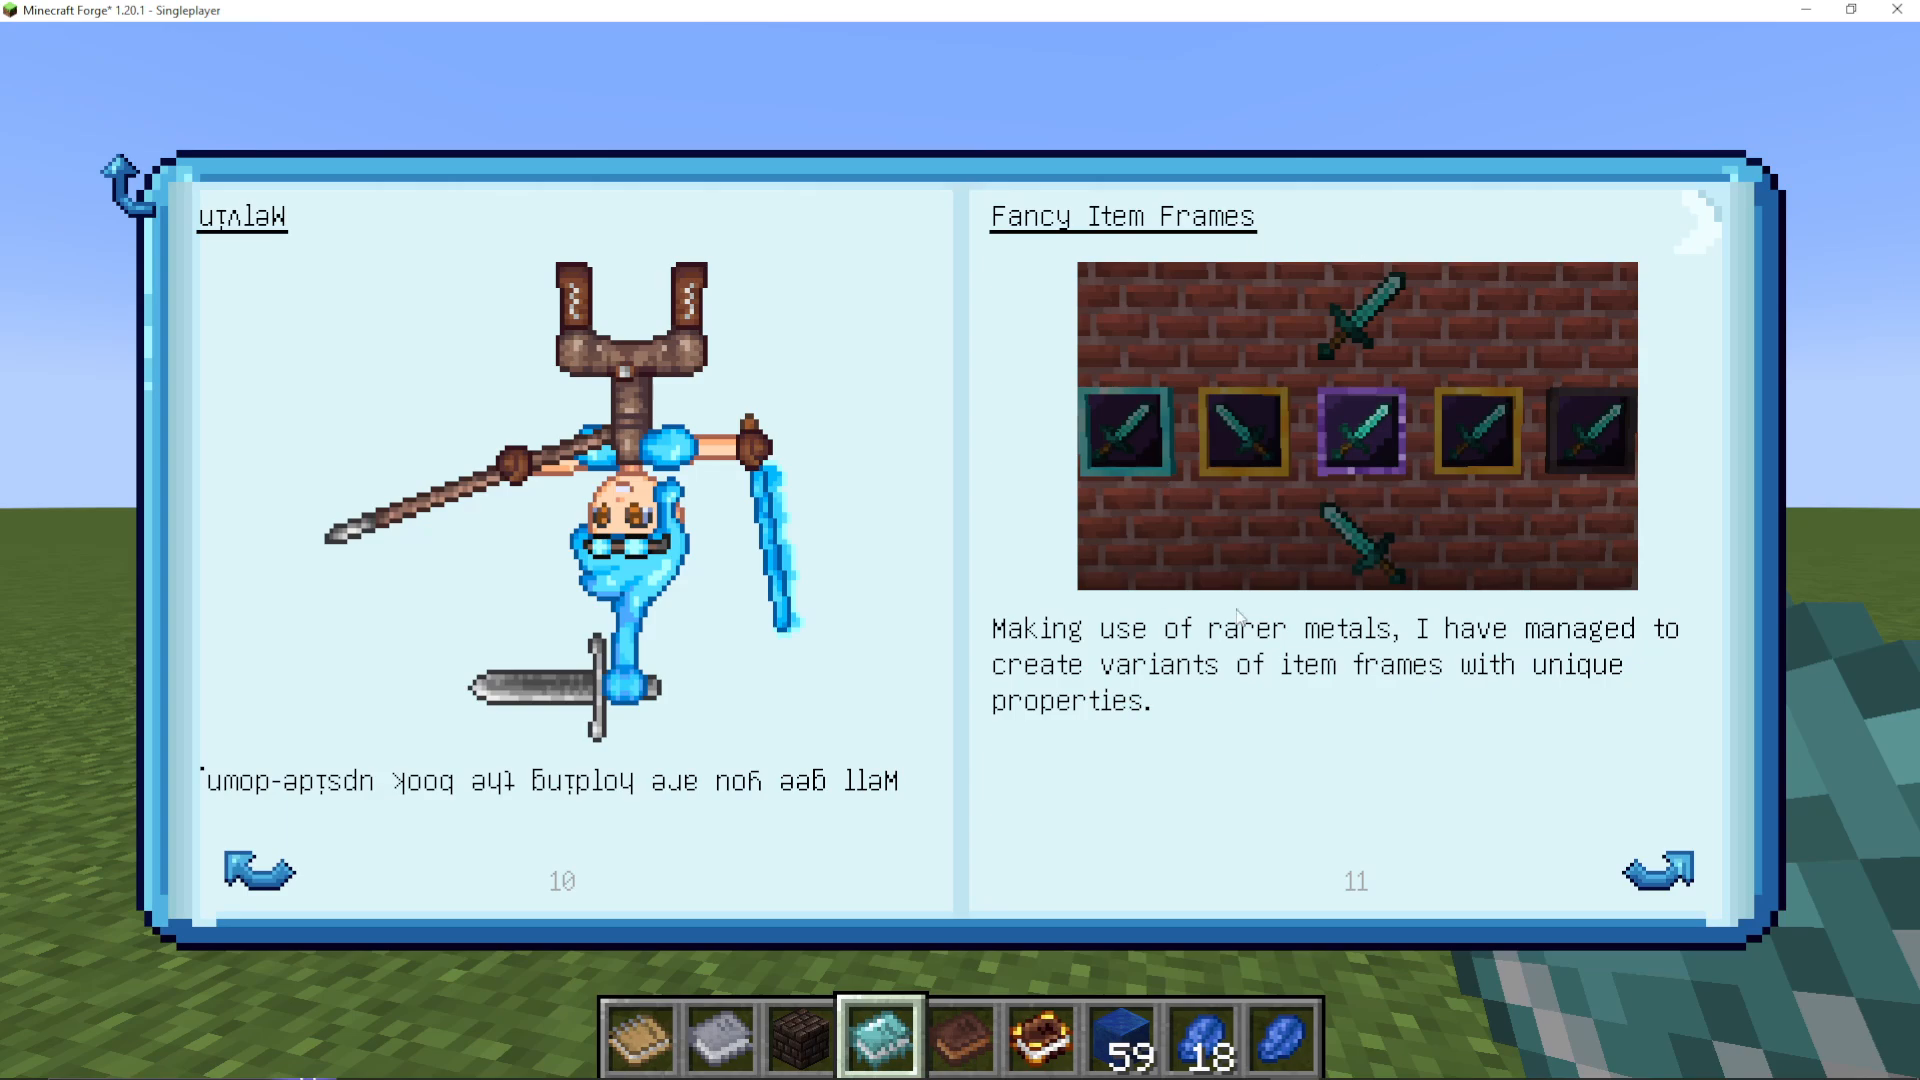
Fancy Item Frames
Tinkers Construct adds special item frames with unique properties:
Clear Frame: Turns invisible when an item is placed, making it appear as though the item floats on its own.
Diamond Frame: Gradually reduces item rotation until it’s perfectly upright. Supports more rotations than a standard frame.
Manulin Frame: Always appears fully lit, even in darkness.
Netherite Frame: Resistant to fire and explosions.
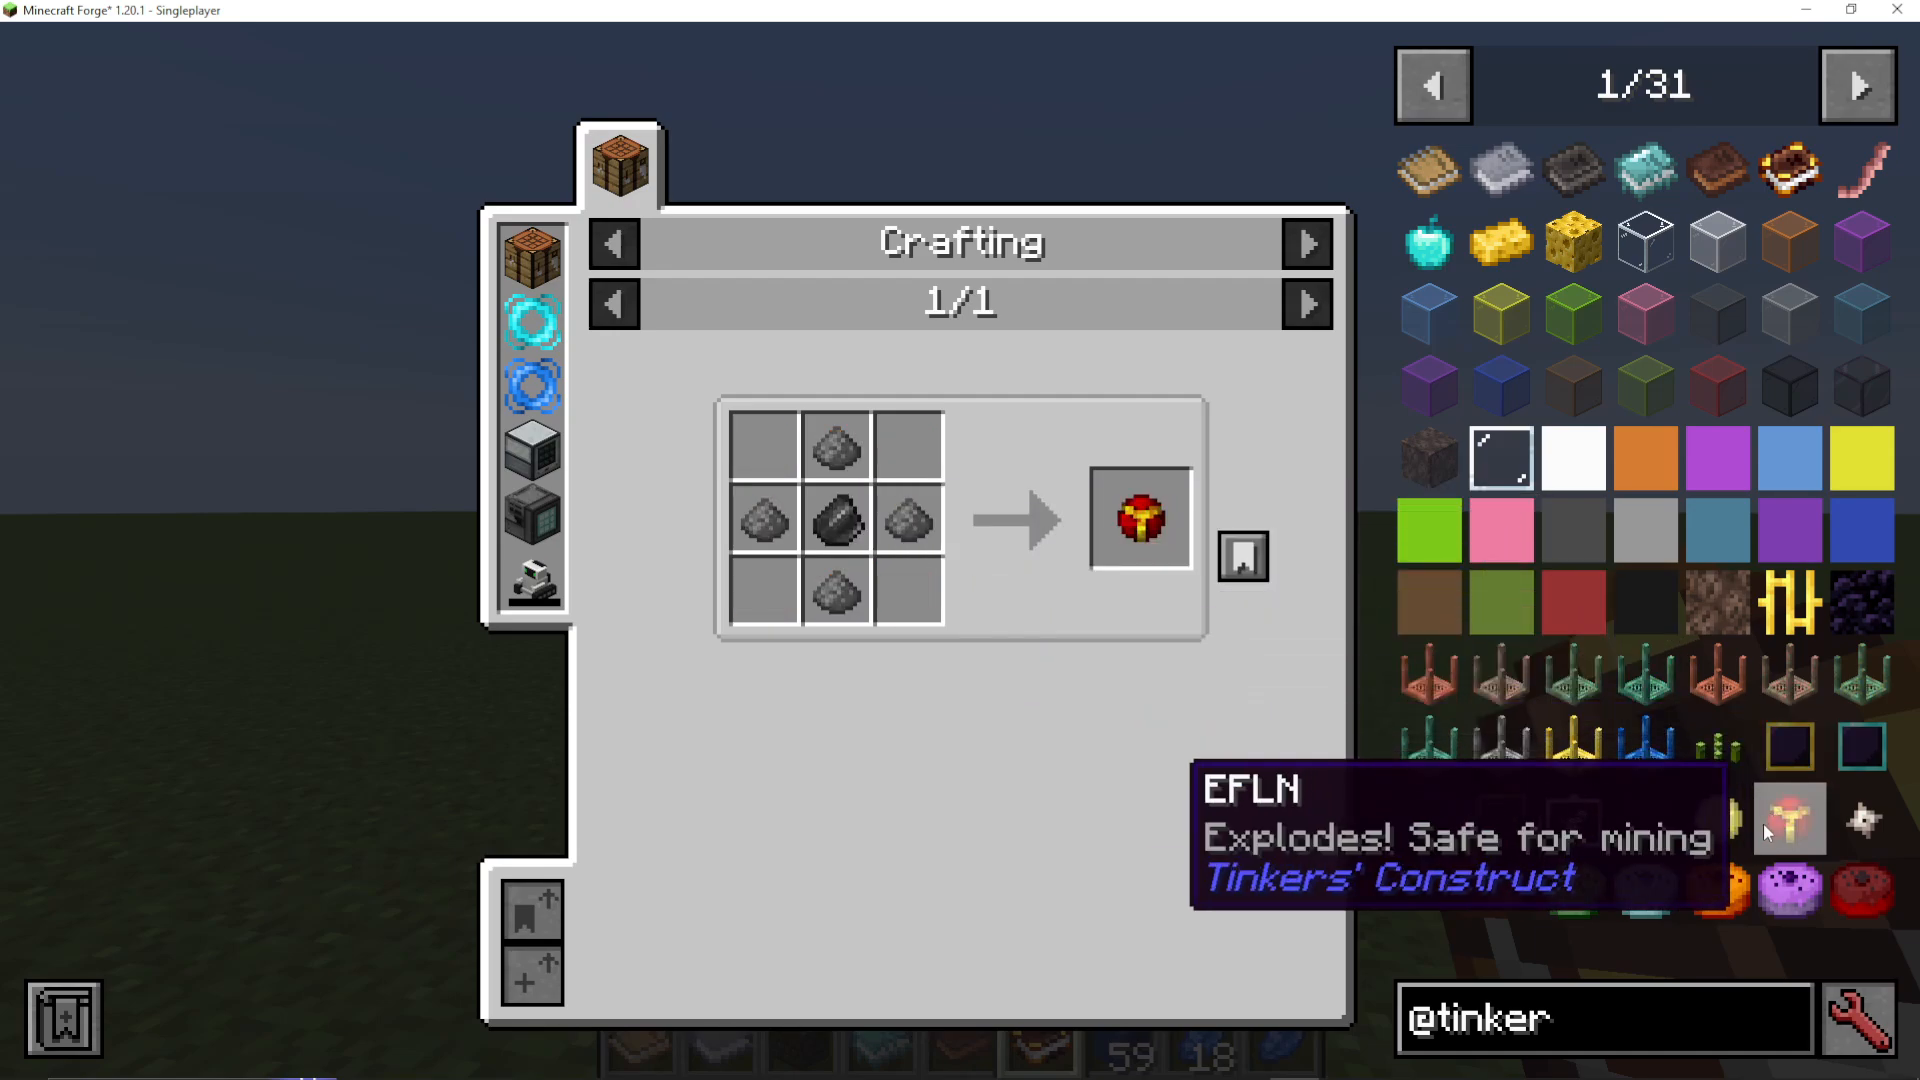
Safe Mining with EFLN
You can craft an EFLN (an explosion-based mining tool) that is safe for mining. This allows you to quickly clear large areas without worrying about dangerous cave explosions.
Modifiers and Upgrades
Understanding Modifier Slots
Each tool has a limited number of modifier (upgrade) slots. Some modifiers take only one slot, while others (like lapis for fortune) can be stacked up to 45 times, using multiple slots.
Common Modifiers
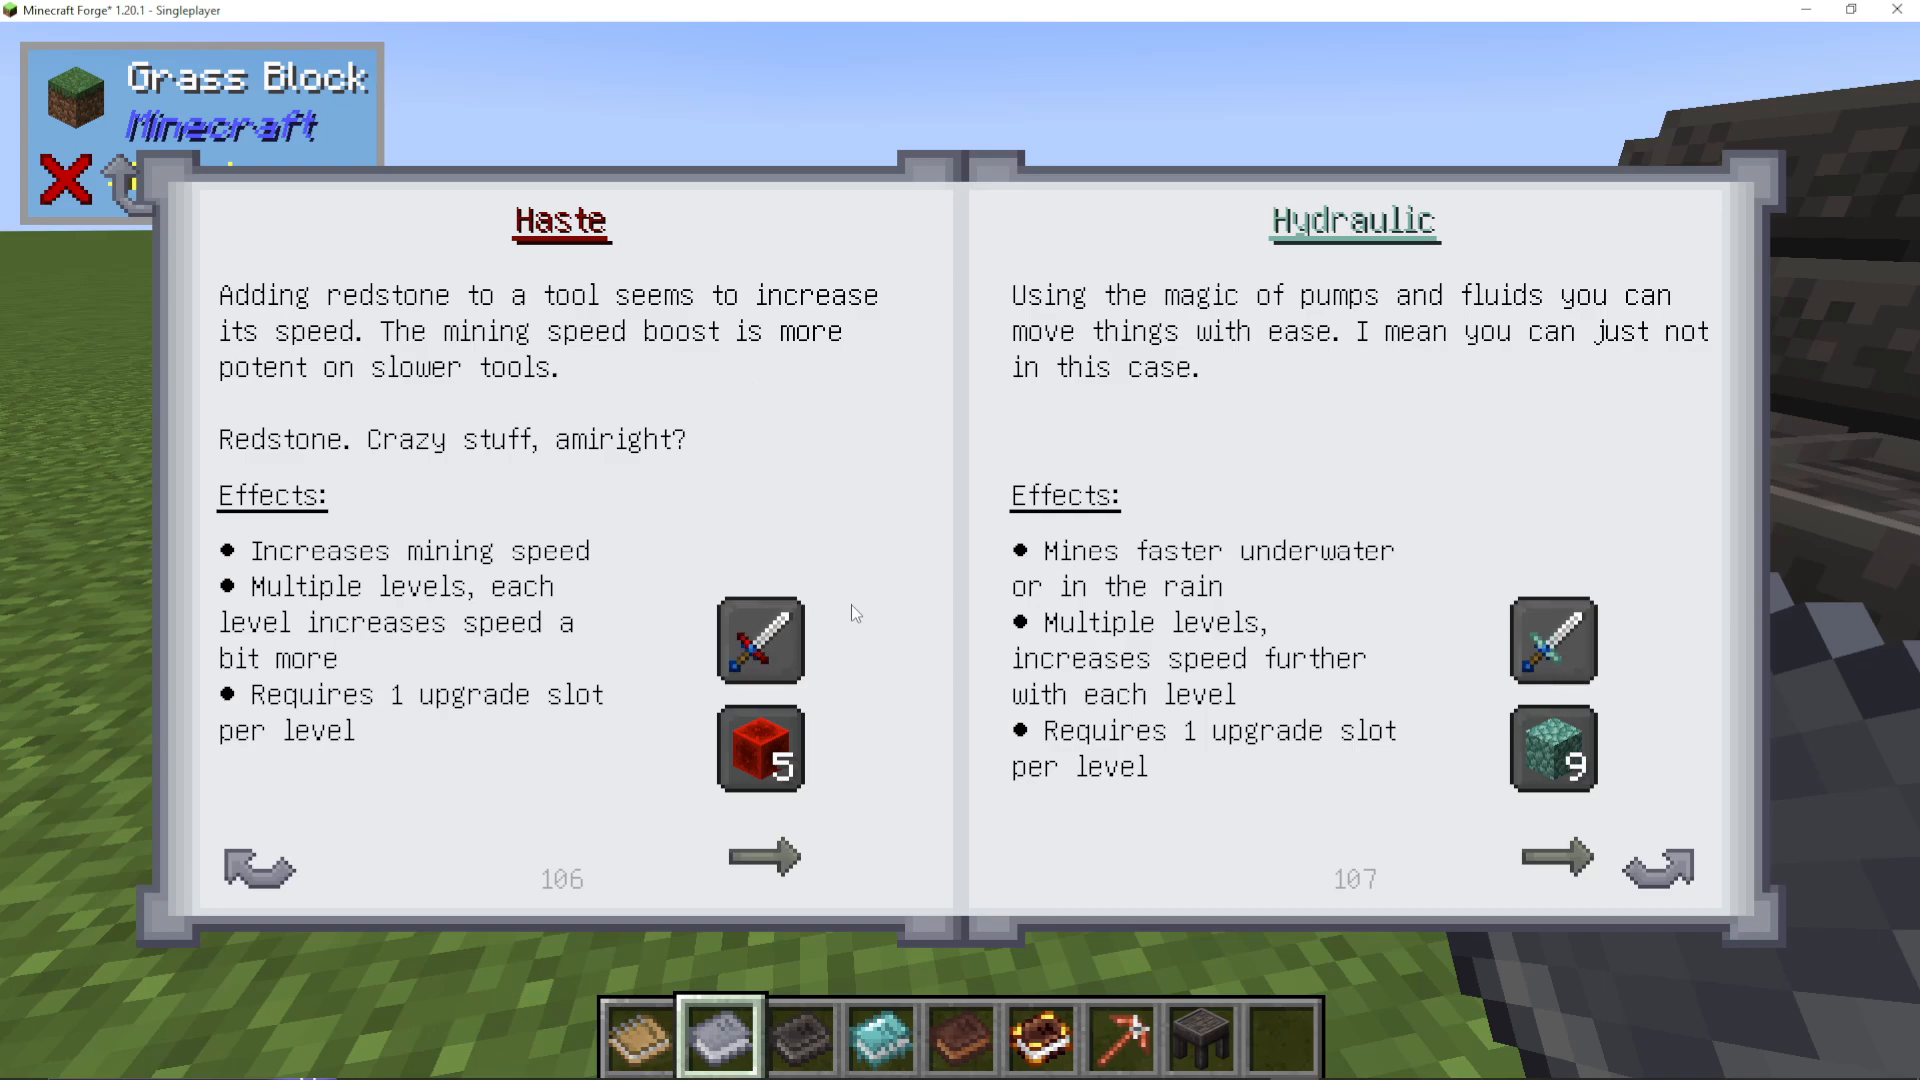
Diamond: Increases durability, mining speed, and melee damage.
Redstone: Adds Haste. Use blocks of redstone to add 9 levels at a time instead of individual redstone dust.
Lapis Lazuli: Adds Fortune (if not changed by your modpack). Can be stacked up to 45 levels for maximum ore multiplication.
Experience: Increases tool experience gain.
Emerald: Increases durability and mining effectiveness.
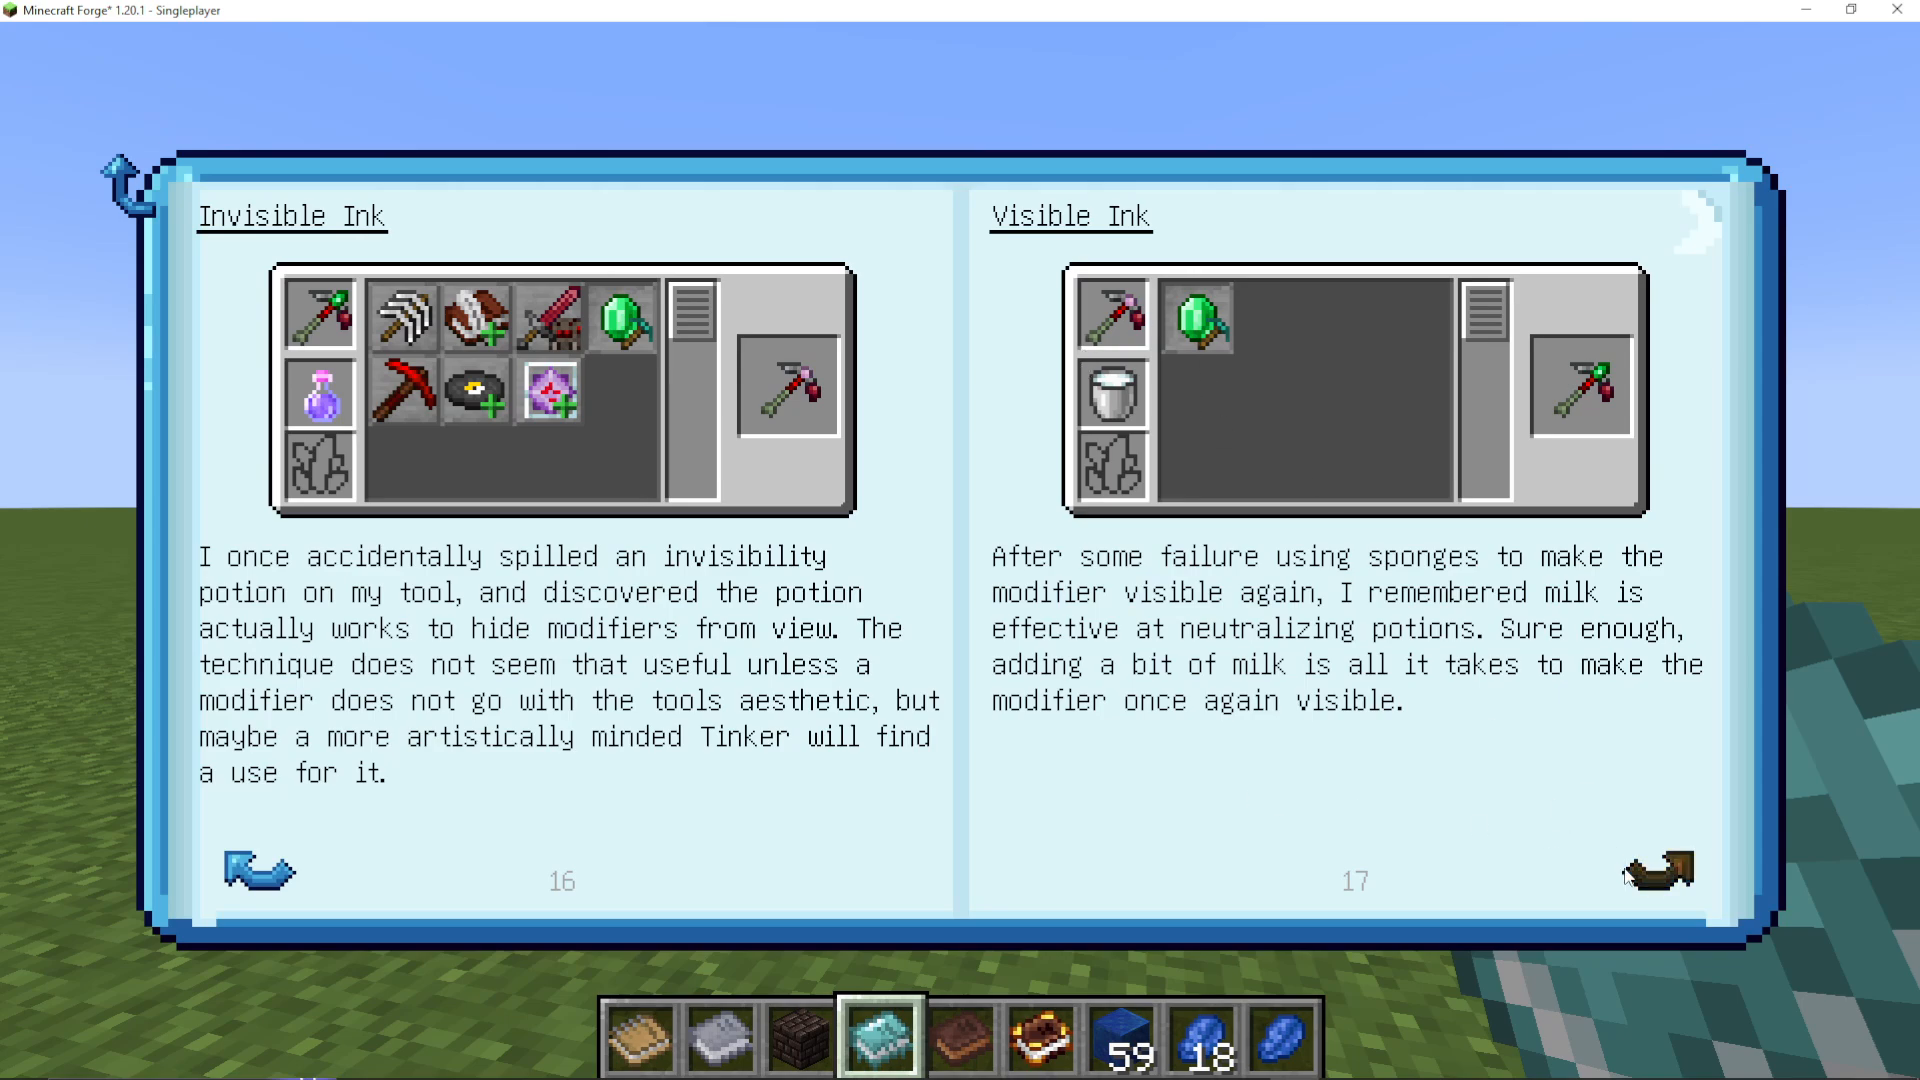
Invisible Ink: Hides modifiers from view for aesthetic builds.
Visible Ink: Reveals previously hidden modifiers.
Compass/Magnetize: Allows you to point the tool toward targets or adjust behavior.
Wet Sponge: Removes modifiers from tools that you no longer want.
Advanced Modifiers
There are dozens of modifiers available, including:
Ambidextrous (punch with both hands)
Anti-Aquatic (bonus damage to sea creatures)
Aqua Affinity (removes underwater mining penalty)
Auto Smelt (smelts ores automatically)
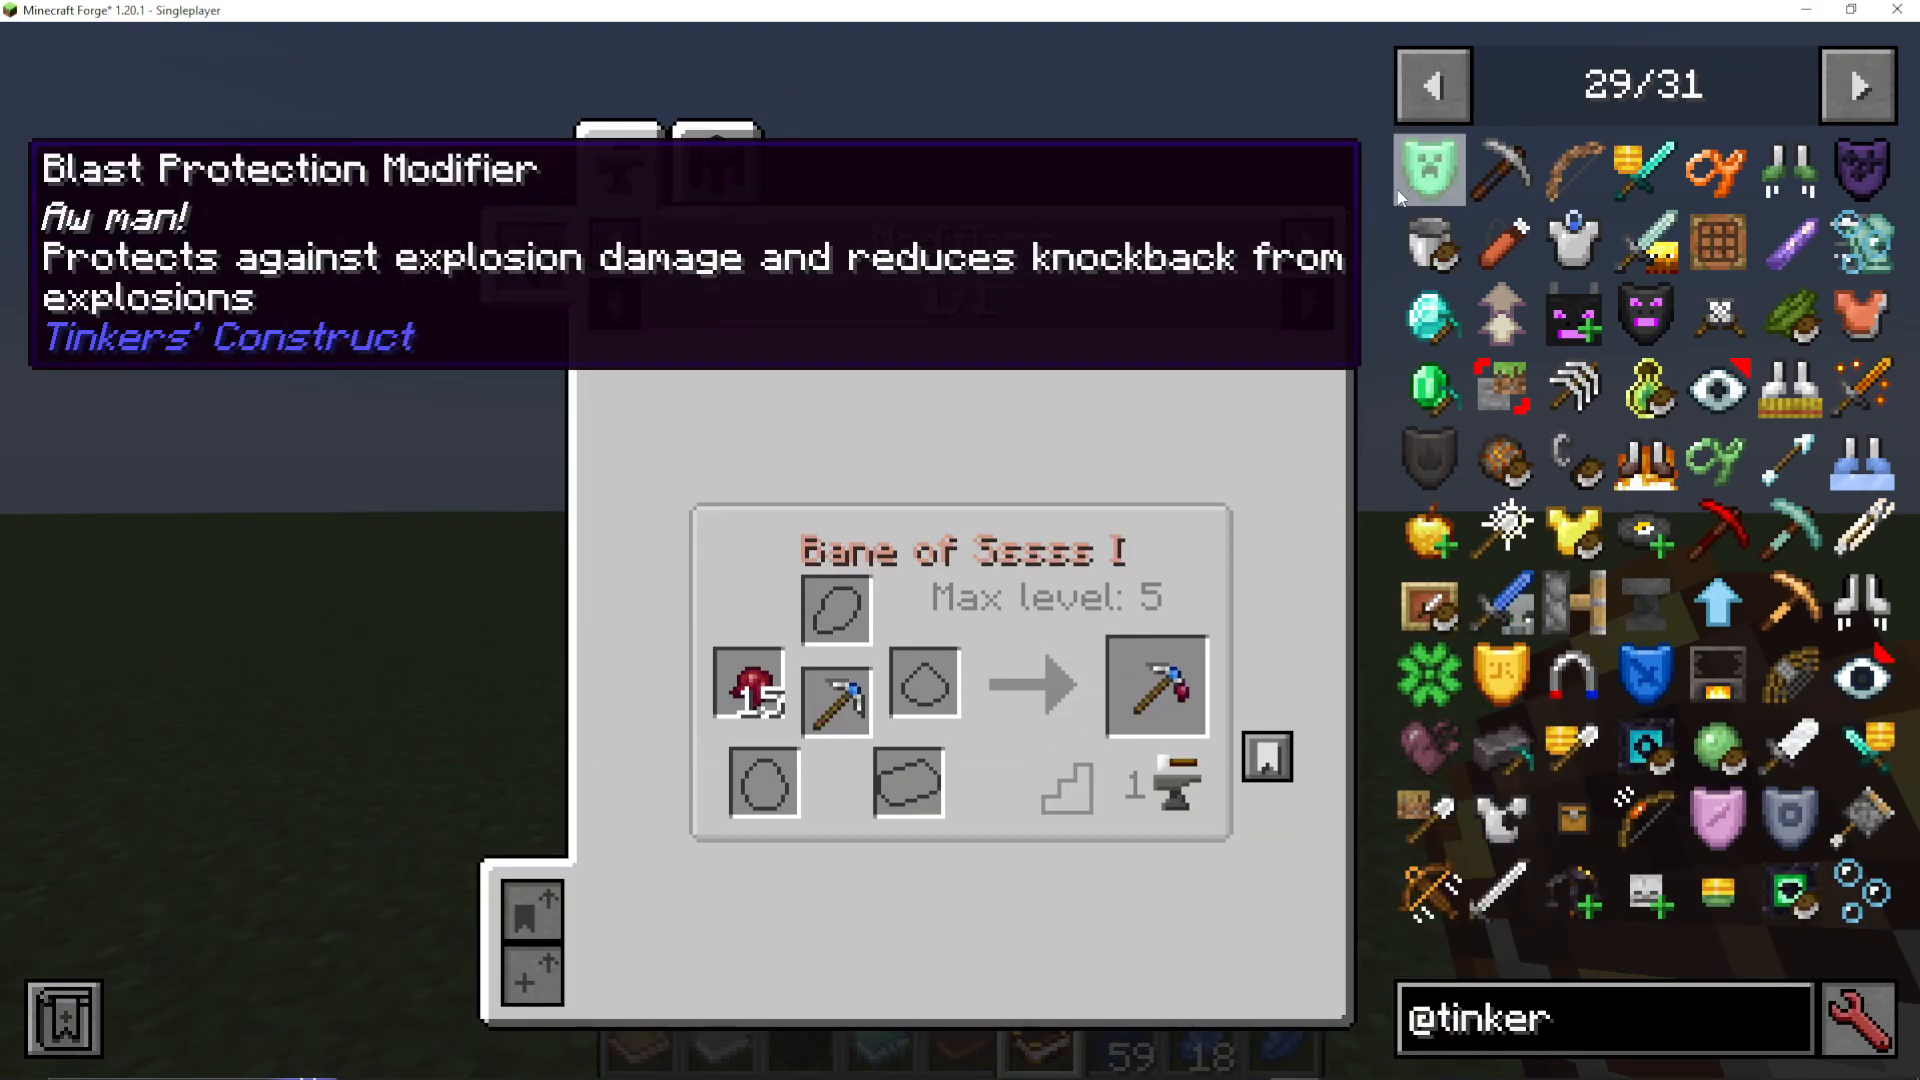
Bane of Arthropods (bonus damage to spiders)
And many more…
Use JEI (Just Enough Items) to search for modifiers: type “@tinker” to see all Tinkers Construct items. Hover over a modifier, click it, and press R to see the recipe for adding it to your gear.
Slime Islands and Special Features
Finding Slime Islands
Floating Slime Islands appear throughout the Overworld. These islands have several useful features:
Slime grass and slime blocks
Various slime types (sky slime, earth slime, etc.)
Geodes with valuable resources
Slime Types and Geodes
Different slime types can be found in various locations:
Sky Slime Geodes: Found in sky slime islands
Earth Slime Geodes: Found in earth slime islands (ground level)
Ender Slime Geodes: Found in the End dimension
Oka Geodes: Found in the Nether, excellent for obtaining blazing blood
Slime Staffs
You can craft staffs from different slime types, each with unique properties:
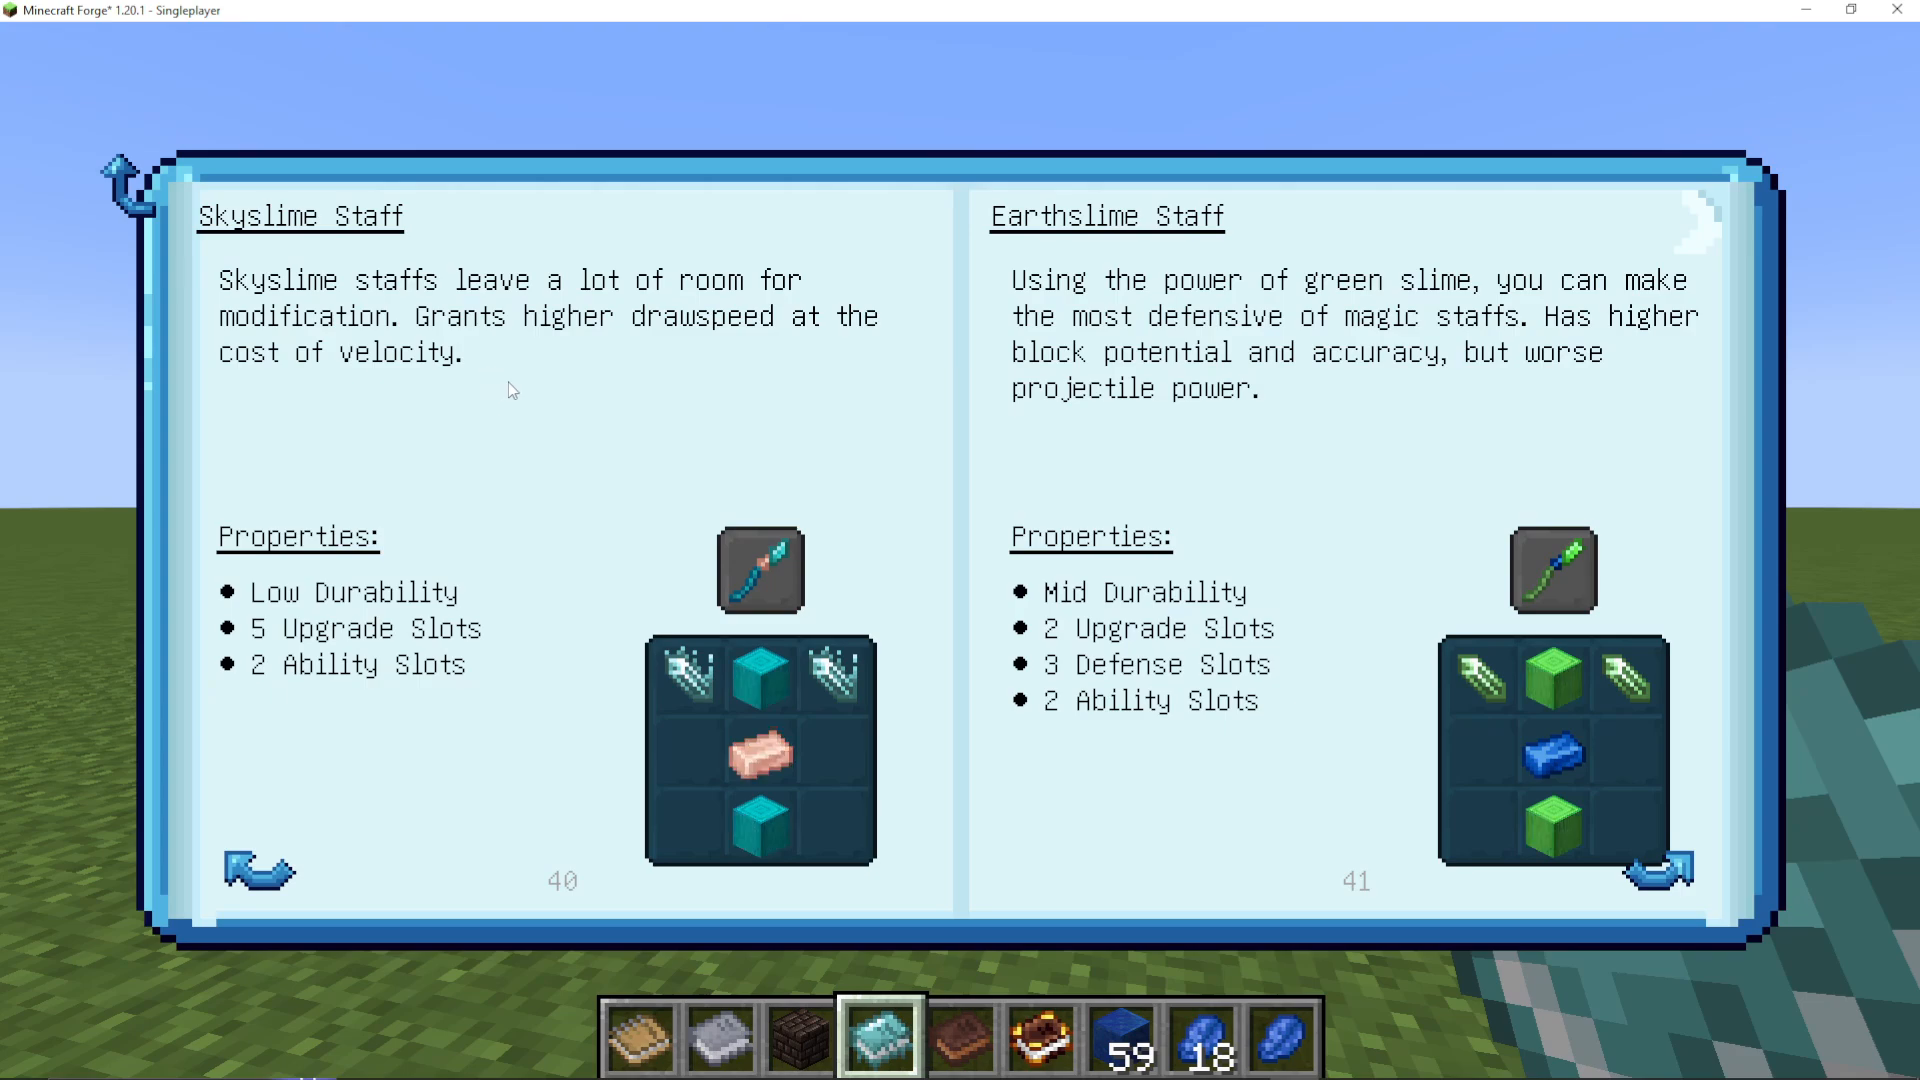
Sky Slime Staff: High draw speed, lower velocity. Room for lots of modifications.
Earth Slime Staff: Most defensive option with higher block potential and accuracy but lower projectile power.
Oka Slime Staff: High velocity at the cost of draw speed.
Ender Slime Staff: Unique properties related to the End dimension.
Slime Skulls and Armor
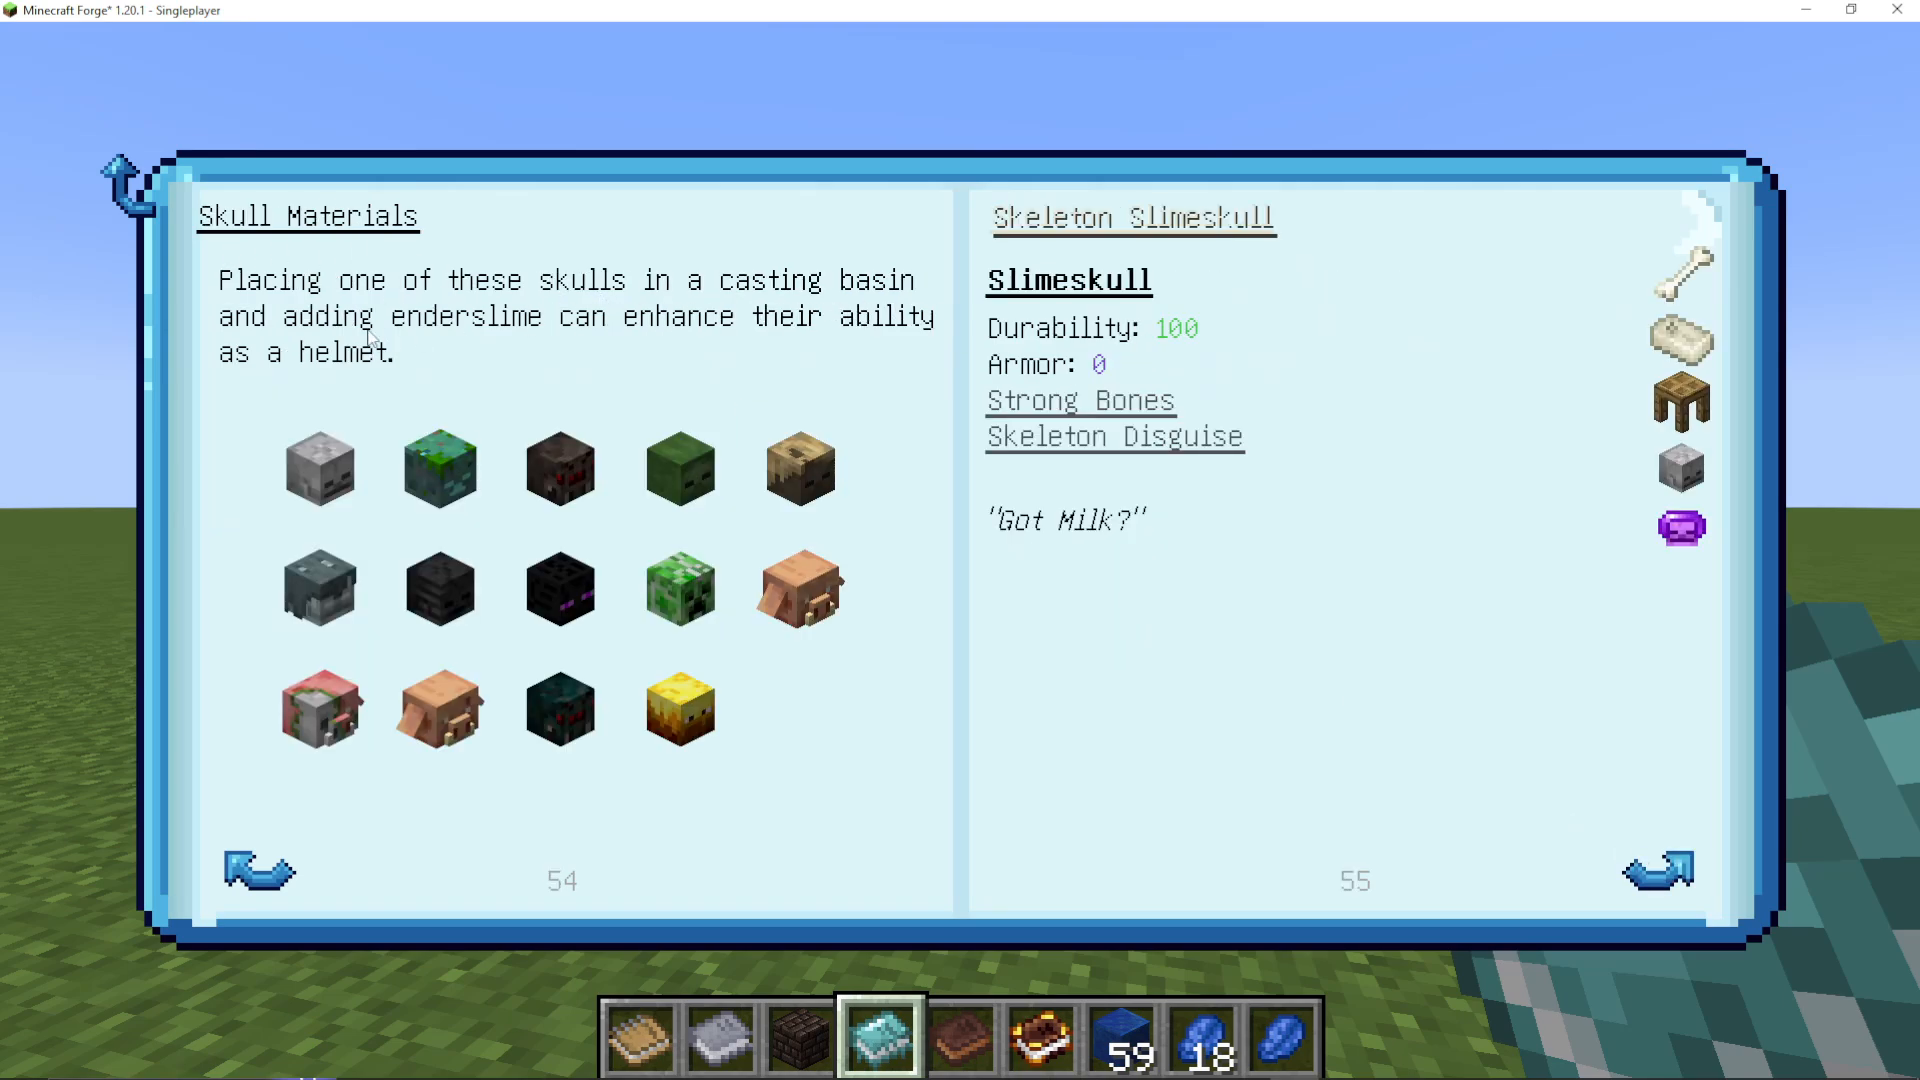
You can enhance skulls into helmets by pouring molten ender slime over them in a casting basin. Different skull types provide different bonuses:
Skeleton Helmet: Strong Bones and Skeleton Disguise
Spider Helmet: Web-related bonuses
Zombie Helmet: Undead-related bonuses
Husk Helmet: Desert-related bonuses
The Melting Pan
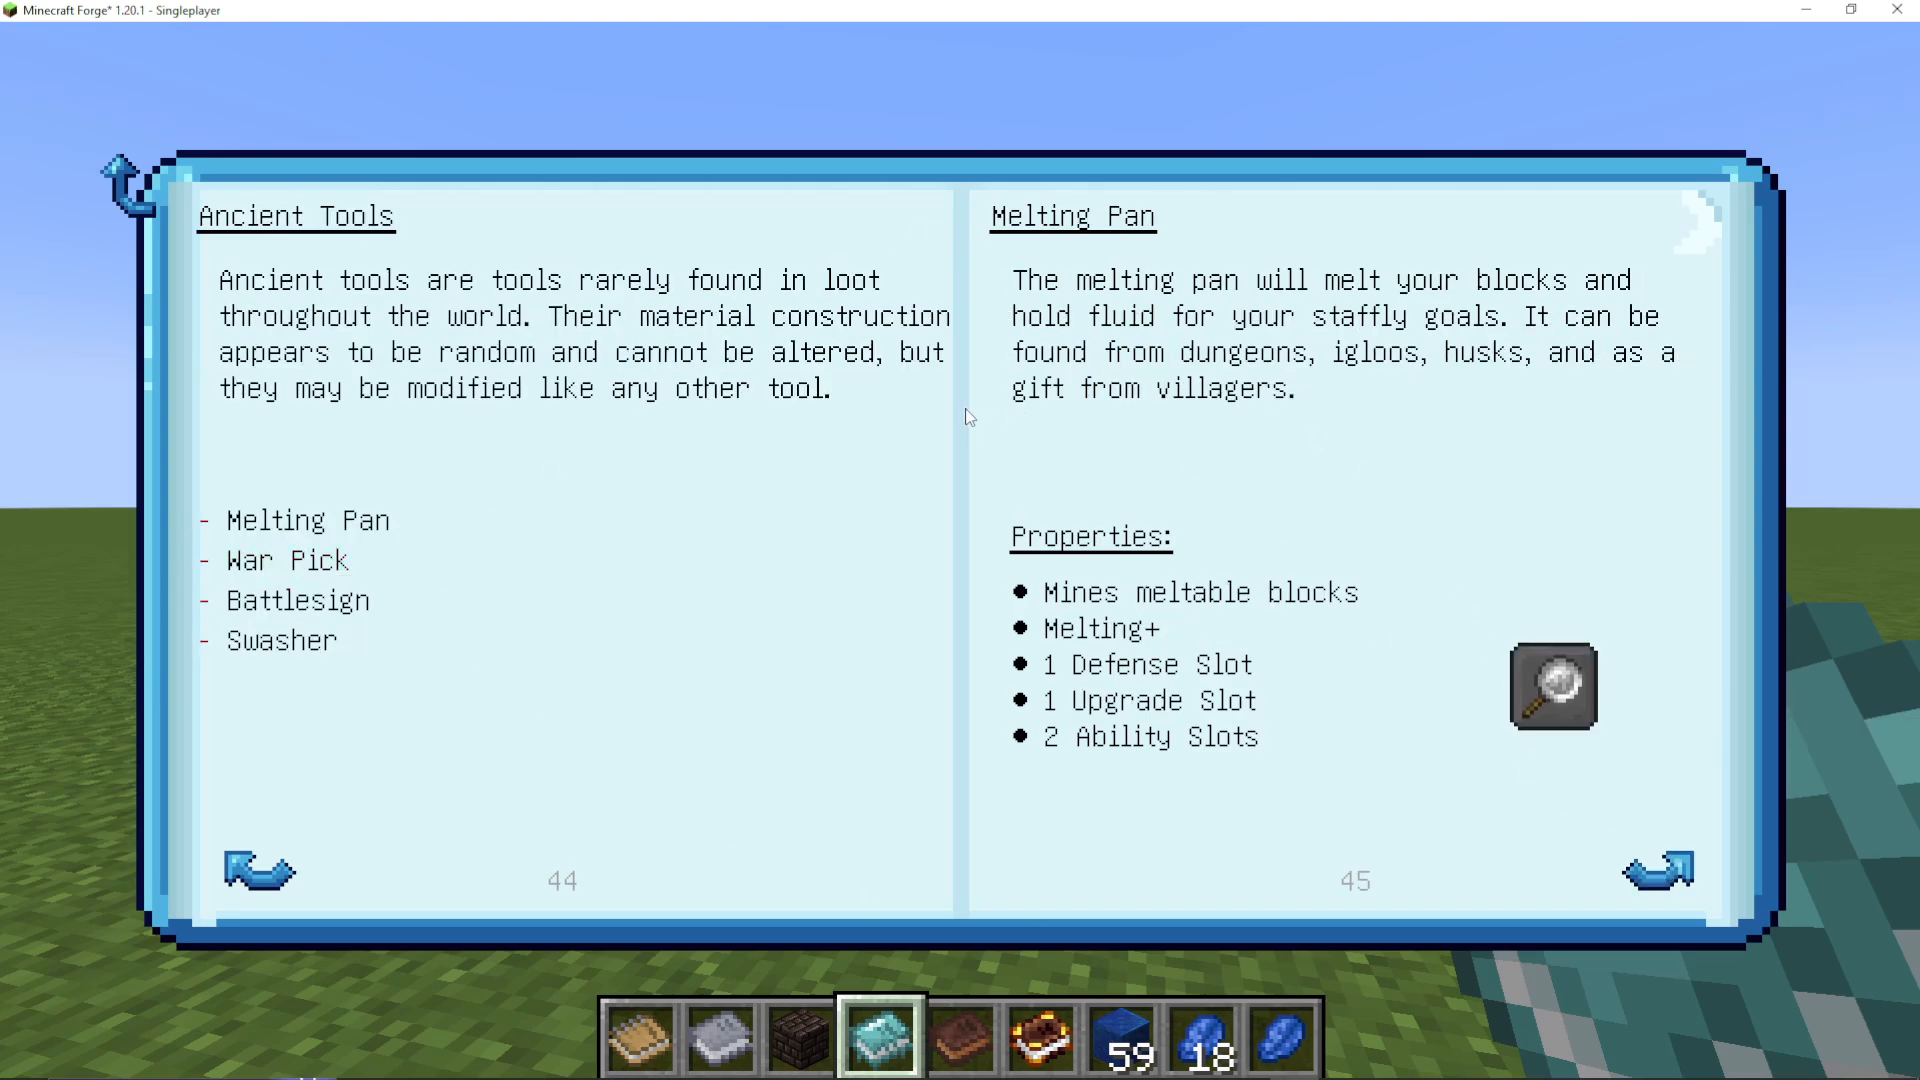
A handheld tool that can mine meltable blocks (ore blocks, stone, etc.) and immediately smelt them into molten metal. Think of it as a portable mini-foundry.
Comprehensive Guides: The Encyclopedias
The Encyclopedia of Tinkering
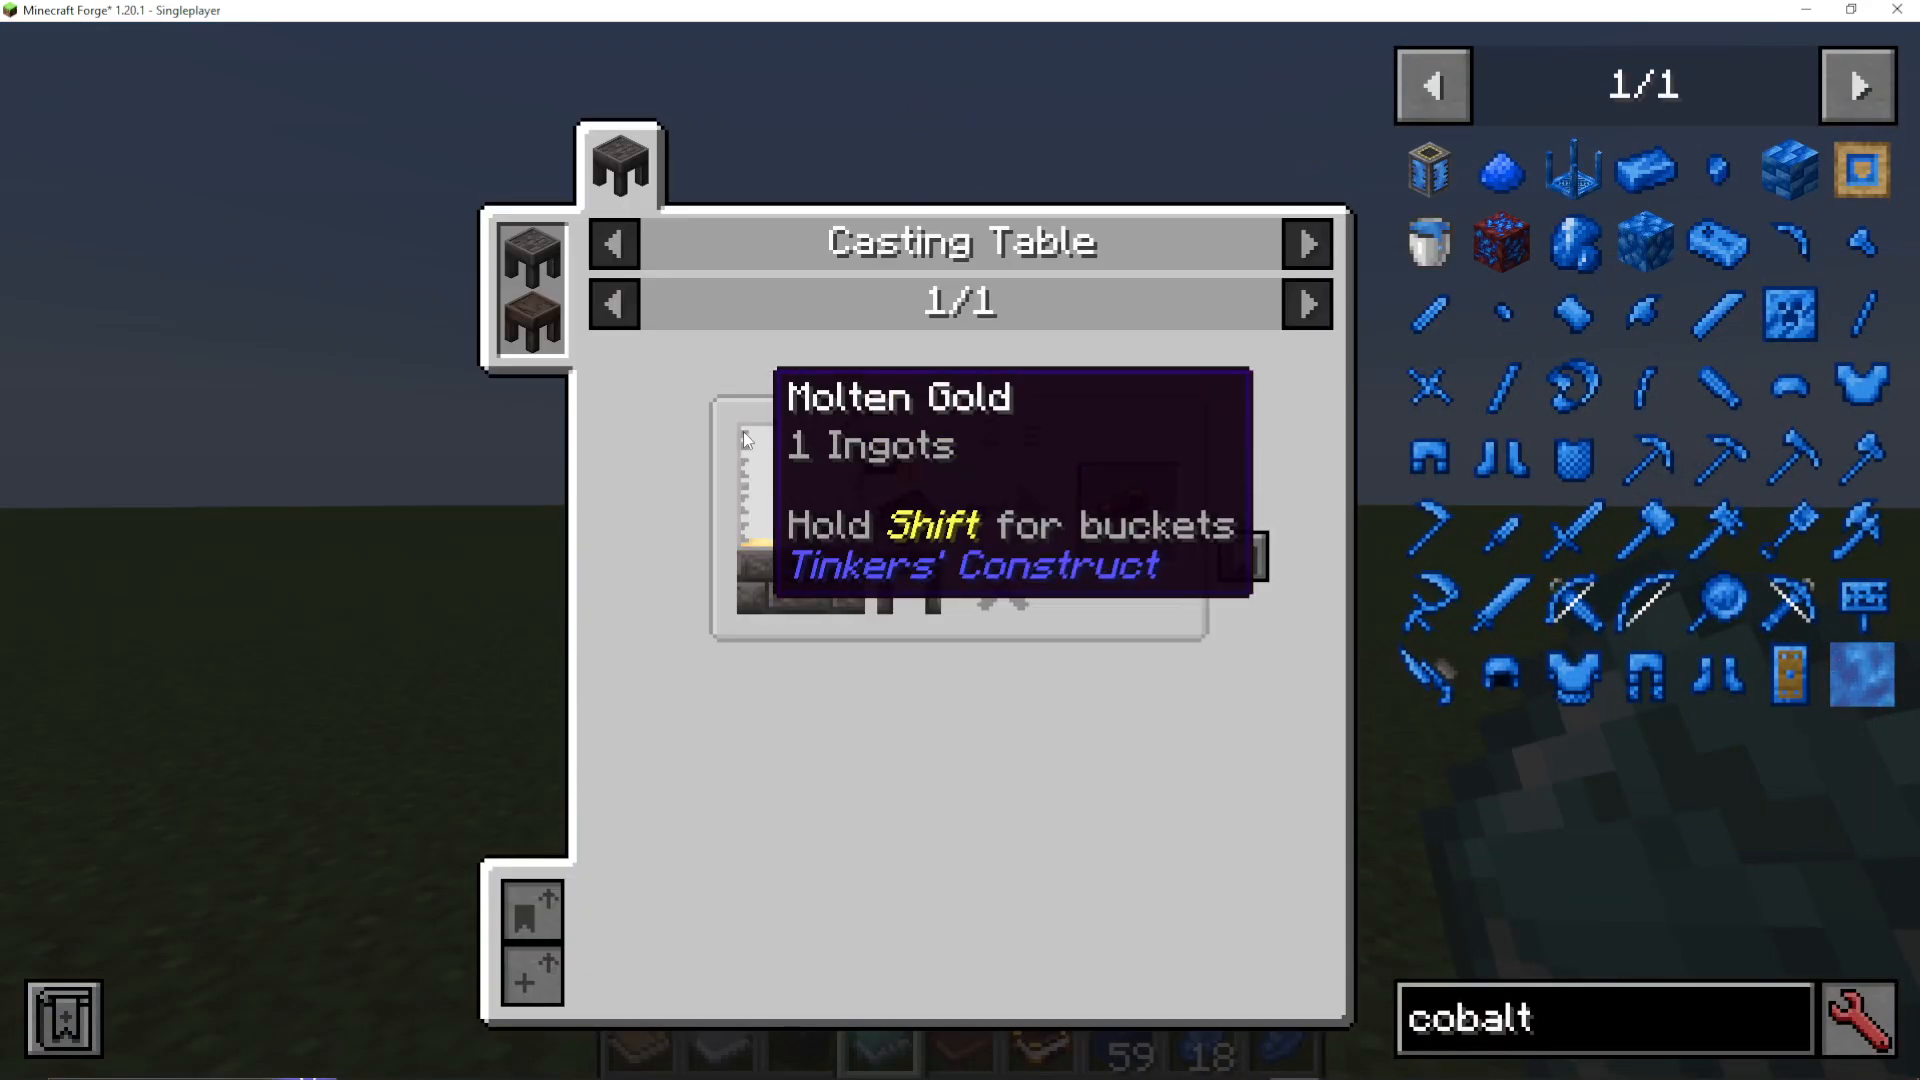
Craft a book with molten gold to create the “Encyclopedia of Tinkering.” This master guide contains comprehensive information about:
Introduction and getting started
Tool crafting and building
Armor creation and upgrades
Melee weapon mechanics
Harvesting tools and techniques
Ability slots and usage
Defense and protective gear
Ranged weapons
And much more…
Additional References
Multiple books are available to guide your progression:
Materials and You: Tier 1 materials reference
Puny Smelting: Smeltry operations and tier 2 materials
Mighty Smelting: Advanced smelting techniques for tier 3
Fantastic Foundry: Foundry operations and tier 4 materials
Tinker’s Gadgetry: Special items, staffs, and utilities
Encyclopedia of Tinkering: Complete master reference
Additional Features and Tips
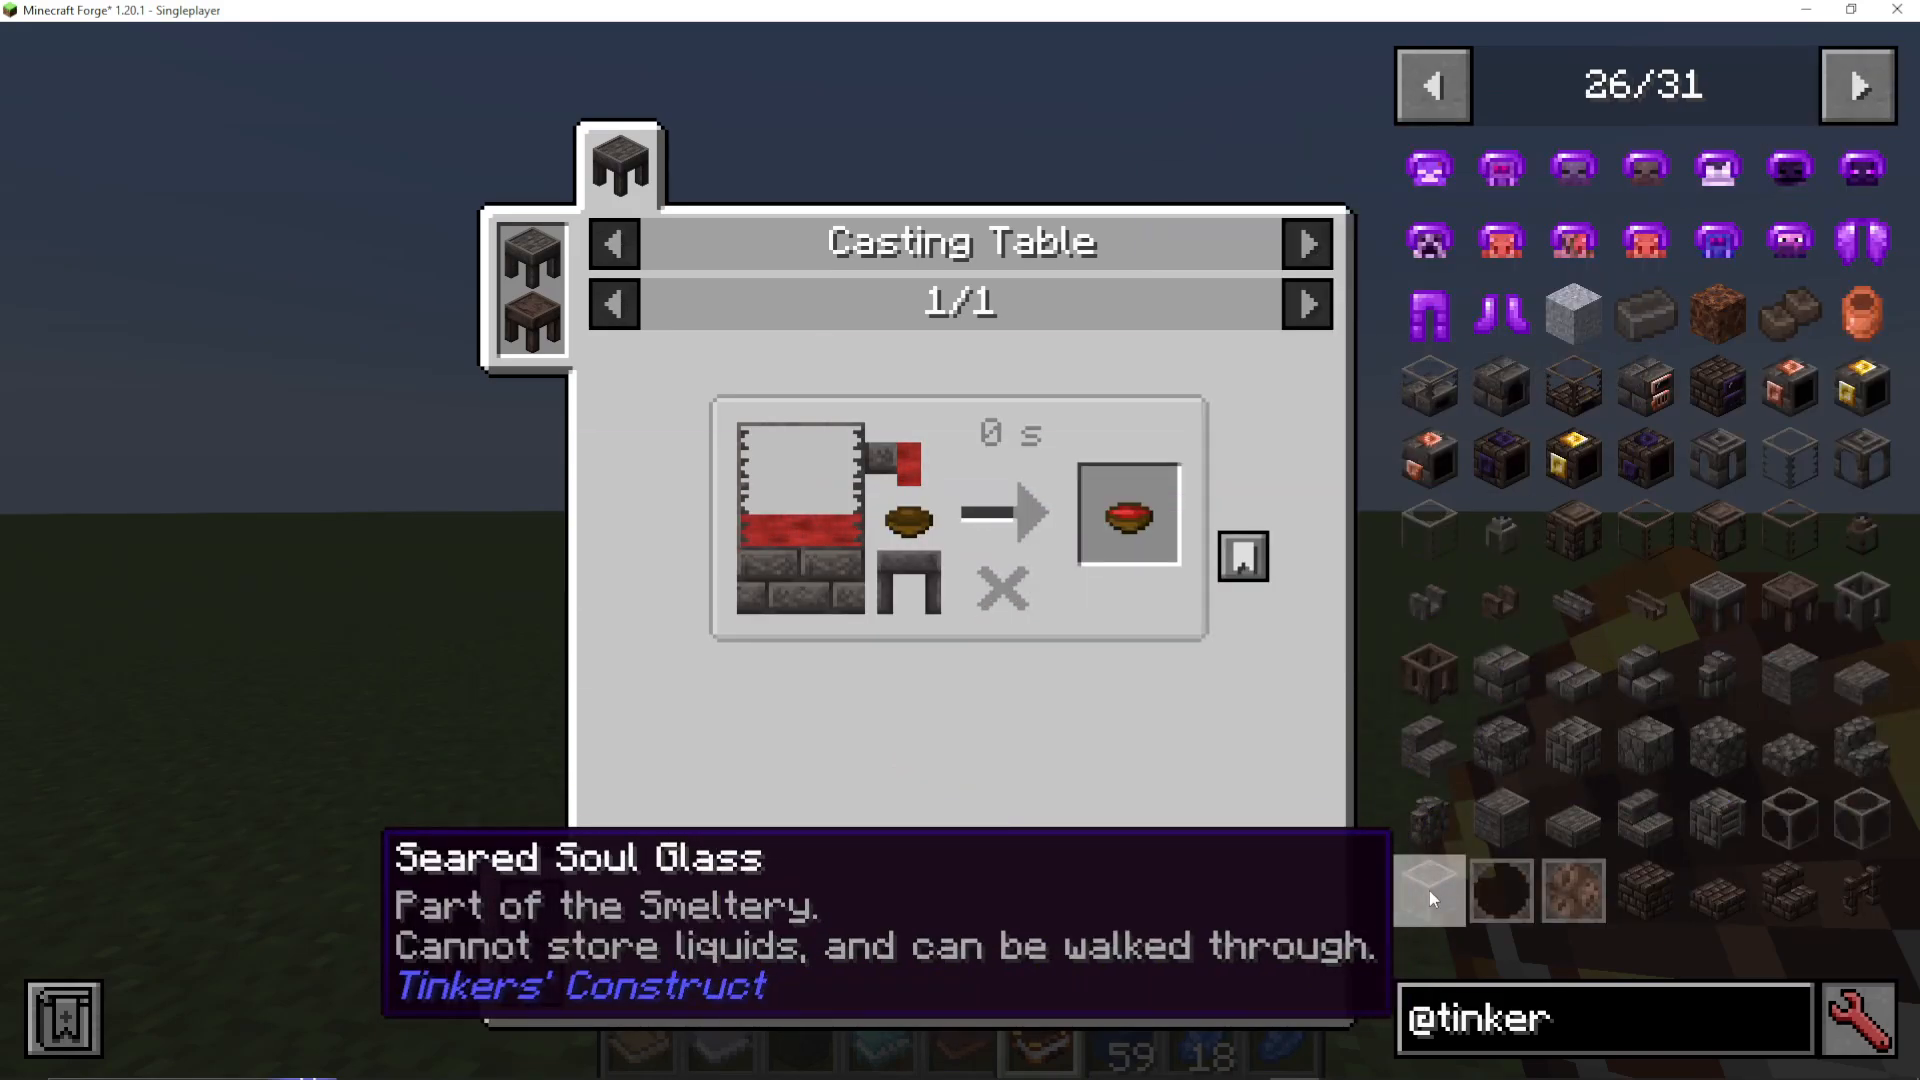
Seared Soul Glass
A special decorative block that cannot store liquids but can be walked through. Perfect for creating transparent structures in your Smeltry area without blocking passage.
You can also create Seared Soul Glass Panes with the same properties.
Hopper and Automation
The “Puny Smelting” book shows simple automation setups using levers and hoppers, allowing you to automate basic ore smelting without complex mods.
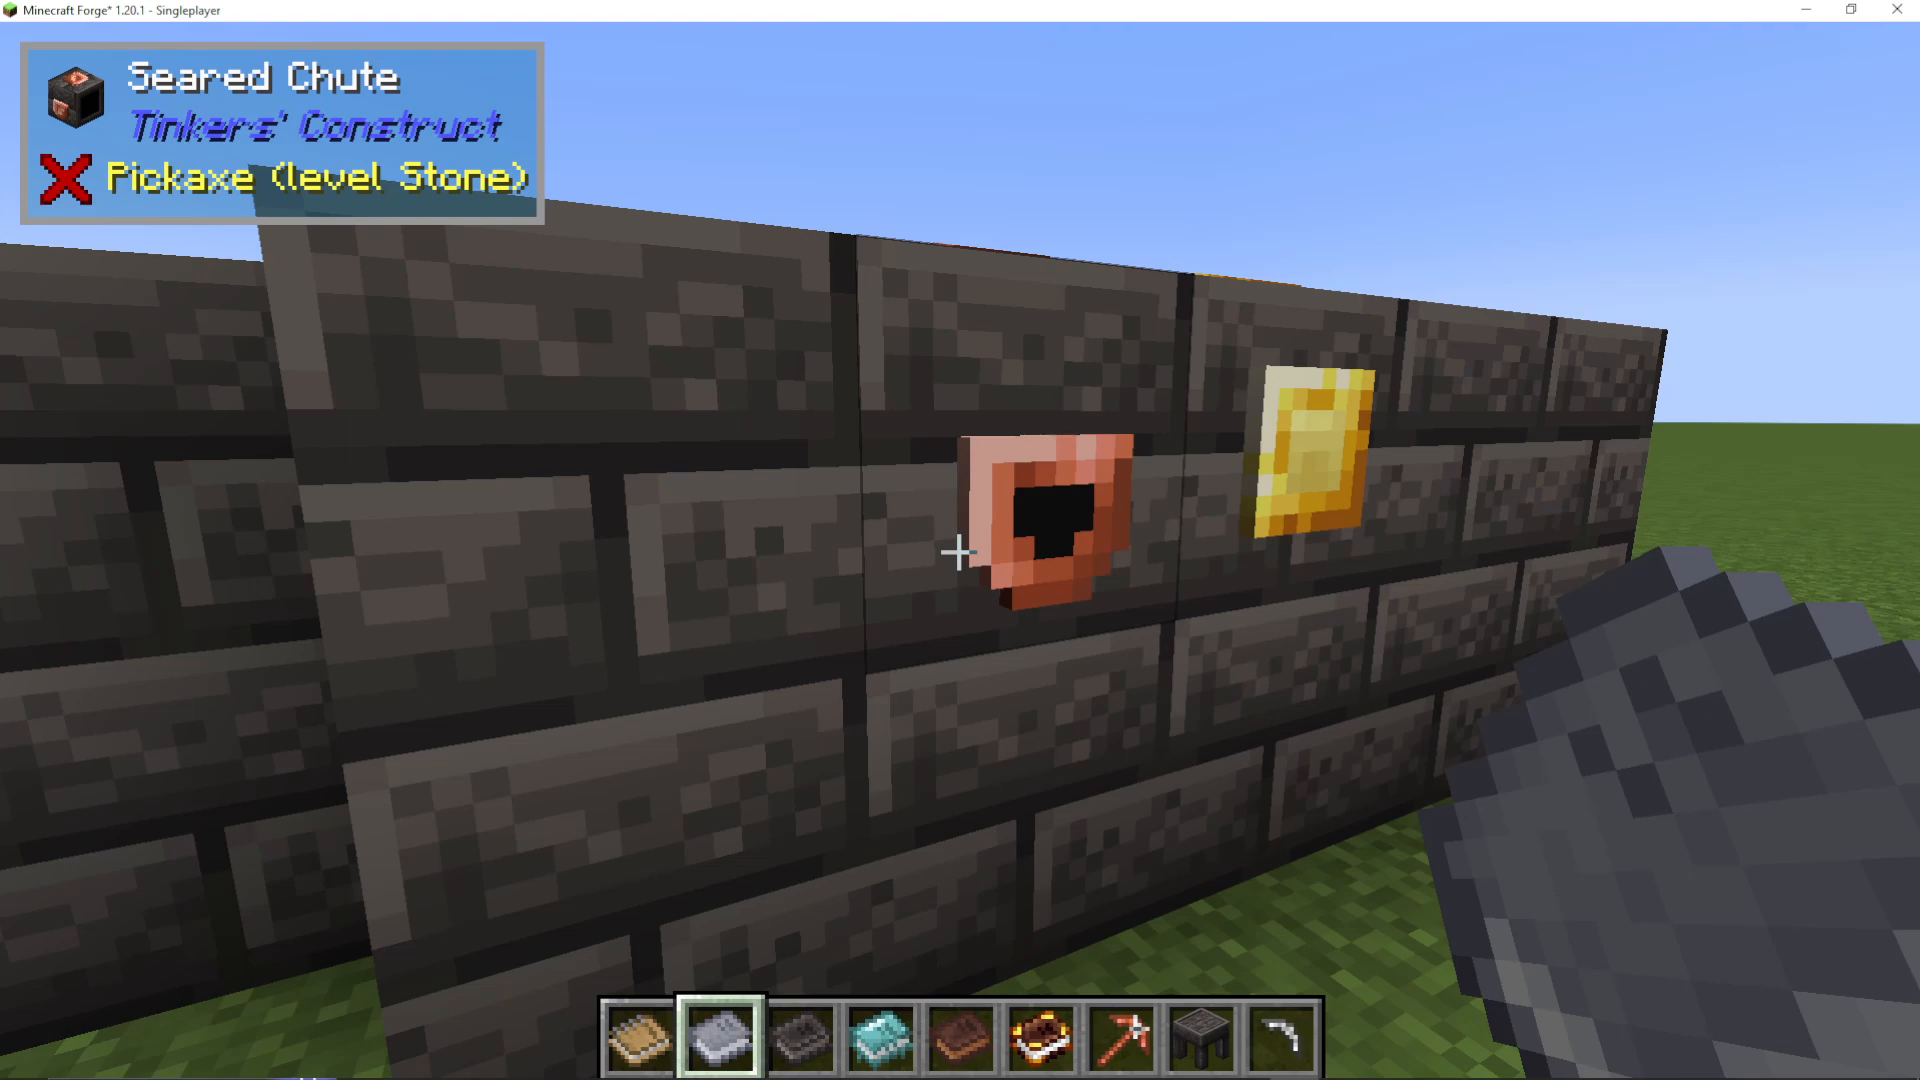
Seared Shoots and Ducts
Shoots: Input and output items from the Smeltry.
Ducts: Act as filters. Place a molten bucket of a specific metal into the duct to filter outputs—only that metal will flow through.
Obtaining Dragon Scales
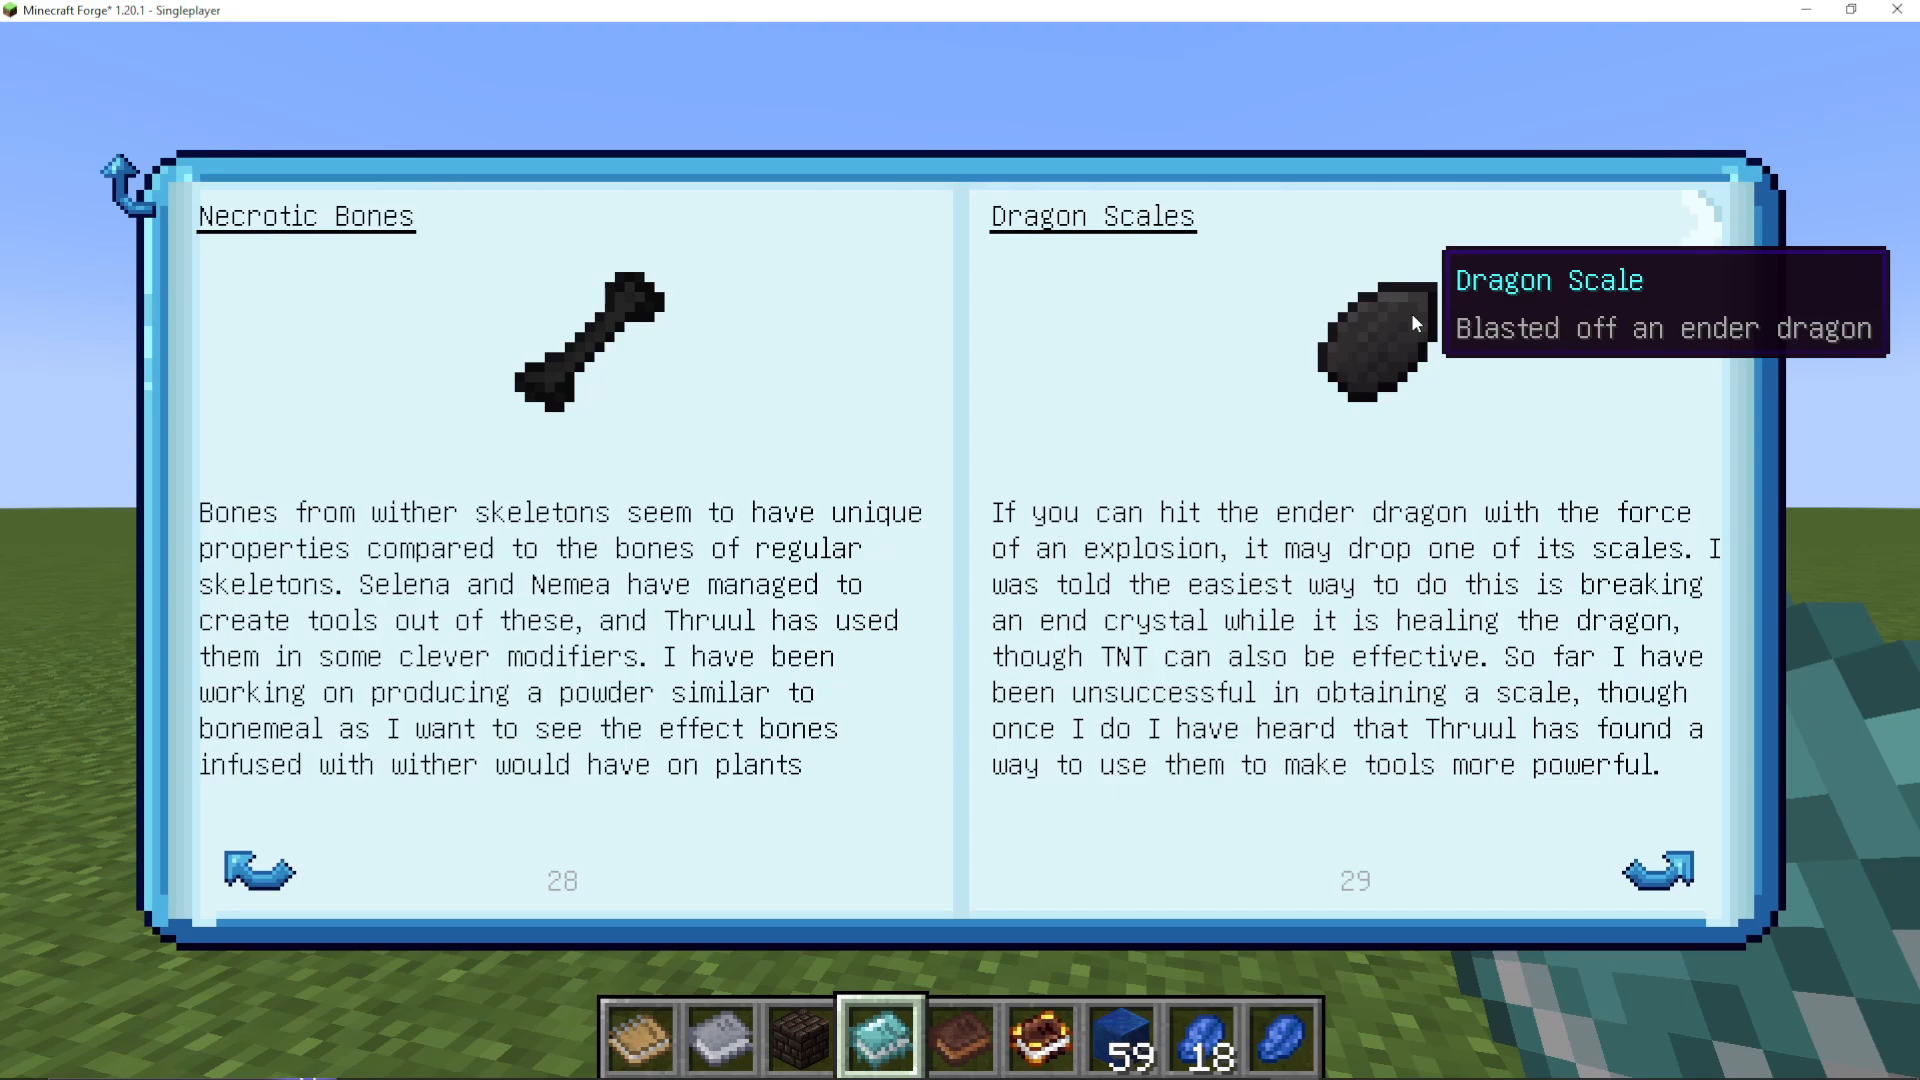
To get dragon scales, you must damage the Ender Dragon while it’s healing at its healing crystals. Using TNT is also effective for damaging it during this phase.
Creative Mode Ability Tool
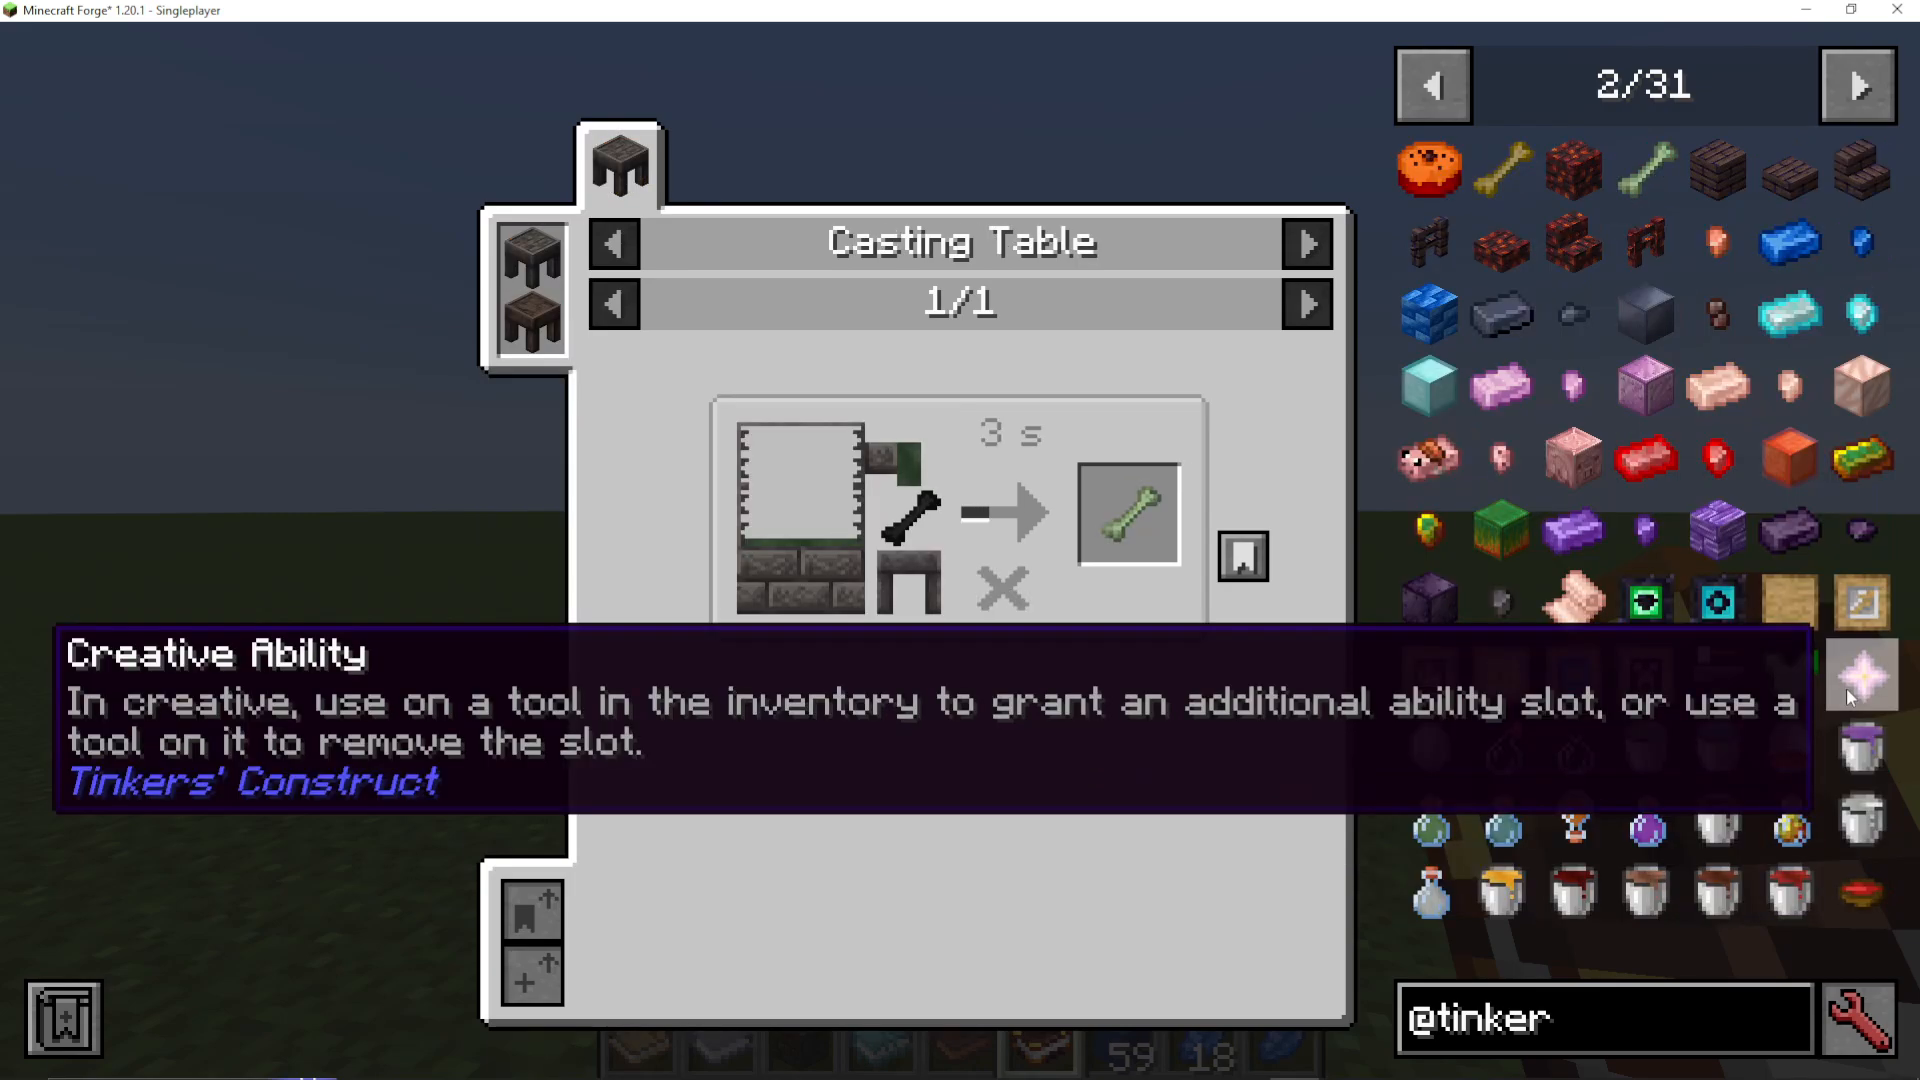
If you’re testing in creative mode, use the Creative Ability Tool on a tool to grant an additional ability slot, or use it on your tool to remove a slot.
Crafting Meat Soup
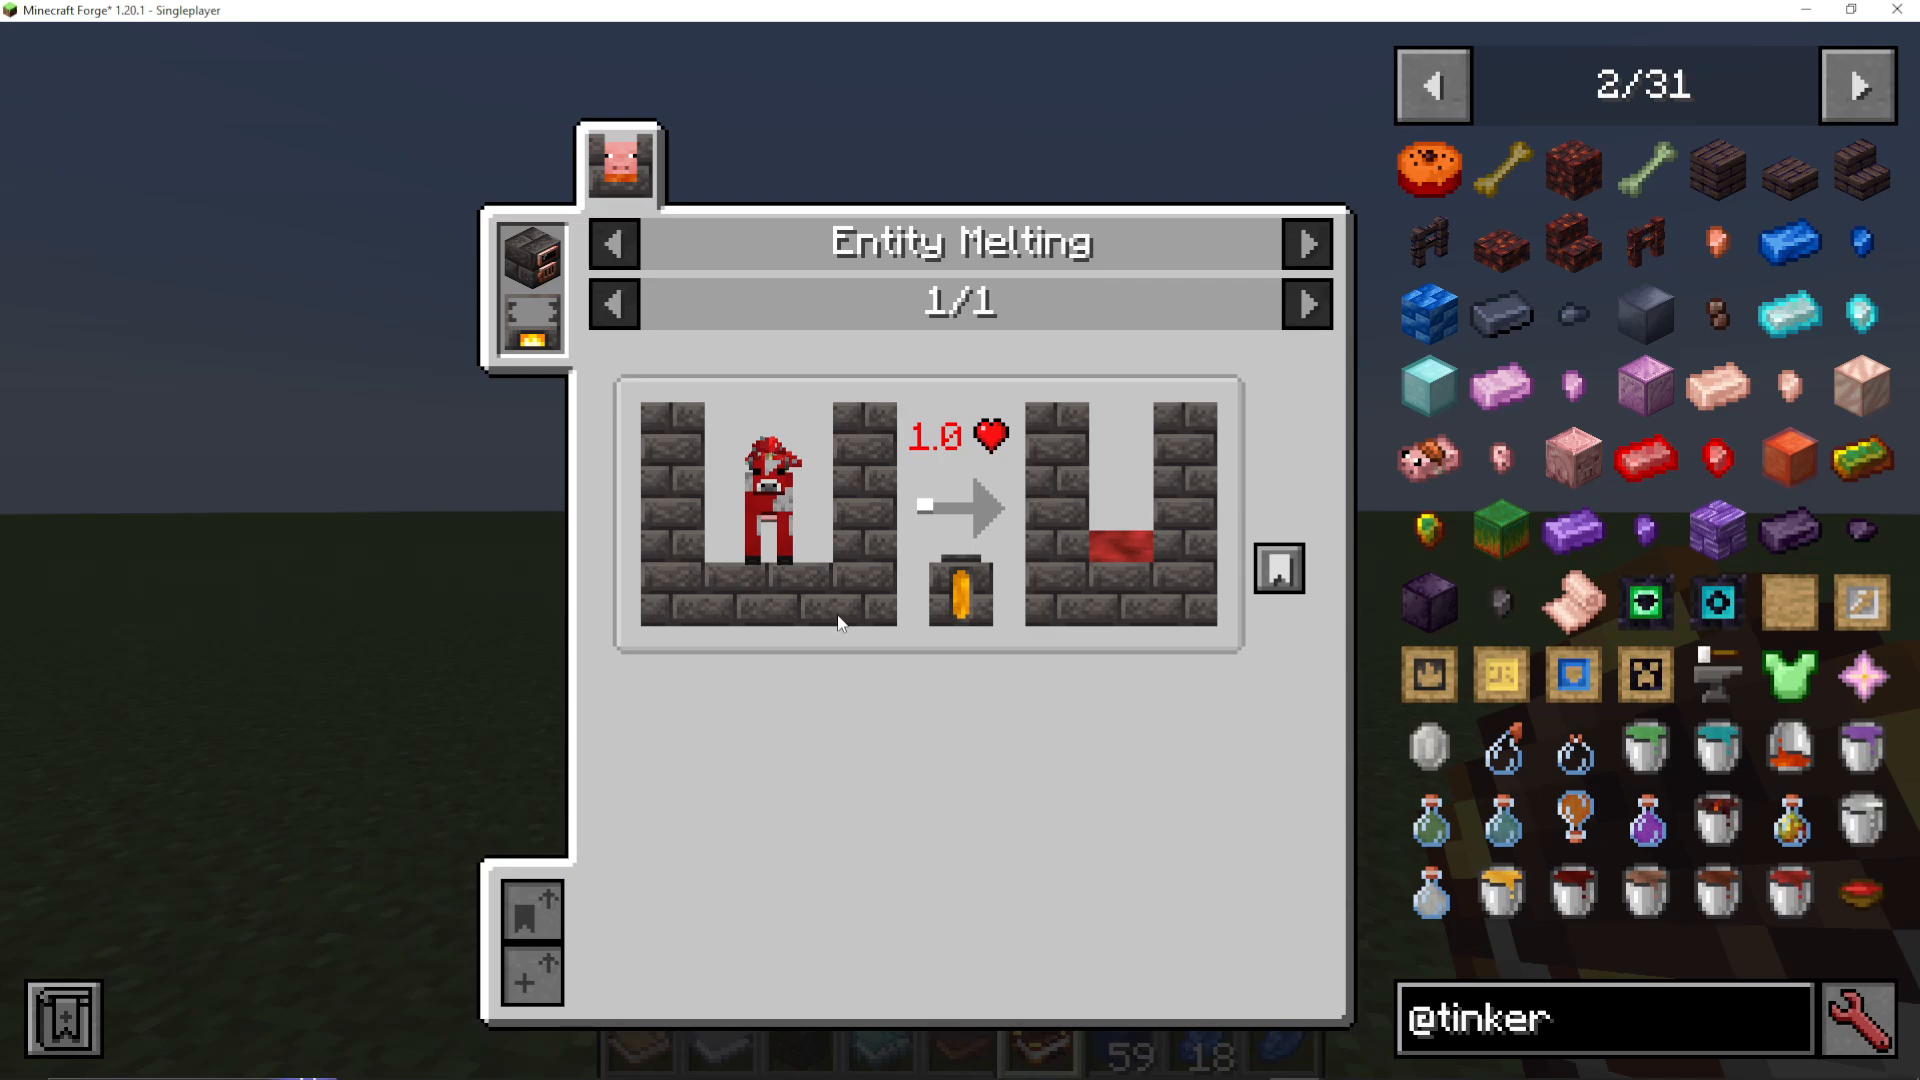
You can smelt mobs like chickens in the Smeltry to produce Meat Soup. This can be:
Alloyed with molten honey and molten iron to create molten pig iron
Poured into a casting basin with a bowl to create a bowl of meat soup that you can eat
Conclusion: You’re Now an Expert!
Congratulations! You’ve now learned the complete fundamentals of Tinkers Construct for Minecraft 1.16 and above. You understand how to:
Craft your first basic tools with tier 1 materials
Build and operate a Smeltry for tier 2 and 3 materials
Construct a Foundry for tier 4 materials
Create advanced tools and weapons at the Tinkers Anvil
Add and manage modifiers on your gear
Utilize special items, staffs, and utility features
Access comprehensive guides to explore even deeper
Remember that Tinkers Construct integrates with every mod in your modpack, so always check what materials are available to you. The mod’s flexibility allows for endless customization and progression. Happy crafting!
— Want to Support? —
If you would like to help us continue making these guides – please consider joining our patreon here – https://www.patreon.com/c/JaviHeals
Alternatively – we host a group of MC Servers you can join here – https://discord.gg/zD7Gjt6MHF
“`



