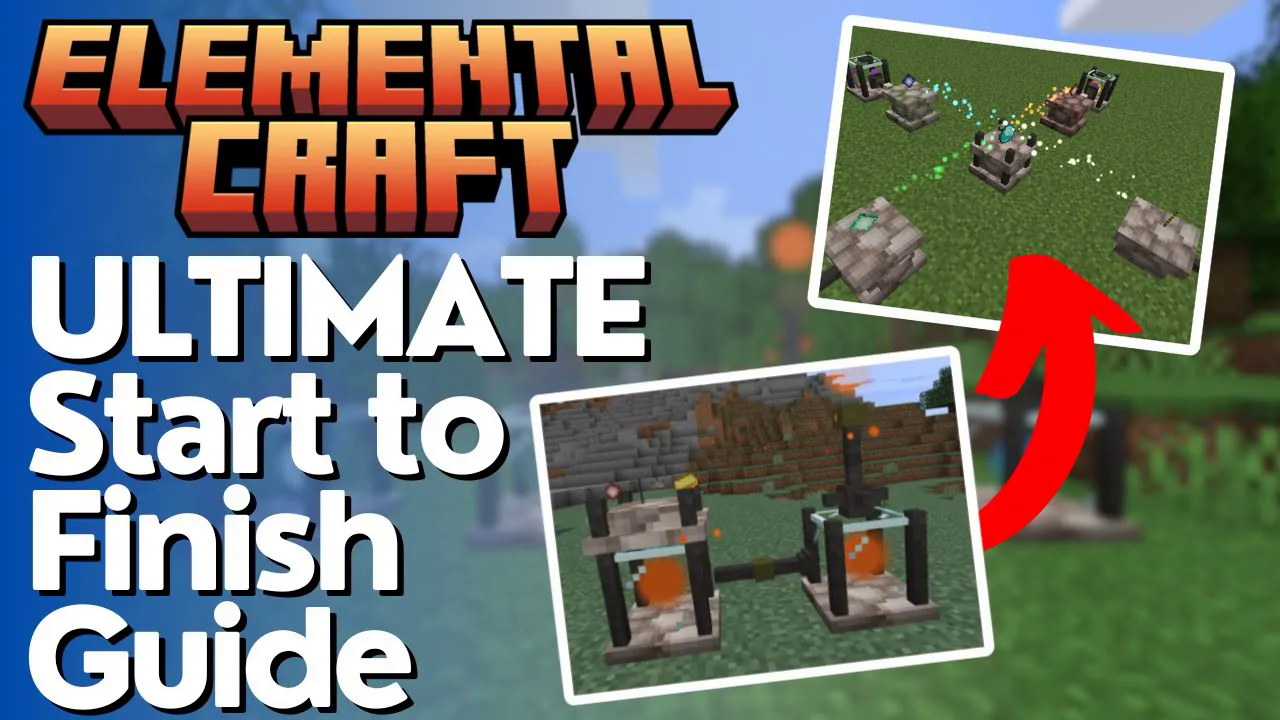
The Ultimate Guide to Elemental Craft
The Ultimate Elemental Craft Mod Guide: Start to Finish
Elemental Craft is one of the most impressive magic-tech hybrid mods available for Minecraft, built entirely around the four classical elements: Earth, Water, Air, and Fire. This complete guide walks you through everything — from mining your first inert crystal to casting spells and equipping passive jewels. No fluff, no filler. Let’s get into it.
Step 1: Finding Inert Crystal Ore
The very first resource you need is Inert Crystal Ore. It comes in two variants: a regular version and a Deepslate version. The best layer to mine it is Y level 36, though this may vary depending on your modpack settings. The ore spawns between Y level 94 and Y level -24, so avoid going too deep into the Deepslate zone — you don’t need to.
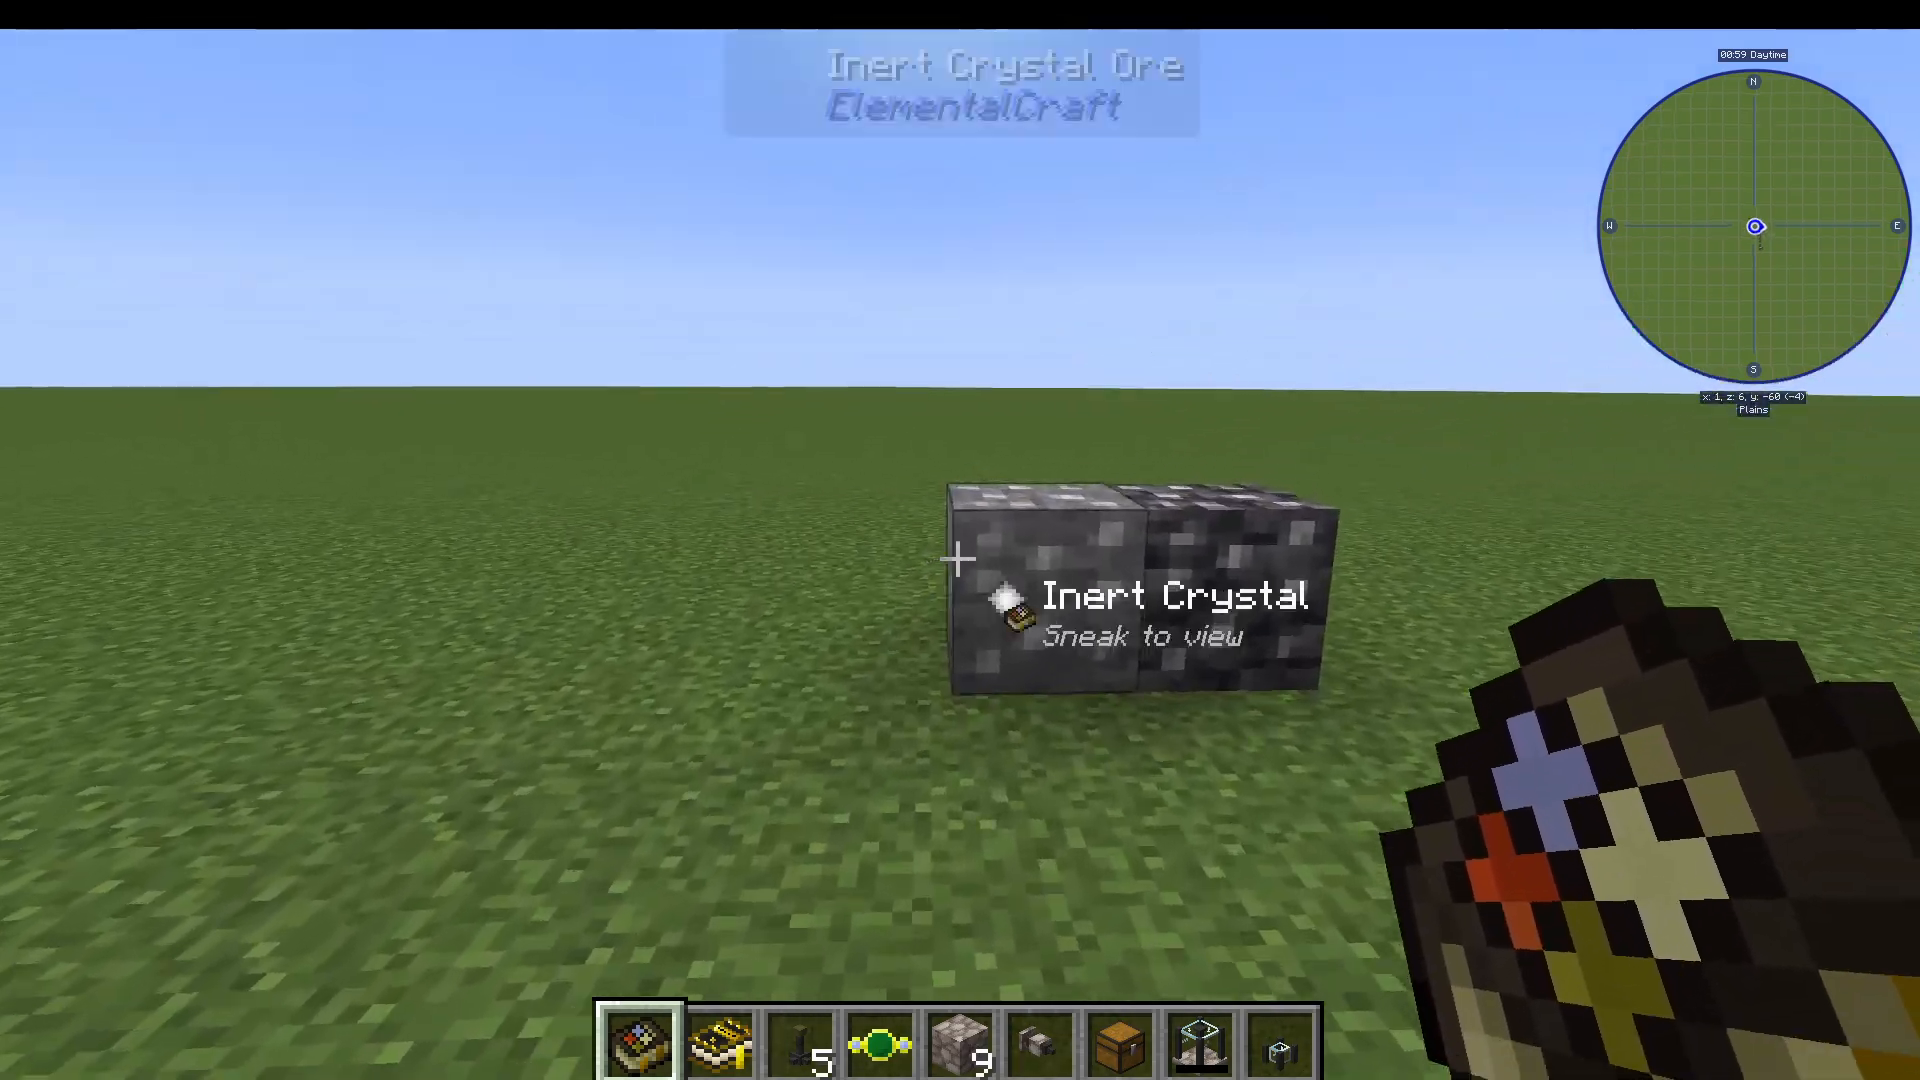
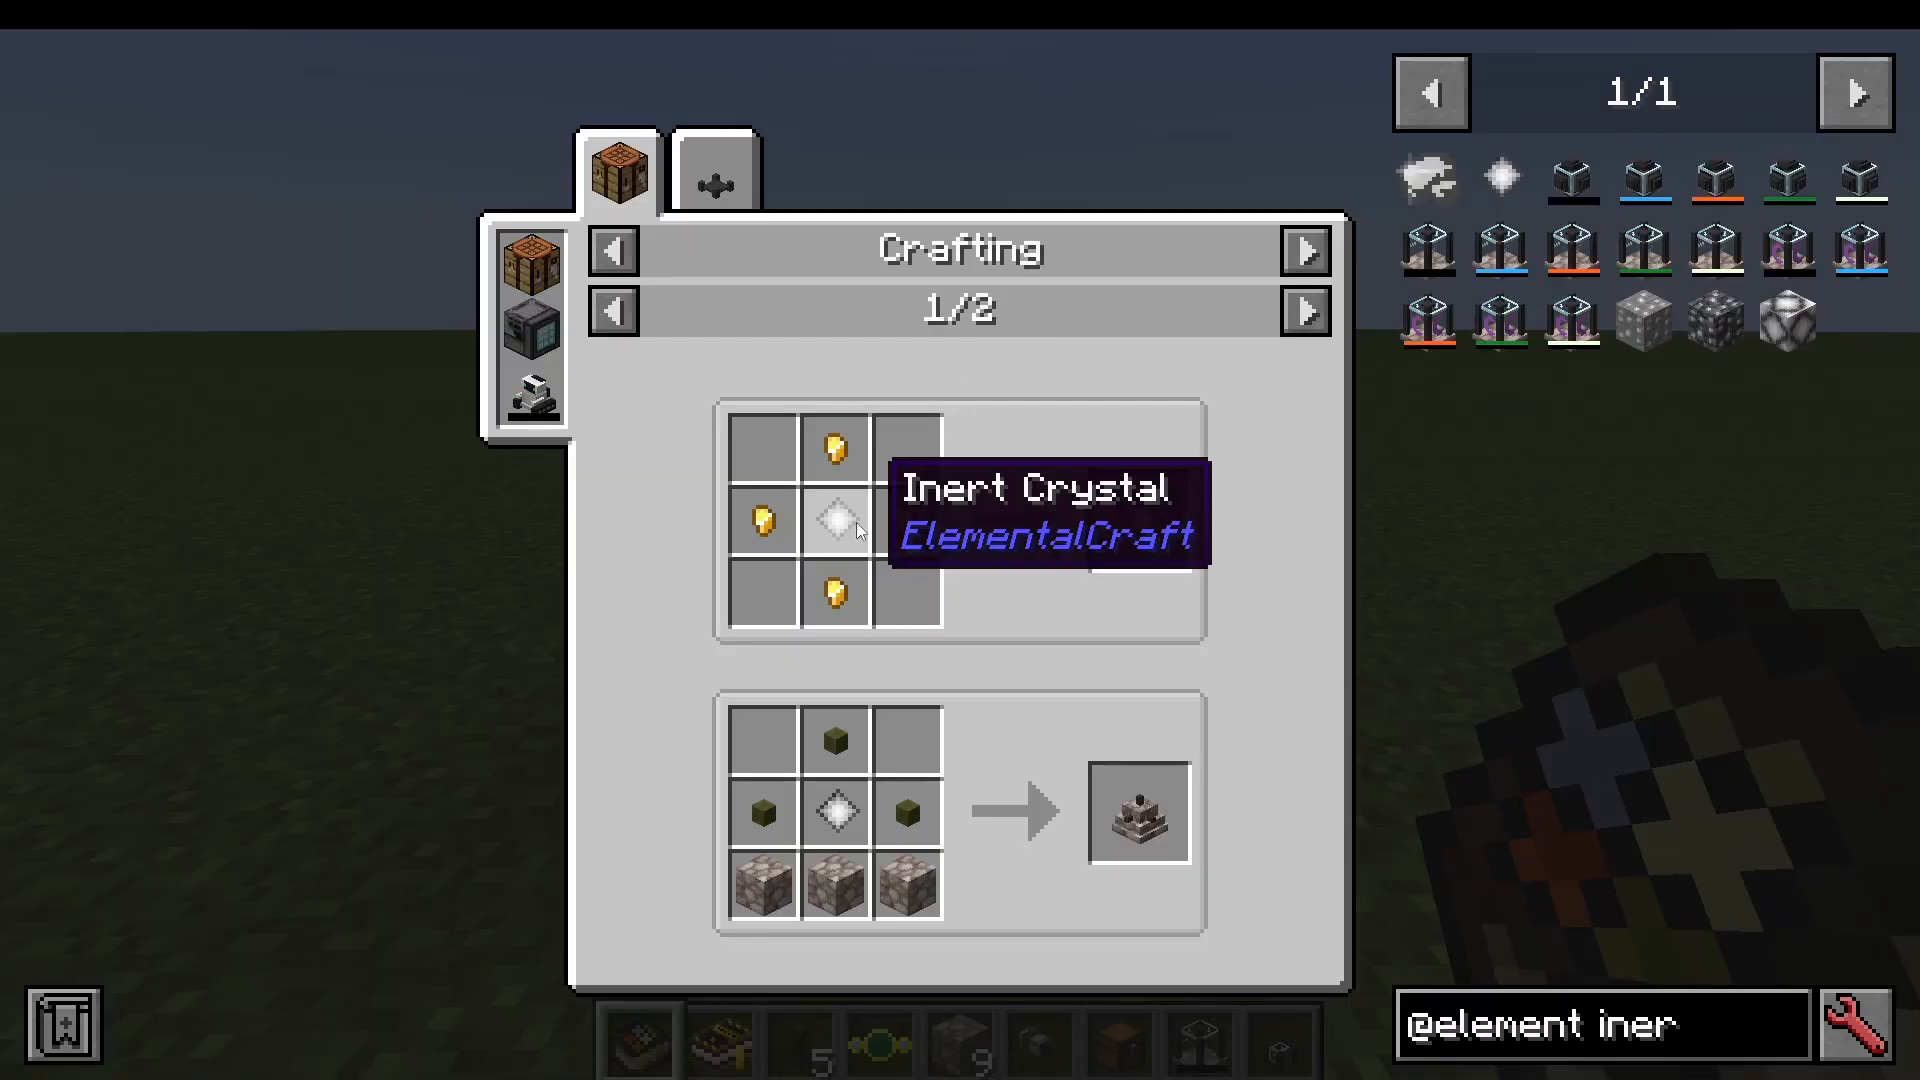
Mining Inert Crystal Ore drops Inert Crystals. You can combine these with Gold Nuggets to craft a Contained Crystal. This is one of the two core items you need to get started. You can also craft the mod’s Guidebook at this stage, though most entries will be locked until you progress further.
Step 2: Getting Elements — Sources and Shards
Elemental Craft revolves around four elements. There are two primary ways to obtain them.
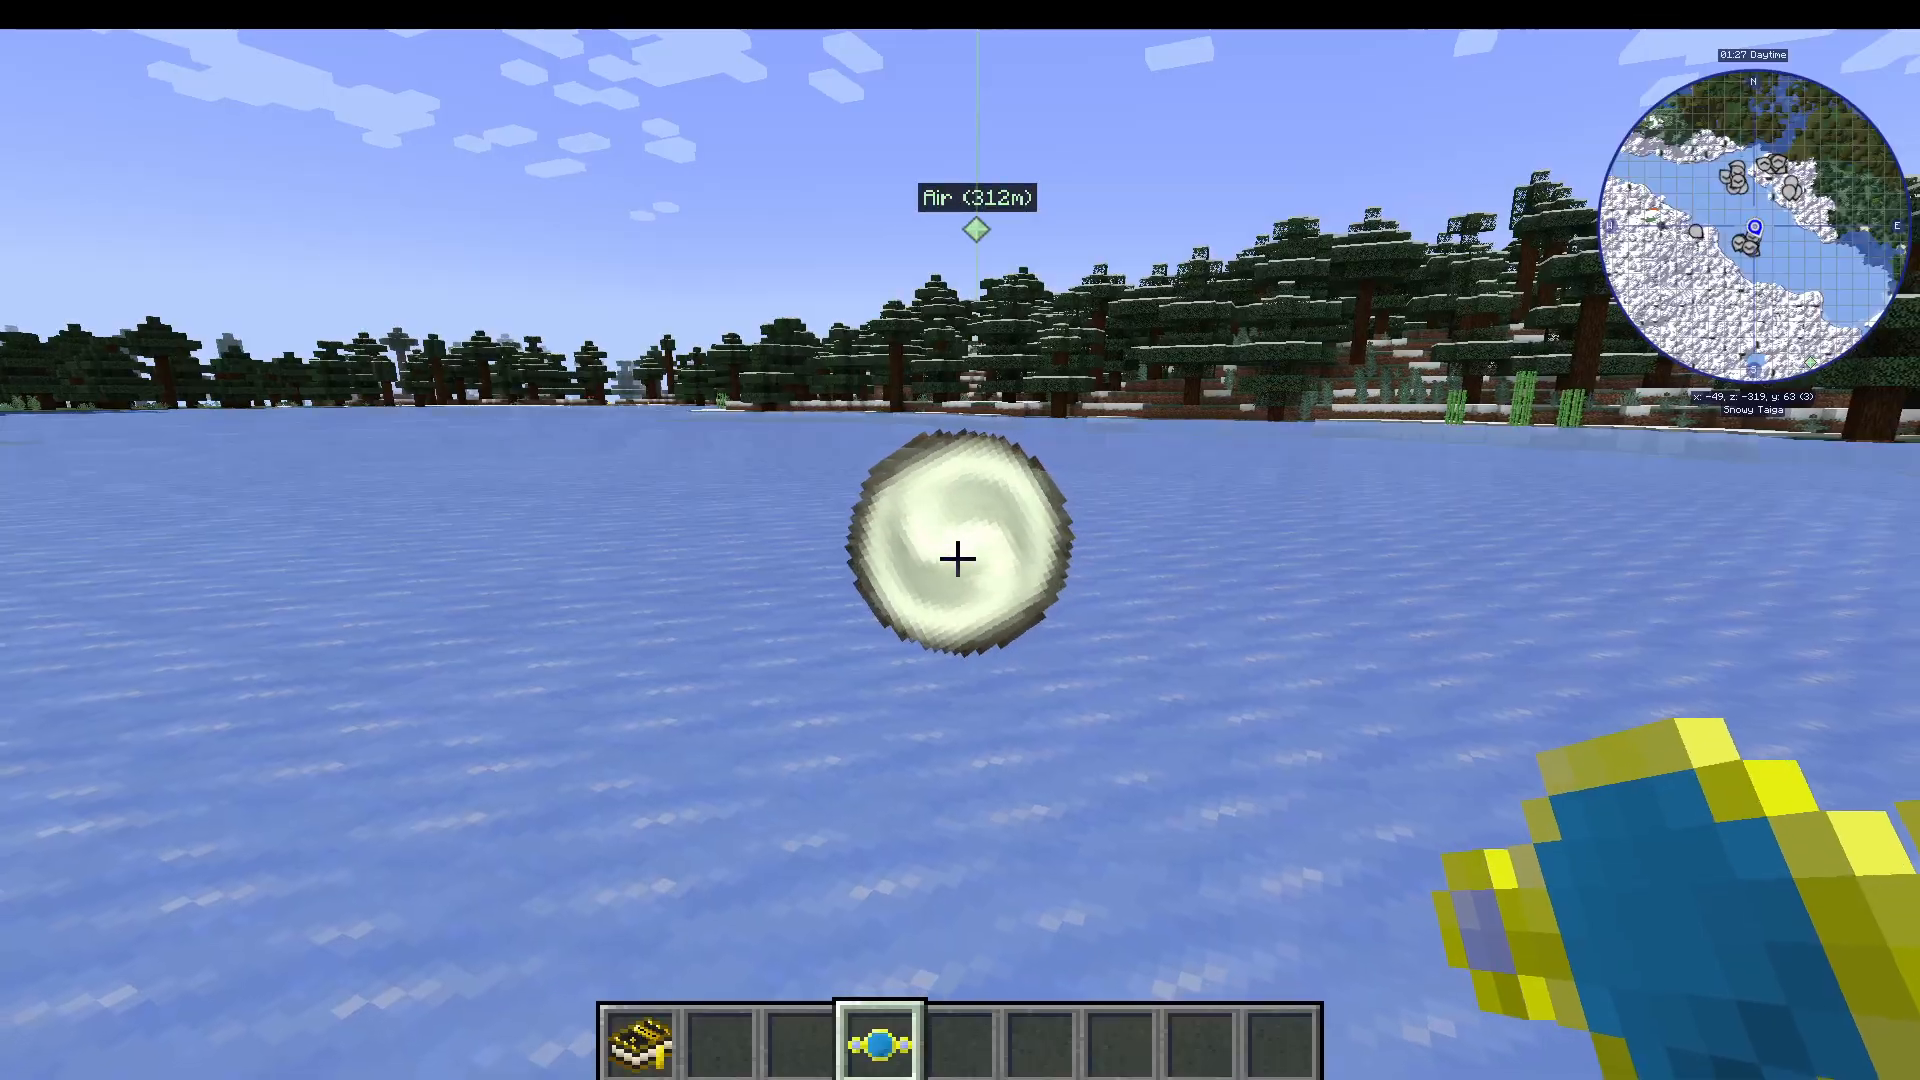
Method 1: Finding Element Sources in the World
Element sources spawn naturally across different biomes and dimensions:
Air: High altitudes, mountain biomes, and the End dimension.
Earth: Underground areas and caves.
Fire: Dry biomes like deserts, and the Nether.
Water: Ocean biomes and aquatic areas.
Method 2: Collecting Element Shards from Mobs
If you’re struggling to find natural sources, you can collect Element Shards by killing specific mobs. Each mob type drops a shard corresponding to a particular element:
Fire Shards: Creepers and Nether mobs.
Water Shards: Drowned, Squids, Guardians, and fish.
Earth Shards: Zombies, Skeletons, and other undead mobs.
Air Shards: End mobs and levitating mobs.
Shards come in two tiers: a regular Raw Shard and a Powerful Shard, which is simply nine small shards combined. If you’re having trouble finding world sources, setting up a mob farm is a great alternative strategy.
Step 3: Extracting Elements into Containers
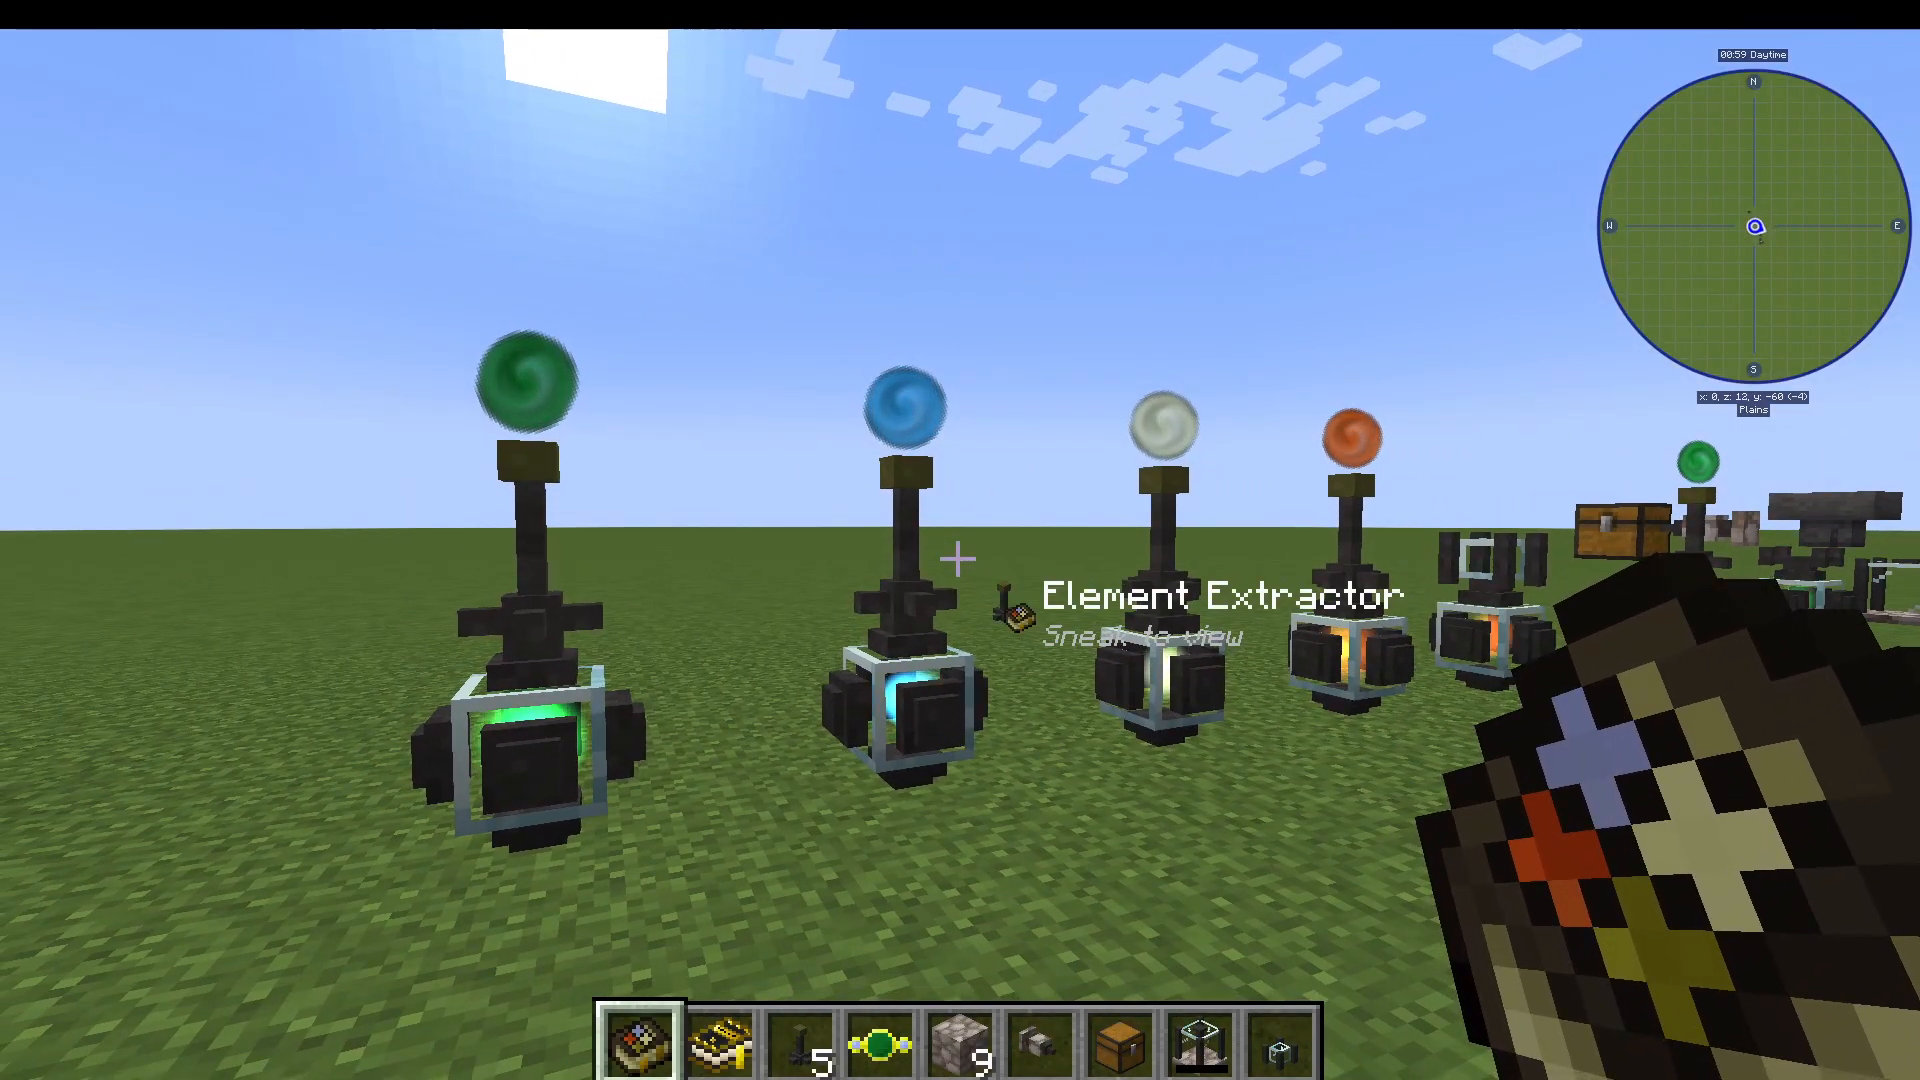
Before you can use elements, you need to extract them into storage. This requires two items: a Small Element Container and an Element Extractor.
Using an Element Source with an Extractor
Place the Small Element Container two blocks below your element source. Then place the Element Extractor one block above the container, directly below the source. The extractor will show a visual indicator confirming correct placement. Right-click the extractor to begin pulling element from the source into the container below.
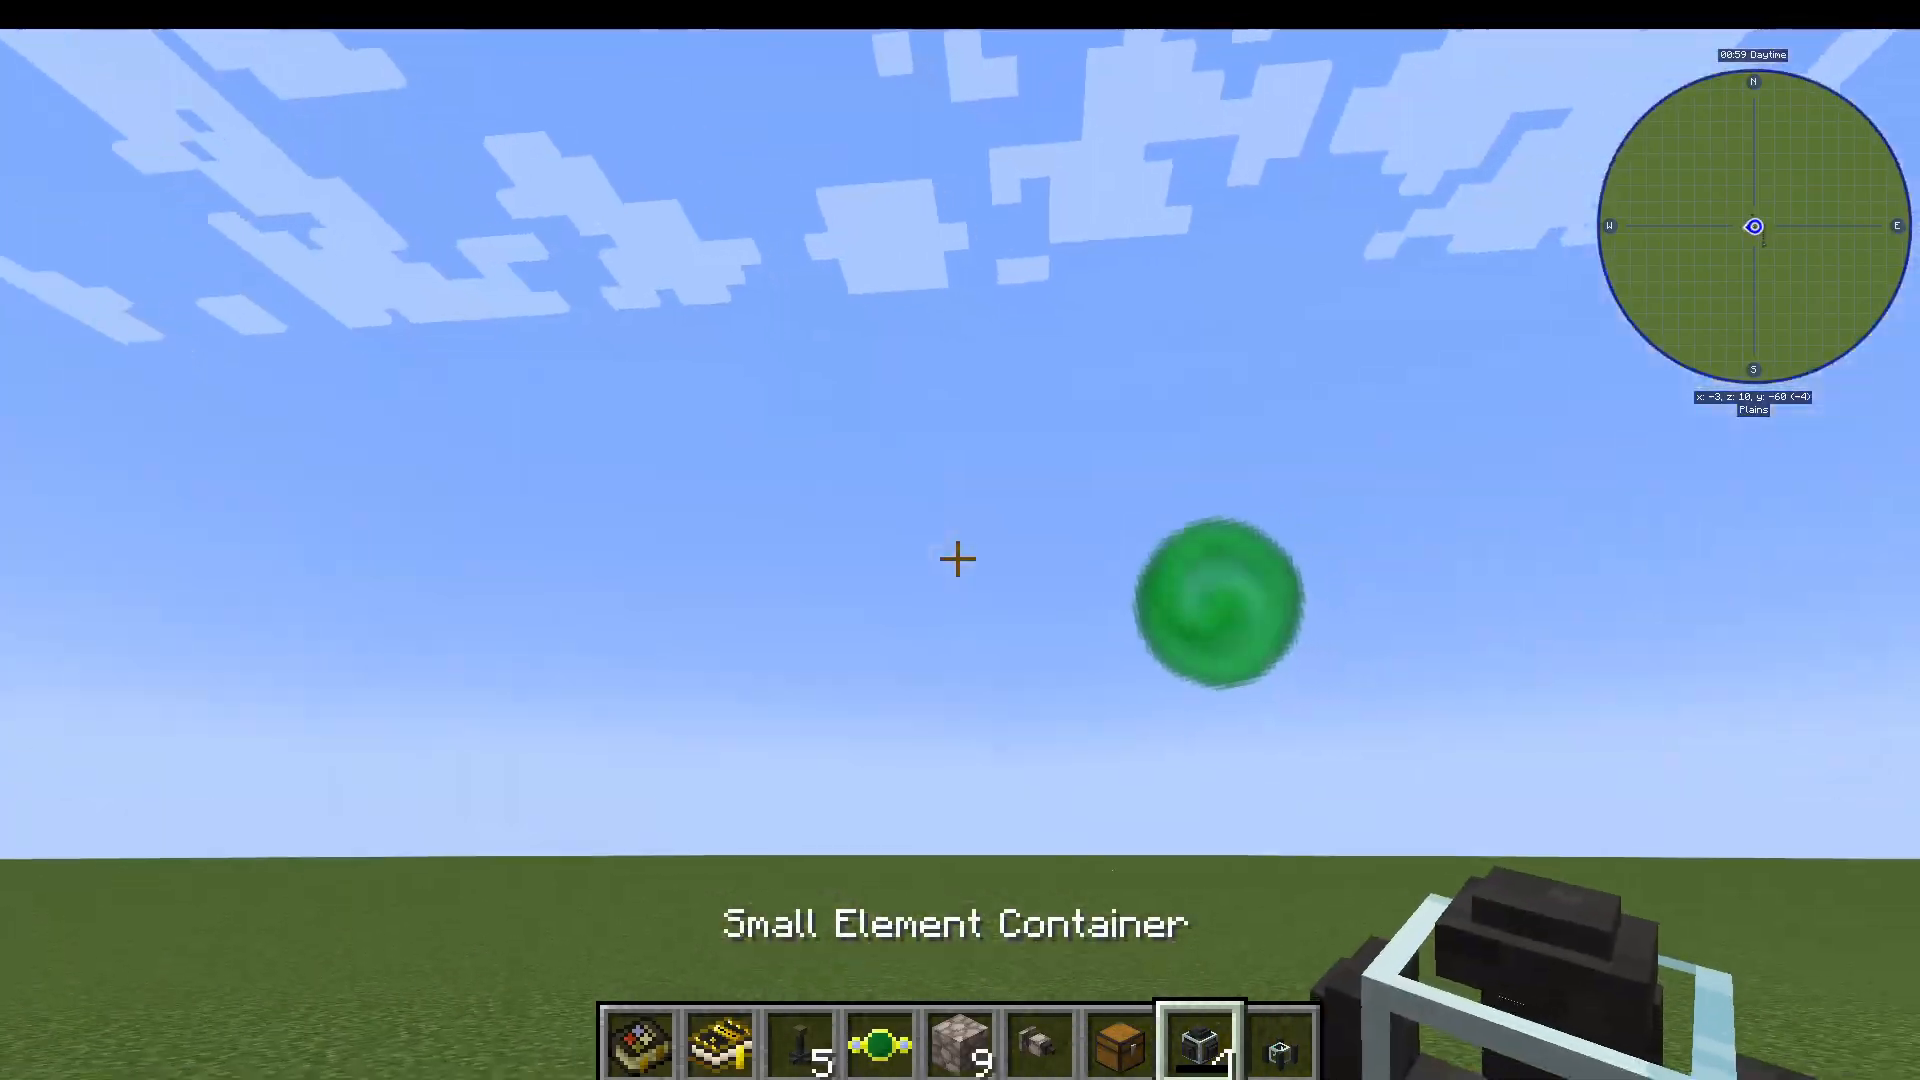
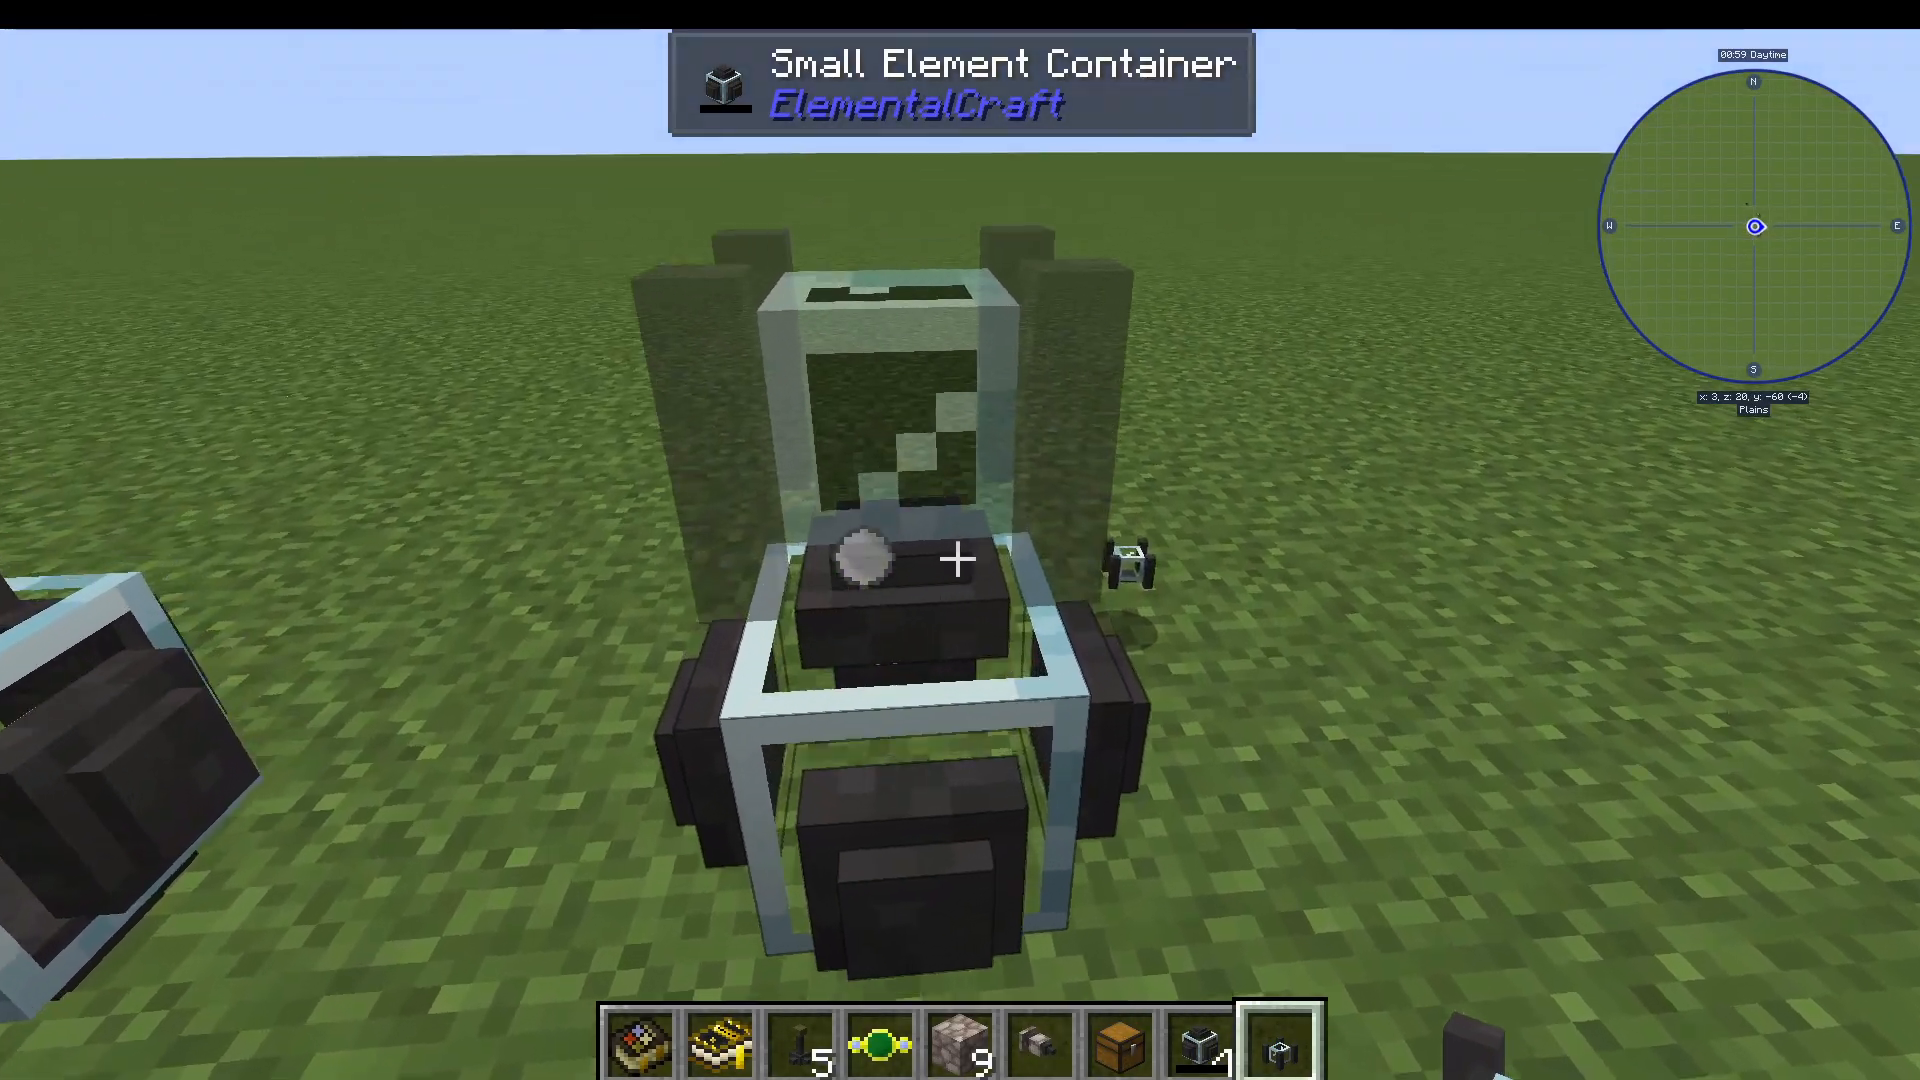
The container displays a small orb indicating how full it is — white means empty, and a coloured orb (green for Earth, blue for Water, etc.) shows it filling up. Sources can deplete over time. If yours runs dry, simply wait 5–10 minutes for it to refill periodically. Be careful not to place blocks directly on or around a source, as this will permanently destroy it.
Note on moving sources: In Minecraft 1.19 and above, you can move sources using a Displacement Plate. In 1.18 and below, this item is called a Source Receptacle. Both are covered in a later section of this guide.
The Small Element Container is crafted from glass and Impaired Element Pipes. Impaired Element Pipes are made from Contained Crystals (your Inert Crystal + Gold Nugget) combined with iron — these are the first pipes available in the mod.
Using Shards with an Evaporator
If you are using shards instead of a natural source, you’ll use an Evaporator rather than an extractor. Place a Small Element Container below the Evaporator, then right-click your shard into the Evaporator. It will slowly evaporate the shard into its corresponding element, which flows downward and fills the container below. You’ll see the container orb gradually filling over roughly 30–60 seconds.
Step 4: Piping and Element Infusion
Once you have element stored, you need to start moving and using it. This is done with Impaired Element Pipes and an Element Infuser.
Setting Up Pipes
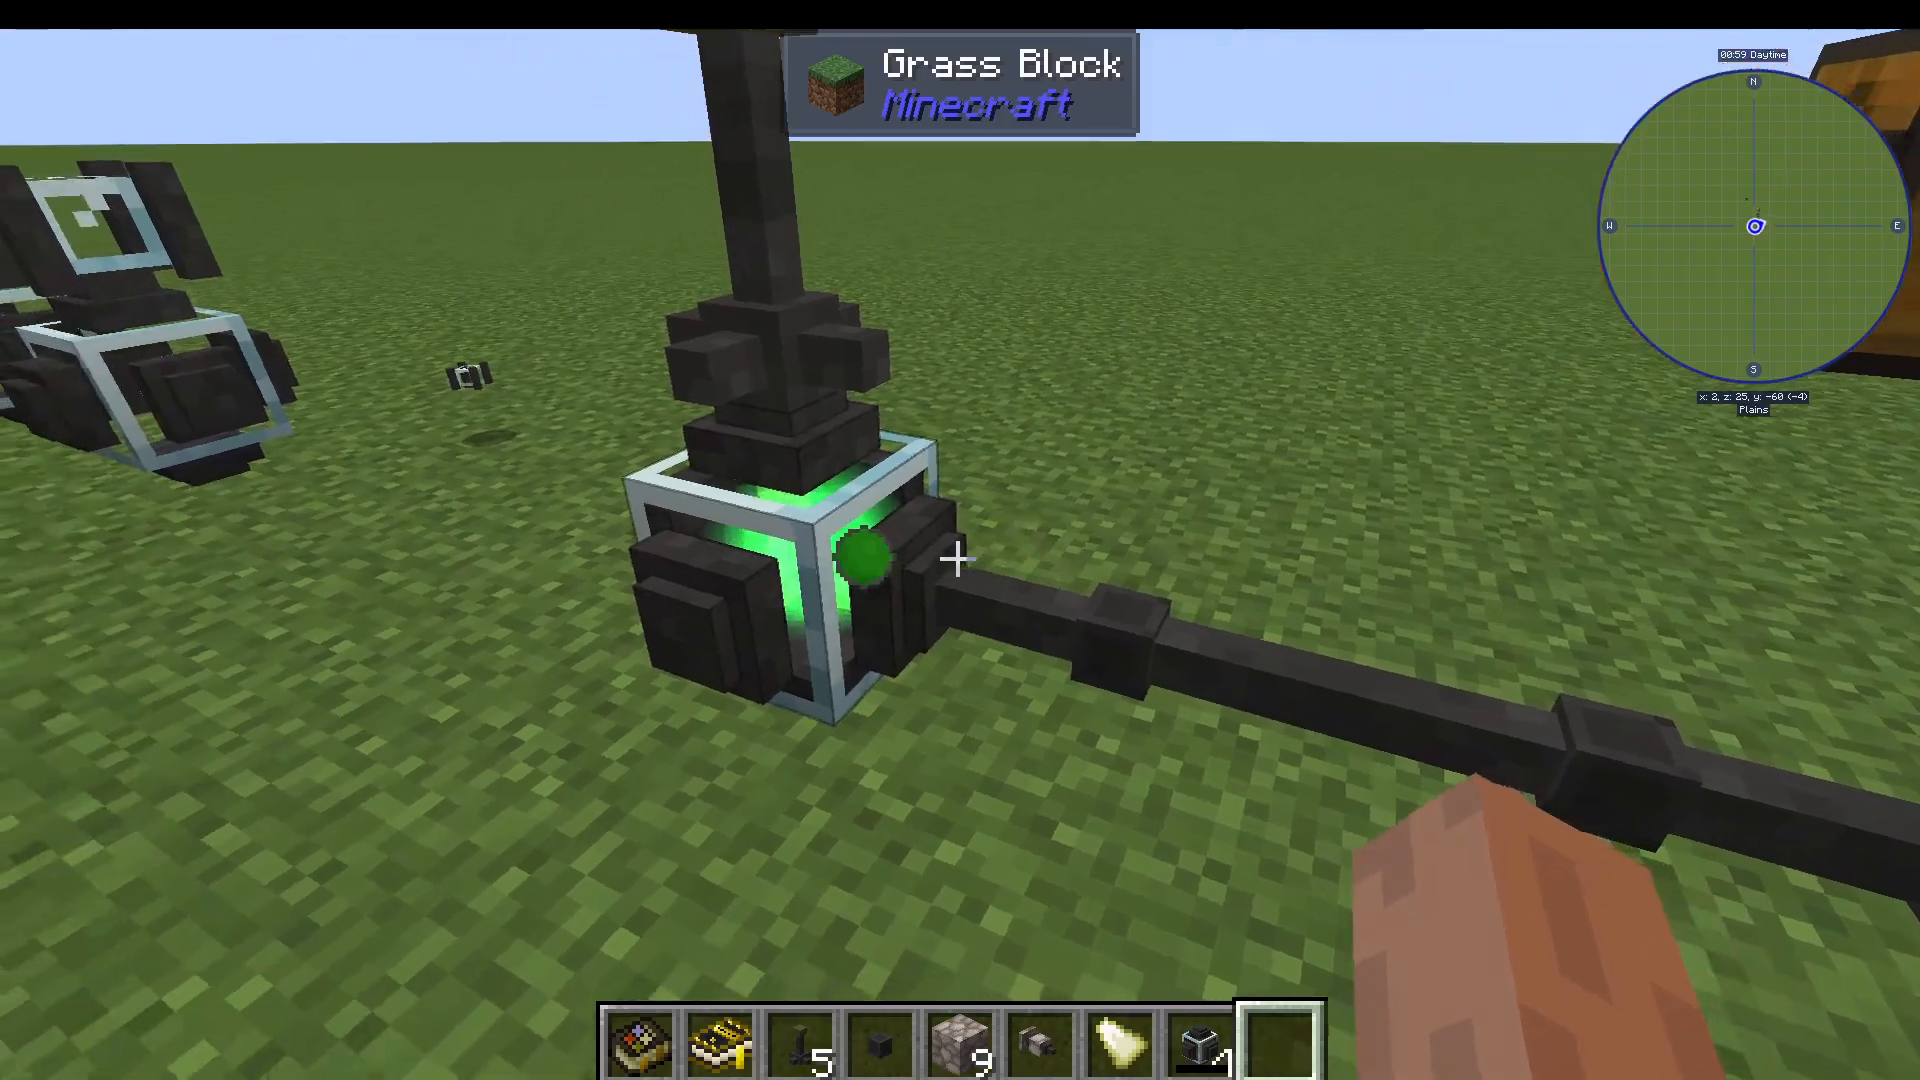
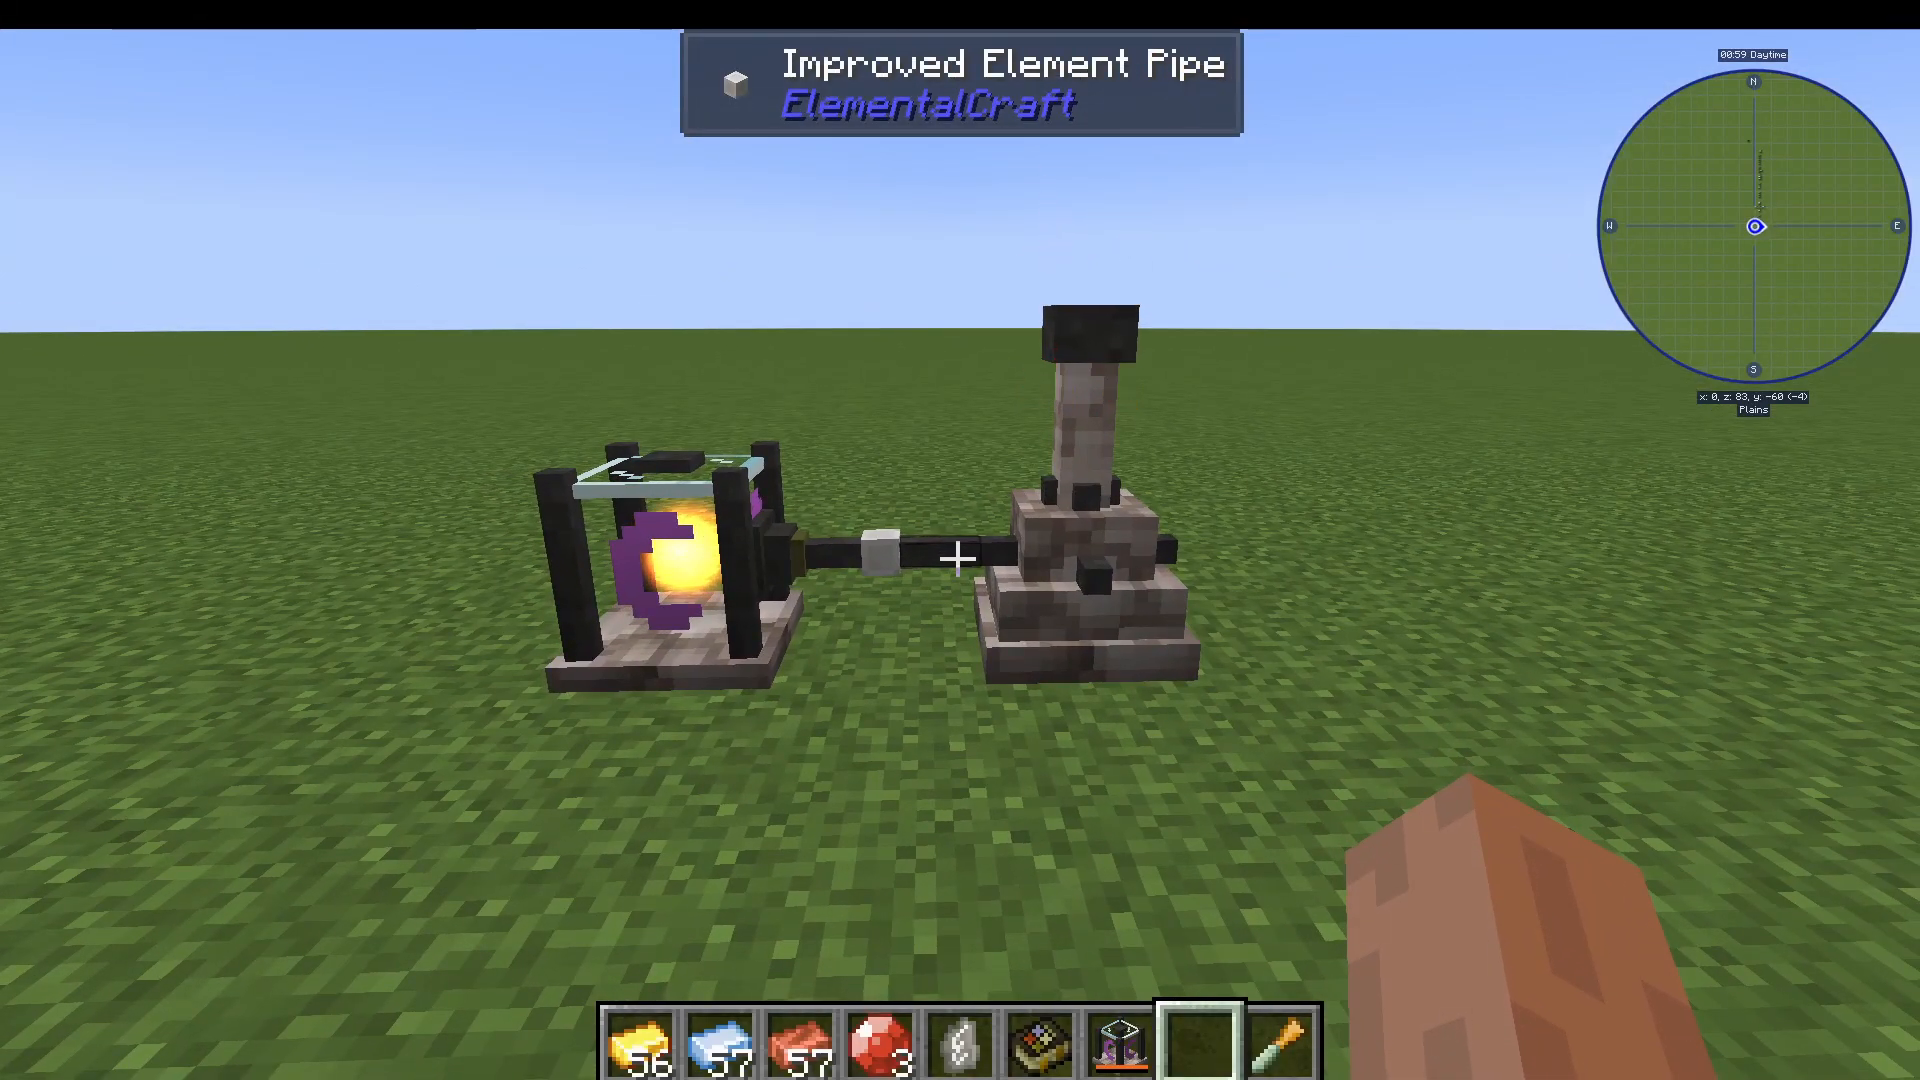
Connect your element containers together using pipes. To extract element from a pipe into a connected container, right-click the pipe connector on the side facing the source container. A small green nub will appear, indicating that element is being pulled from that pipe. Right-clicking again will disconnect it. If you need to reset a pipe connection, simply break and replace it.
Infusing Items with Elements
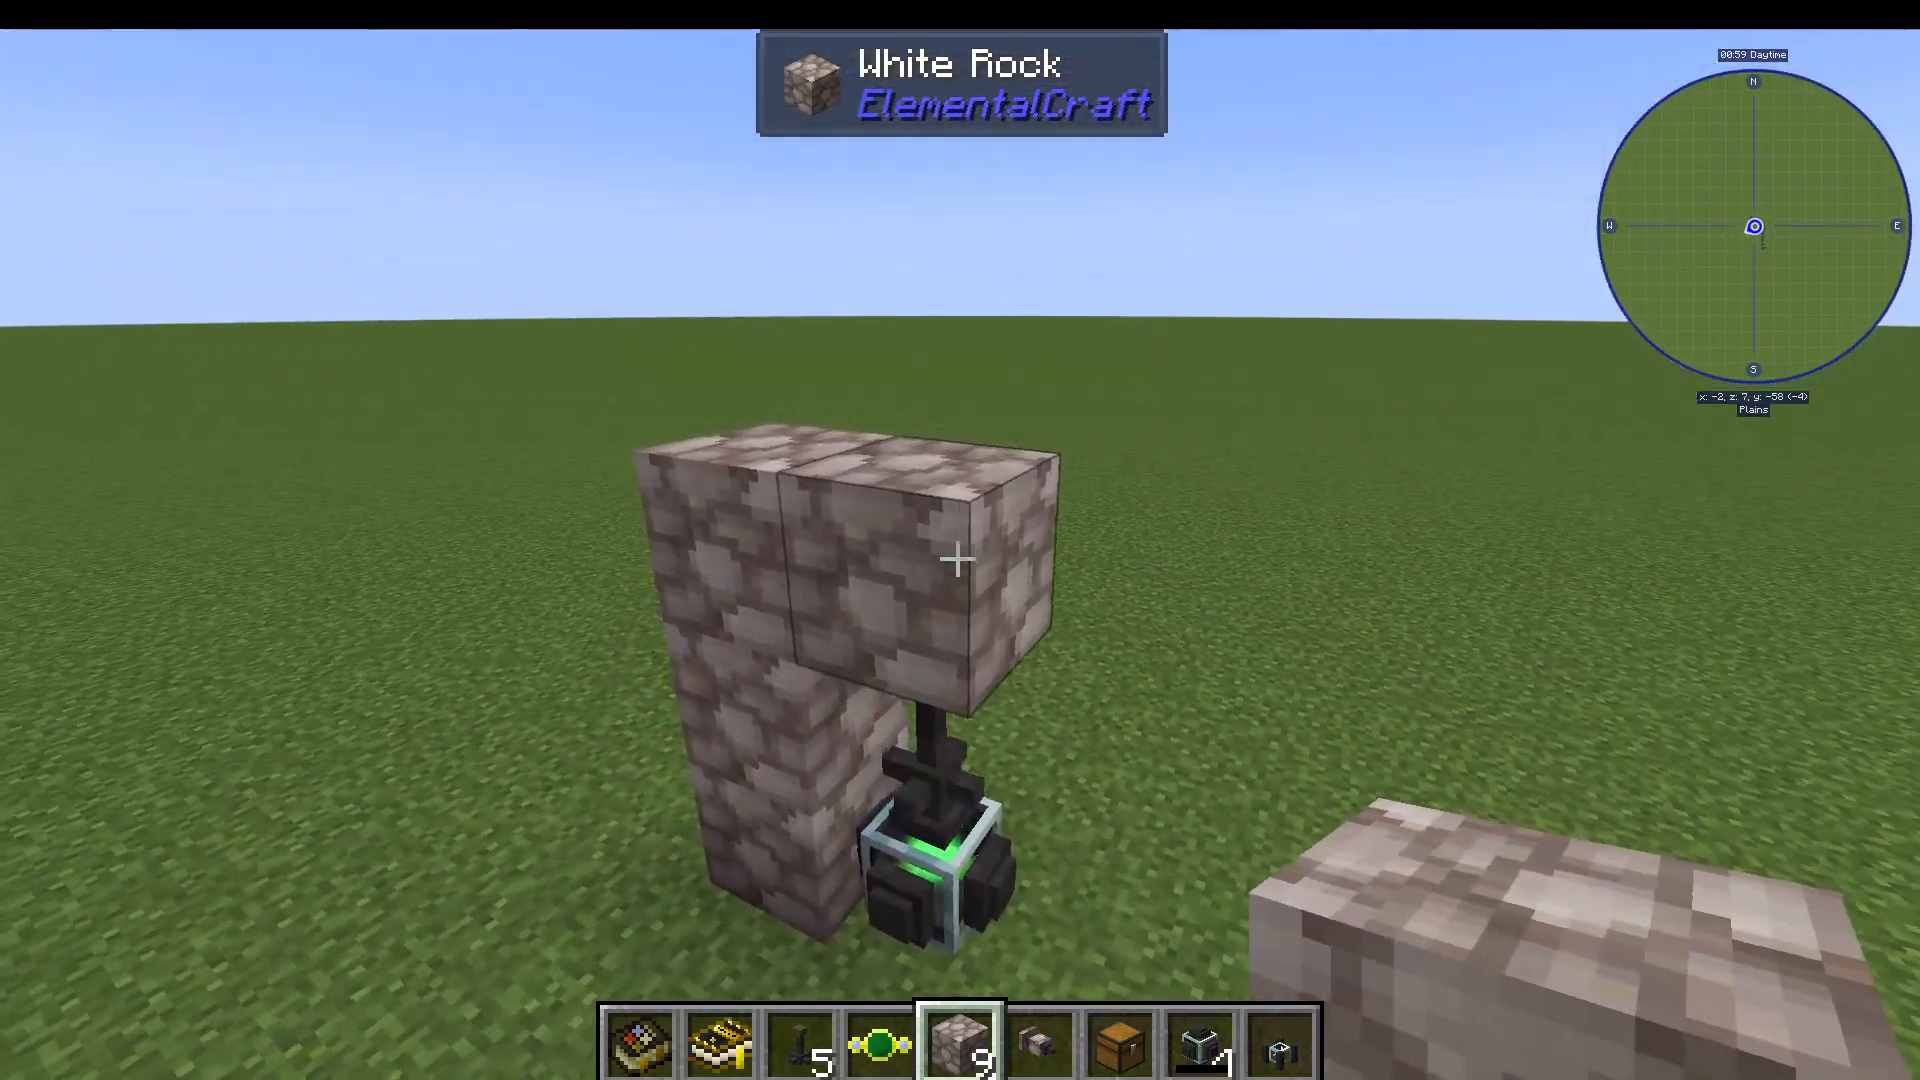
Place the Element Infuser above a filled element container. Then right-click your item (for example, stone) directly into the infuser. The infuser will infuse that item with the element stored in the container below it. For instance, stone infused with Earth element produces White Rock, and an iron ingot infused with Water element produces a Drenched Iron Ingot.
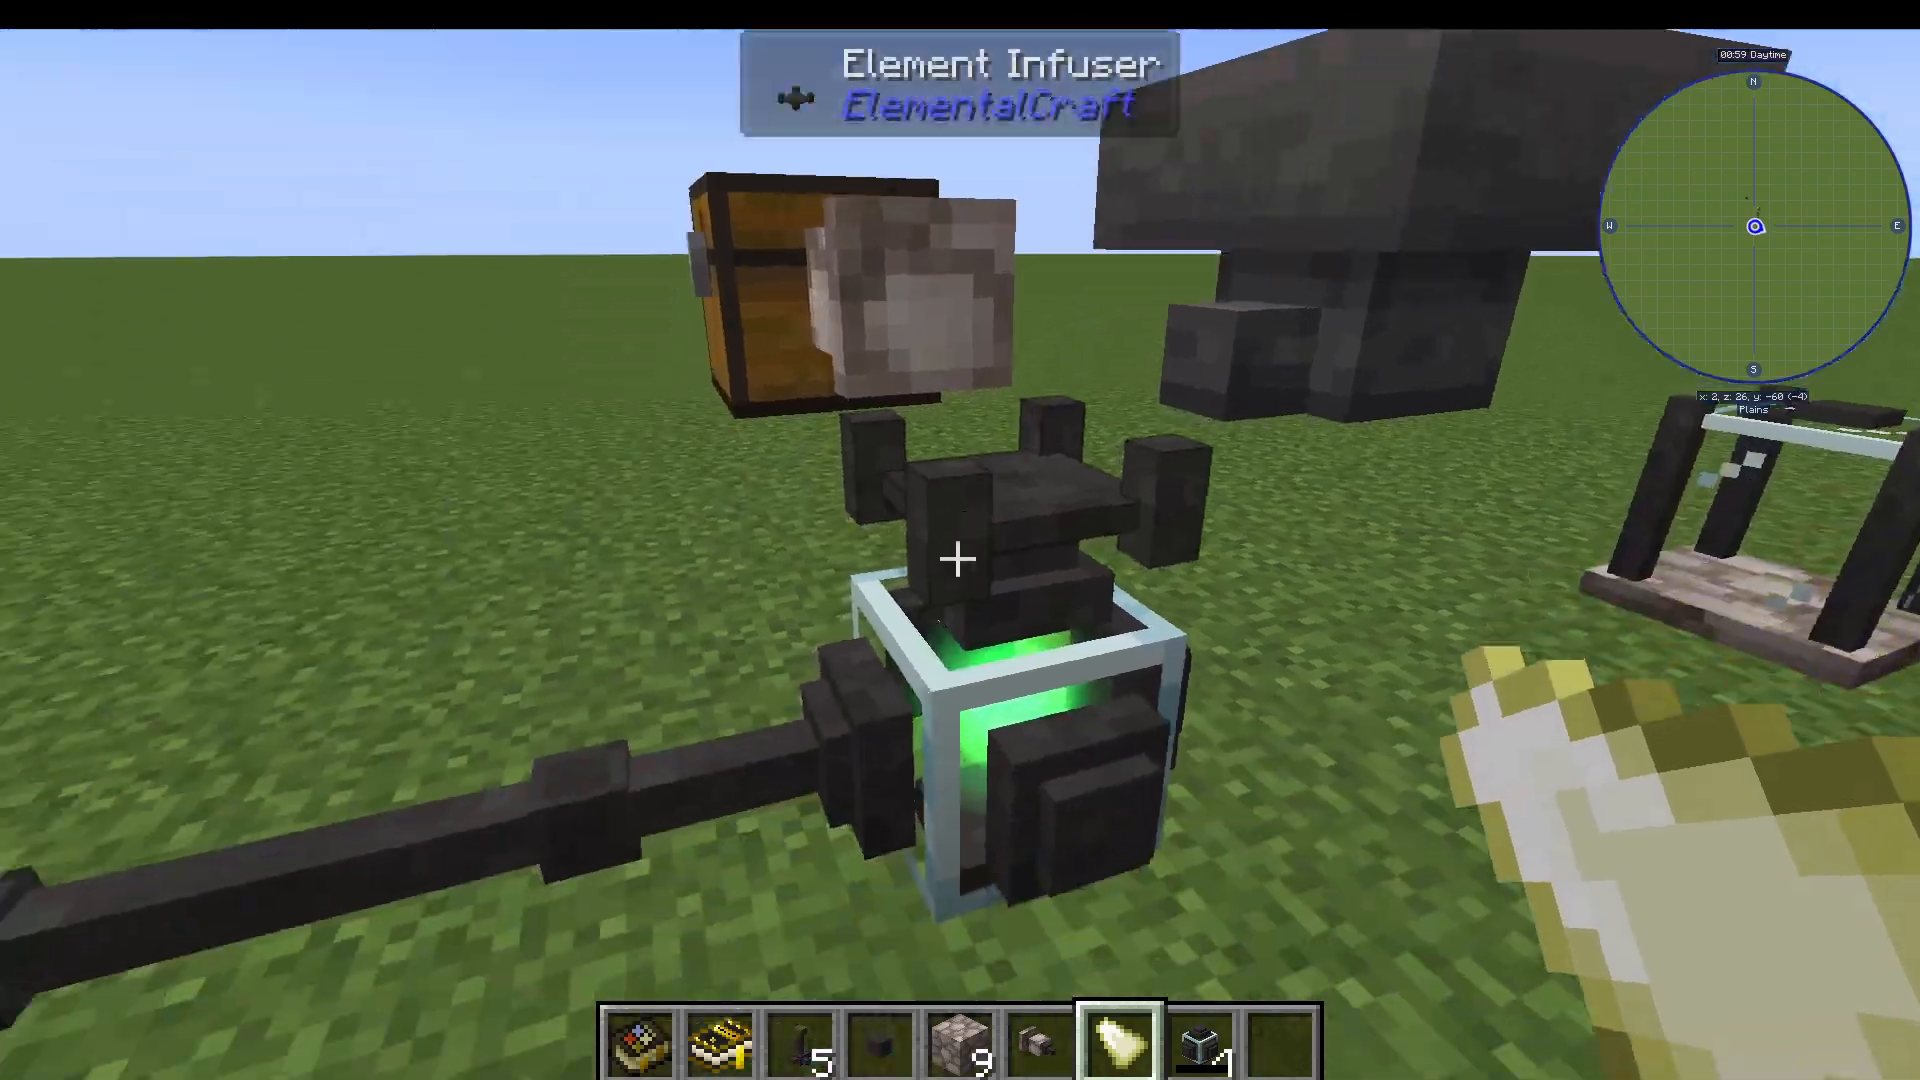
These two materials — White Rock and Drenched Iron Ingots — unlock a large range of new crafting recipes and are essential for progression. It is highly recommended that you automate this setup early, as you will need large quantities of both materials.
Automating the Infuser
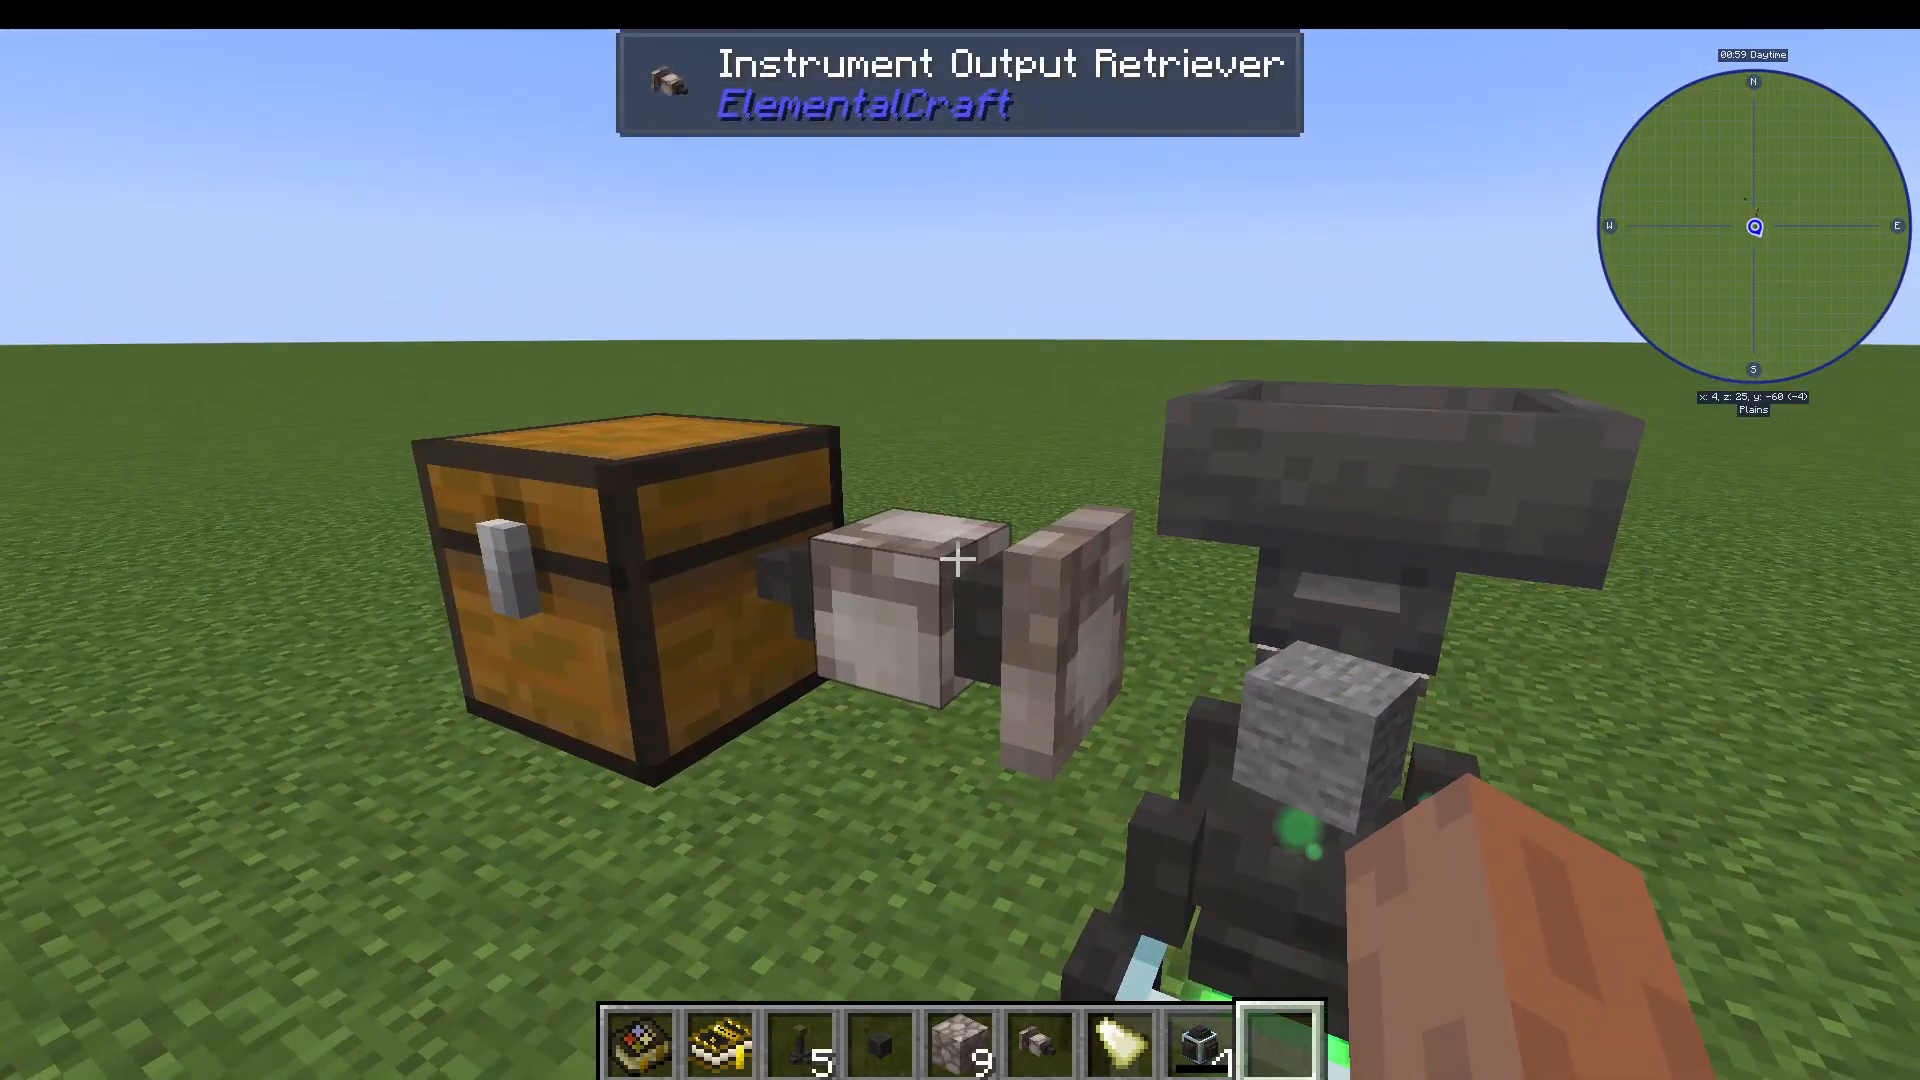
To automate input, use a hopper feeding items into the top of the Element Infuser. To automate output, craft an Instrument Output Retriever (which itself requires White Rock and Drenched Iron Ingots) and place it adjacent to the infuser. It will automatically pull finished items out into a connected chest.
Step 5: Upgrading Pipes and Containers
Once you have Drenched Iron Ingots, you can upgrade your infrastructure significantly:
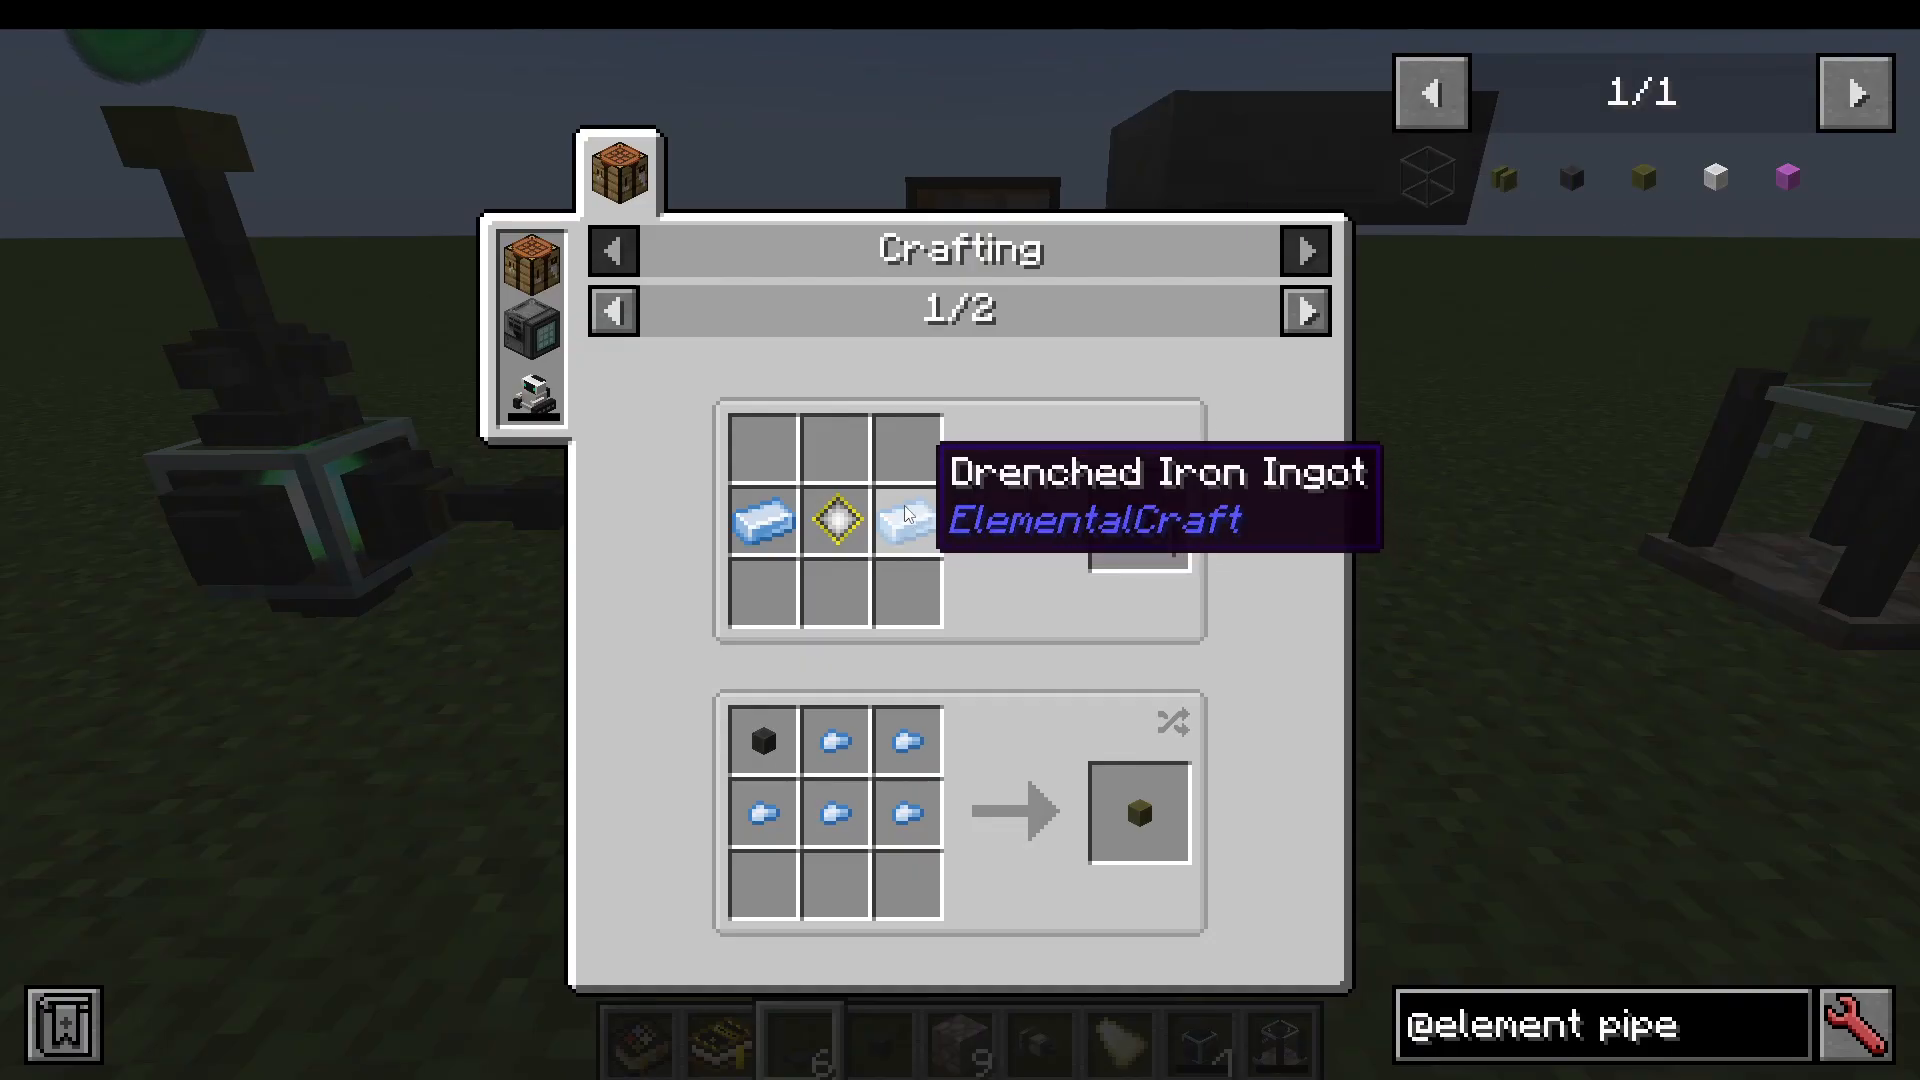
Craft an Element Pipe using Drenched Iron and a Contained Crystal — an upgraded version of the Impaired Element Pipe.
Alternatively, use two Drenched Iron Ingots to upgrade your existing Impaired Element Pipes into standard Element Pipes.
Craft a full-size Element Container — a larger, more powerful version of the Small Element Container that holds significantly more element.
Pipes exist in three tiers: Impaired, Normal, and Improved. Some recipes and machines will specifically require the higher-tier pipes to function correctly, so upgrading as soon as possible is strongly recommended.
Step 6: Elemental Machines — Fire Furnace, Air Mill, and Water Saw
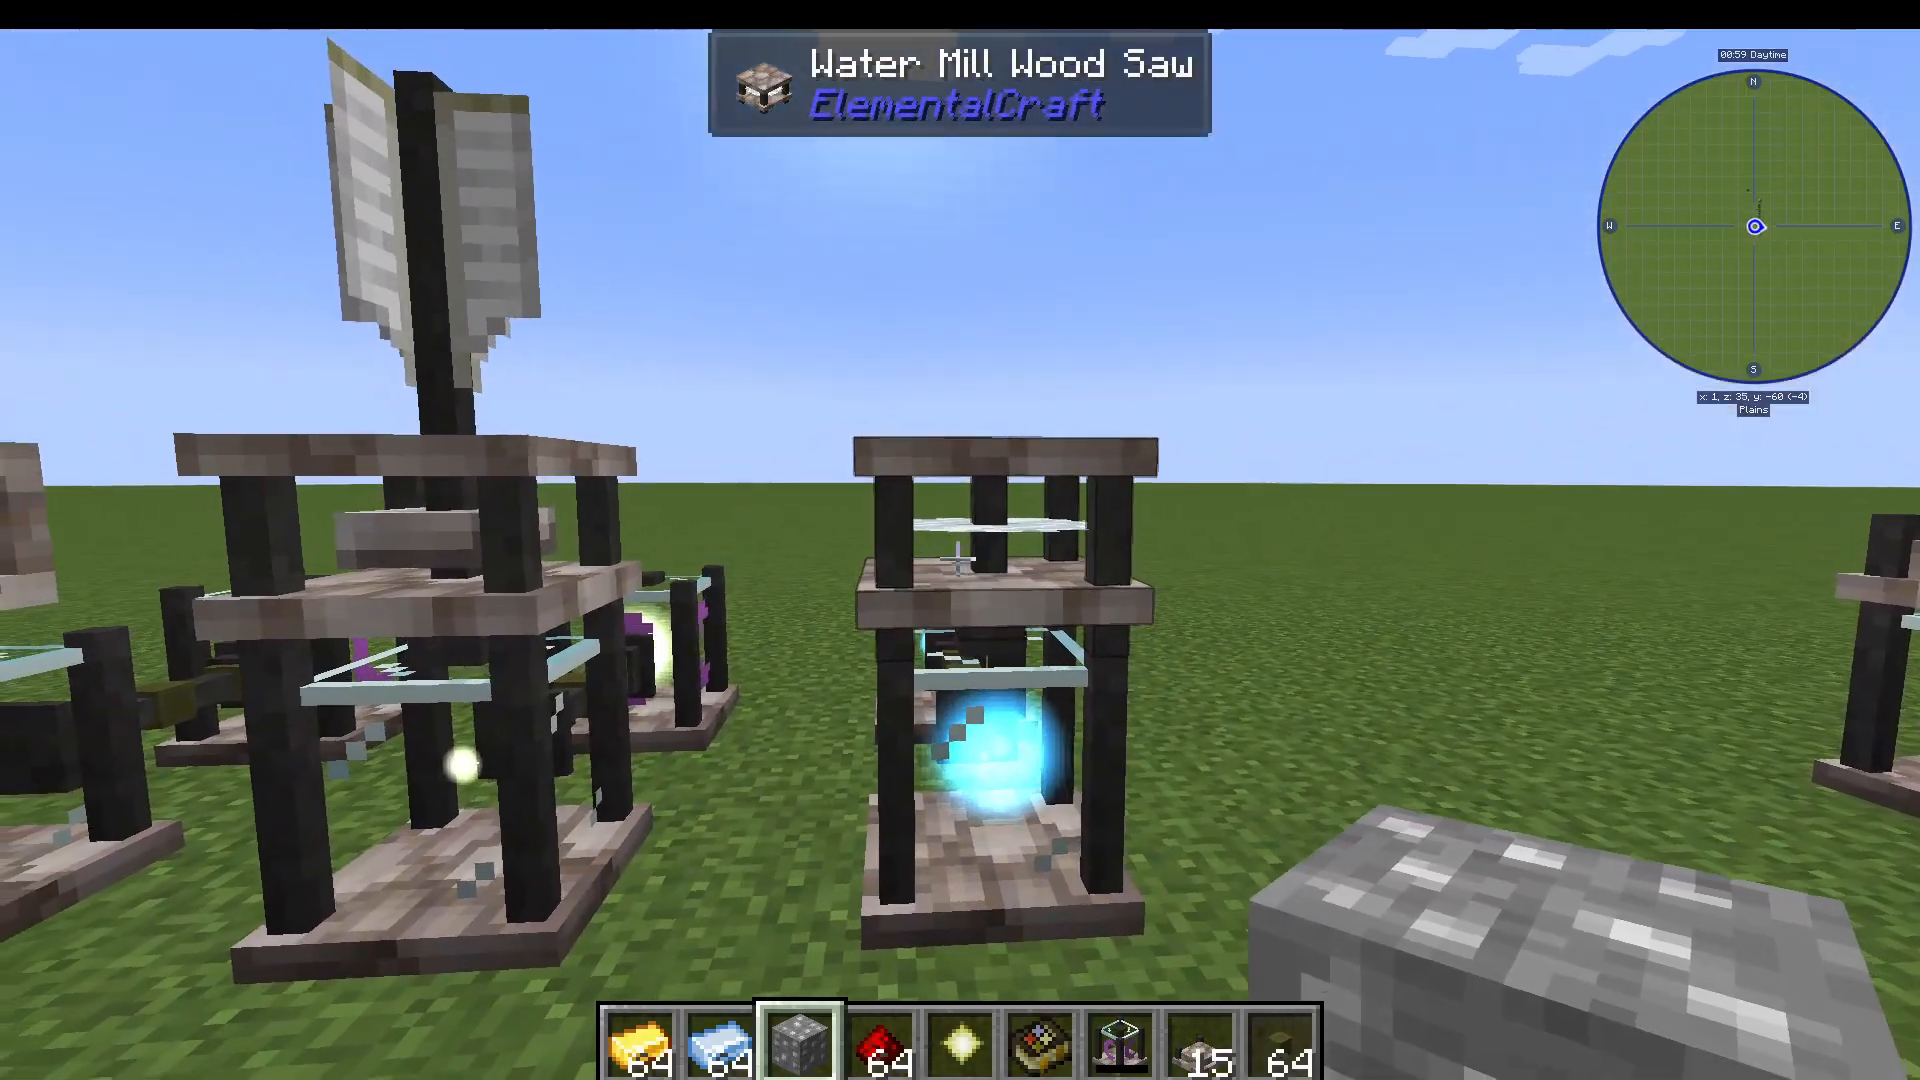
With your infusion setup running, you can now unlock three element-powered machines. Each must be placed above an Element Container supplying the appropriate element:
Fire Furnace: Powered by Fire element. Functions as a standard furnace — place items in or automate with hoppers and output retrievers.
Air Mill Grindstone: Powered by Air element. Grinds materials down — for example, Amethyst Clusters into Amethyst Shards, cobblestone into gravel, or Ancient Debris into Netherite Scraps.
Water Mill Wood Saw: Powered by Water element. Processes wood — strips logs, makes planks, and more.
Step 7: Element Binding
Element Binding is a crafting method that combines specific items in a specific clockwise order to produce advanced materials. You will use the Element Binder for this.
The Clockwise Rule
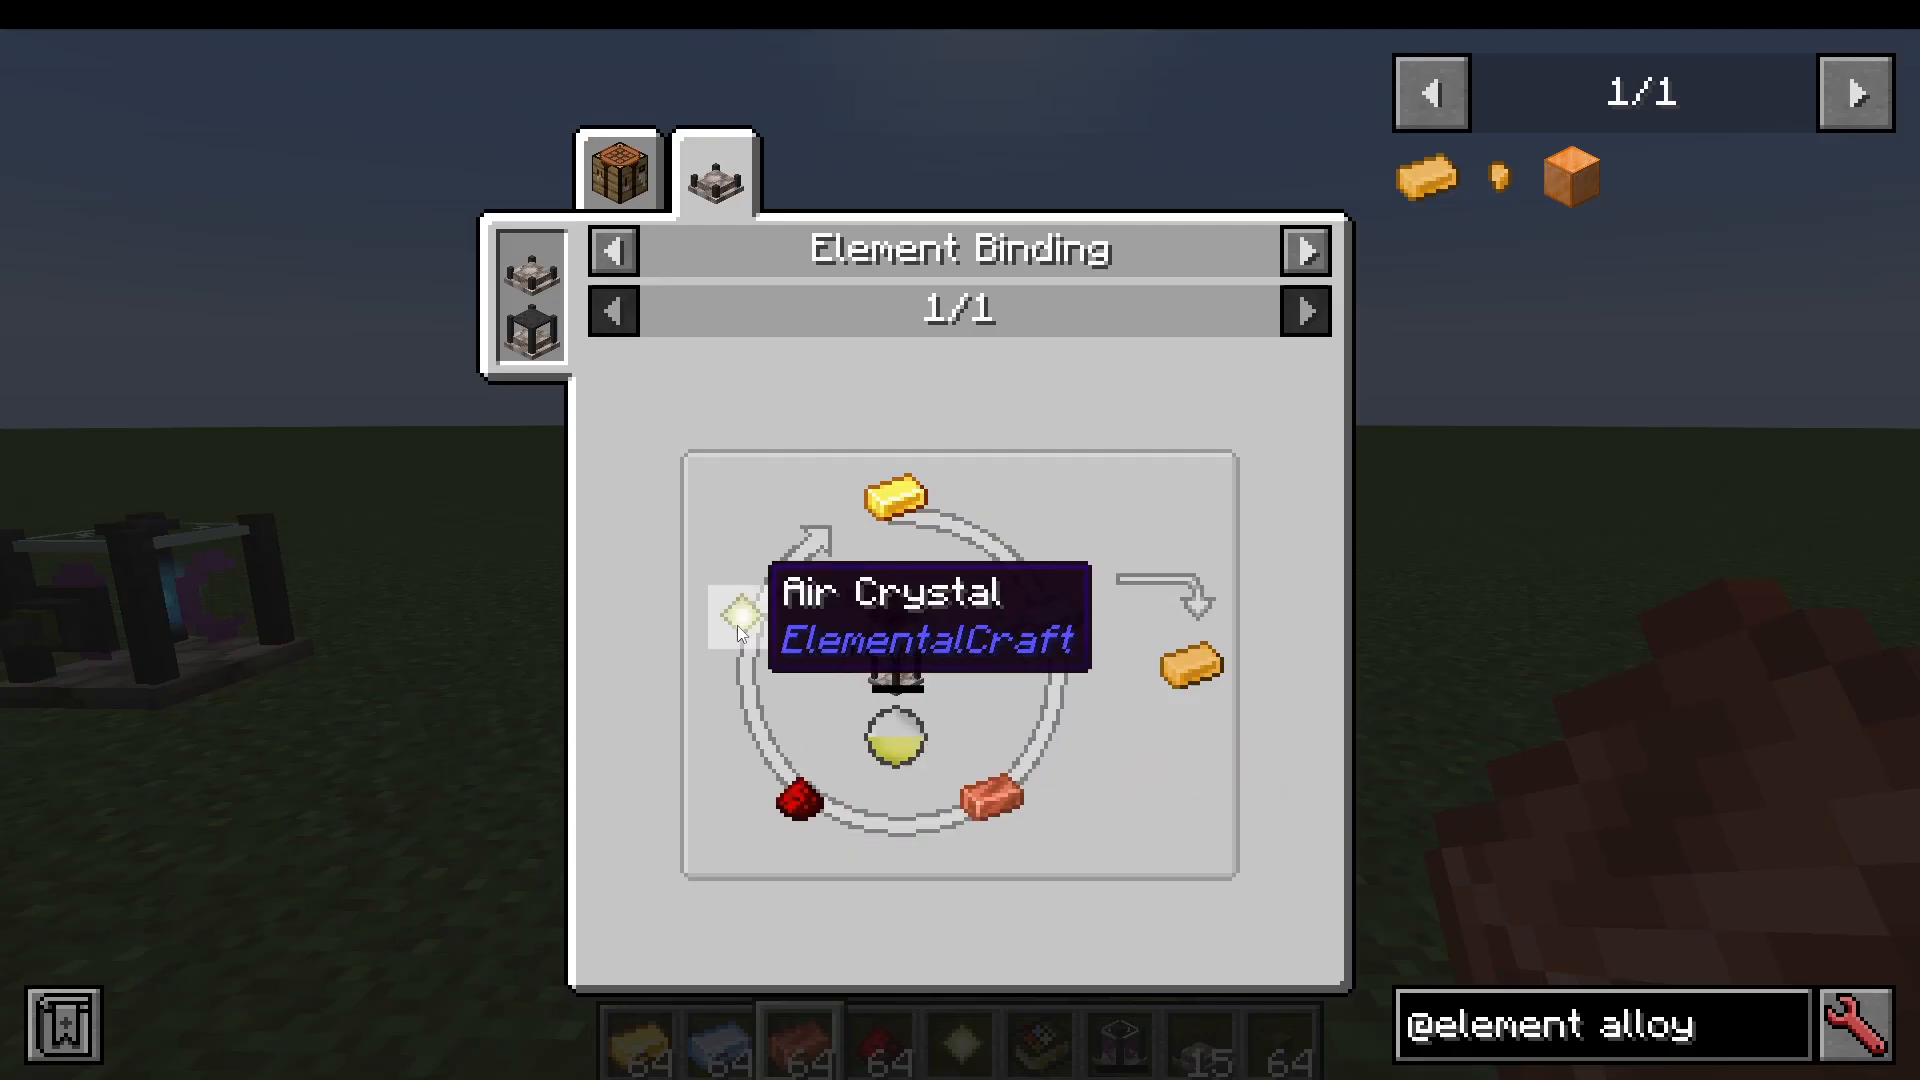
When viewing an Element Binding recipe (for example in Just Enough Items / JEI), you must always add items starting from the top slot and working clockwise. The order is critical — adding items in the wrong sequence will cause the recipe to fail completely.
Crafting a Swift Alloy Ingot
The first important Element Binding recipe is the Swift Alloy Ingot. Add items in this exact clockwise order: Gold Ingot → Drenched Iron → Copper Ingot → Redstone → Air Crystal. Right-click each item into the binder in that sequence and the binding process will begin automatically.
Step 8: The Ordered Sorter — Automating Element Binding
Standard hoppers cannot insert items in a specific order, which makes automating the Element Binder impossible without a smarter tool. That tool is the Ordered Sorter, which you can now craft using your Swift Alloy Ingots — making it one of the first things you should build at this stage.
Shift-click the Ordered Sorter onto a chest that feeds into your Element Binder. Then click the Ordered Sorter’s interface to set the exact order you want items to be inserted. For the Swift Alloy Ingot recipe, that would be: Gold → Drenched Iron → Copper → Redstone → Air Crystal.
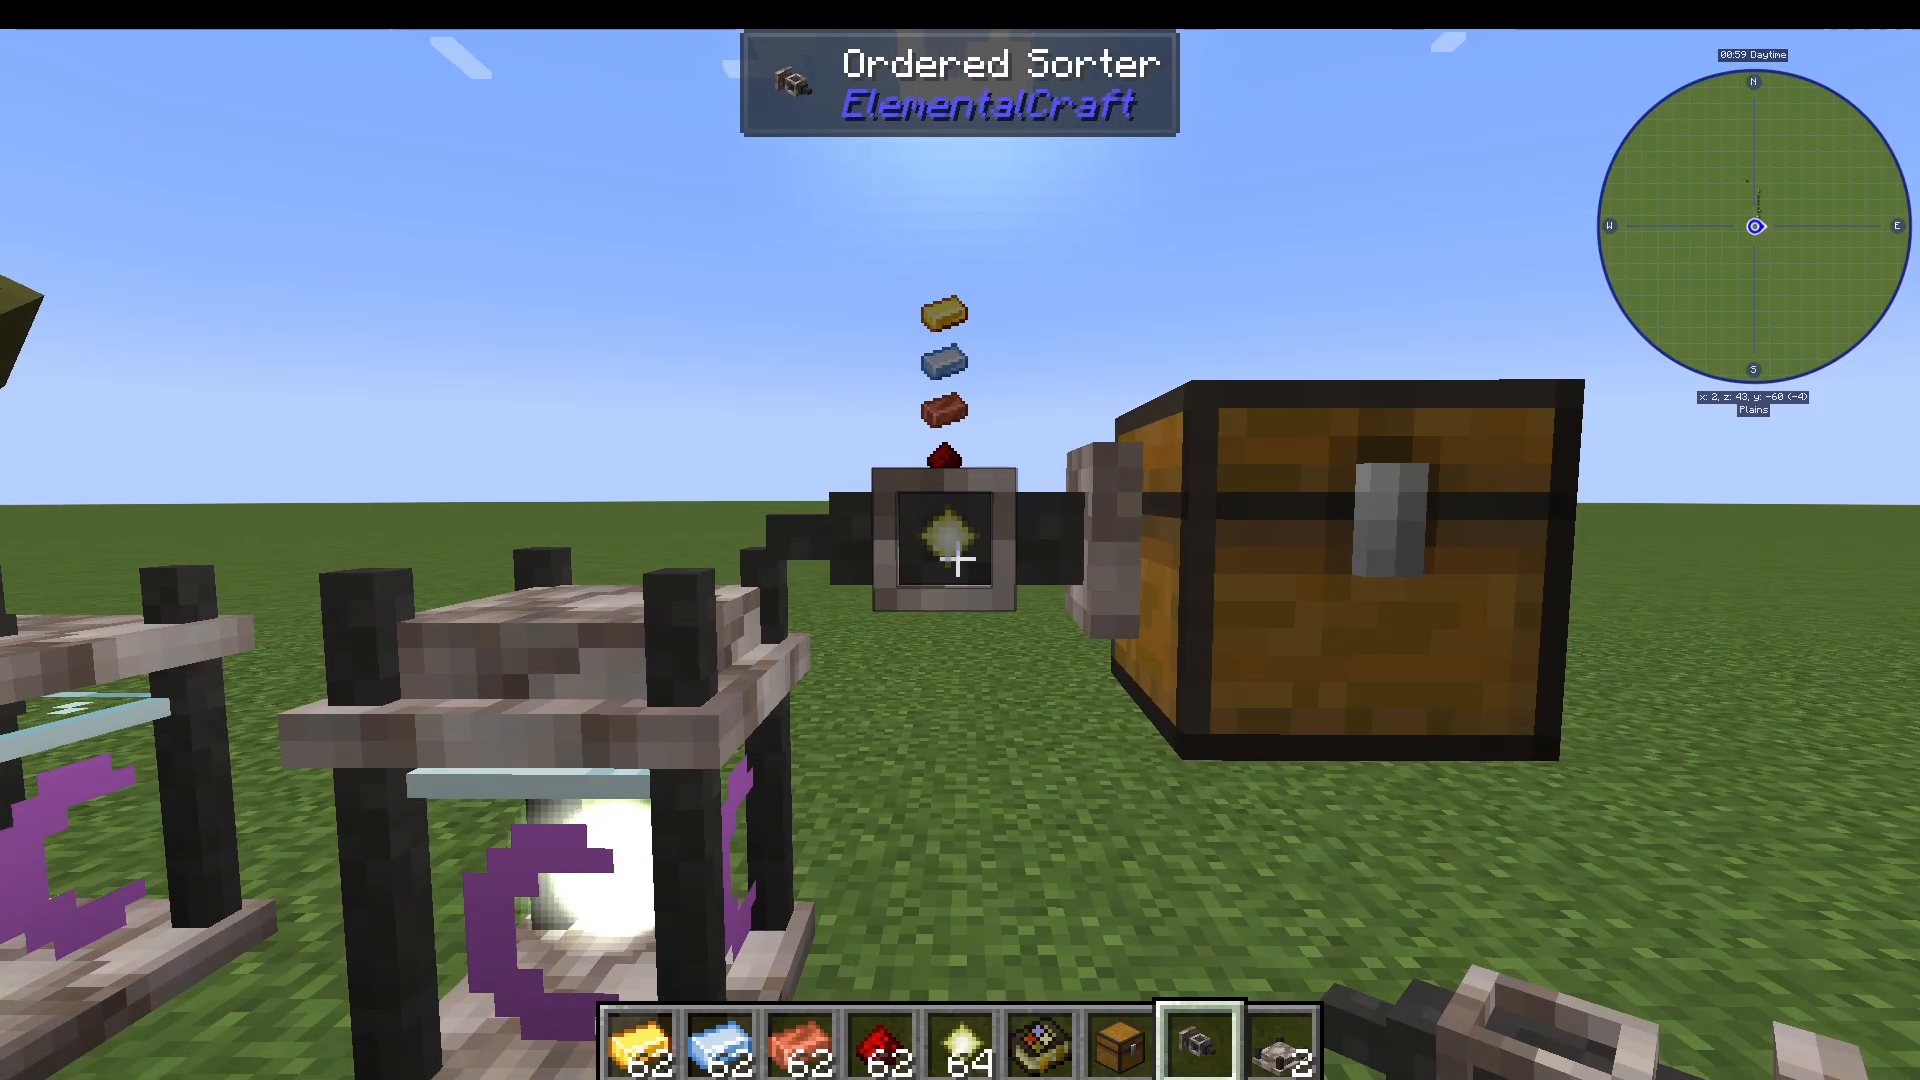
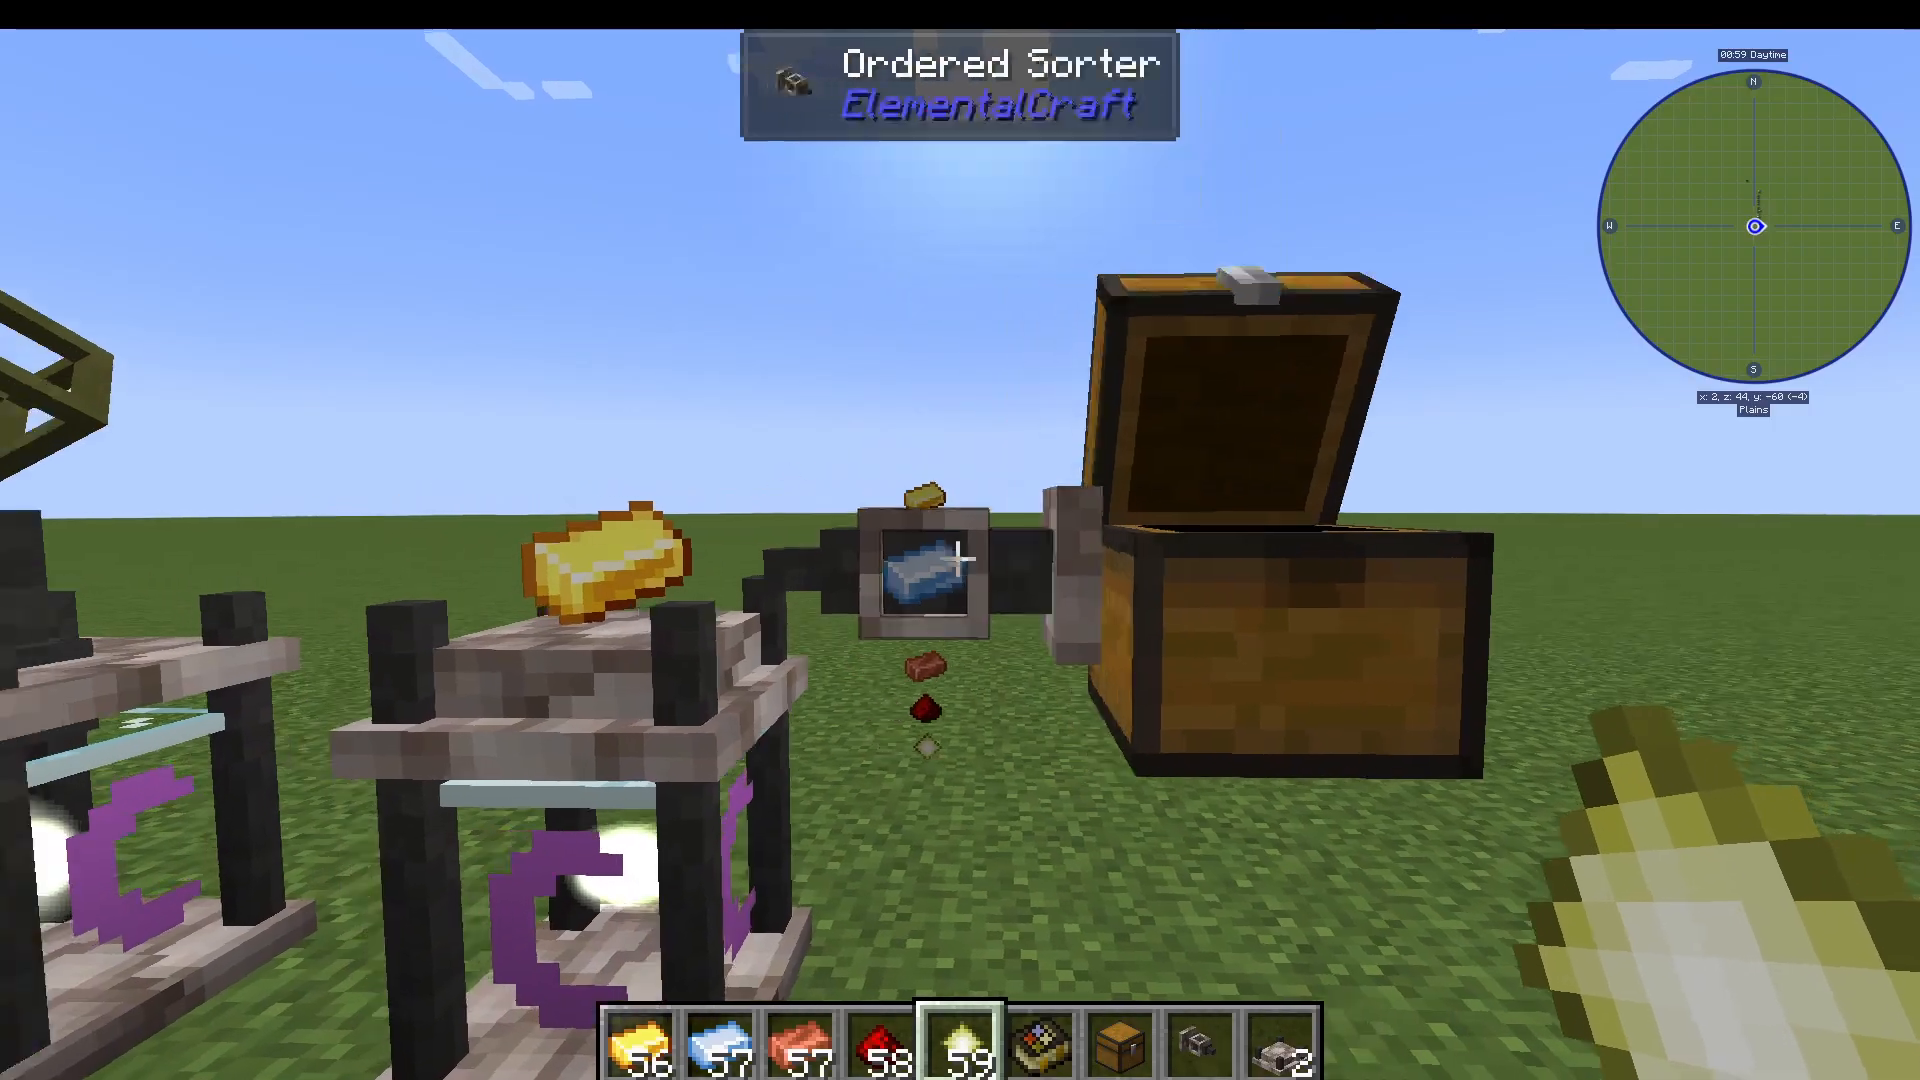
The Ordered Sorter will hold all items until the first item in the sequence (Gold) is present. Once it detects gold, it inserts all items in the specified order. Pair it with an Instrument Output Retriever on the other side of the binder to automatically collect your Swift Alloy Ingots.
Step 9: Element Diffusers and Holders
Using Swift Alloy Ingots, you can craft Element Diffusers and Element Holders. There is a holder for each element (Earth, Water, Fire, Air) as well as a Pure Element Holder covered later.
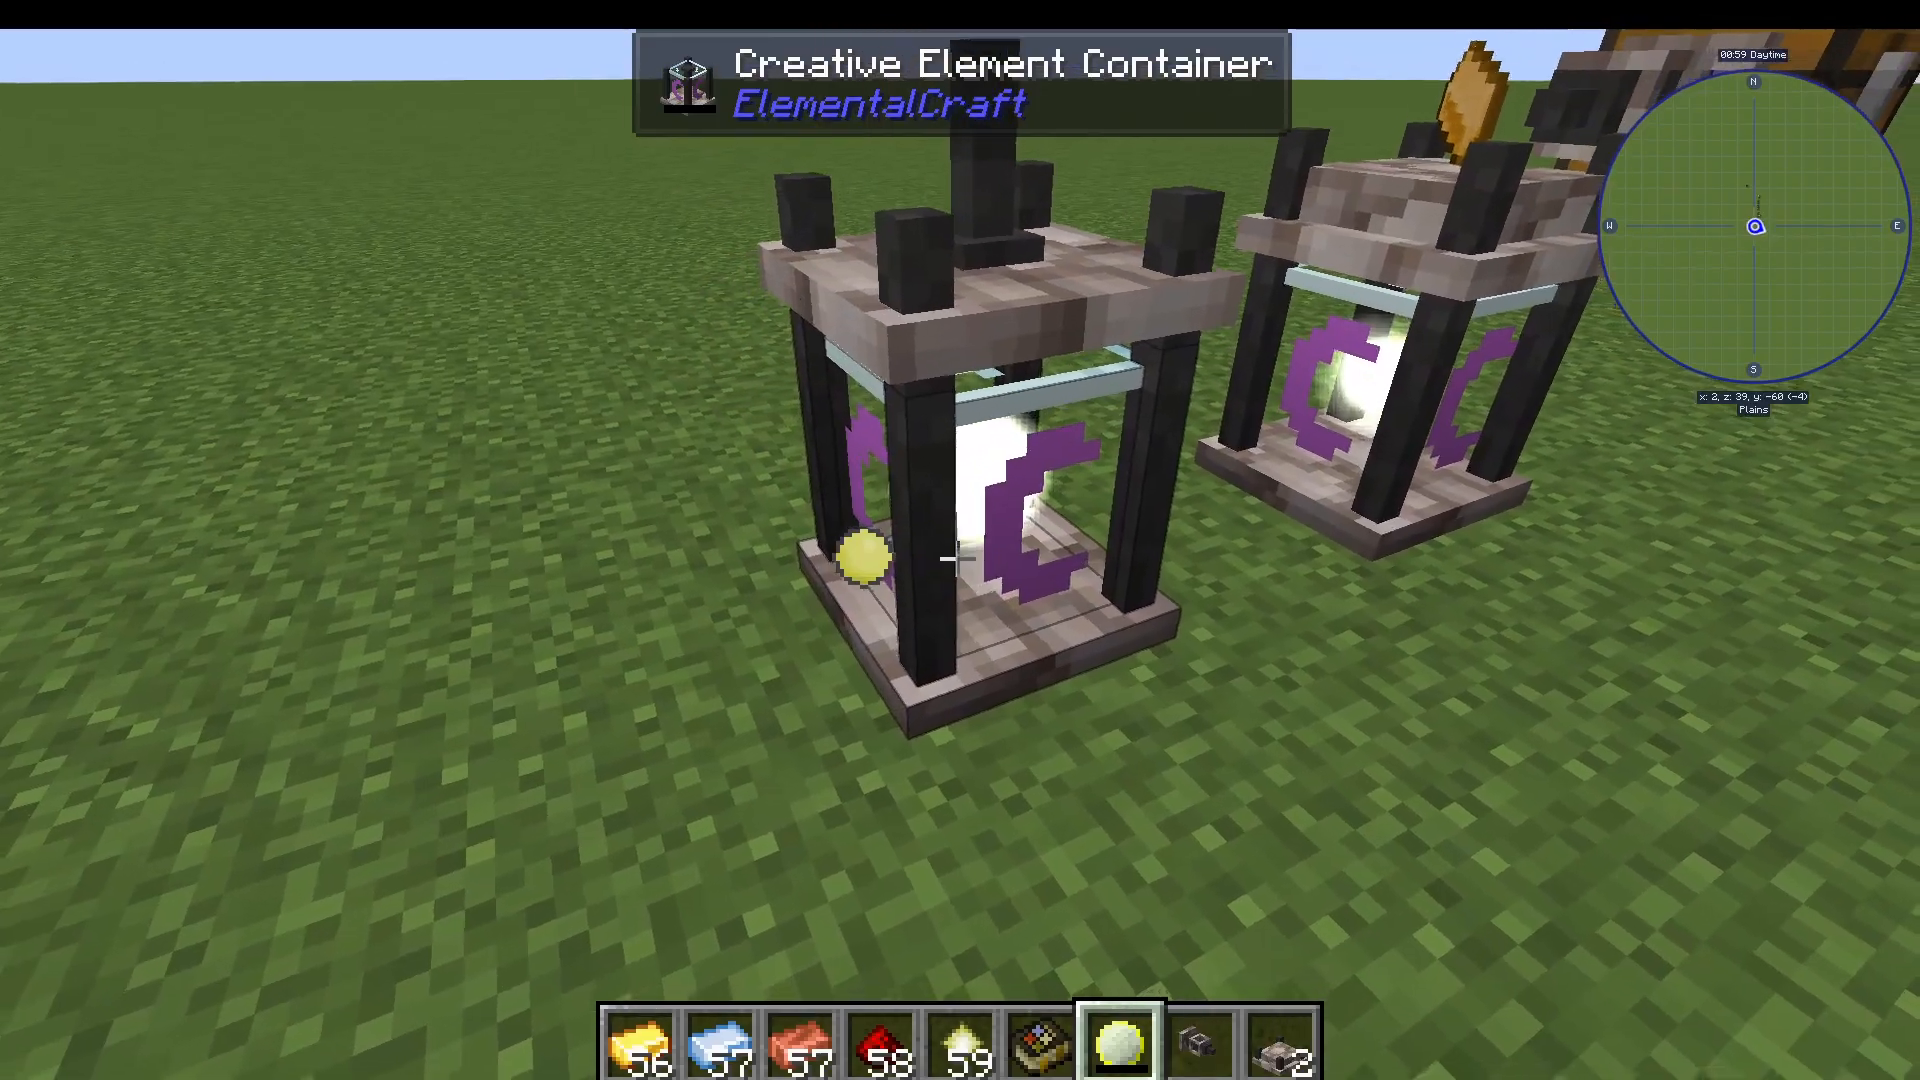
Place an Element Diffuser above an Element Container. The diffuser broadcasts the element passively into the surrounding area. If you are holding or carrying the corresponding Element Holder in your inventory, it will passively fill with that element from the nearby diffuser — no direct connection needed.
Step 10: Creating Your Own Element Sources
The Solar Element Synthesizer
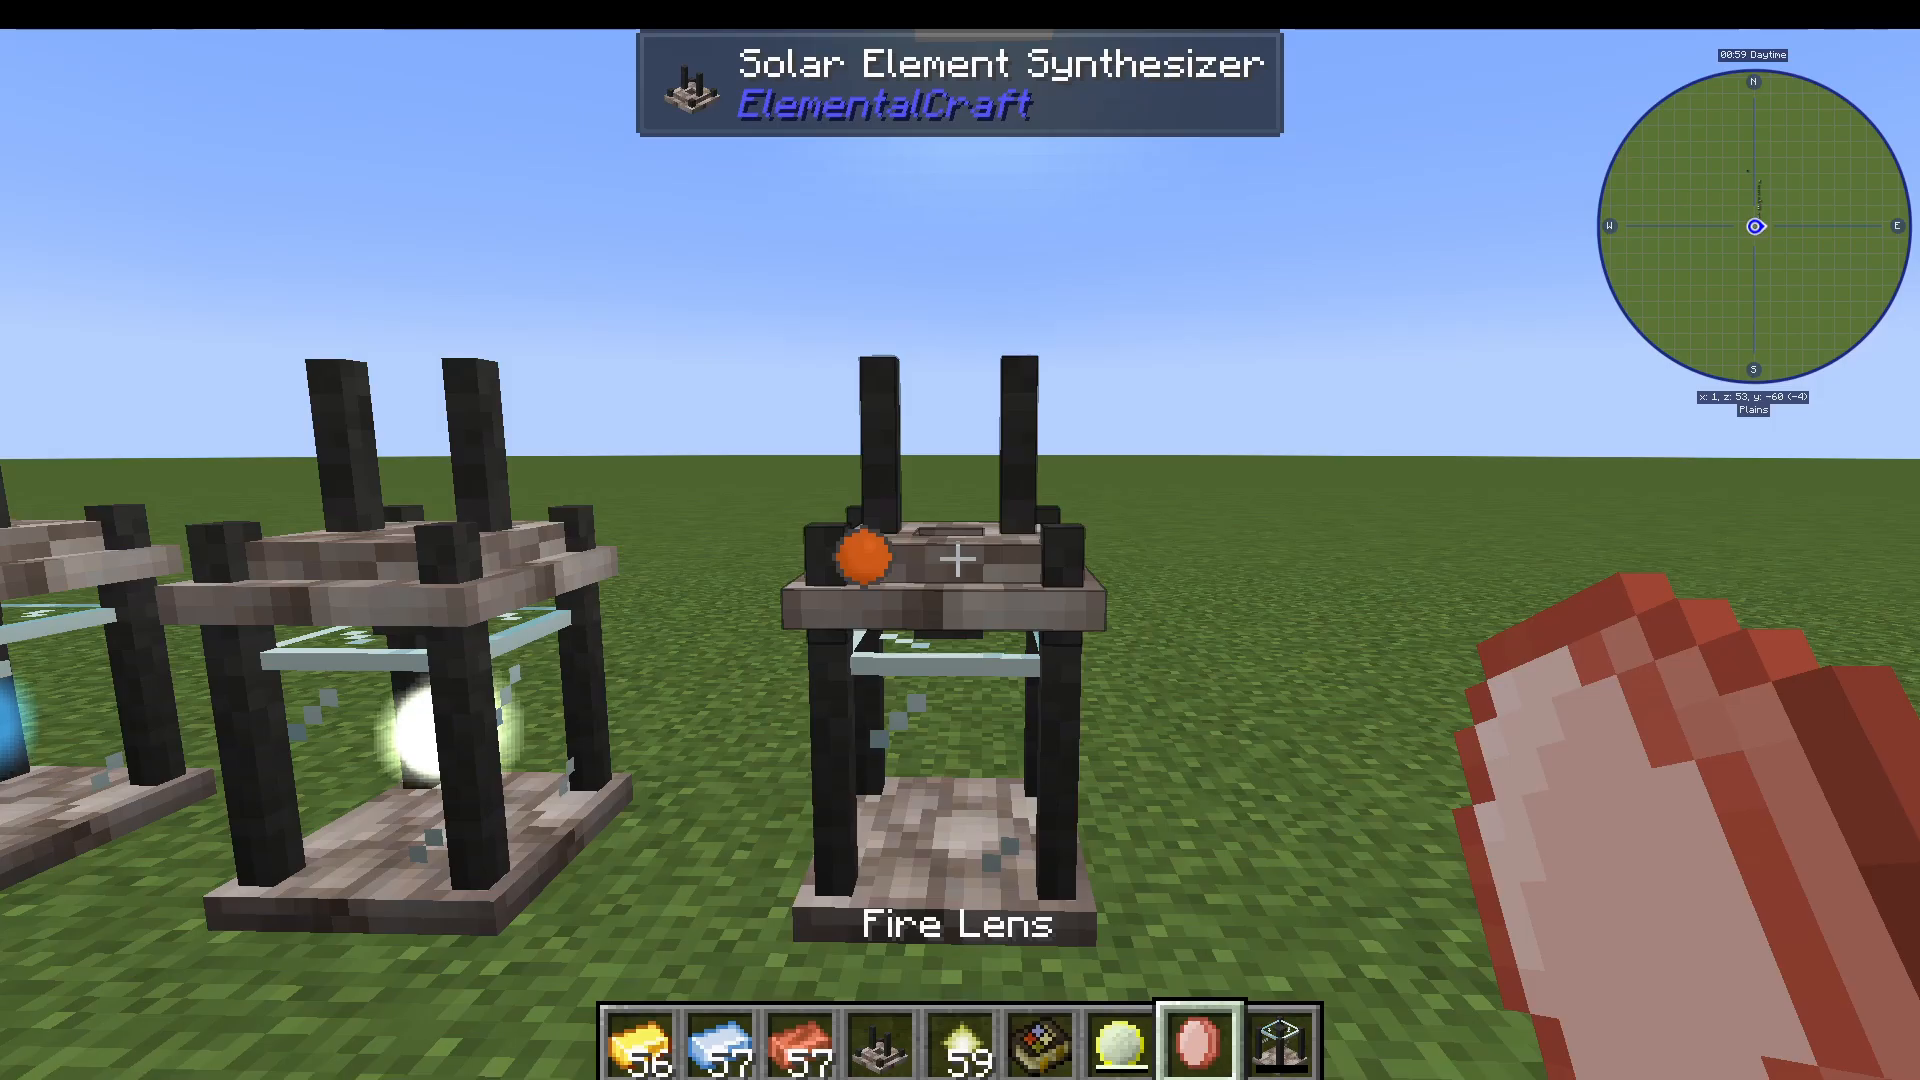
Rather than relying entirely on naturally spawned sources, you can generate your own using the Solar Element Synthesizer. Its recipe requires a Solar Prism and a Hardened Handle. The Solar Prism is made with Amethyst Shards, Nether Quartz, Water element, and a Water Crystal in an Element Binder. The Hardened Handle uses Air Silk, which is simply String infused with Air element in the Element Infuser.
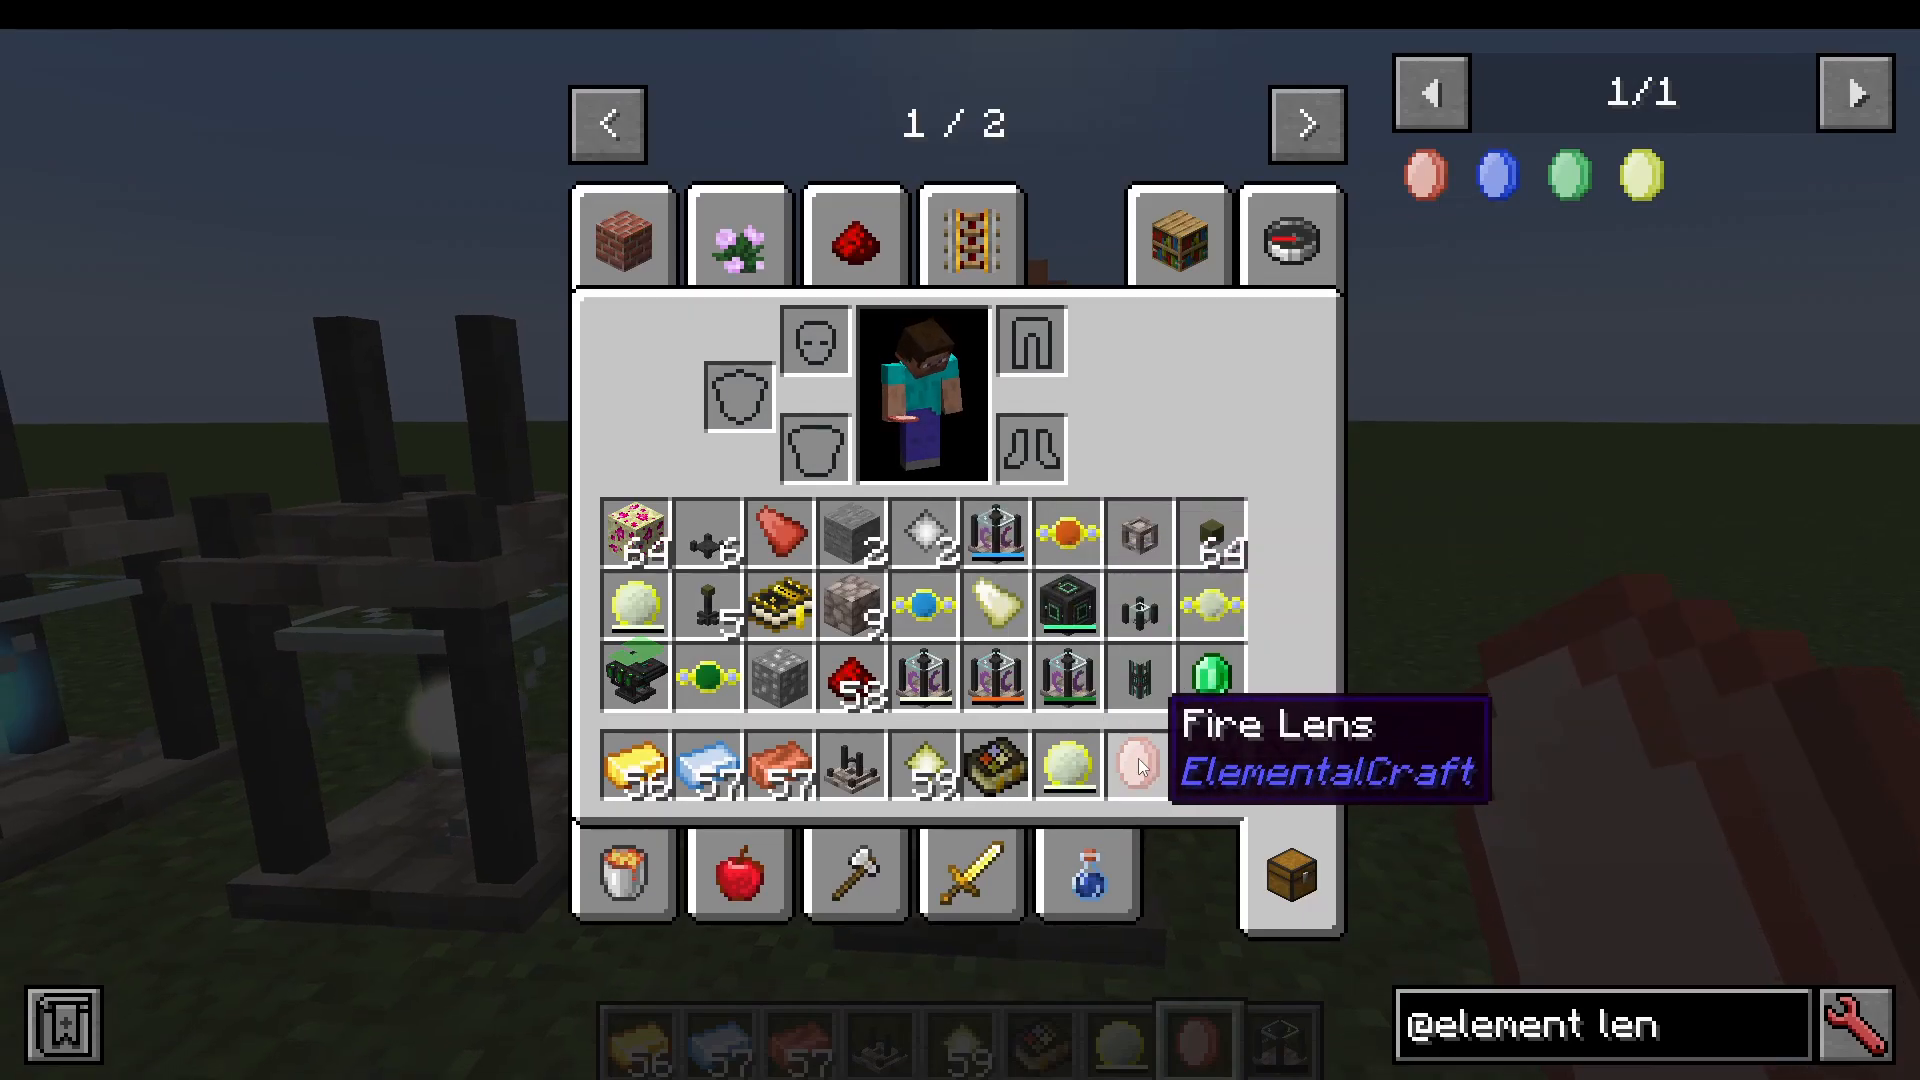
Place the Solar Element Synthesizer above an Element Container. Then craft a Lens for each element type (Fire Lens, Water Lens, etc.) using Element Binding with materials appropriate to that element. Right-click your chosen lens into the Solar Element Synthesizer to begin generating element from sunlight.
Lens Durability and Enchanting
Lenses lose durability over time. You can see this using mods like Jade. To counteract this, enchant your lens with Unbreaking. Alternatively — and very thematically — you can infuse the lens with more of its corresponding element to grant it Unbreaking I. Infuse it again to get Unbreaking II, and so on. You can chain this process to stack multiple levels of Unbreaking onto your lenses.
Step 11: Pure Infusion and the Infusion Altar
Pure Infusion is a multiblock crafting setup and one of the most important milestones in Elemental Craft progression.
Setting Up the Pure Infuser
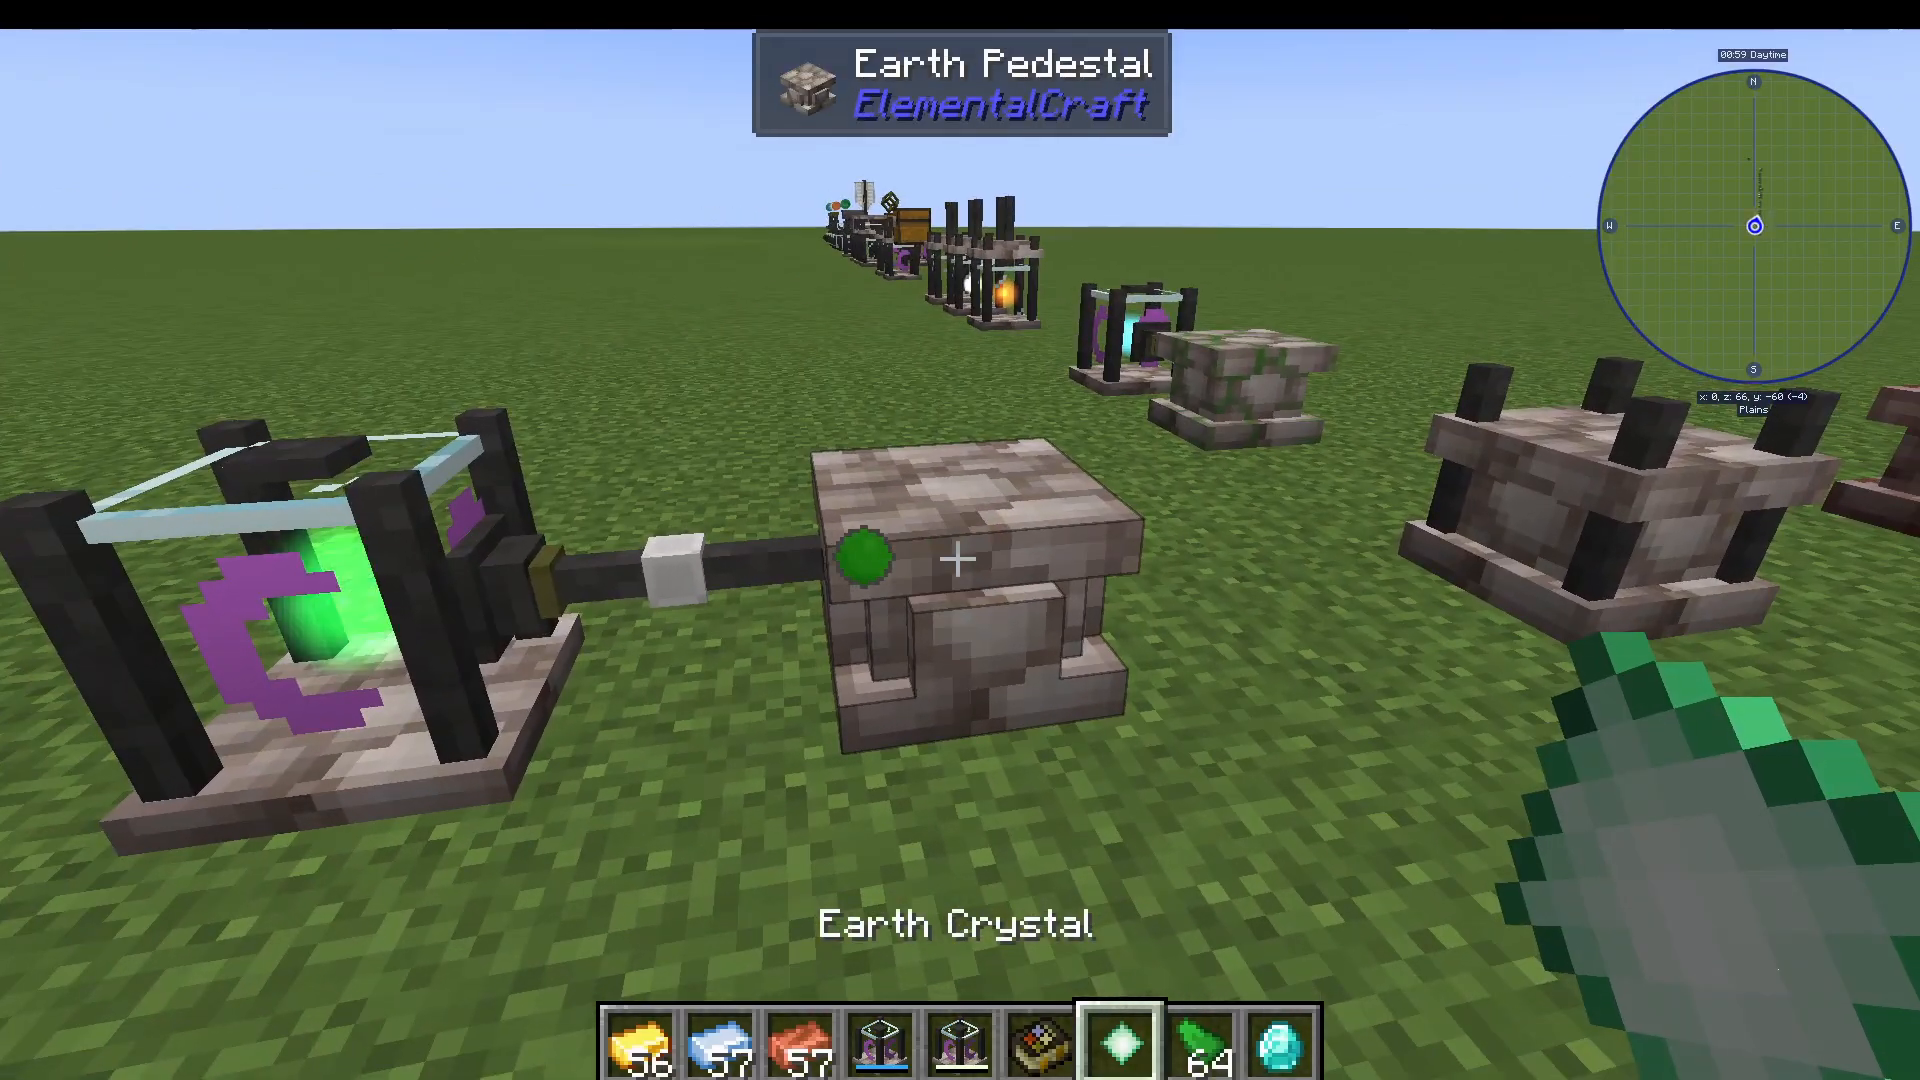
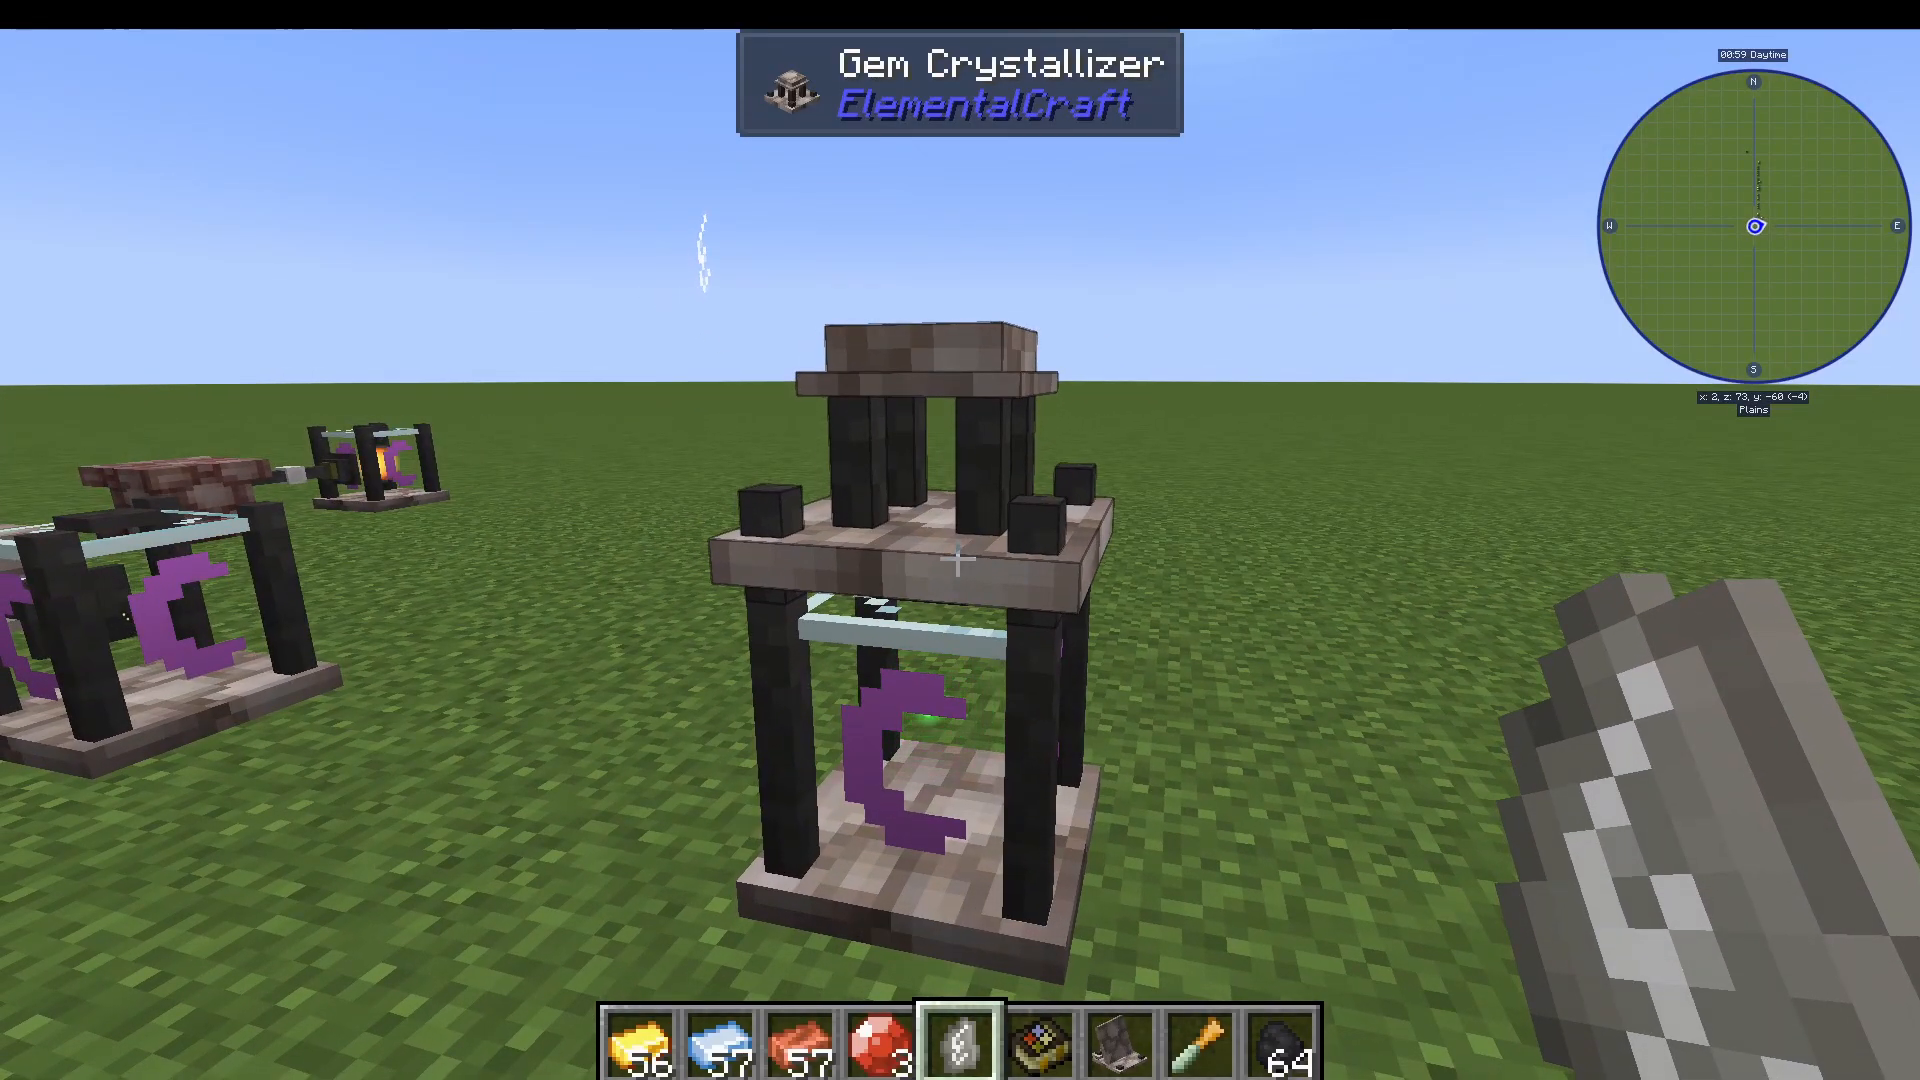
Craft the Pure Infuser (which uses a Strongly Contained Crystal in its recipe). You will also need one pedestal for each element: Water Altar, Fire Altar, Air Altar, and Earth Altar. Each pedestal requires a Gem in its crafting recipe, made via the Gem Crystallizer.
The Gem Crystallizer
To make gems, place a Diamond into the Gem Crystallizer first, then right-click in an element crystal (Fire Crystal, Earth Crystal, etc.). You can also add raw element shards to increase the chance of obtaining a higher-quality gem. Gems come in three quality tiers: Crude, Fine, and Pristine.
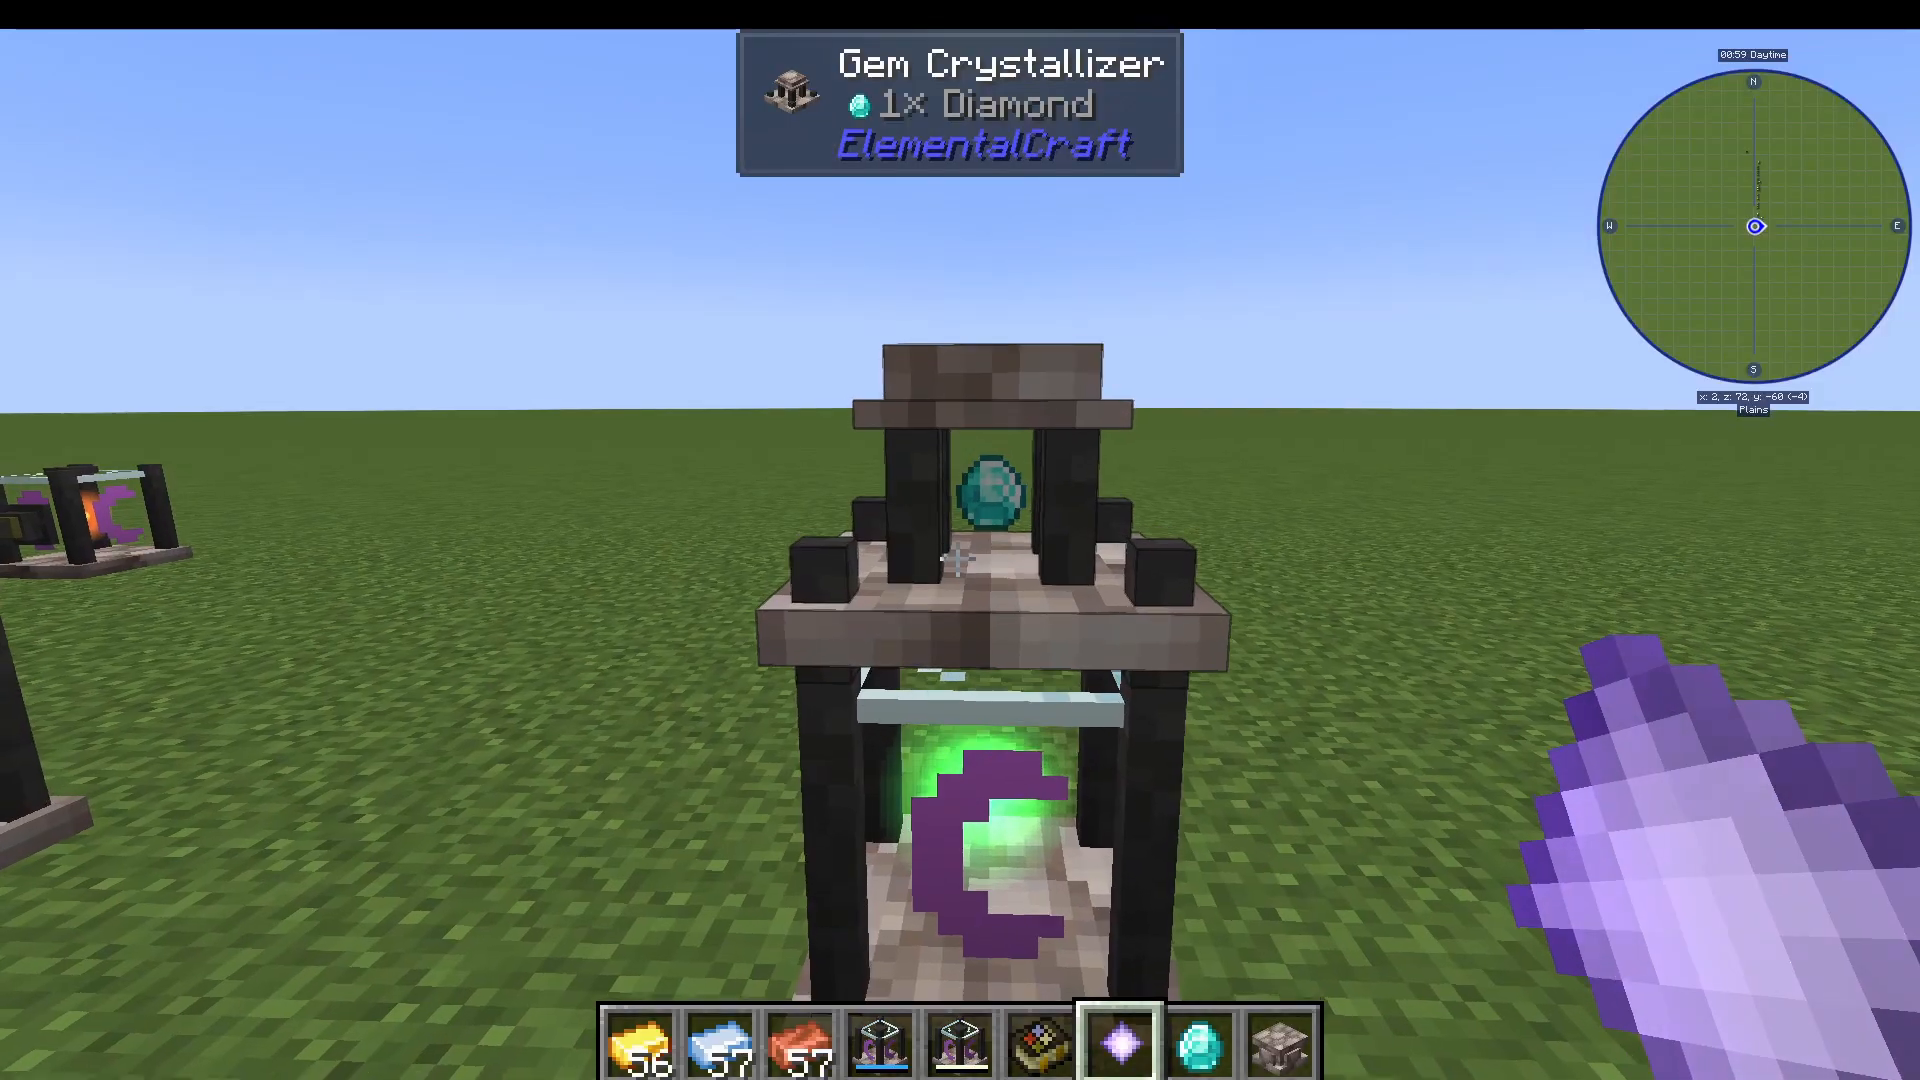
In recipes, you can always substitute a higher-quality gem for a lower-quality requirement. However, if a recipe specifically requires a Pristine gem, you must use Pristine — no lower tier will work.
Using a Pure Crystal for Pristine Gems
Using a Pure Crystal in the Gem Crystallizer instead of a standard element crystal will always produce a Pristine gem. A Pure Crystal itself is made via Pure Infusion — see below.
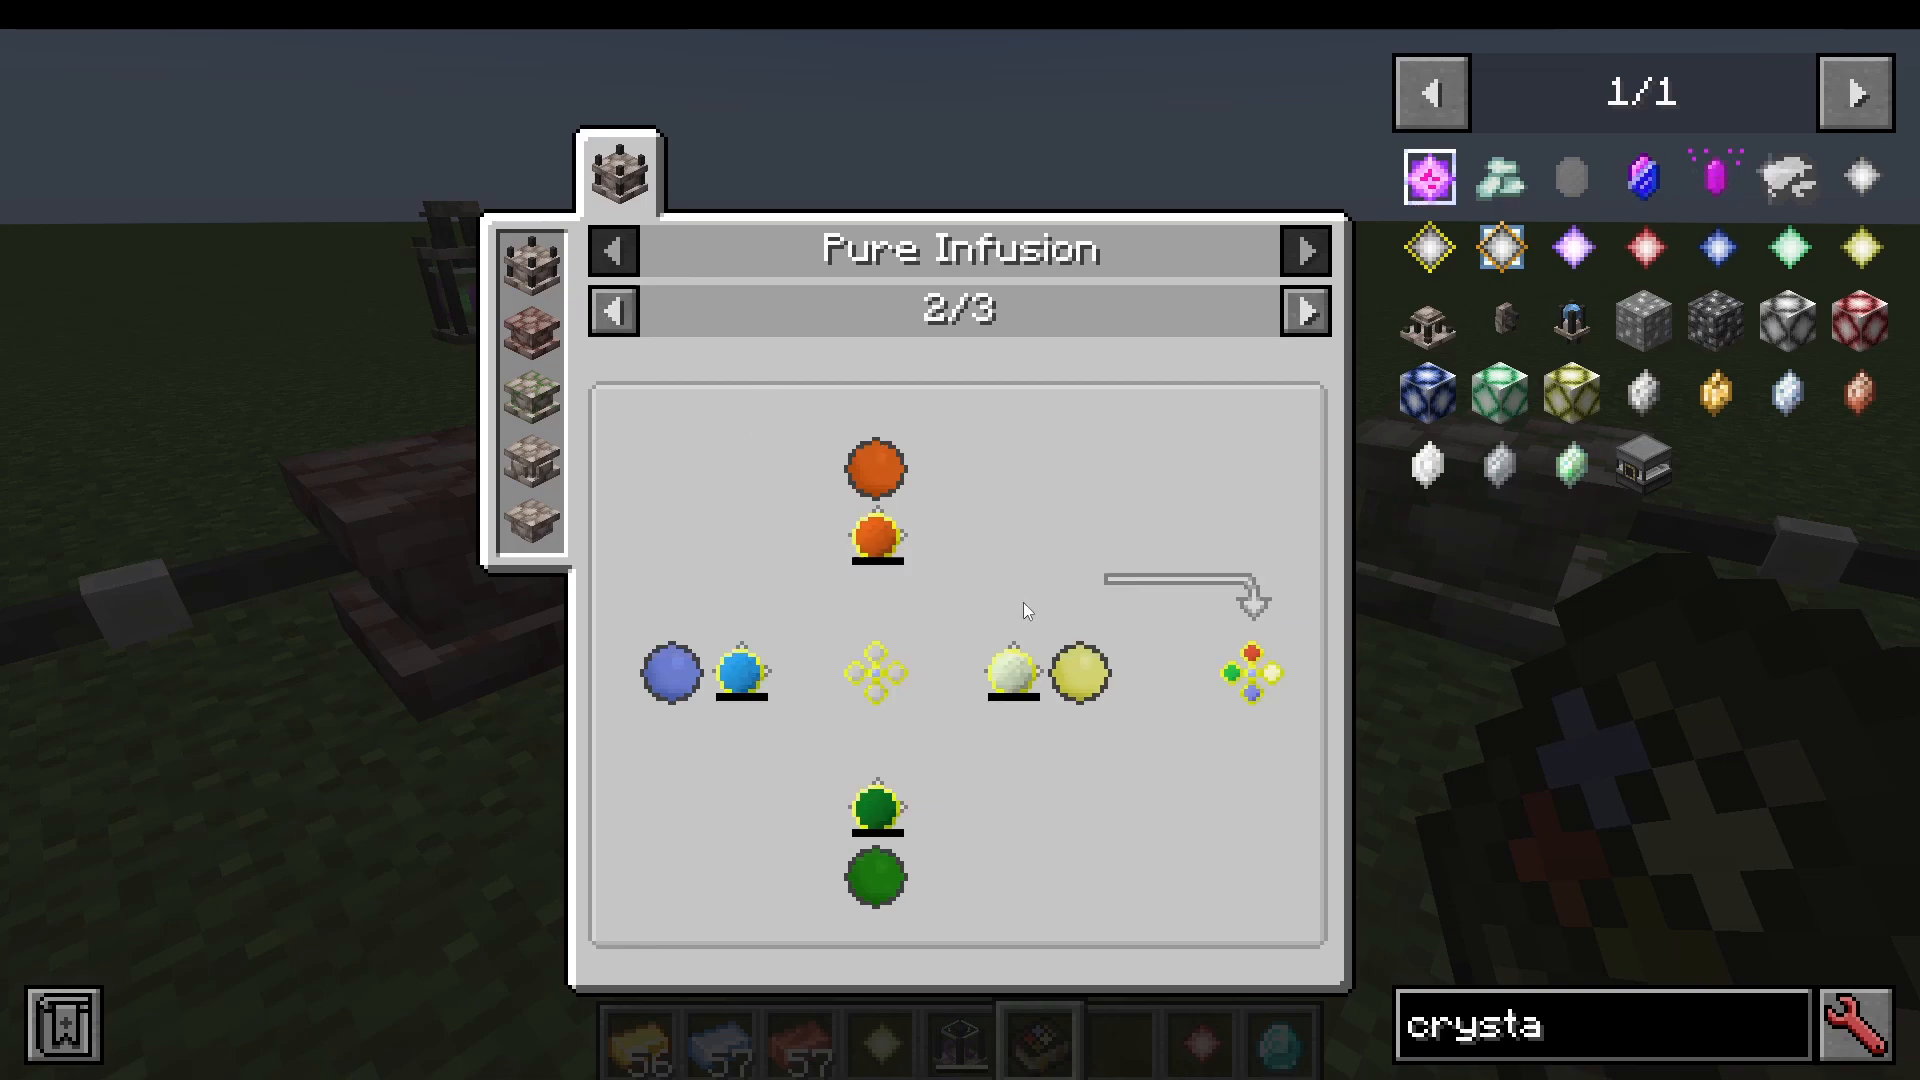
Running the Pure Infusion Process
Place your four element pedestals around the Pure Infuser and pipe the appropriate element into each one using Improved Element Pipes. Place a crystal on each pedestal matching its element: Earth Crystal on the Earth Altar, Air Crystal on the Air Altar, and so on. Place a Diamond in the centre of the infuser. The infusion will start automatically, consuming element from each pedestal, and after roughly 5–10 seconds will produce a Pure Crystal.
Step 12: Advanced Machines
Improved Element Binder
Crafted with Swift Alloy Ingots and Pure Crystals. Works as both a Binder and an Infuser in a single machine, and operates at a significantly faster rate than the base versions.
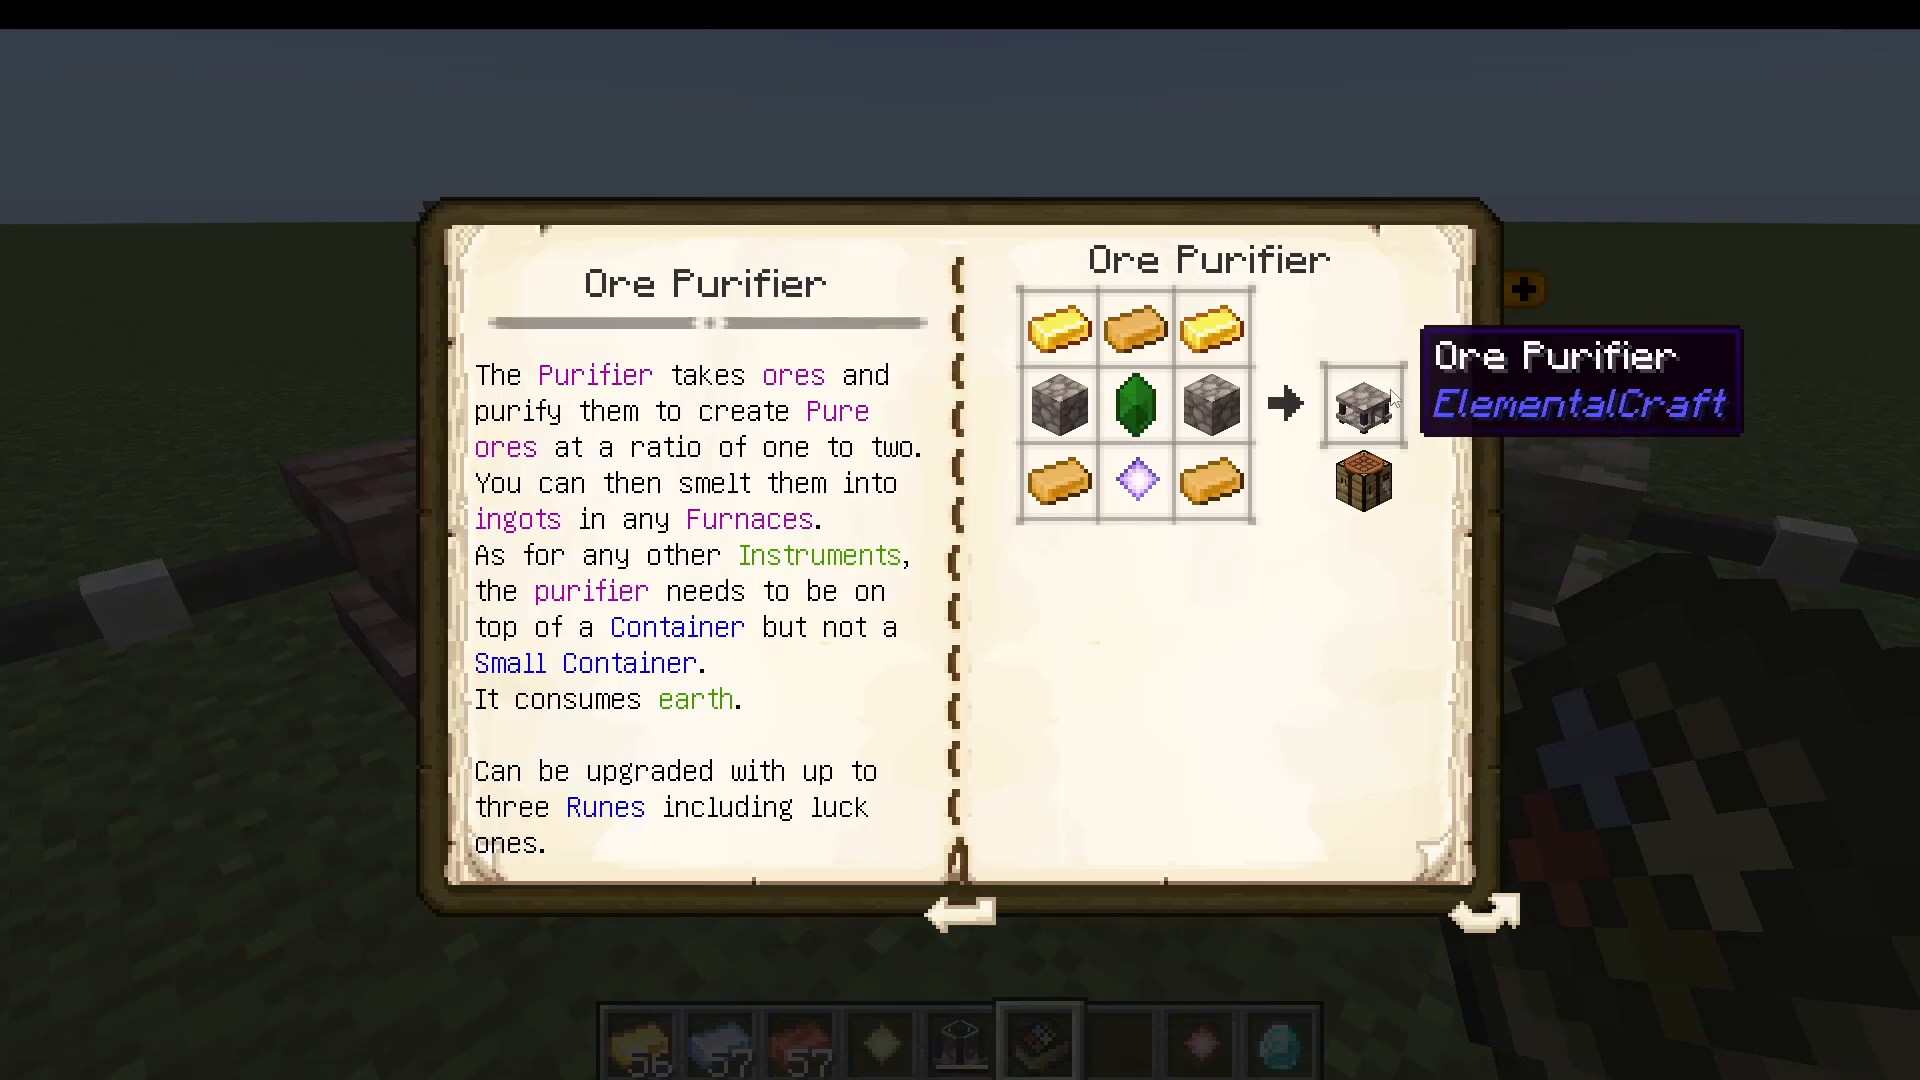
Ore Purifier
Doubles your ores — input one ore and receive two pure ore outputs at a 1:2 ratio. Smelt the pure ores in any furnace to get ingots. Requires an Earth Element Container (not a Small Container) placed beneath it. Note that most advanced machines require a full Element Container rather than the Small version.
Element Reservoir
The highest tier of element storage available. Stores significantly more element than a standard Element Container.
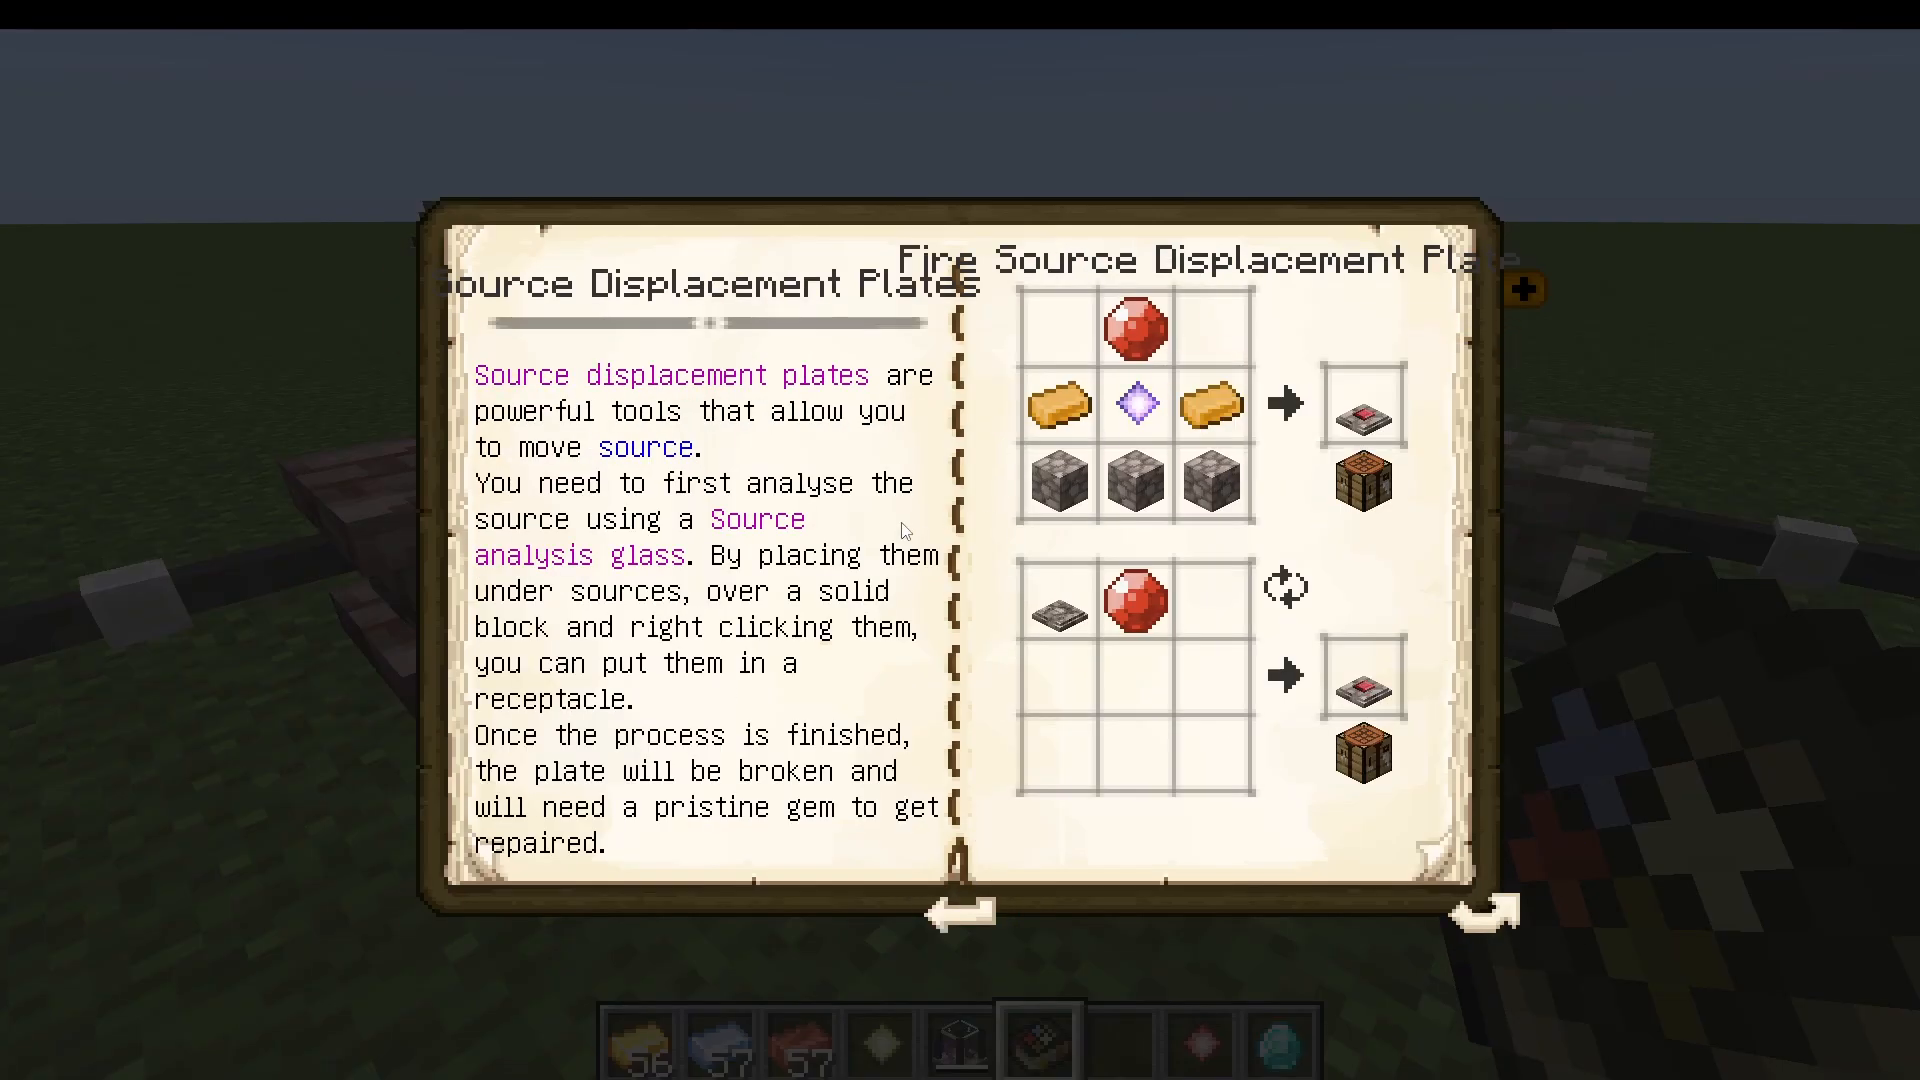
Source Displacement Plates (Moving Sources)
Now that you have Pristine Gems, you can craft Source Displacement Plates to relocate natural element sources. First, analyze a source by using a Source Analysis Glass — place it under the source and over a solid block, then right-click it. Once analyzed, the displacement plate will capture the source into a receptacle. The plate will break in the process and requires a Pristine Gem of the matching element to repair it. There is one plate type for each element.
Pipe Cover Frames
Pipe Cover Frames allow you to camouflage pipes behind blocks. Sneak and use the frame on a pipe, then right-click with the block you want to use as camouflage. The pipe will visually disappear behind that block.
Pure Rock
Using Pure Infusion, you can infuse Obsidian with Purple White Rock, Prismarine, and Fireite Ingots (crafted via Element Binding) to produce Pure Rock. Pure Rock is blast-resistant and can withstand Wither explosions.
Pure Element Holder
Also made in the Pure Infuser, the Pure Element Holder combines all four individual element holders and a Pure Element Holder Core (crafted from Fireite Ingots and a Pure Crystal). Rather than carrying four separate element holders, the Pure Element Holder stores all four elements at once — a major quality-of-life upgrade.
Step 13: Runes and the Rune Inscriber
Runes allow you to augment and enhance your Elemental Craft machines. To create runes, you first need the Rune Inscriber, which is placed above your element setup like other machines.
Rune Tiers
Runes are inscribed onto Rune Slates, which come in two tiers: Minor Rune Slate and Major Rune Slate. The tier of slate required depends on which rune you are making. Each rune also requires a specific element and a matching Pristine Gem.
Notable Runes
Manks Rune: Grants 5% Element Preservation (uses less element) at the cost of reduced processing speed.
We Rune: Adds speed but reduces element preservation.
Cowaroon Rune: Adds both speed and preservation — but requires a Jitter Rune and a Fuss Rune combined to craft it. Limited to one per machine.
Zodrune: Significantly increases machine speed.
Luck Runes (Chapclap Traps / Bombadille’s Rune): Adds 100% or 200% Luck — ideal for the Ore Purifier to maximise ore output.
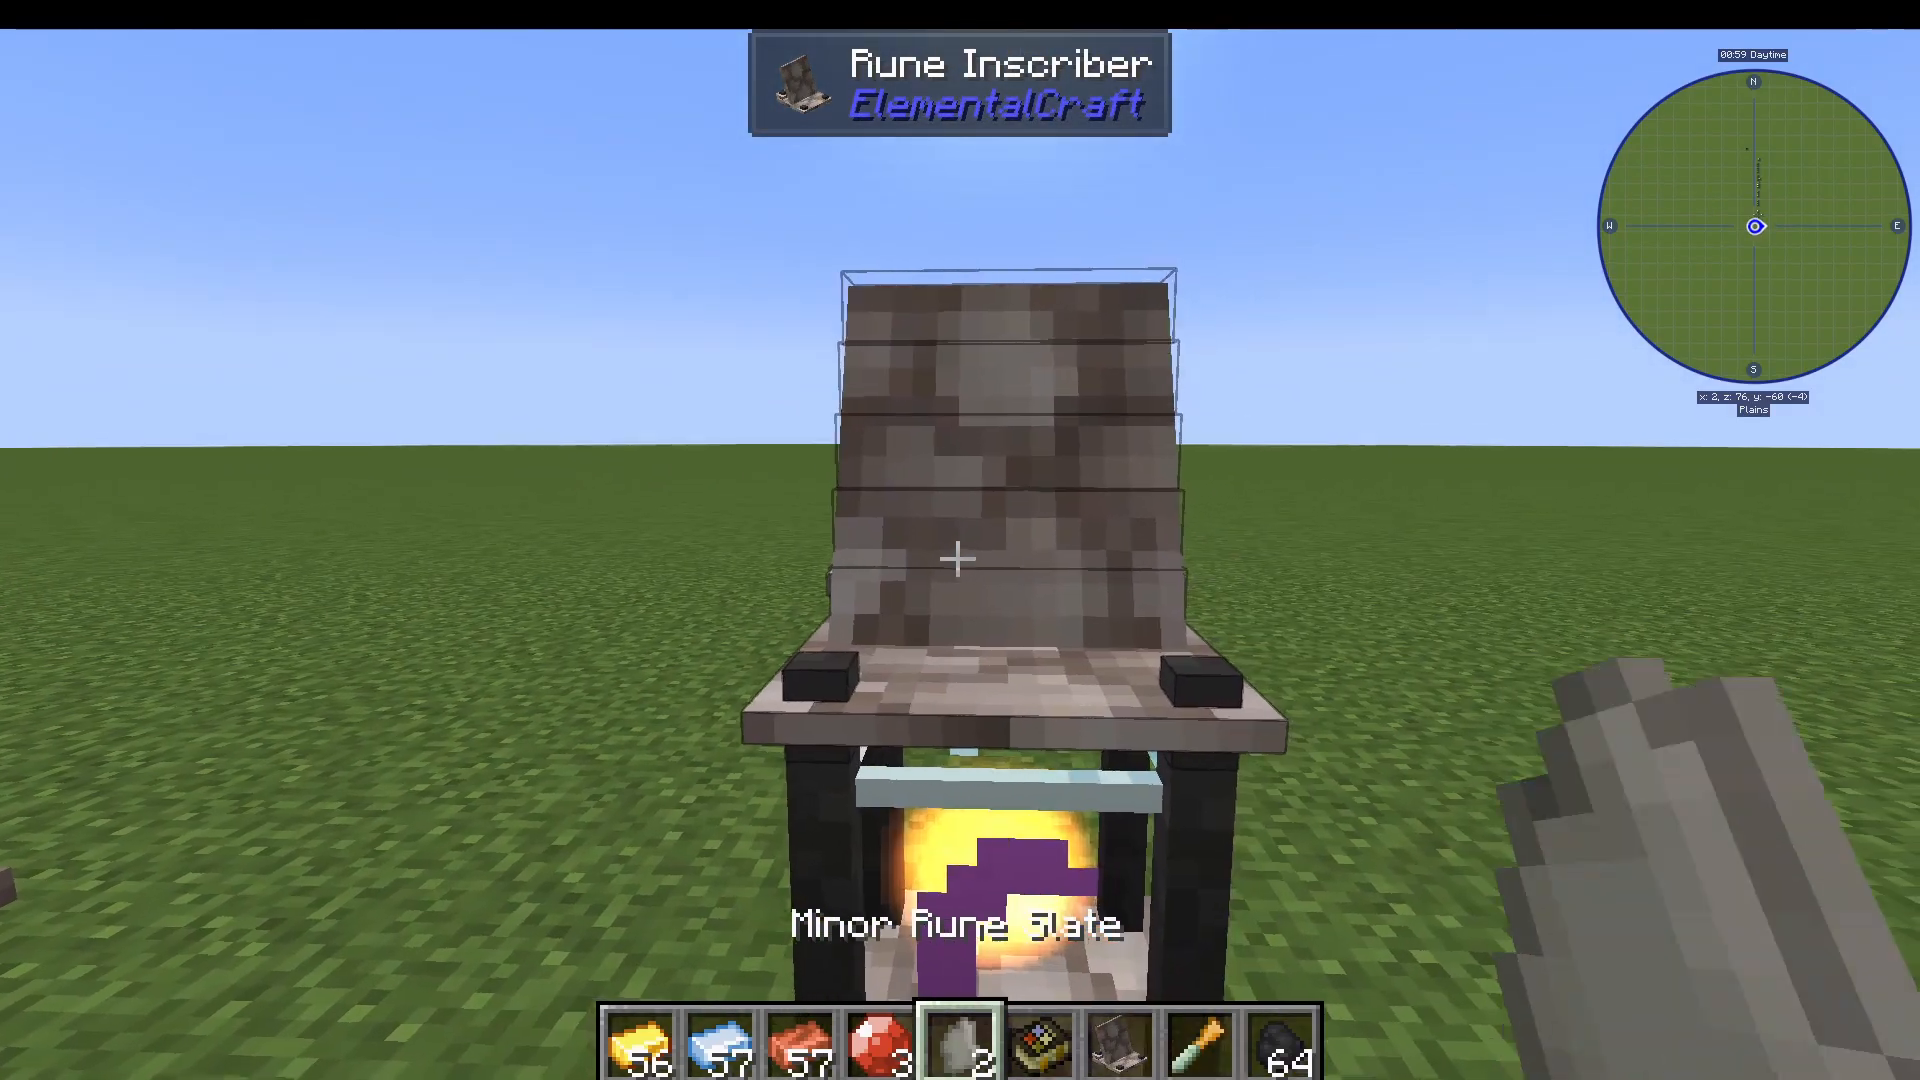
Inscribing a Rune
Place your Rune Slate in the Rune Inscriber, then right-click in the required materials (for example, two Coal Blocks and a Pristine Fire Gem for the Manks Rune). Use the Rune Inscription Chisel and right-click it several times to complete the inscription — this is intentional and not a bug. Once done, right-click to retrieve your finished rune.
Applying and Removing Runes
Right-click a rune onto any compatible machine to apply it. Most machines support up to three runes, as indicated in the Guidebook. To remove a rune, shift-click the machine with the Rune Inscription Chisel. Breaking the machine entirely will also drop the runes.
Step 14: Shrines
Shrines are powerful passive-automation machines that must be supplied with element via pipes. Each shrine performs a specific function when active and will display a status icon:
Tick (✓): Active and working.
Pause icon: Running but nothing to do — will not consume element.
Red X: Out of element.
Shrine Types
Ore Shrine: Excavates walls underneath it, leaving only stone where ores were. Consumes Earth element.
Lava Shrine: Melts salt above it into lava.
Sweet Shrine: Periodically restores hunger. Can be upgraded with a Nectar Shrine Upgrade to boost nearby bee production.
Vacuum Shrine: Pulls nearby items toward itself and stores them in a chest or container below.
Grove Shrine: Accelerates crop growth up to three blocks above it for crops that cannot be grown with Bonemeal. Upgradeable to a Boneless Growth Shrine.
Harvest Shrine: Automatically harvests crops below it.
Budding Shrine: Grows Amethyst clusters.
Breeding Shrine: Breeds animals within range — requires food to be supplied nearby, such as via a dropper.
To craft a shrine, first make a Basic Shrine using Element Pipes and related components, then use Element Binding to produce the specific shrine type you want. Place it down and pipe in the required element.
Step 15: Spells and the Spell Desk
Spells are one of the most exciting and rewarding parts of Elemental Craft. Start by crafting a Spell Desk.
Crafting Scrolls
Open the Spell Desk interface. To craft a spell scroll, you need:
Scroll Paper (crafted from Paper, Silk, and an Ink Sac)
The element crystal shown in the recipe for that spell
Different spells require different gem quality tiers. For example:
Scroll of Purification: Crude, Fine, or Pristine gem.
Scroll of Flame Cleave: Crude, Fine, or Pristine gem.
Fireball Scroll: Can even use a Diamond instead of a gem.
Insert your Scroll Paper and chosen crystal into the Spell Desk, select the spell you want to create, and click to craft it. The scroll will show a green tick when valid.
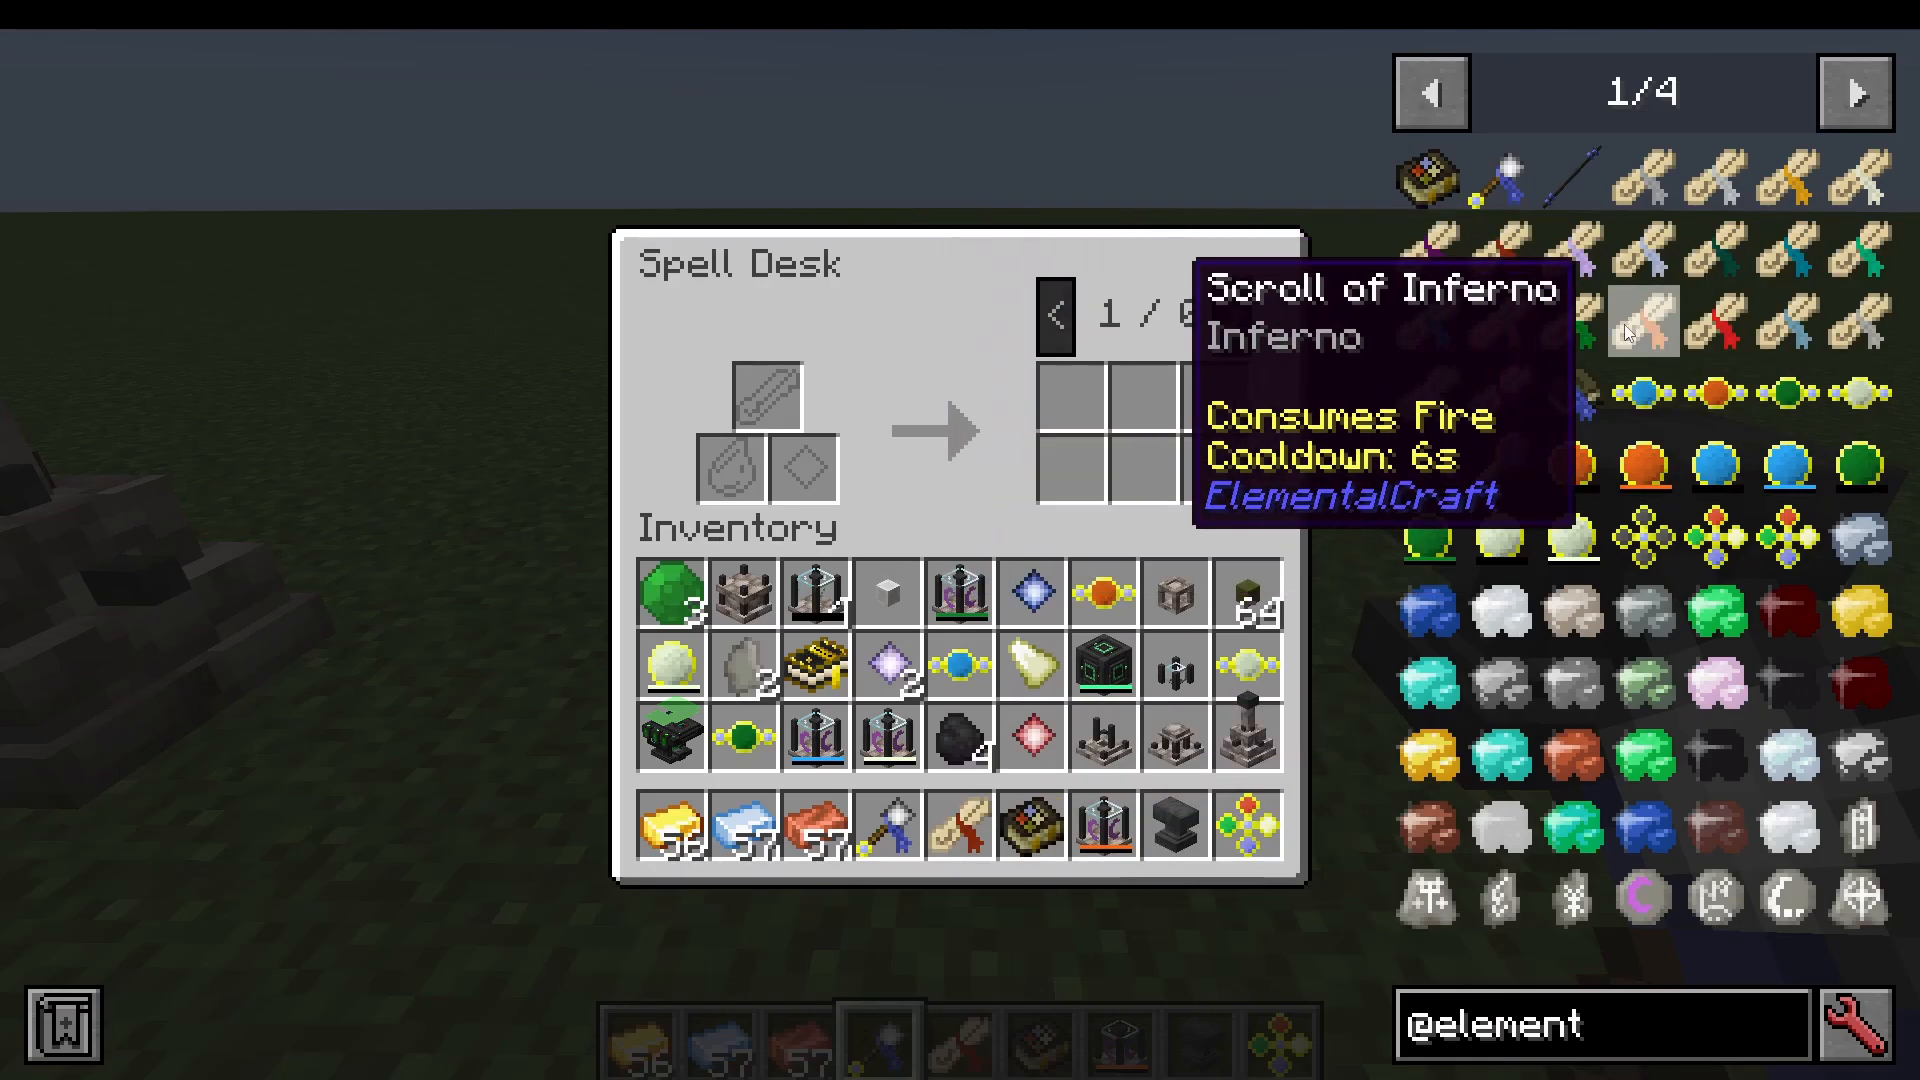
Right-click with a scroll in hand to cast its spell. Spells consume element from any Element Holder in your inventory.
The Focus — Multiple Spells in One
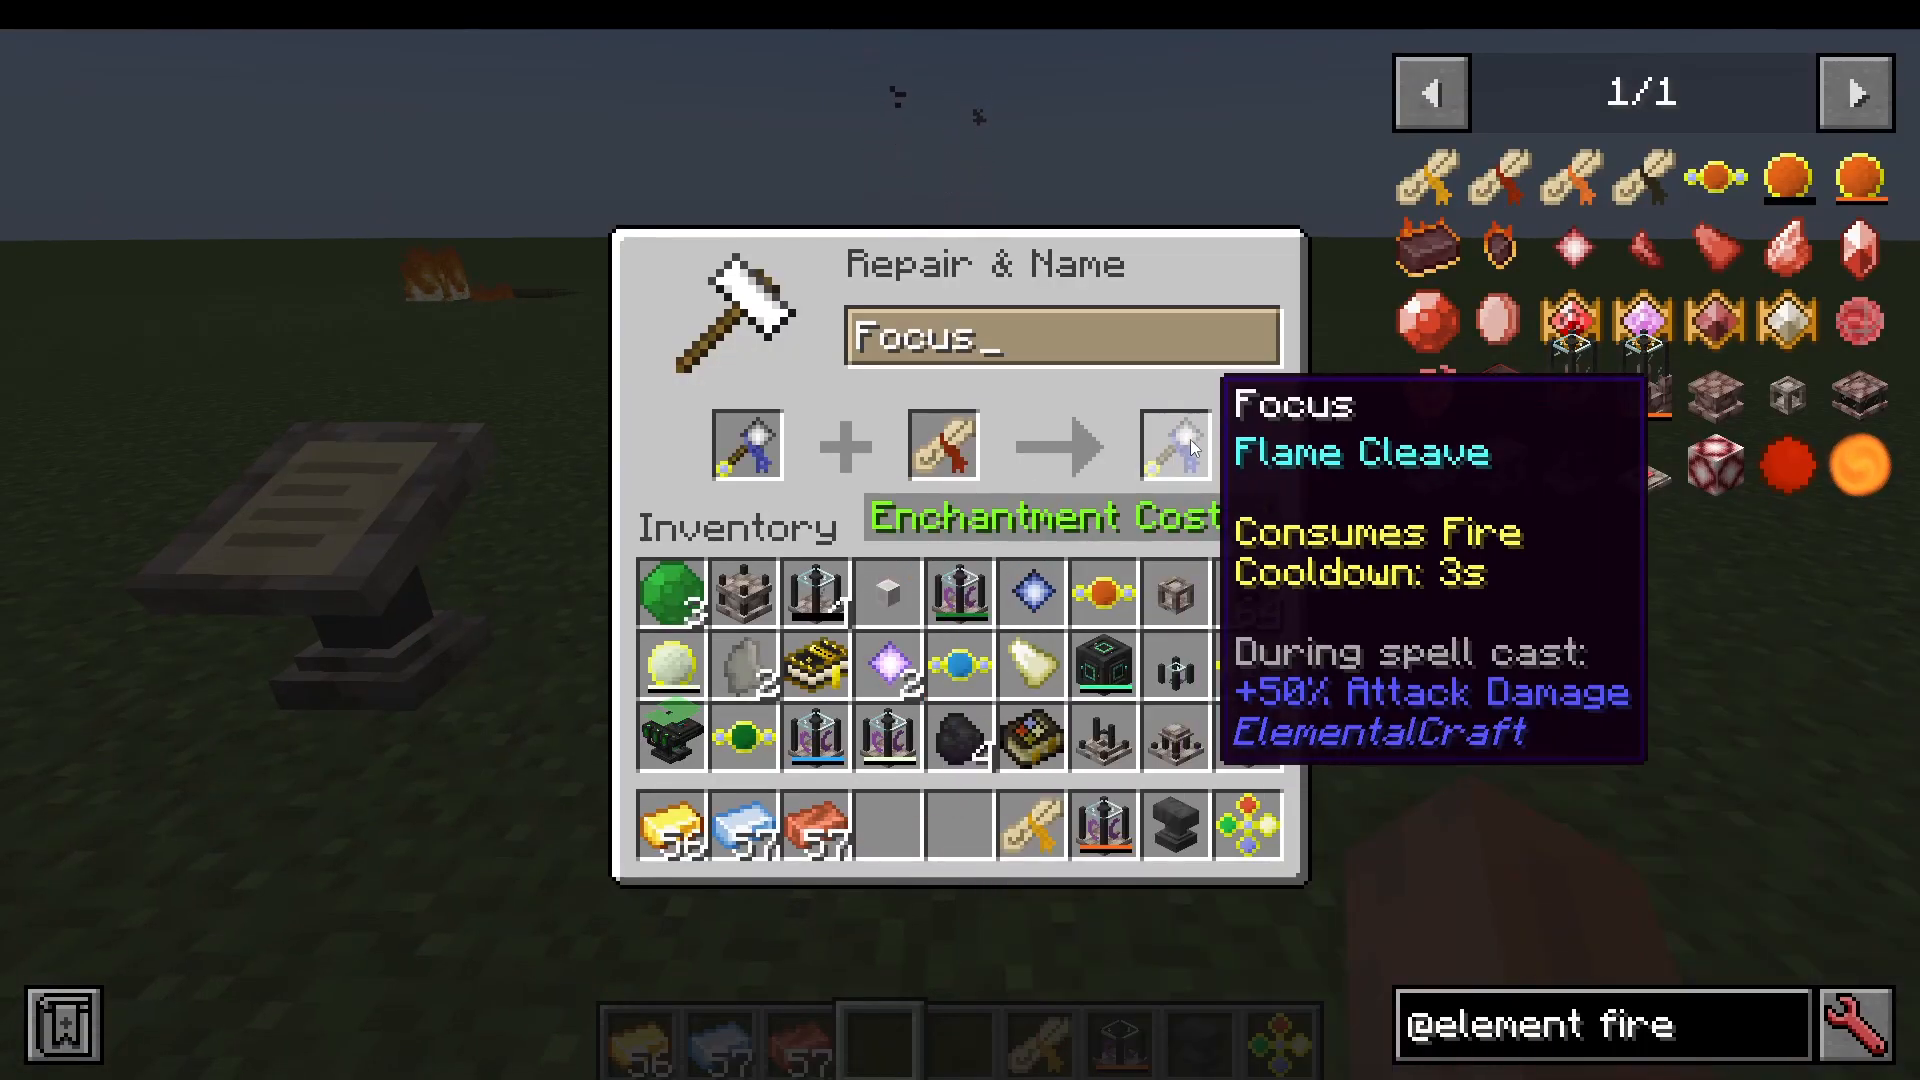
Craft a Focus and combine it with a scroll at an Anvil. You can add multiple spells to a single focus using the anvil repeatedly. Switch between spells using Shift + Scroll Wheel.
The Grimoire
The Grimoire is a portable book that lets you store and organise all your spell scrolls in one item.
The War Staff
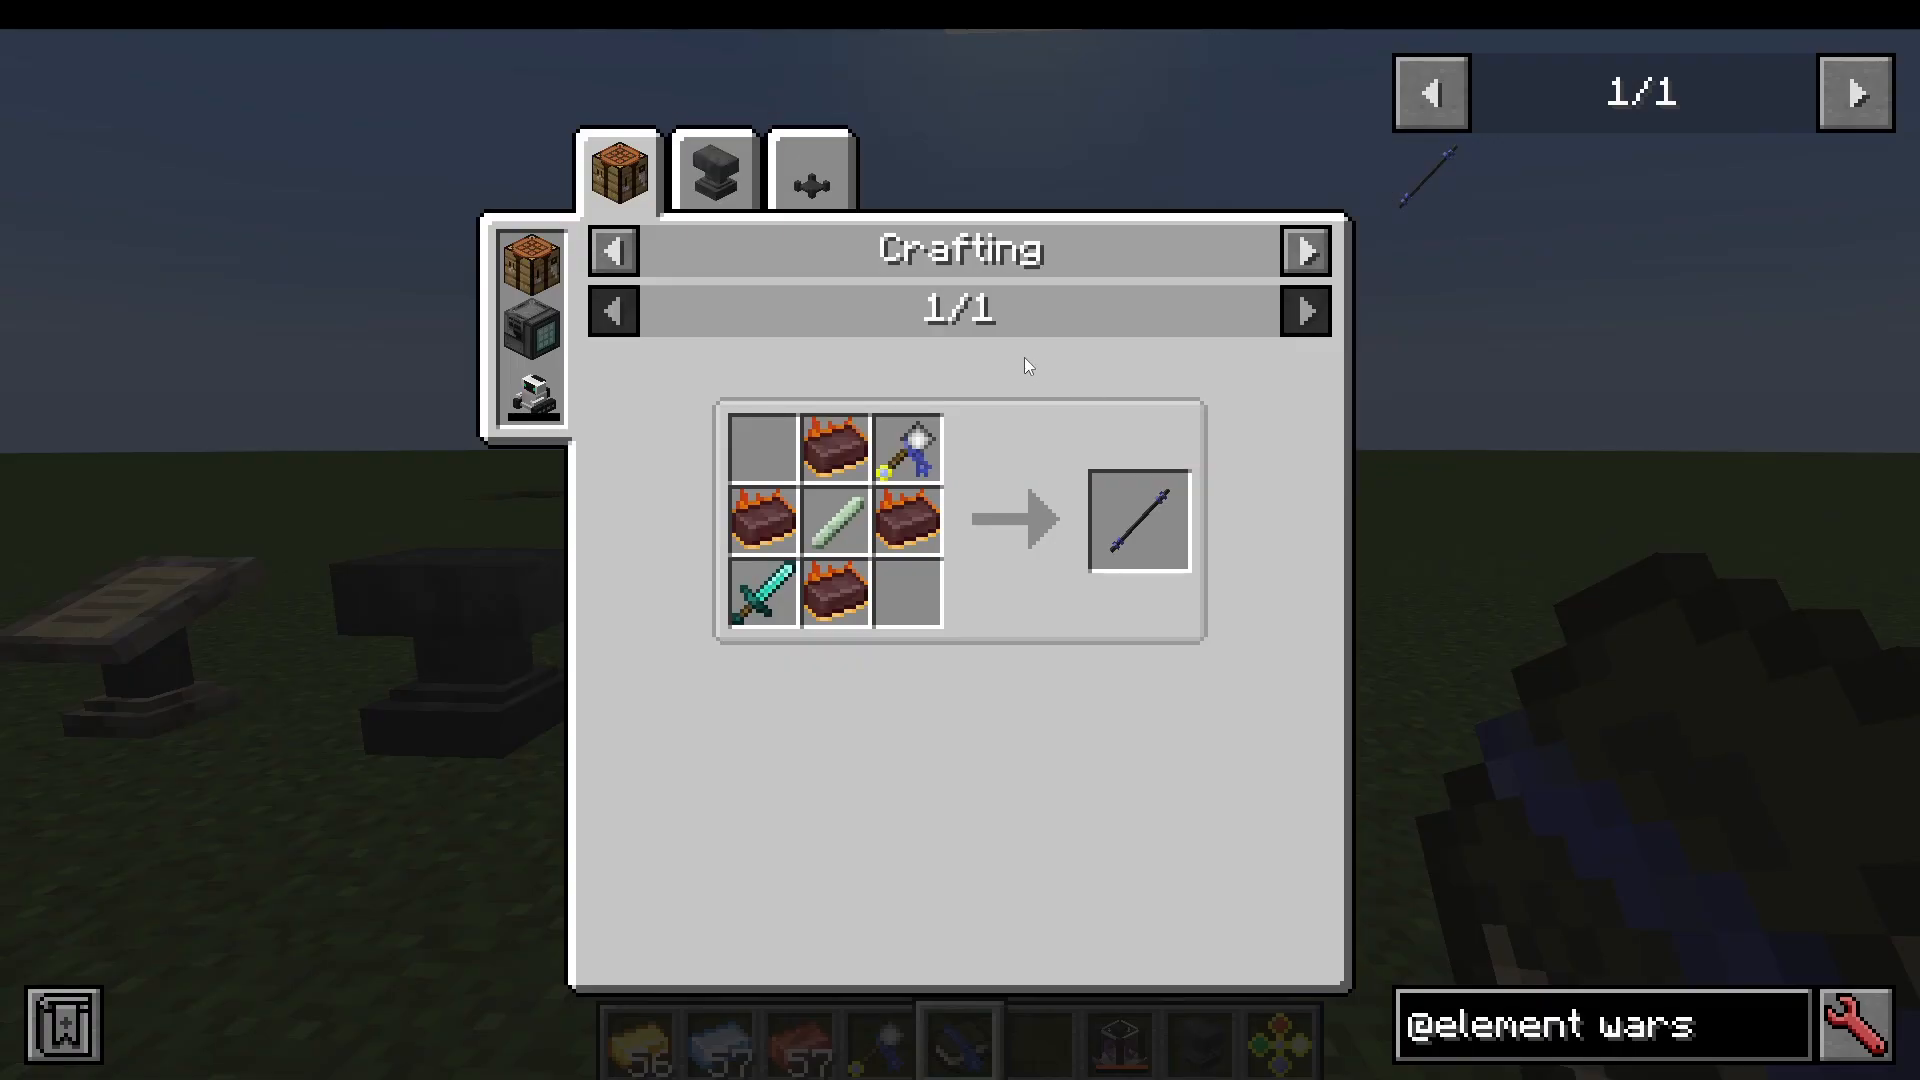
Craft the War Staff using a Netherite Sword or Diamond Sword, Fireite Ingots, a Hardened Handle, and your Focus. The War Staff slightly increases the range of your spells. Crucially, it preserves all existing enchantments from your sword and keeps all spells already loaded onto your focus — giving you both a powerful weapon and a spell-casting tool in one item.
Step 16: Jewels — Passive Element-Powered Buffs
Jewels are passive items that grant powerful buffs while they are in your inventory or attached to a piece of gear. They consume element from your Element Holder automatically. To activate a jewel, either hold it in your hand or attach it to a piece of armour using an Anvil.
Notable Jewels
Jewel of the Phoenix: Makes you immune to fire damage and converts fire damage into healing. Consumes Fire element.
Jewel of the Tiger: Increases attack speed while in combat.
Jewel of the Viper: Adds poison to your attacks.
Jewel of the Demigod: Allows Totems of Undying to trigger from anywhere in your inventory — no need to hold one in your hand.
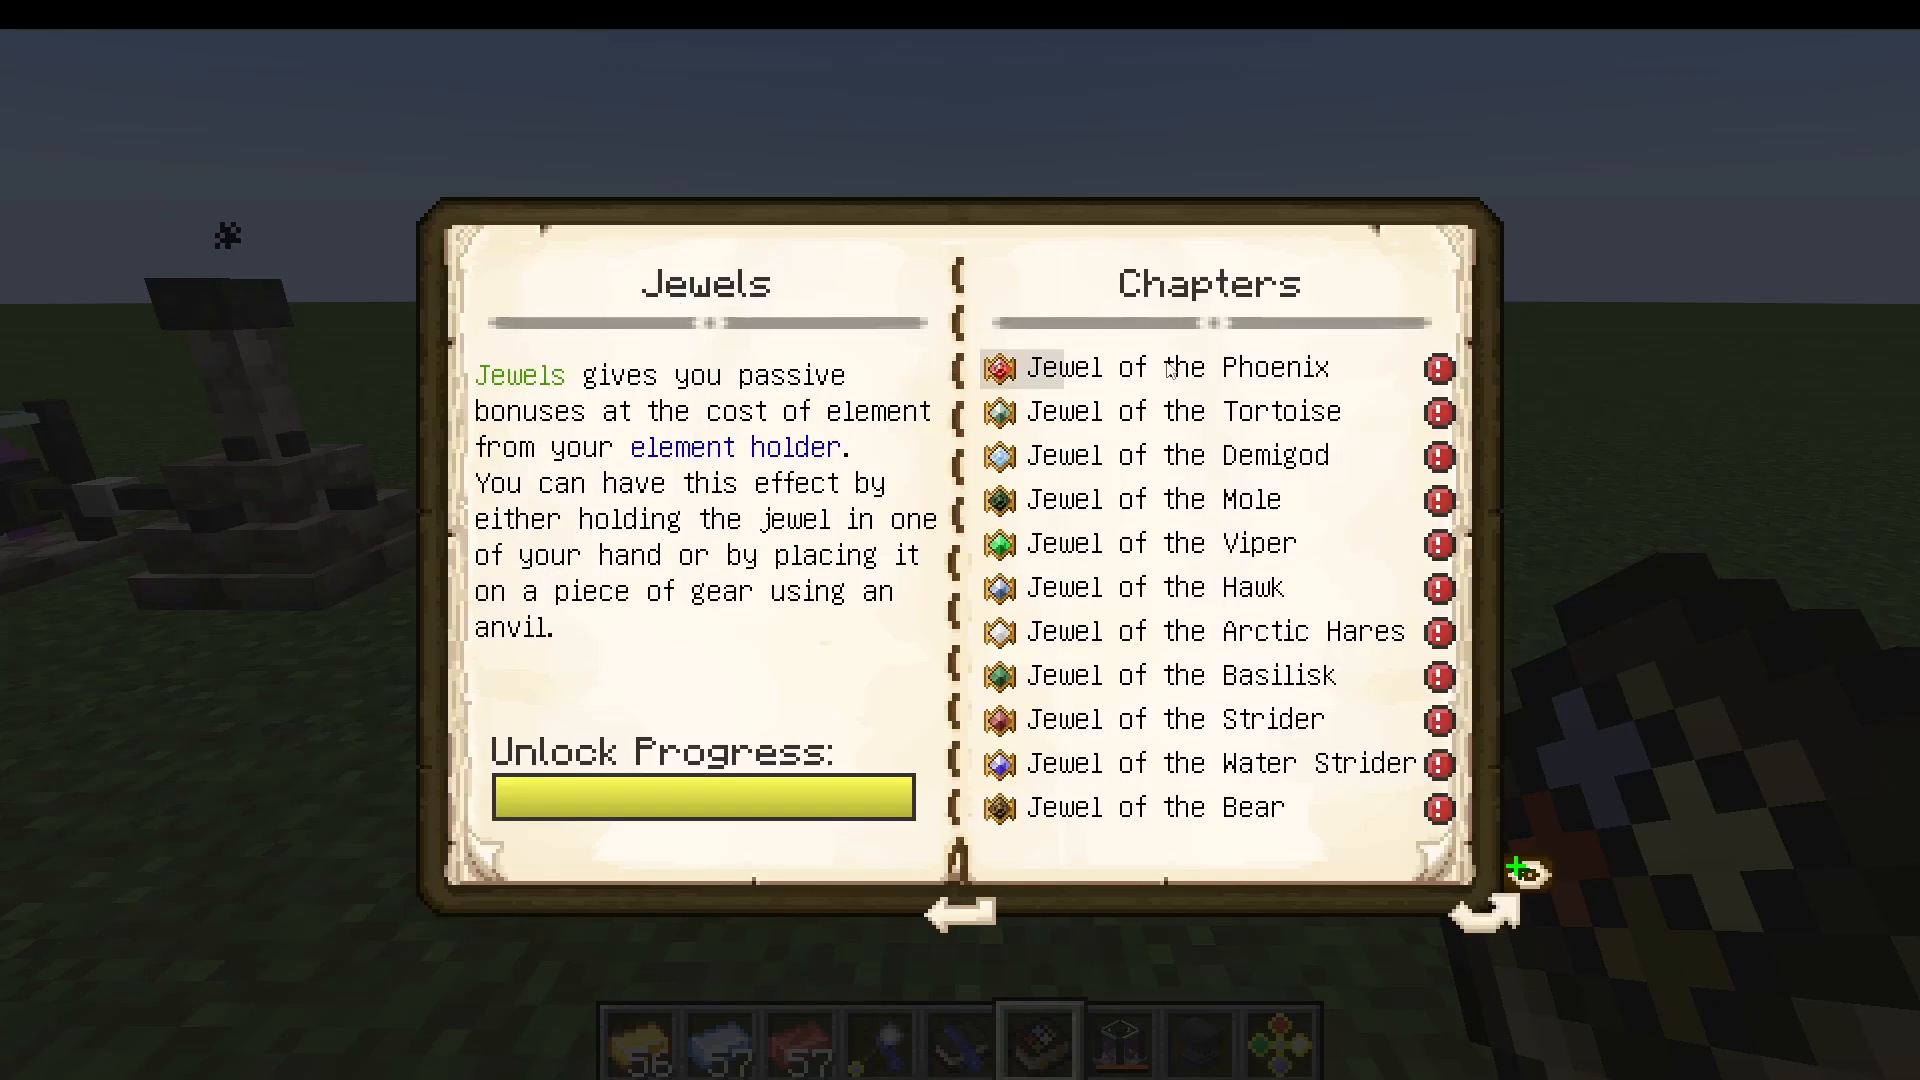
To craft a jewel, start with an Unset Jewel base, then add the specific gem and ingredients shown in the recipe for the jewel you want.
Conclusion
Elemental Craft is an exceptionally deep magic-tech mod that rewards methodical progression. Starting from a single Inert Crystal, you work through element extraction, infusion, binding, shrines, gem crafting, pure infusion, rune augmentation, and finally spells and jewels — each system building naturally on the last. Keep the in-game Guidebook open as a reference as you advance, use JEI to look up any recipe that isn’t immediately obvious, and automate your infusion and binding setups as early as possible. With the knowledge from this guide, you have everything you need to master Elemental Craft from start to finish.
“`